

Hello friends! This week I received a message from a friend who asked me how to export a C2C written pattern into a PDF file using WinStitch. This may seem like an easy task, but with WinStitch, there are a few steps you should know about. So, if you are wondering how to create a PDF of your written C2C pattern in WinStitch, wonder no more!
There are two versions of WinStitch. WinStitch 2017 & WinStitch 2020. In this post I will cover the 2017 version and please visit this post for how to export a crochet graph to PDF for the 2020 version of Winstitch.
In this tutorial you will learn:
- How to create a PDF file of your crochet C2C written graph pattern.
- How to create a PDF file of your Row by Row crochet written pattern.
If you are not familiar with WinStitch, it is a graphing program used to create crochet, cross-stitch, and Tunisian crochet graphs. It’s wonderful and I love it!
 Video tutorial is at the bottom of the post
My WinStitch Tutorial Series
Bookmark the Winstitch Tutorial Series and check back for more videos.
This tutorial is a part of a series of tutorials on graphing using WinStitch. Visit the page to get the full list of WinStitch tutorials.
If you want to read more about the Winstitch program, head over to this post and scroll down to “About Winstitch.”
Create a PDF from Your Written C2C Pattern – WinStitch 2017
If you are looking for how to do this in WinStitch 2020 – please see this post.
Step 1:
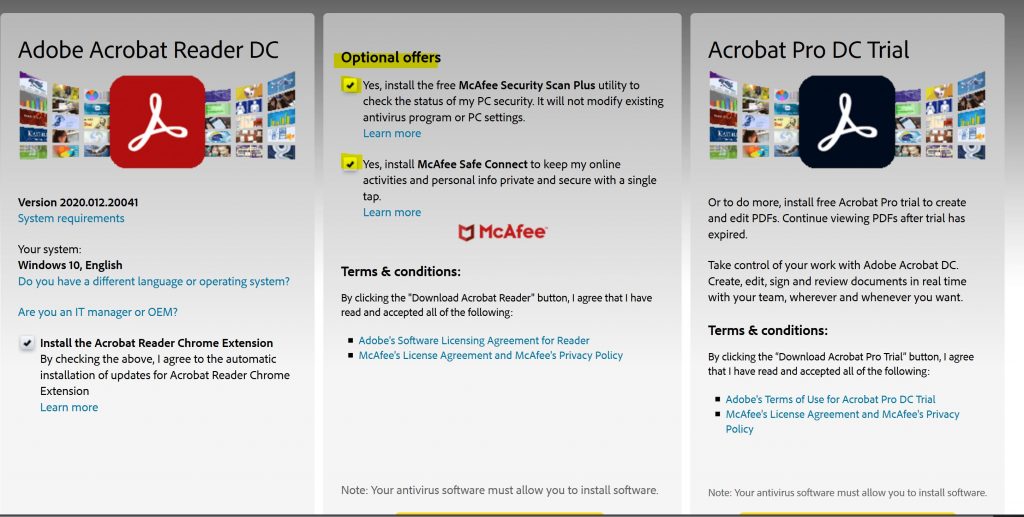
To create a PDF from your graph, you will need to make sure you have adobe viewer or adobe acrobat on your PC. You can download the free version of these here.
Recommended: Do *not* download the optional offers (highligted in yellow Be sure to uncheck those boxes before you download – They bog down your computer and you don’t need them.
Step 2:
Navigate to Import/Export on the top menu and choose Tunisian Crochet/Graphghan.

Step 3:
You can read the “how to” in the dialog box – but just close it out to continue creating your PDF.

Step 4:
Choose the drop down menu beside “order” – choose (C2C) Diagonal >, <, >.

Step 5:
Beside Identifier, choose “Color Blocks,” then choose “Print.”


Step 6:
Page setup dialog box will appear. Choose “ok” if everything looks good.

Step 7:
Another dialog box will appear, and choose “Adobe PDF,” then choose “Print.”

Step 8:
Name your file and choose where to save it. Then click “save.”

That’s it! Your PDF will start generating and you will be ready to grab your hooks and start crocheting! Keep scrolling to watch the video!
Video Tutorial – Create PDF from C2C Written Graph
I hope you enjoy this tutorial. Please subscribe, like, and follow! Link to my YouTube Channel is here, or you can click below.

