

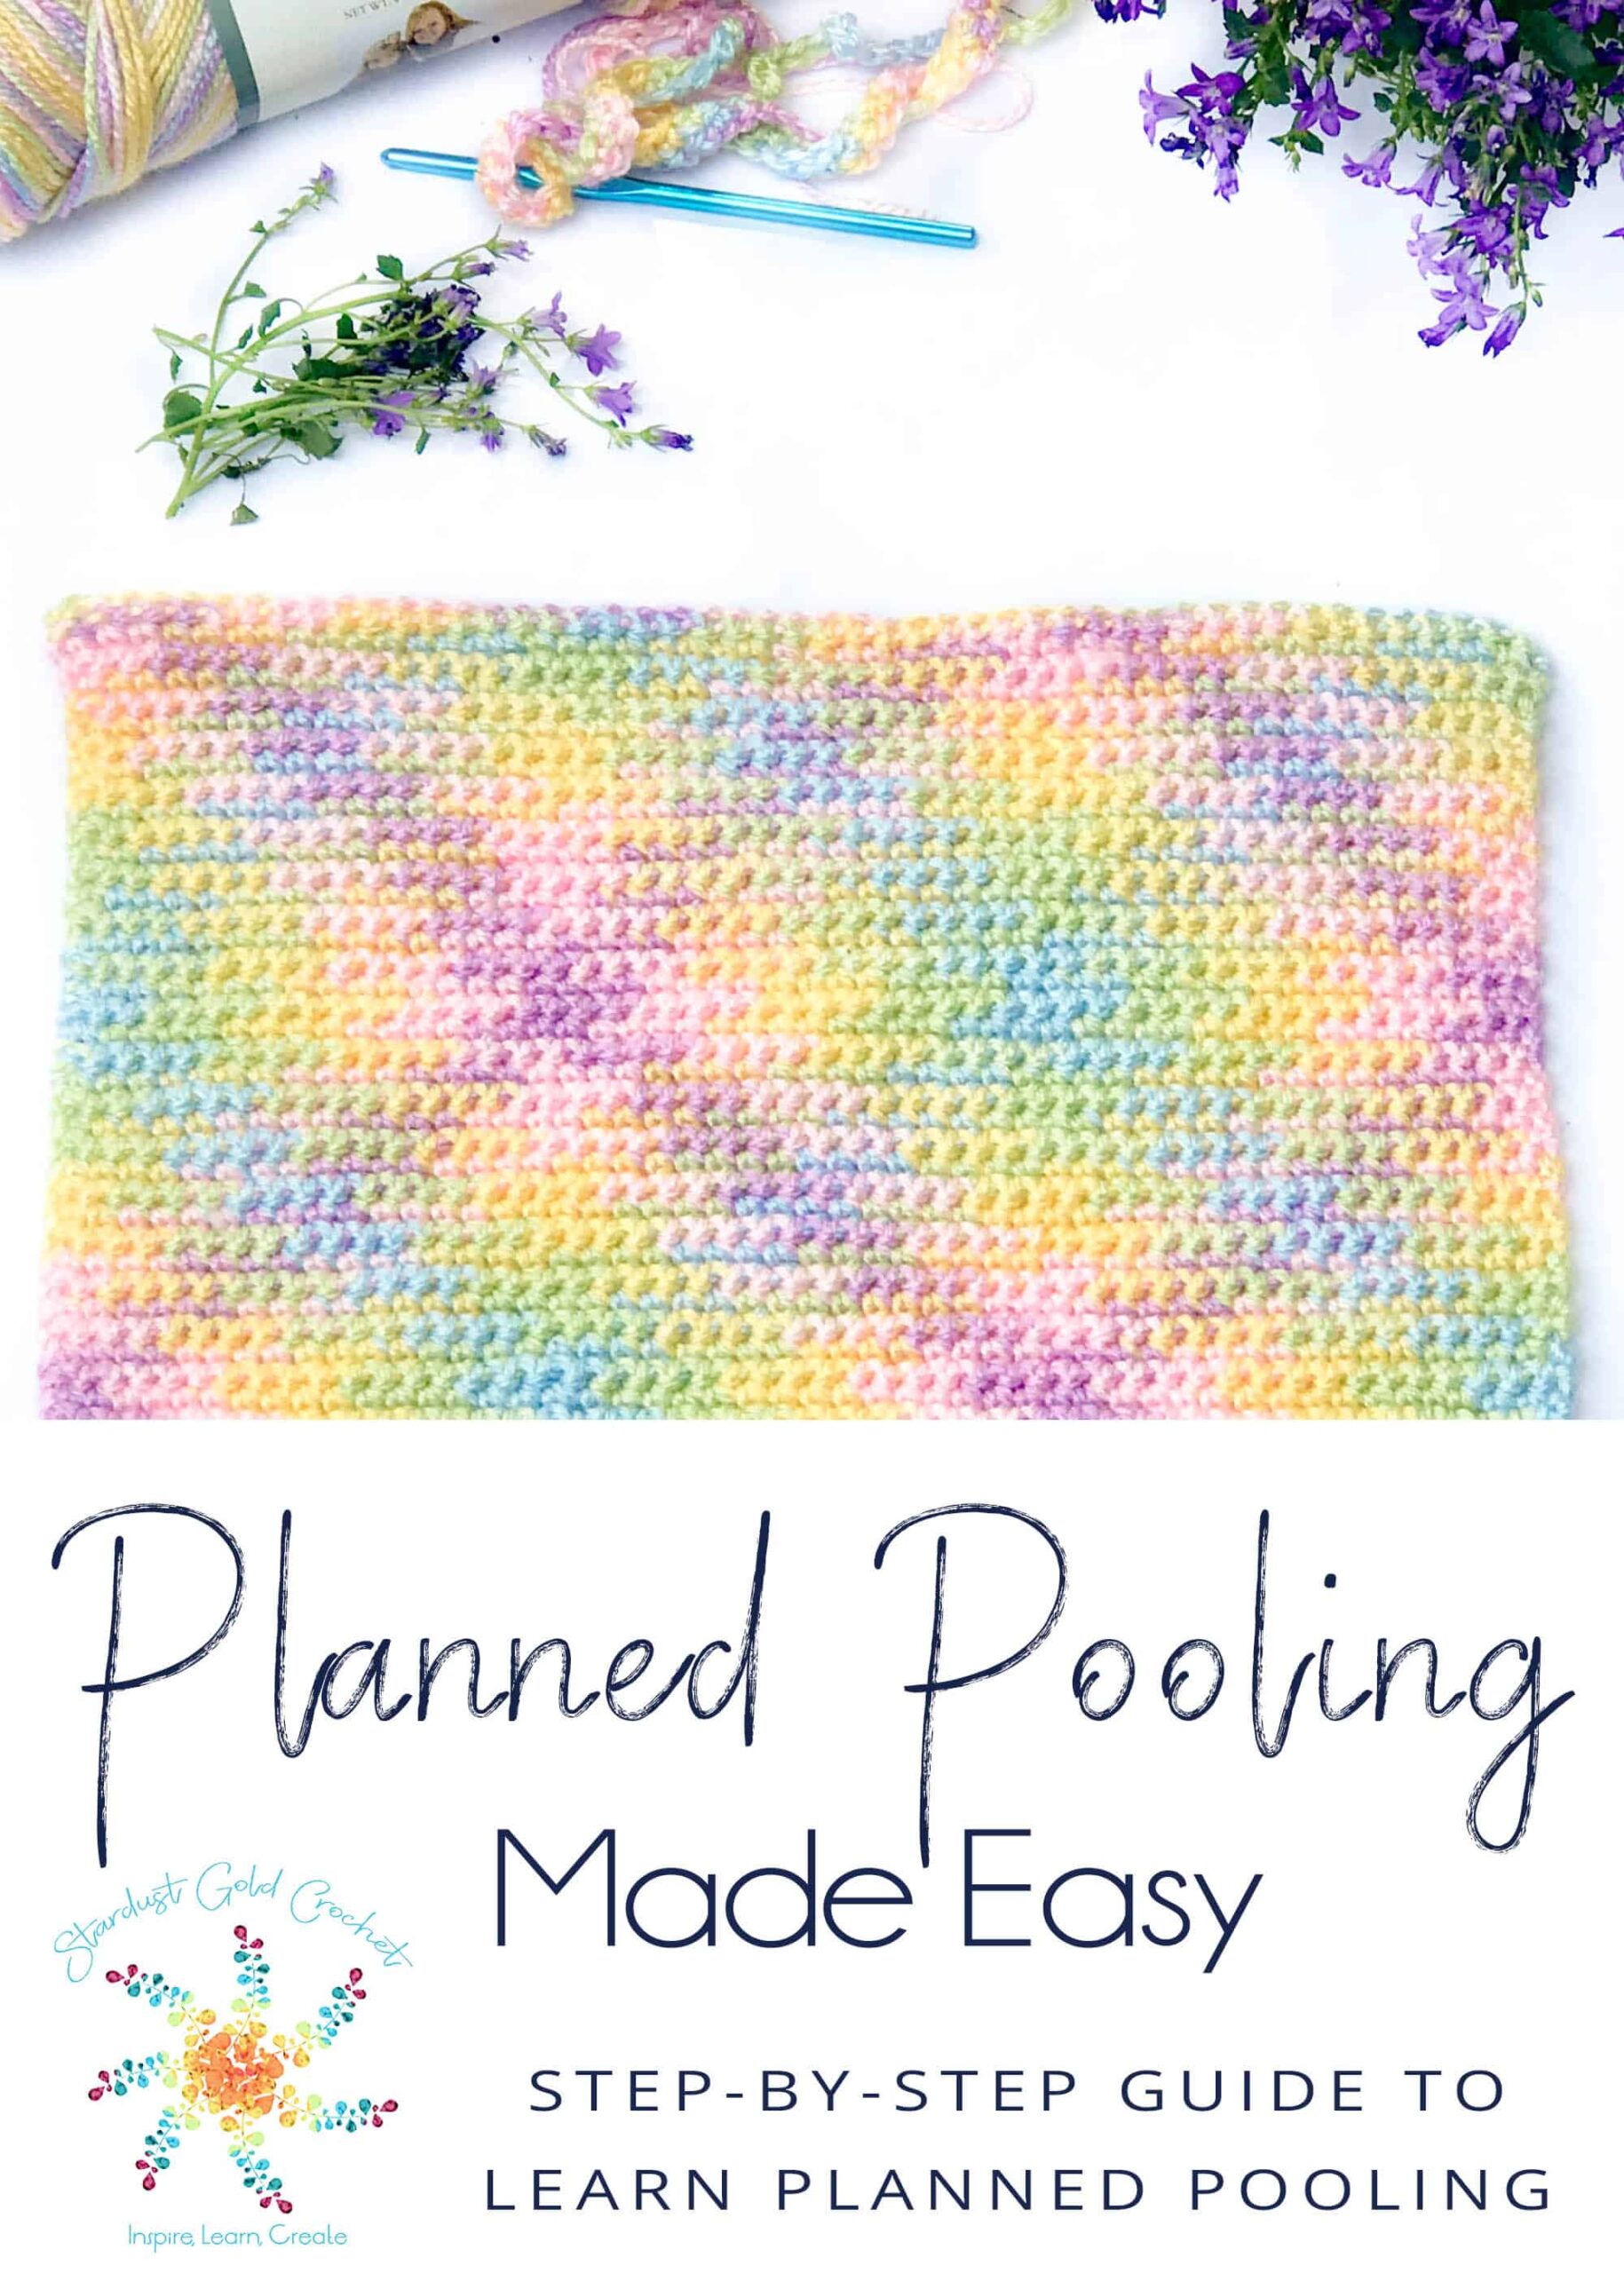
What is Planned Pooling?
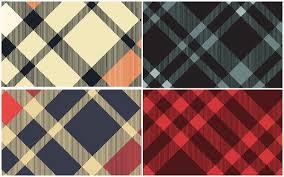
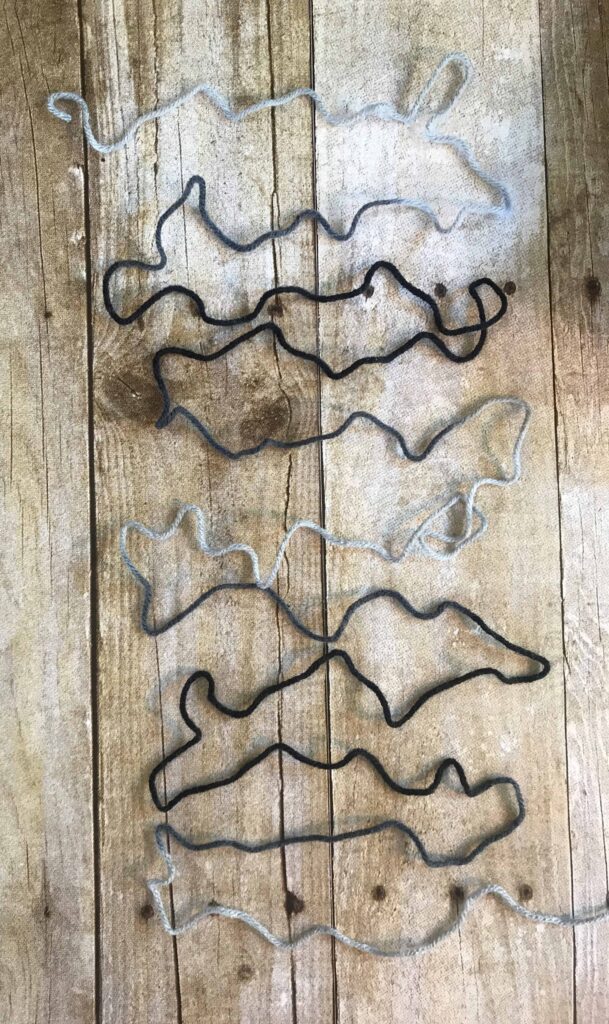
Let’s talk about what planned pooling is. Planned pooling is a style of crochet or knitting that involves a bit of counting, and strategically placing stitches so they create a pattern that ends up being a mix of argyle and plaid. These are a few examples of plaid.
I think the reason it seems so confusing is because guessing which yarns will work for planned pooling seems daunting. It doesn’t have to be though!
Choosing the Right Yarn for Planned Pooling
A few companies have embarked on creating yarns that are made for planned pooling, which makes it easier for sure!
A few of these yarns are listed here – from the blog Interweave and I’ve added a few more that I know work.
Worsted-Weight Acrylic
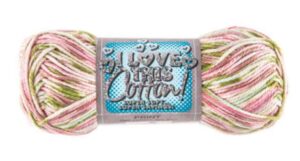
I Love This Cotton:Peony
Caron Simply Soft Paints: Sunset Variegated
Red Heart Soft Yarn: Grey scale
RED HEART Super Saver Yarn, Bright Mix: Earth & Sky, Mistletoe, Pink Camo, Zebra
Red Heart Yarn With Love 1816 Waterlily: Fruit Punch
Universal Yarn Uptown Worsted: First Down, Full Speed
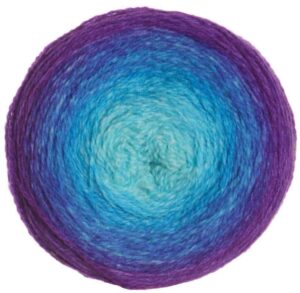
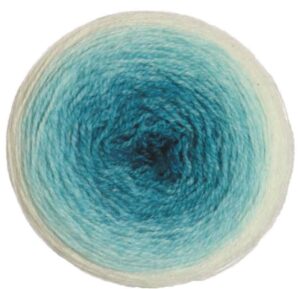
Yarn Bee – Soft Secret Ombre’: Whisper, Blueberry Hill
Worsted-Weight Acrylic Blend
Berroco Comfort: Color 9830
Worsted-Weight Cotton Blend
Deborah Norville Cotton Soft Silk Multi Yarn-Stained Glass: Stained Glass
Bulky Acrylic Yarns
Bernat Blanket – most colorways
Bernat Softee Chunky Ombre Yarn – (5) Bulky Chunky Gauge 100% Acrylic – 2.8 oz – Shadow – Machine Wash & Dry: Shadow, Summerset Ombre
I must say, I am normally not a huge fan of variegated yarns. They seem to take away from them being able to see the beautiful stitches crochet creates, and it seems somewhat useless to use it in projects meant to show stitches (in my humble opinion).
I’ve changed my mind! I love when my mind gets changed about something, it opens up a whole new world.
Soooooooo, I’ve changed my mind a bit with these yarns now that I’ve finally conquered planned pooling! Just to give you a little insight into the difference between variegated yarns and ombre’ yarns, here are examples of both.
These are examples of variegated yarn:
These are examples of Ombre’ yarn. You can see the difference in transition of colors. It’s quite different from variegated.
Let’s Get Down to Business!
Planned Pooling
I’ve laid out the basic steps and below that, we break it down further with TIPS on how to make your planned pooling project perfect.
Planned Pooling Step-by-Step – the Basics
1. Find a yarn that works (we covered that a little above).
2. Find the color sequence and write it down.
3. Make a long chain that sequences through every color.
4. Single crochet or Moss stitch back through the entire sequence (I’ll stress this throughout – tension is important – make sure both V’s of your stitches are the same color – more details below)
5. Count the number of stitches in each color and write it down.
6. Head over to this Planned Pooling Tool and enter your color sequence. Then add or subtract stitches until you get a good argyle or plaid print.
7. Print it out, and flip it upside down, because the top is actually the starting row.
8. Begin crocheting.
Let’s break down the steps and start crocheting…
Step 1 – Find that yarn!
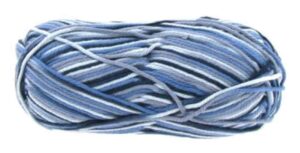
The first step is to find a variegated yarn that has 5-6 inches of each color change within the yarn – below is an example from the Vanna’s Choice – Charcoal.
You can use the yarns listed above to make it easier, or go in search of your own variegated yarns and maybe find a new one to add to the list!
Step 2 – Discover the sequence of the colors
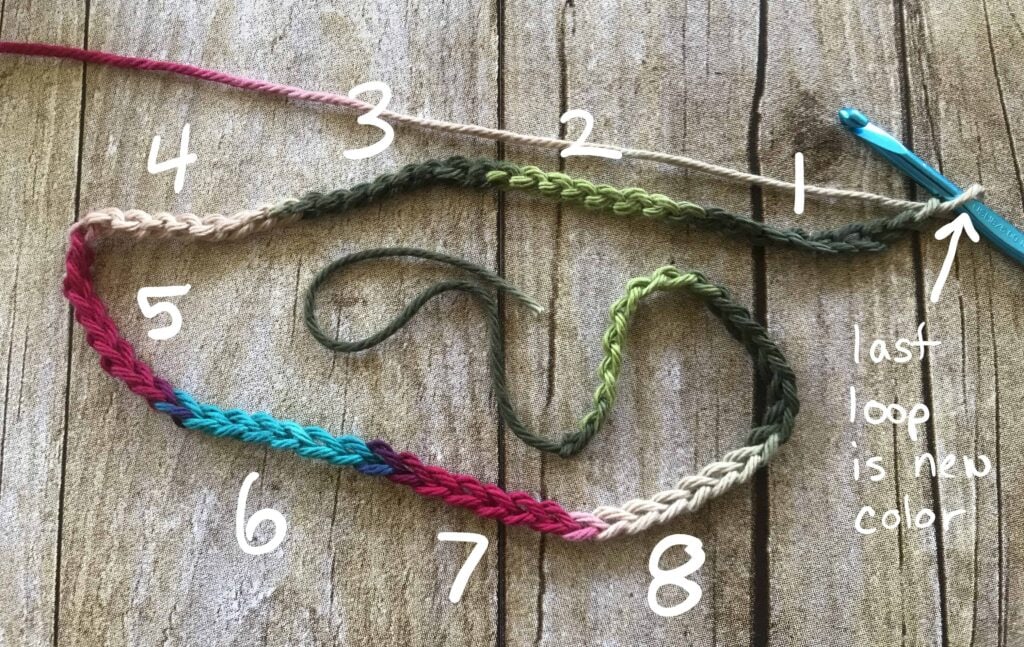
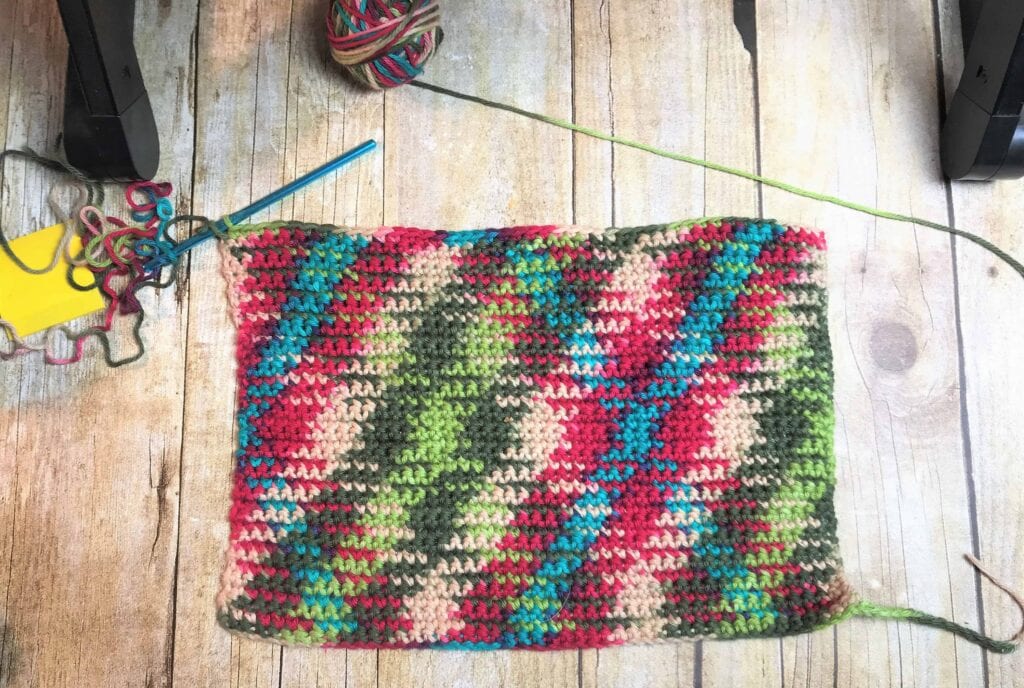
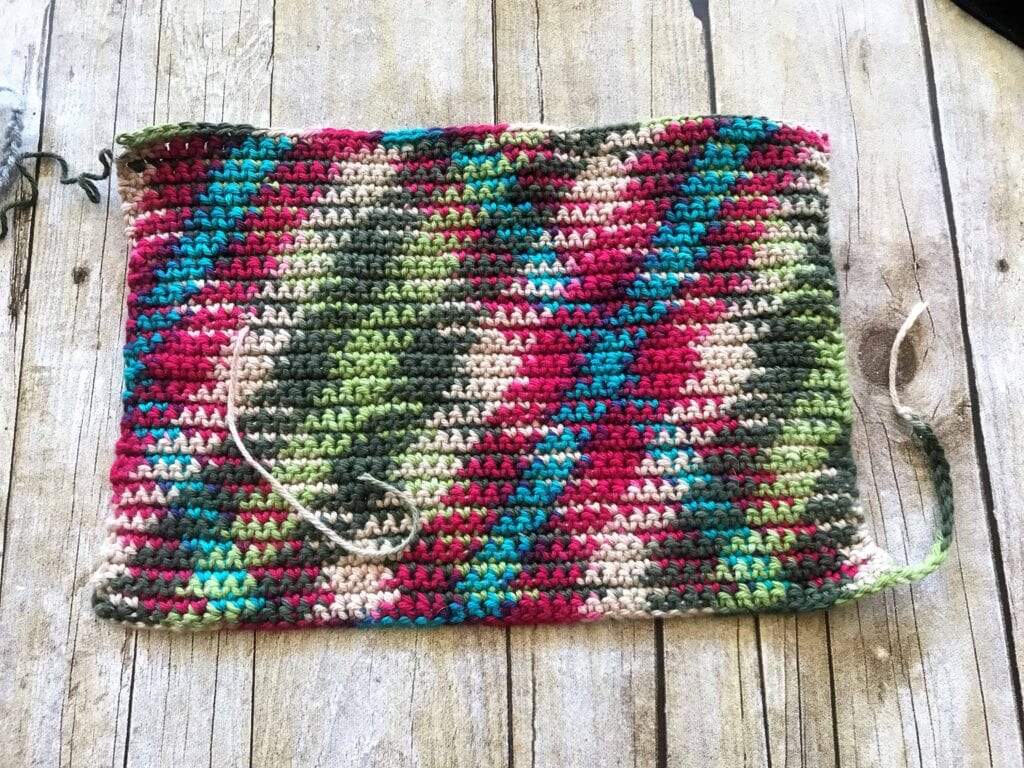
This is somewhat easy to do, but can be a little confusing at first. Normally variegated yarns are not dyed randomly, they have a sequence. The yarn I used in the dishtowel is called Peony by I Love This Cotton.
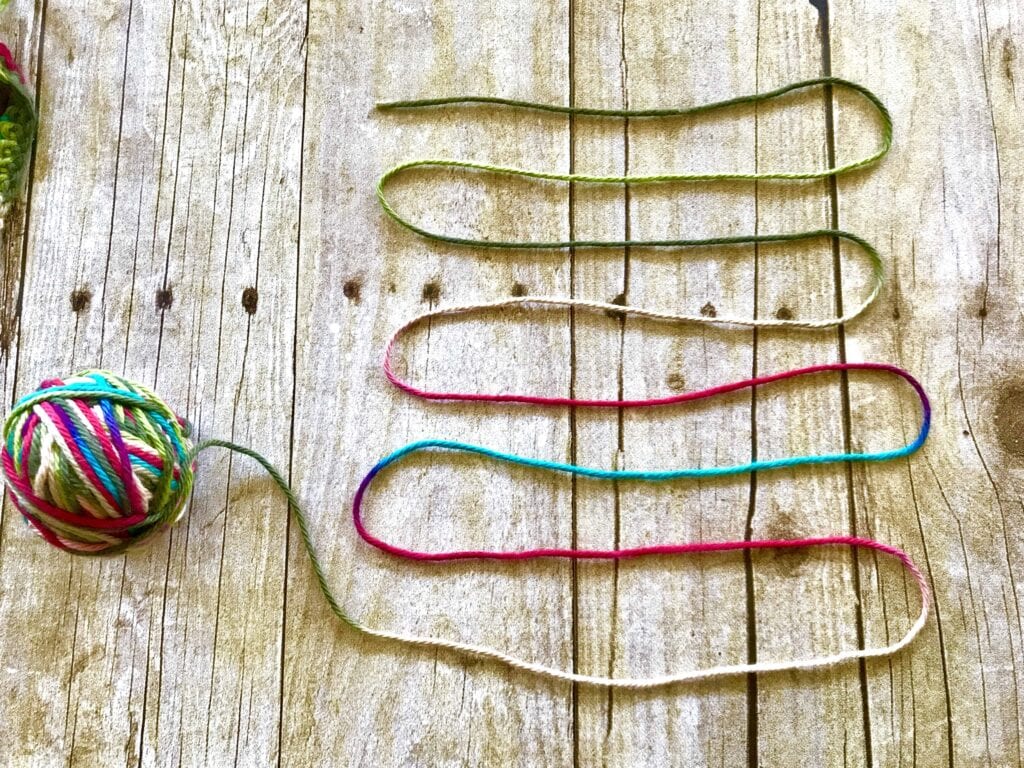
I found an 8 color sequence consisting of 5 colors:
(1) Dark green (2) Light green (3) Dark green (4) Cream (5) Red (6) Turquoise (7) Red (8) Cream
Then the sequence repeats with dark green, light green, dark green, etc.
This is what my color pattern looked like for the Peony by I love This Cotton. There is a little bit of purple at where the turquoise and reds meet, but I lumped that in with the stitch count for the red.
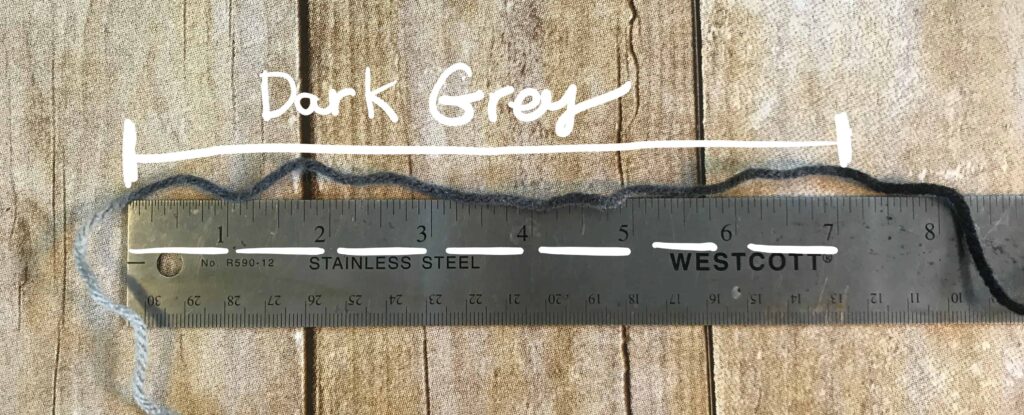
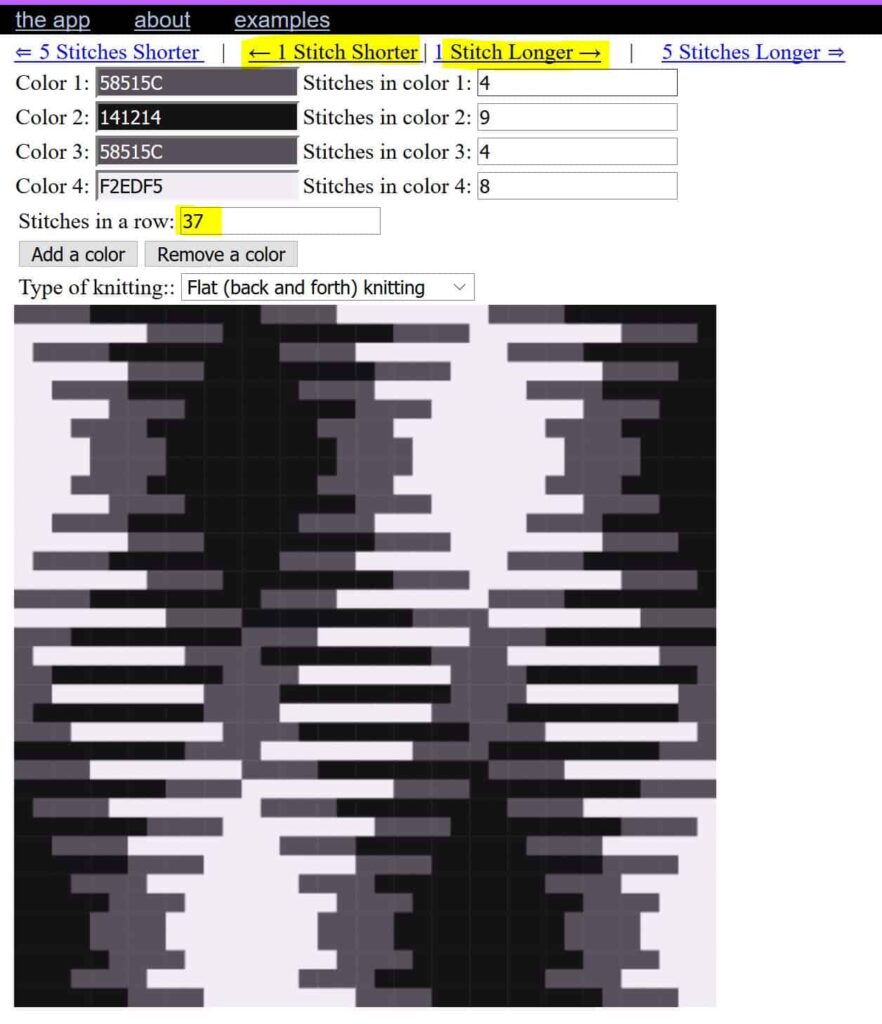
In another example, I used Vanna’s Choice, in Charcoal. You can see below the sequence is pretty short. With light grey, dark grey, black, then dark grey again. So this sequence has 4 colors before it repeats.
(1) Light grey (2) Dark Grey (3) Black (4) Dark Grey
Step 3 – Crochet a long chain
End the chain with the last color of the sequence, pull up a loop in the first color of the sequence (see arrow below). For me, this was ending with dark green, and I pulled up one loop in the cream. As you can see, there is some of tail left over because our sequence began with color 8 (cream) and ended with color 1 (dark green).
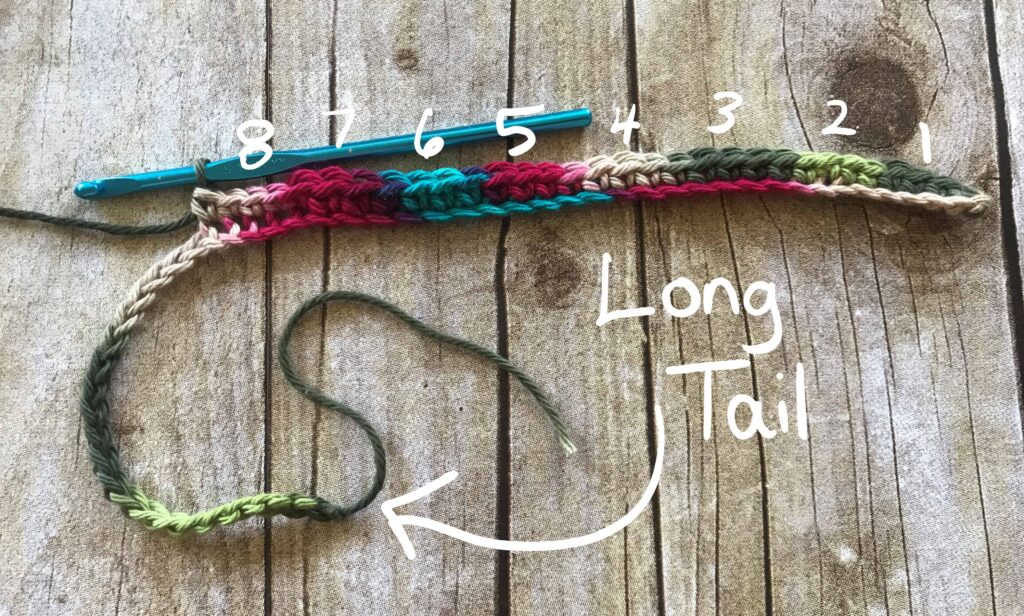
Step 4 – Single crochet or moss stitch back down the chain and count the number of stitches in each color.
Begin crocheting in single crochet or moss stitch, and count how many stitches each color will make. For me, this was…
(4) Dark green, (4) Light green, (4) Dark green, (4) Cream, (4) Red, (3) Turquoise, (4) Red, (4) Cream
I used single crochet to learn this technique – but moss stitch looks great too. If you decide to do a moss stitch – you need to make sure your stitches are an even count (2, 4, 6, etc.).
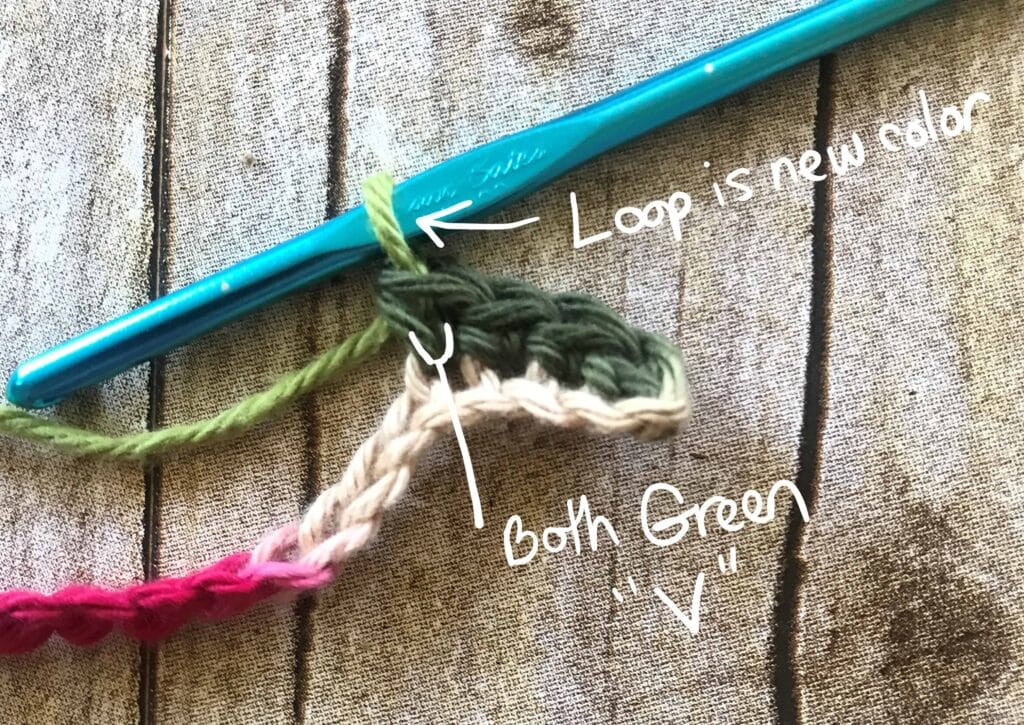
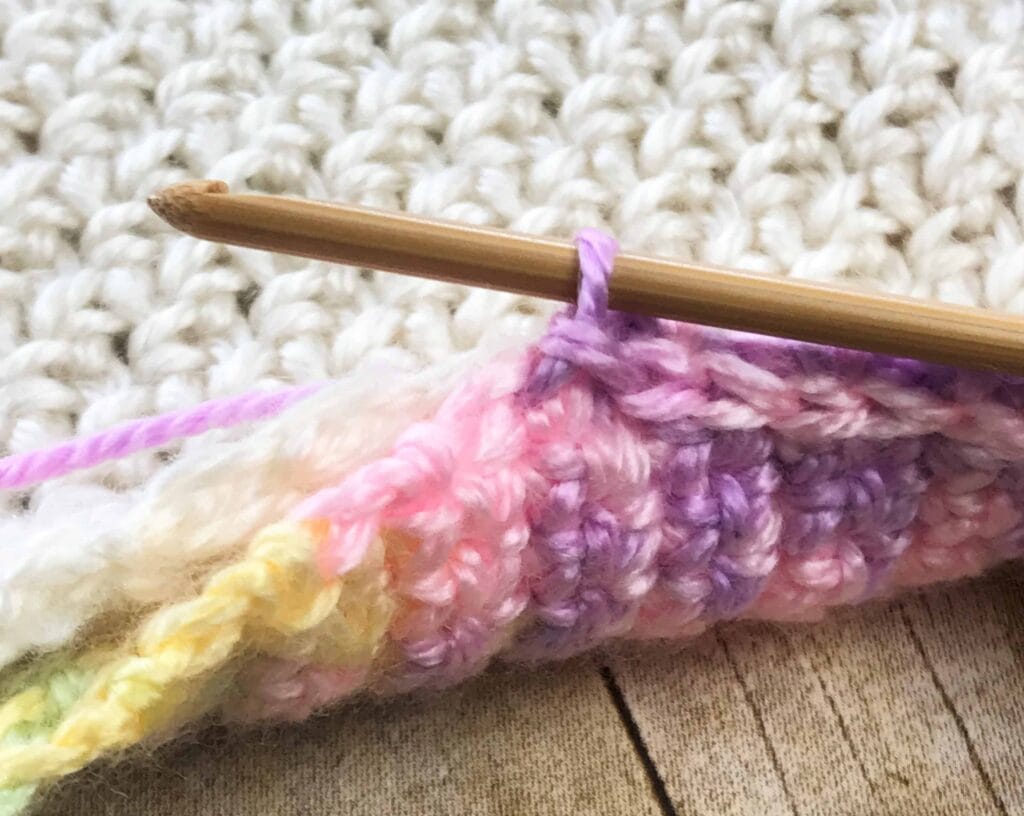
TIP: Make sure the “V” of the last stitch of each color is the same – if you find that the right leg of the V is green and the left leg of the V is light green – rip it back and adjust your tension to get a complete stitch in the color you need, and the loop on the hook will be the next color. Like this:
Write down your color sequence – the photo below is for Vanna’s Choice – Charcoal.

You can see above that the light grey has 8 stitches – each V of the stitch is grey.
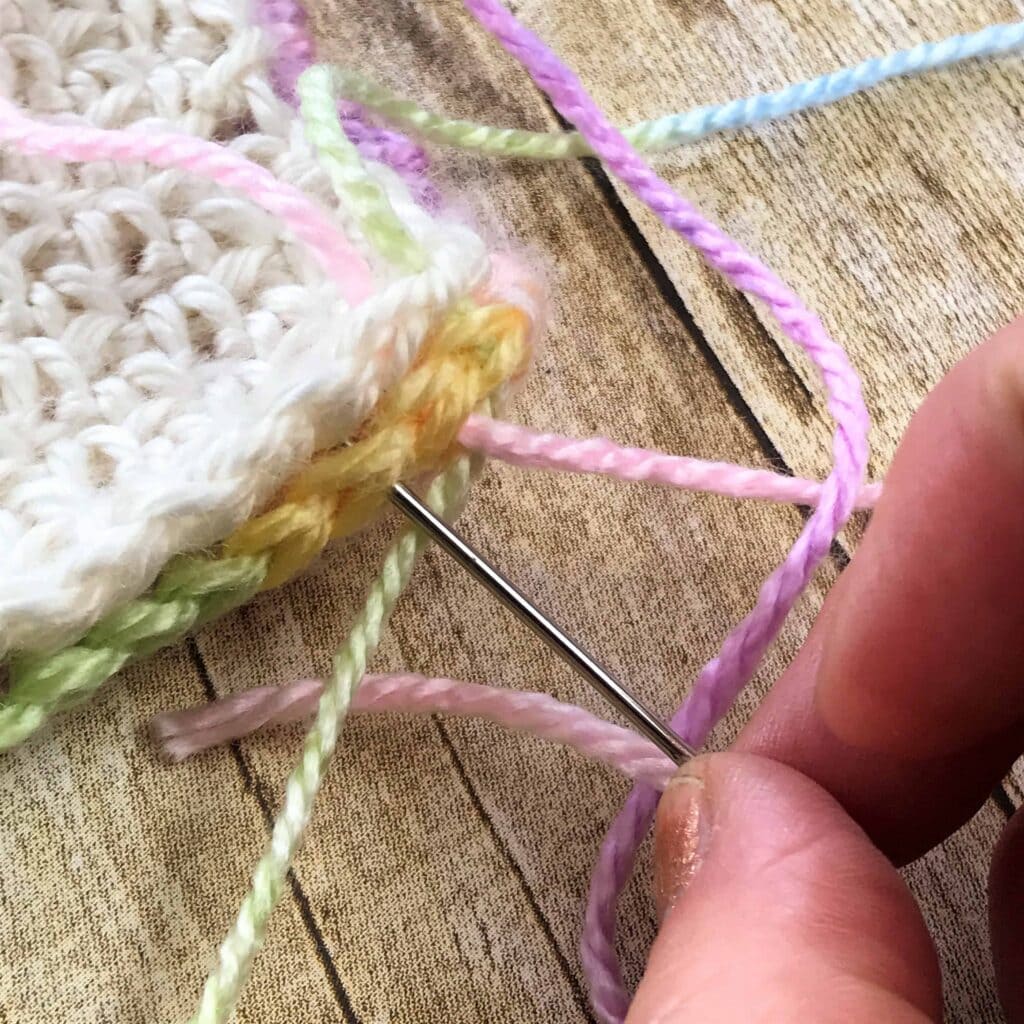
When you finish crocheting back through your sequence, you’ll have a long tail. Don’t worry about it for now, we will deal with that later! It’s easy, just cut it and unravel it until you reach your first stitch of the row….then weave in the tail.
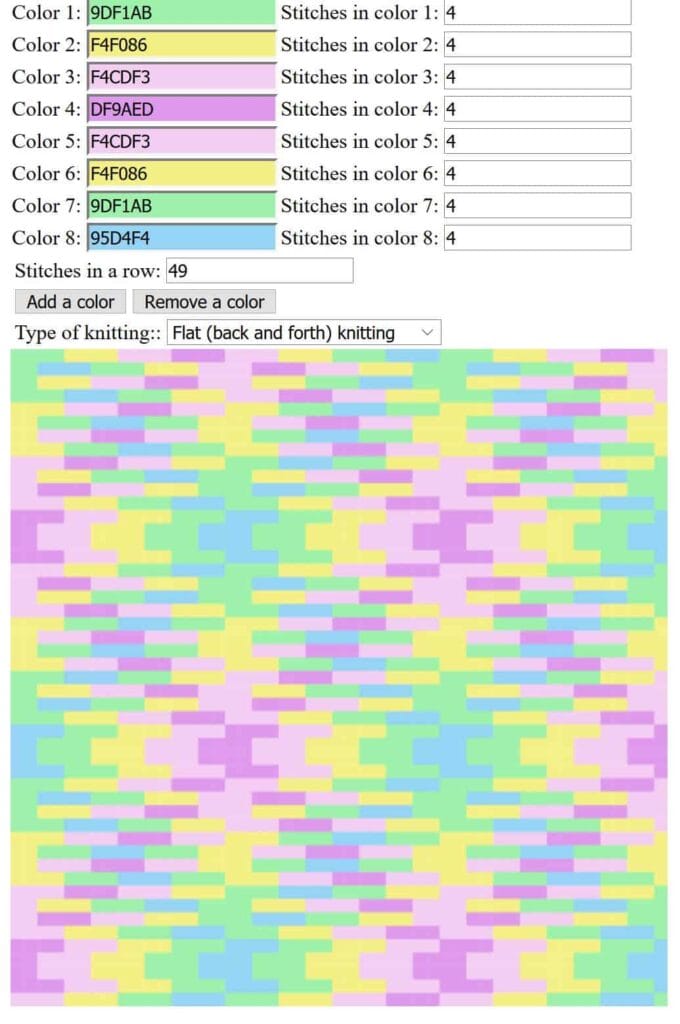
Step 5 – Use the Planned Pooling tool to find the number of stitches you will need to create the pattern.
In step 5, head on over to this Planned Pooling Tool and enter your color sequence.
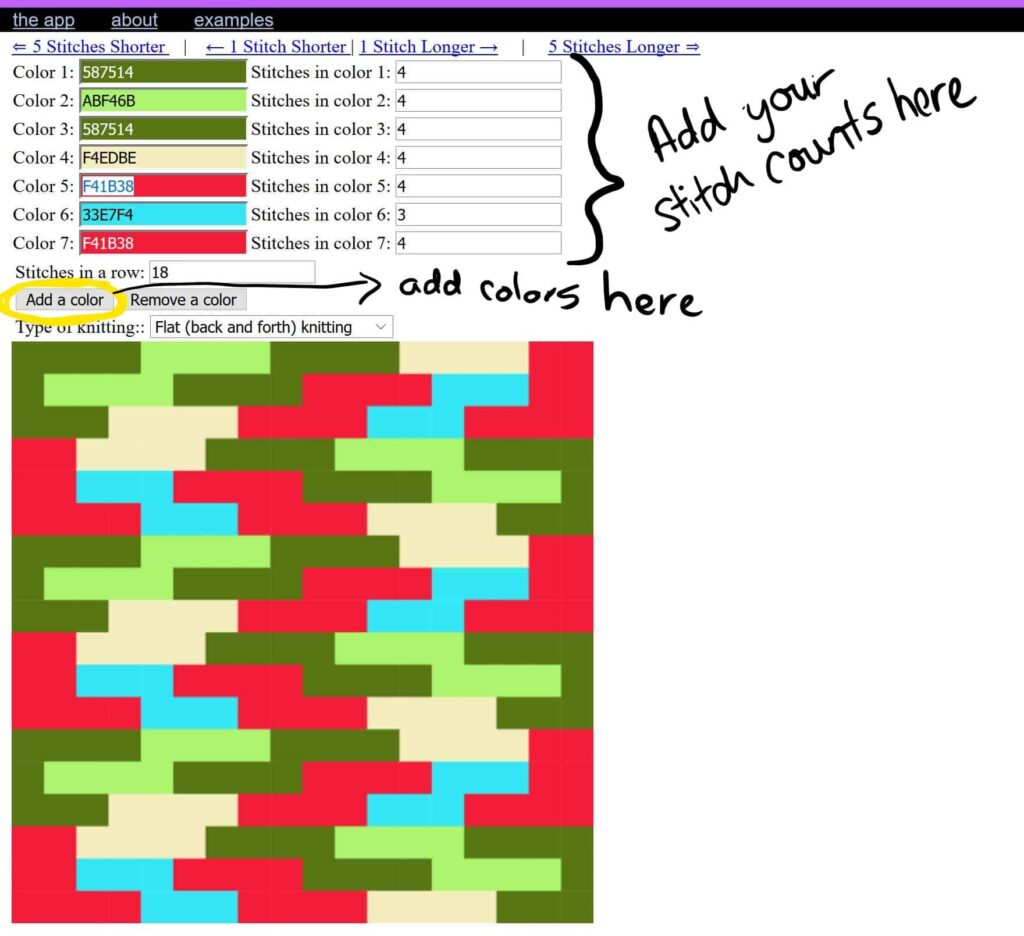
Then add or subtract stitches (not the stitch count of your colors, but how long you need to make it in order to create the pattern) – It’s labeled “Stitches in Row.”
As you can see from the image above, the stitches in the row are 18. If I began crocheting this pattern, it would end up looking like the photo above – so we need to add stitches by clicking the “1 stitch longer” or “5 stitch longer” button at the top of the page. Do this until you get a good argyle or plaid print.
For me, the magic number was 46.
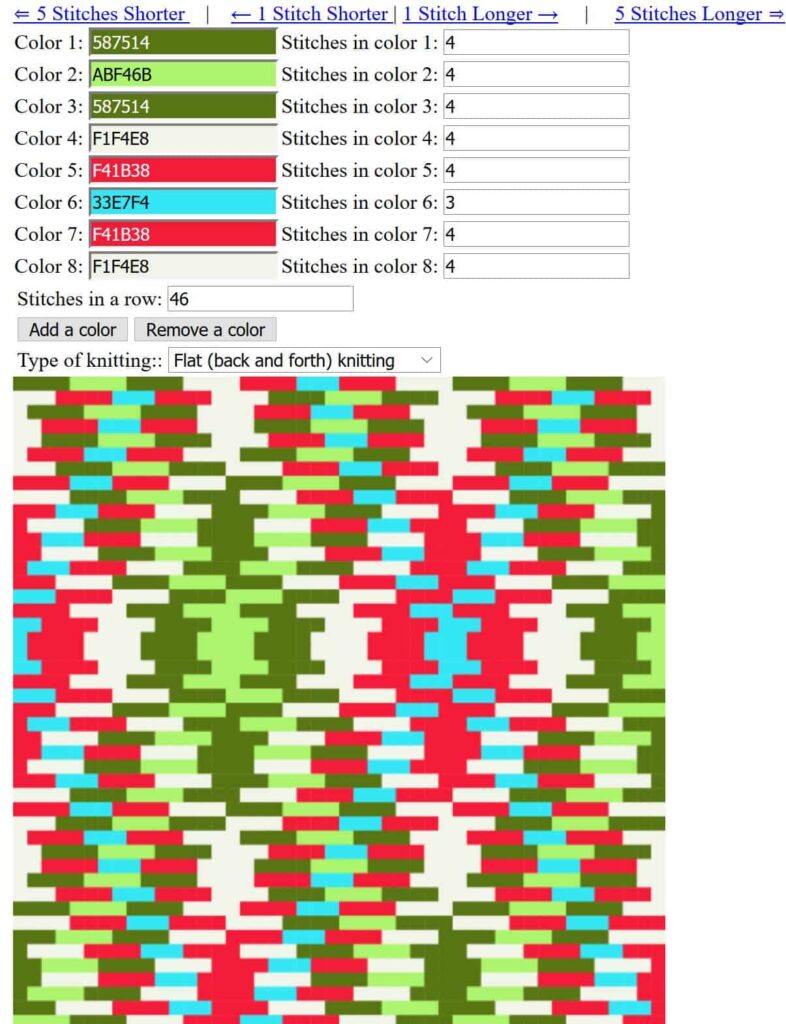
It’s a good idea to print this out. When you do…flip it upside down. The top part of this graphic is actually the bottom row.
(If you’d like to use the pattern above, I used Peony by I Love This Cotton – this is what it looks like)
Here is an example of the pooling tool with the Vanna’s Choice in Charcoal. The magic number for this one is 37.
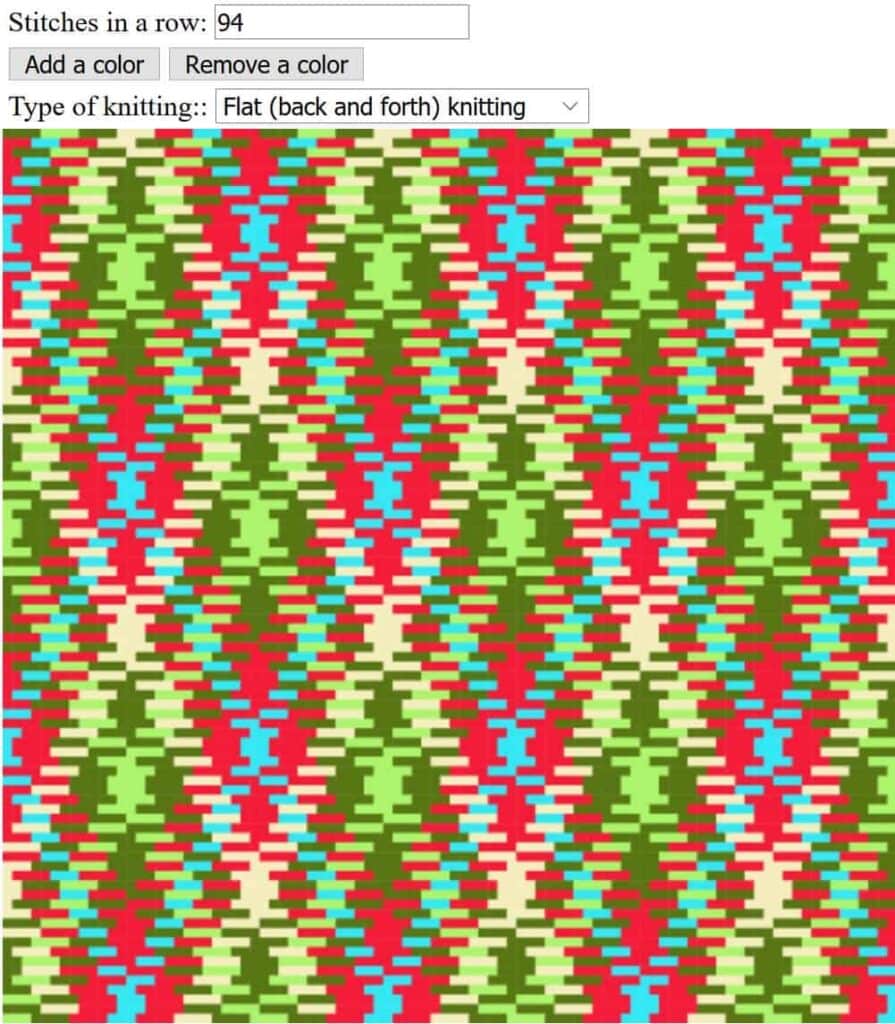
TIP: Whether you are making a scarf, a kitchen towel, pillow, or blanket – you can increase the stitch count to create the size you need for your project. Of course, this will also take more yarn for larger projects, so make sure you use the same lots for this or your color stitch count or sequence may get messed up.
Here is a sample of what it would look like if I used 94 stitches!
Step 6 – Begin your project!
Now, continue crocheting down the chain until you reach the stitch count mapped out in the planned pooling tool. You many need to rip it back and make a longer starting chain to depending how many stitches create your pattern.
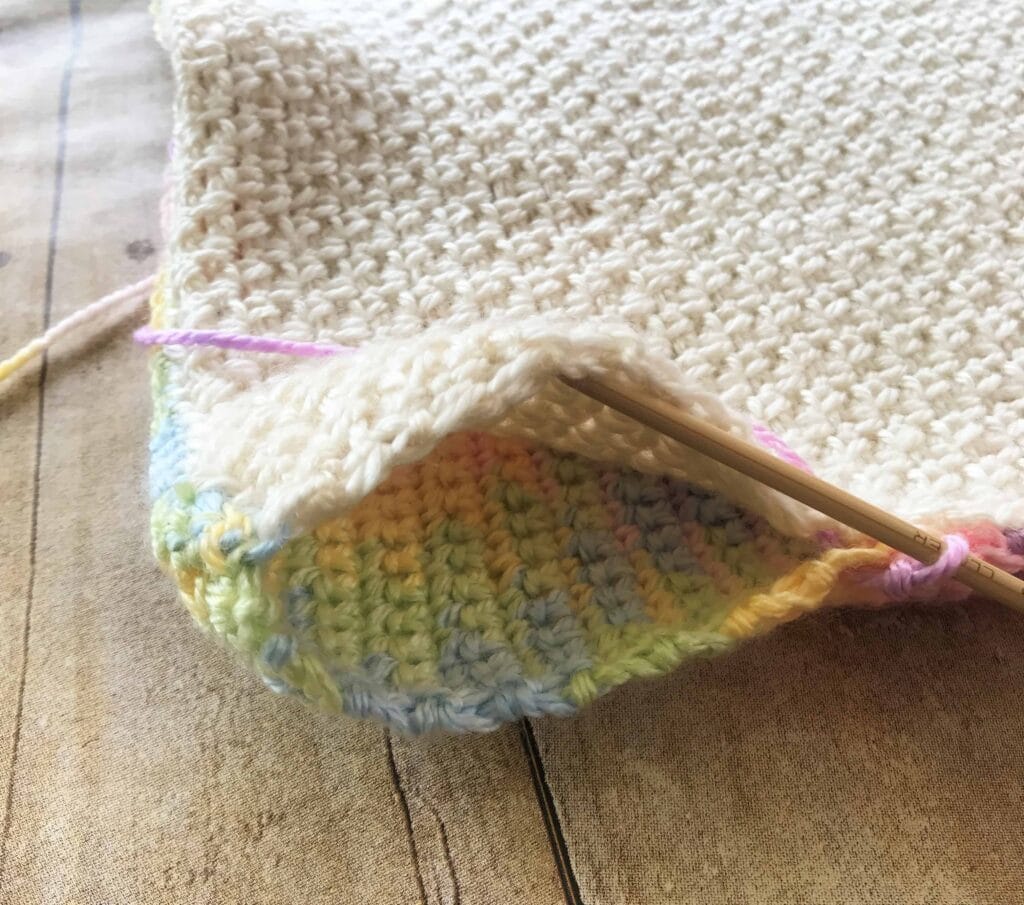
My pattern called for 46 stitches in a row, so I crocheted 46 stitches. I still had a bit of a tail left over. You can see below that I had to add a new skein mid-way. If you end up needing to add a new skein, match up the color sequence then join, then continue with your pattern.
So, you may ask yourself….what do I do when I come to the end of a row and I’ve only crocheted 2 stitches of the color block? Do not chain. Just turn your work, then work the next st in the first stitch of the row.
For instance, if your color block is 5 stitches long, and you come to the end of the row and crocheted 3 of that color…you are short by 2, so just turn the work and finish the 2 stitches on the next row. You are still completing 5 stitches in that color, but continuing it to the next row. Tensionplays a role in this too. See below for some tension tips.
TIP: Do not chain 1 at the end of each row. Just work back in the 1st st of the row.
MUST-READ! – It’s all about the Tension
Tension is perhaps the most important aspect of planned pooling, aside from basic counting! lol. Tension, tension, tension. You may need to loosen it or tighten it throughout the project to keep your color stitch count accurate and remember – you want to both V’s of the last stitch of the color block to be the same color and pull up a loop in the next color.
If you find that the last stitch of the V is in the next color, frog (frogging is ripping it back, aka ribbit ribbit – frog lol) it back to the the last color and tighten your tension or loosen it to get all your V’s for that color to be consistent.
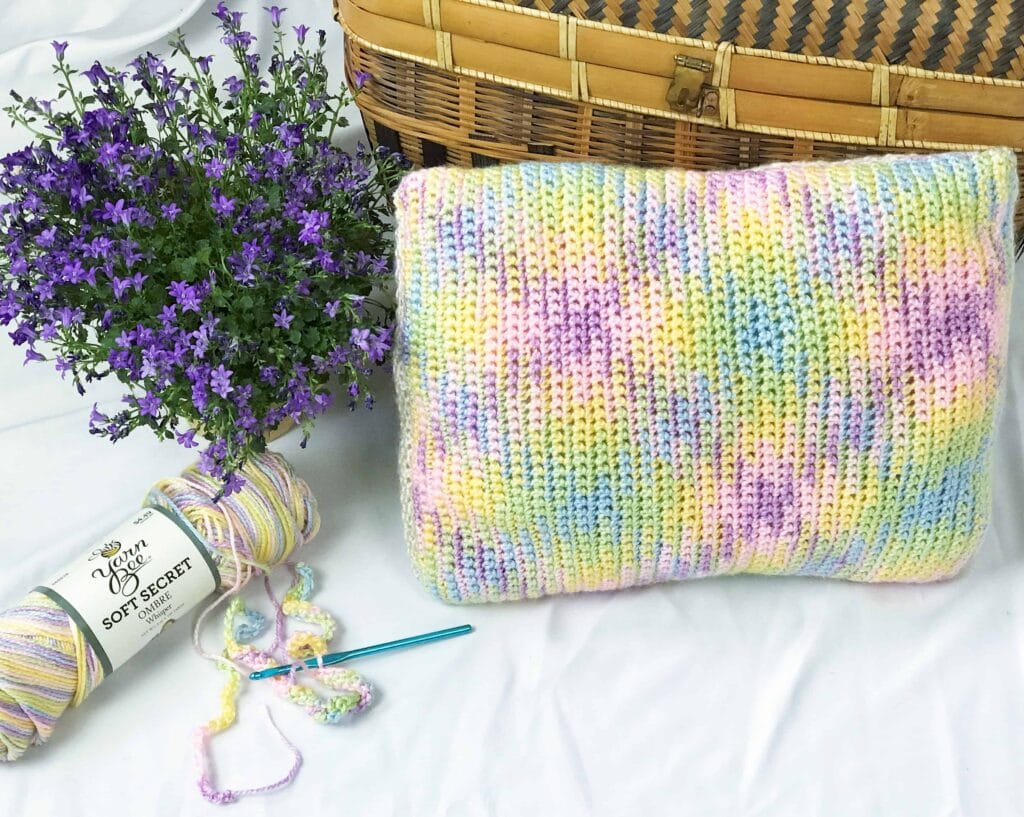
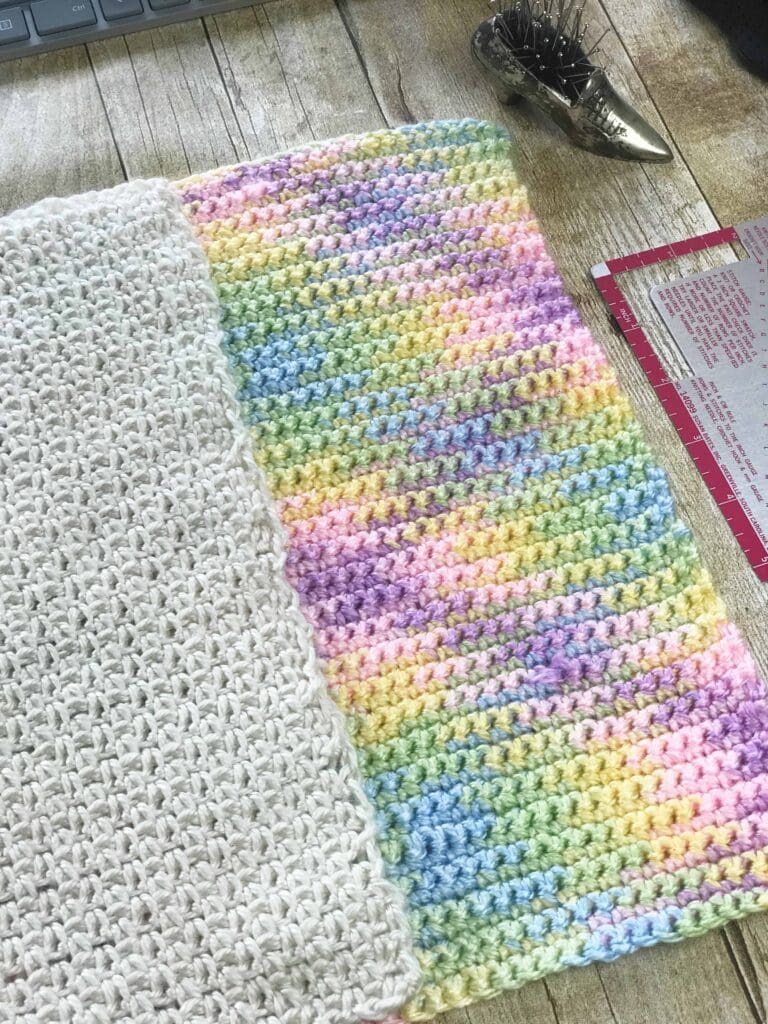
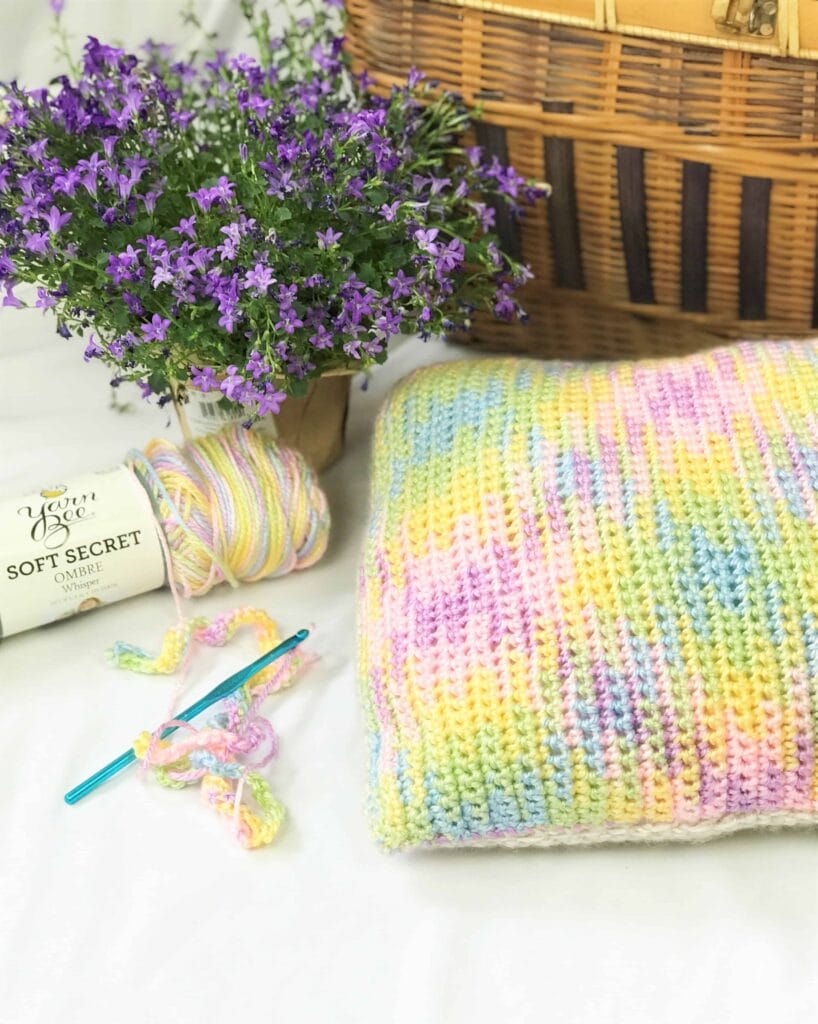
Baby Soft Pillow Free Pattern (Planned Pooling)
Okay! So here is a fun project for you to get started. If you’d like to make this pattern, I’ve already done the leg work for you. Here is a link to the pattern from the planned pooling website: Click Here, then print it out.
Front of Pillow – Planned Pooling Pattern:
Gauge:

Yarn:
Soft Secret by Yarn Bee – in colorway “Whisper” – Yardage= 1 skiein
Hook Size:
H hook (5.00 mm)
Pattern:
Follow this pattern (pictured below)
stitch counts are 49 stitches per row and 61 rows tall.
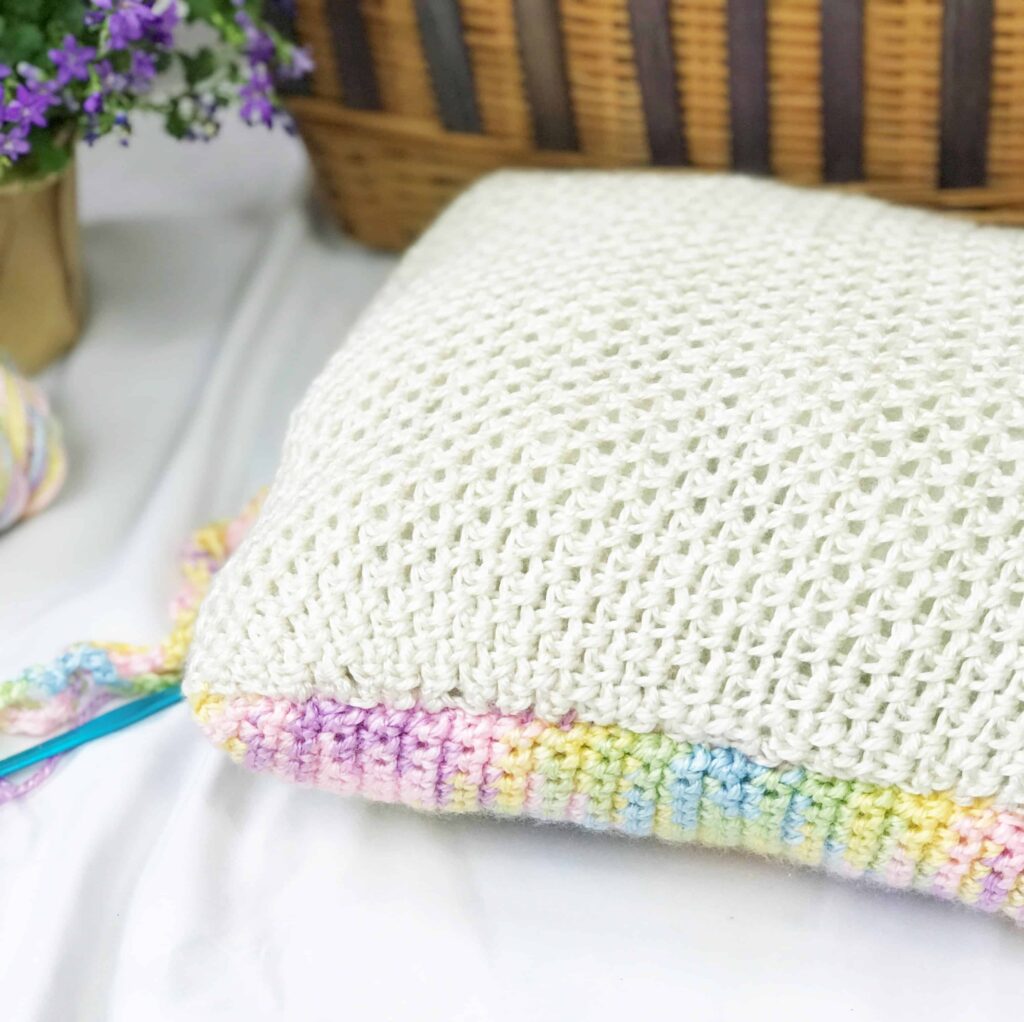
Back of Pillow Pattern: – Moss Stitch Variation
Gauge:
Yarn:
Soft Secret by Yarn Bee – in colorway “Ivory” – Yardage = 1 skein
Hook Size:
H hook (5.00 mm)
Pattern:
Chain 50.
Row 1: sc in first st. *ch 1, sc in next st* – repeat to end.
Row 2: ch 1, turn. sc in 1st ch sp. *ch 1, sc in next ch sp* – repeat to end.
Rows 3 – end: repeat Row 2 until you reach the same height as the front of pillow.
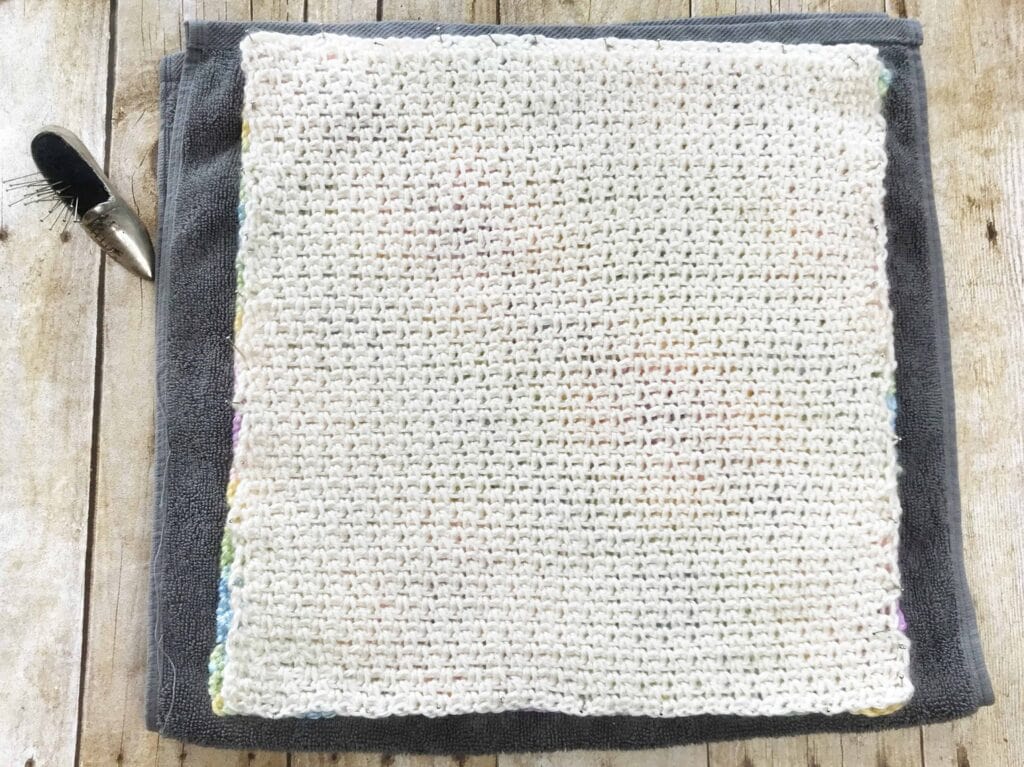
Depending on your gauge, it may be slightly small on the sides than the front of the pillow – I solved this by blocking them together so they match in size.
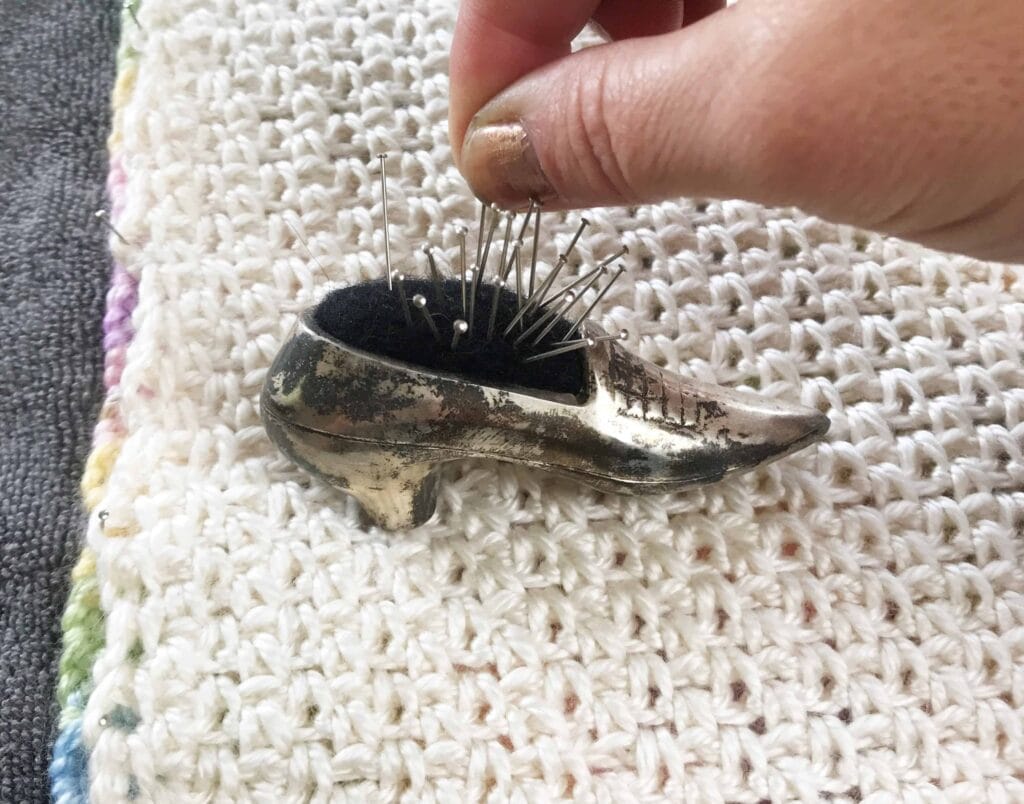
Block it – Let it sit over night to dry.
Remove the pins…
Place sides together…
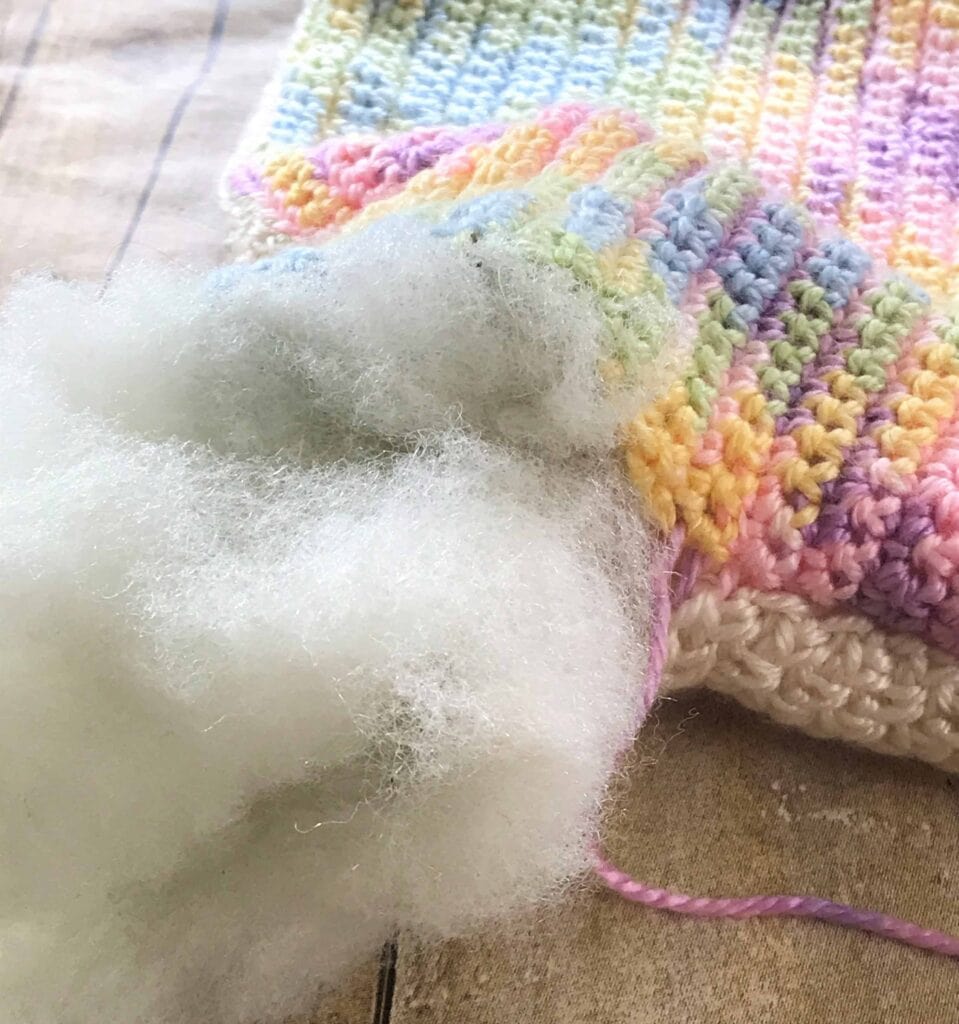
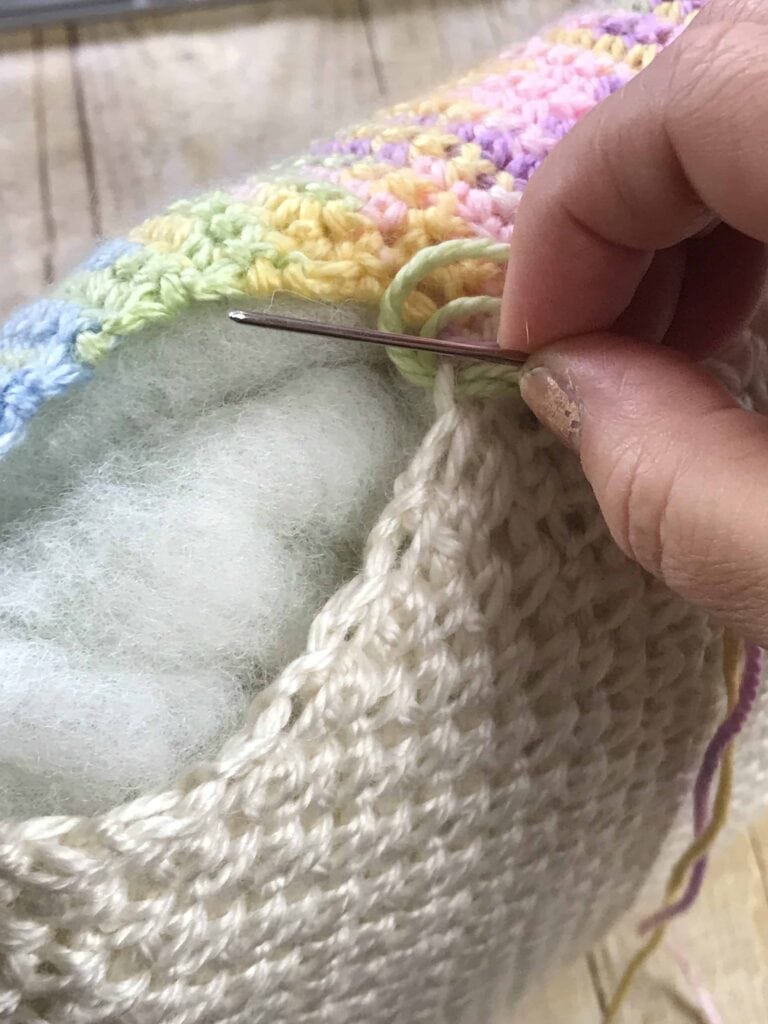
Whip stitch or slip stitch sides together, leaving a hole big enough for stuffing.
Turn it inside out and add stuffing…
Sew it up…
You’re Finished!
I hope you enjoy this step-by-step guide to planned pooling today! If I missed something, or you have a tip to add, please leave a comment – I will update it :).
I’m here to answer any questions too! If these videos don’t play on your browser – head over to my YouTube channel to view them. Stardust Gold Crochet Channel
Part 1 – Planned Pooling Choosing the Right Yarns
Part 2 – Simple 12 Minute Tutorial on Planned Pooling


I loved this guide on planned pooling! Your tips make it feel so much less intimidating, and I can’t wait to give it a try. The photos are super helpful too—thank you for breaking it down so clearly!
When I check the number of stitches for each colour, using the moss stitch, do I count only the number of sc? or do I include the ch1 spaces counting them as stitches for each colour? And if I count only the number of sc, how do I calculate the number of chains to make? Thank you.
I absolutely loved this guide on planned pooling! Your instructions were so clear and encouraging. I was intimidated at first, but now I feel ready to give it a try. Can’t wait to share my first project! Thank you for breaking it down so well!
I would really love to purchase the color pooling plaid pattern. You do very good work. Here is some ideas for you. This is a search engine page for certification for crocheting – Bing This is a good one: About the CGOA Masters Program – Crochet Guild of America (CGOA)Look at this site for knitting its a different way of doing it COCOKNITS – Cocoknits you want to do this professionally for actors, “Cats” play & “Downtown Abbey” used knitters & crocheters. Study textiling.
Thanks these are great links! I appreciate it.
Hello. I have learnt a lot form this blogpost but I still have a problem. The color change in my yarn is not a hard change.so it’s hard to get 6 stitches every time… The yarn is Katia Big diamonds so made for planned pooling.
Do I need to adjust the tension? is that the solution?
Hey Emma, hopefully you’ve figured it out by now. I’m using the same yarn in the beige/baby blue/white variation. I chained the whole color sequence but stopped single crocheting back when I reached the width of my scarf. (I am not making the pillow.) And then I planned the argyle pattern. You do need to adjust your tension up or down from time to time. Alternatively, you could change the crochet hook up or down a size.
Hi Courtney. Can I ask how many stitches are in each of your colors?
Hi i am in need of some help with my pooled project i am using the vanna’s choice in charcoal print and have come to a stand still because i need to add the second skein and can’t seem to join it and keep my design.thank you.
I’ll have to look into it for you.