

It’s that time of year again, cold  blustery weather, hot chocolate
  , and warm snuggles
  all around. The Sequoia Ridge Slouch is a easy crochet slouchy beanie pattern, perfect for Fall.
You’ll love working this easy slouchy beanie as a beginner or novice crocheter.
Autumn Harvest Blog Hoppers! Please Read
Welcome and thanks for being here! Today’s FREE PATTERN is a free PDF download. BUT, before you jump out of my site, please take a moment to scroll this post to the bottom to get the PDF (look for the graphic for Autumn Harvest.
Then head on over and graph the free PDF! Scroll on down.
Perks in the Pattern:
- Completely adjustable.
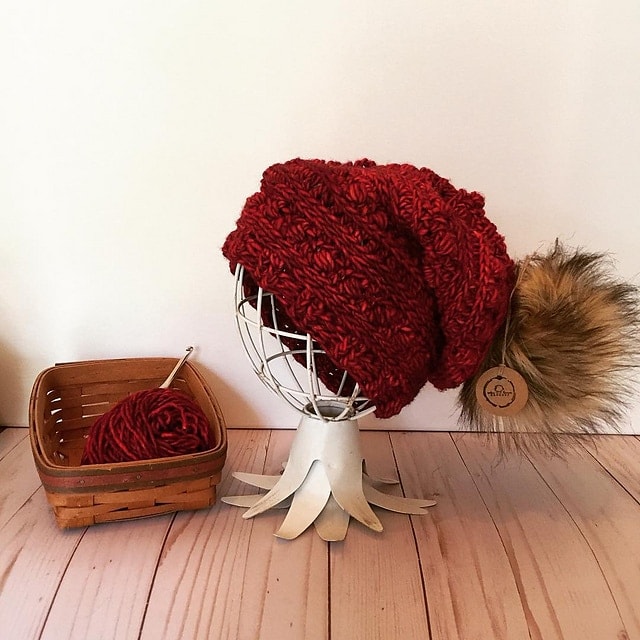
- Looks great in all types of yarn colorways.
- Beginner friendly crochet beanie pattern for sure!
- It works up fast and there are so many options to make it your own.
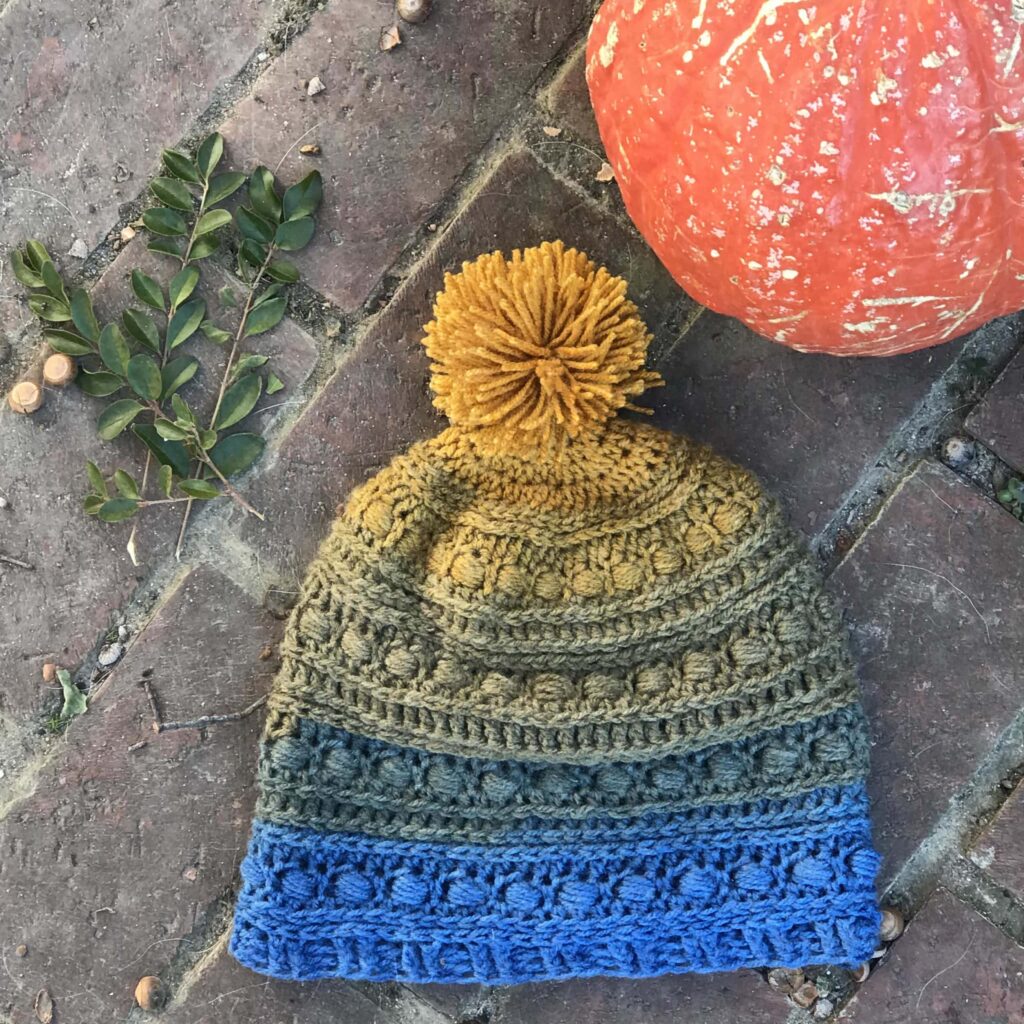
I worked this up in various yarns  , just to show you how versatile the pattern can be.
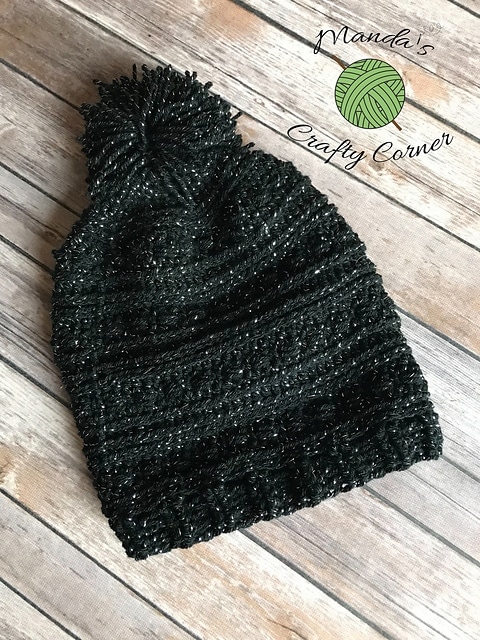
In addition, I had such wonderful pattern testers for this. They created some beautiful renditions too!
Crochetspiration for this Easy Crochet Slouchy Beanie Pattern
The inspiration for this slouch stems from the mighty Flint Ridge caves (They are the longest cave system in North America) and the giant Sequoias.
The Sequoias are the tallest, most beautiful trees in the world. I envision hiking trails wearing this beauty.
It’s been a while, given I live in the deciduous forest region of the country now (Tennessee). I miss the Sequoias, and hopefully someday I will get back to California. 😊
For pattern support
Head over to my Facebook group Stardust Gold Crochet & Friends, I’m always there to answer any questions and just talk crochet!
Sequoia Ridge Slouch Crochet Beanie Variations
Here are some of the variations you’ll find with this easy crochet slouchy beanie pattern… 
Easy Crochet Slouchy Beanie
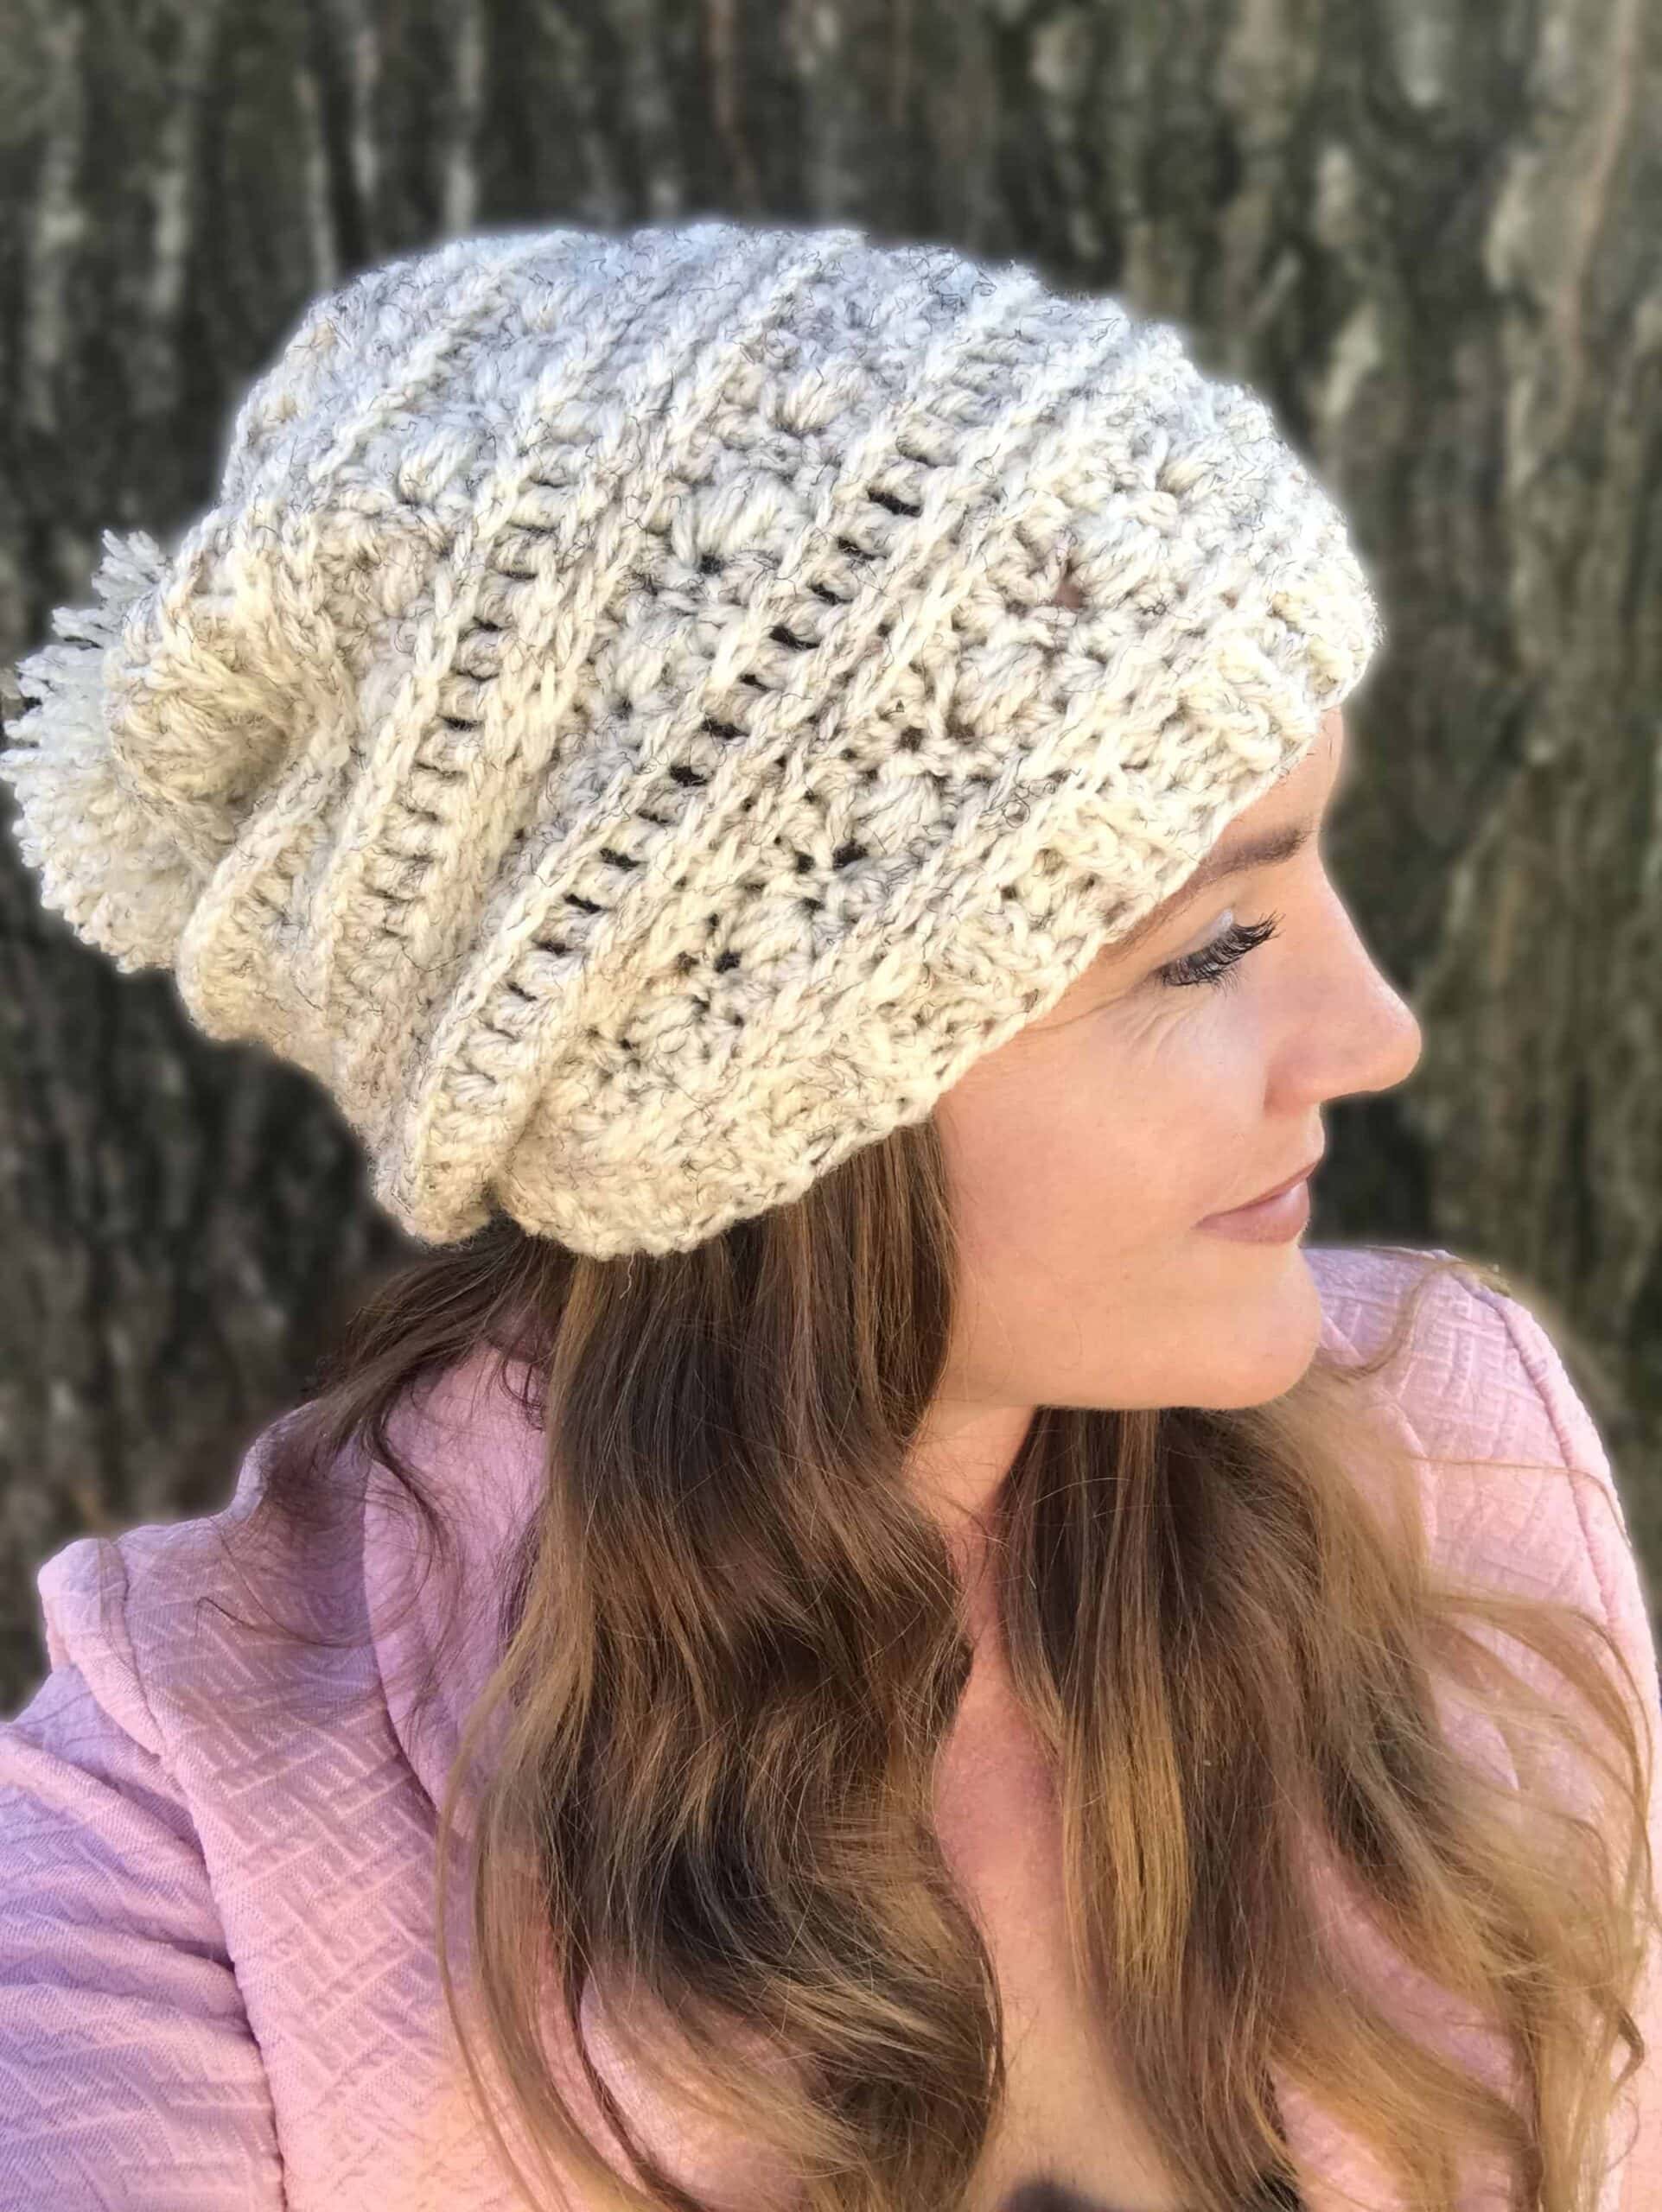

I created this in two yarns, both work great to create the look of tweed. The sample in photo is created with Vanna’s Choice.
Although I love the look of it, I recommend using a softener on it, or washing it a few times with conditioner, because it is slightly scratchy.
This is why I am also suggesting I Love This Yarn, in Ivory Tweed.
Sequoia Ridge Slouch Pattern – Easy Crochet Slouchy Beanie Pattern
Skill Level:
Easy
Materials:
- Suggested Yarn: Vanna’s Choice by Lion Brand, Wheat
- Hook Size: 5.5 mm (USA I hook
- Yardage: 350 yards
- Yarn Alternatives: I love This Yarn in Ivory Tweed or any 4 weight yarn
- Scissors
- Darning Needle
- Ball Jar and 2 Ball Jar Tops – to create pom pom (instructions here)
Gauge:
14 sts x 8 rows = 4”x4” or 10 x 10 cm. Directions for gauge: Ch 14 + 1, hdc 2nd ch from hook, and across chain. Ch 1, turn, *hdc entire row, ch1 turn* – *repeat* until you 8 rows
Sizing:
One size fits most – adjustable as follows
Adult/Teen:
As written, the circumference measures average adult, 22″ ( cm).
You can easily customize by reducing or increasing in multiples of 2 to get the perfect size for your unique measurements.
Toddler/Child:
If you’d like to create this beanie for a child, work pattern as normal except stop increasing rounds when you reach 60 stitches.
When you reach the brim instructions, it will decrease to 50 stitches naturally by following the pattern.
One of my testers created a toddler version and it turned out great!
Pattern Notes – Please Read
- Pineapple stitch instructions are in the stitch guide.
- Chains do not count as stitches.
- First stitch is made in same as turning chain unless otherwise indicated.
- Work the pineapple stitch loose.
- Joins are made with slip stitch in first st of each round.
- Want a larger pineapple stitch? Yo, 4 or 5 times instead of 3 times.
- Stitch count – don’t fret too much if your count is off. Go back and see if you can find the mistake, if not, work an extra st in or decrease by one stitch if you over-count.
- Half Triple Crochet Tutorial
- How to find the Third Loop
You can find the PDF version of the Sequoia Ridge Slouch Beanie in the Infinite Yarniverse (my online shop).
Abbreviations:
| hdc | half double crochet |
| htr | half triple crochet |
| hdc2tog | half double crochet two together |
| pine | pineapple stitch |
| st(s) | st(is) |
| ch | chain |
| sc | single crochet |
| sk | skip |
| st | stitch |
| rnd | round |
| *…* | *crochet instructions between asterisk* repeated as many times as indicated |
Stitch guide:
This Easy Crochet Slouchy Beanie uses a few basic stitches, alongside some more advanced crochet stitches, like the pineapple stitch, and front post stitches.
The colored text links are clickable and will take you tutorials on how to crochet these special stitches.
sl st – slip stitch: Insert hook in indicated stitch, yo and pull through both loops on hook.
pineapple stitch: Skip one stitch, hdc in next st, *yo, insert hook into chain space to the right of hdc, yo, draw up lp* (you are working around the hdc) *repeat* 3 – 5 times (the more loops, the larger the ball) yo, draw through all loops on hook
hdc – half double crochet: Yo, insert hook in indicated stitch, yo, draw up a loop, yo, draw through all three loops on hook.
htr – half triple crochet: Yo twice, insert hook in indicated st, yo, draw up a loop, yo, pull through two loops, yo, pull through all three loops on hook.
FPhdc – front post half double crochet: Yo, insert hook front-to-back around post of stitch from previous row, yo, draw up a loop, yo, draw through all loops on hook.
BPhdc – back post half double crochet: Yo, insert hook from back-to-front around post of indicated stitch, yo, draw up a loop, yo, draw through all loops on hook.
hdc2tog – half double crochet two together: This is a decrease. yo, insert hook in next st. yo, draw up a loop. yo, insert hook in next st, yo draw through all loops on hook.
Easy Crochet Slouchy Beanie Pattern
Pattern:
Rnd 1: Magic Circle. hdc 10 into magic circle, join – 10 hdc.
Rnd 2: Ch 1, hdc 2 in each hdc, join – 20 sts.
Rnd 3: Ch 1, *hdc 1 in next hdc, hdc 2 in the next hdc*, rep *…* around, join – 30 sts.
Rnd 4: Ch 1, *hdc 1 in each of next 2 hdc, hdc 2 in the next st*, rep *…* around, join – 40 sts.
Rnd 5: Ch 1, *hdc 1 in each of next 3 hdc, hdc 2 in the next st*, rep *…* around, join – 50 sts.
Rnd 6: Ch 1, (work in 3rd loop) *hdc 1 in each of next 4 sts, hdc 2 in next hdc*, rep *…* around, join – 60 sts.
Rnd 7: Ch 1, (work in 3rd loop) *hdc 1 in each of next 5 hdc, hdc 2 in next hdc*, rep *…* around, join – 70 sts.
Rnd 8: Ch 1, *pineapple stitch, sc 1 in next st*, rep *…* around (sc 1 in last st of rnd if your count is 69 at end of rnd), join – 70 sts.
Rnd 9: Ch 1, hdc 1 in each hdc, join – 70 hdc.
Rnd 10: Ch 2, htr 1 (3rd loop) in each hdc around, join – 70 sts.
Rnd 11: Ch 1, hdc 1 (3rd loop) in each htr of rnd, join – 70 sts
Rnd 12: Ch 1, hdc 1 (3rd loop) in each hdc around, join – 70 sts
Rnd 13: Ch 1, *pineapple stitch, sc 1 in next st*, rep *…* around, sc 1 in last st of rnd if your count is 69 at end of rnd, join – 70 sts.
Rnd 14: Ch 1, hdc 1 in each st around, join – 70 sts.
Rnd 15: Ch 1, htr 1 (3rd loop) in each st around, join – 70 sts.
Rnd 16: Ch 1, hdc 1 (3rd loop) in each st around, join – 70 sts.
Rnd 17: Ch 1, hdc 1 (3rd loop) in each st around, join – 70 sts.
Rnd 18-22: Repeat rows 13 – 17
Rnd 23: Ch 1, *pineapple stitch, sc 1 in next st* , repeat *…* around, sc 1 in last st of rnd if your count is 69 at end of rnd, join – 70 sts.
Rnd 24: Ch 1, hdc 1 in ea st around, join – 70 sts.
Rnd 25: Ch 1, hdc 1 (3rd loop) in at st around, join – 70 sts.
Rnd 26: Ch 1, *hdc 1 (3rd loop) in next 5 sts, hdc2tog in next st*, repeat *…* around – 60 sts.
Crocheting the Brim
Rnd 27: Ch 1, *fphdc 1 in ea of next 2 sts, bphdc 1 in next st*, repeat *…* around – 60 sts. (you don’t have to join or chain at the end of this row, continue working in the round)
Rnd 28: Repeat R27 until you reach desired rim width. I worked 2 rows for the sample.
Tie off and weave in tails.
Finishing:
I used a handmade pom pom for my sample pattern. I had fun creating the pom pom’s.
If you don’t have a pom pom maker, check out the tutorial below.
Making the Pom Pom
I created a tutorial on how to create the perfect pom pom using household materials. It’s a fun way if you don’t have a pom pom maker!
Autumn Harvest Blog Hop 2025

You May Like These Stitch Tutorials

Congratulations! You’re finished!
I hope you enjoyed creating this Easy Crochet Slouchy Beanie pattern and please share your work with me!
Hashtag #sequoiaridgeslouch #stardustgoldcrochet on IG or Facebook 


I was hoping to get clarification about the first pineapple stitch row, round 8, it says you should have 70 stitches at the end of the row, then stitch into the hdc for the next row, butfar as I can tell, you’re only making a hdc every 4 stitches (hdc, pineapple, sc then sk for next hdc). Where do we get 70 hdc for the 9th round?
Hey Ashley! Did you ever find the answer? I’m wondering if I need to go around twice (although it still wouldn’t make up full two rounds). Stuck on this part – wish there was a video!
Hi Liz, I figured out that she meant to say 1 hdc in every STITCH not every hdc because the row is a mix of sc and pineapple stitches.
Hi Ashley, I figured out that she meant to say 1 hdc in every STITCH not every hdc because the row is a mix of sc and pineapple stitches.
Could this be made with #6 yarn It is soft & fluffy I have the yarn slreadt
Hello. I really like this pattern and wish I could save it to my Pinterest page for quick finding later, but I don’t see the little red “P” icon on any of the photos. Can you tell me how I can save it? Thx!
Hi MonicaI found how to pin this pattern. Go to Pinterest and type in the name of this pattern and search. It will come up and you can pin it from there.Rhonda a fellow crocheter. Happy crocheting.
Thanks Rhonda!
What does work in 3rd loop mean?
I love this! Would you say that Caron Simply Soft is close to I Love This Yarn?