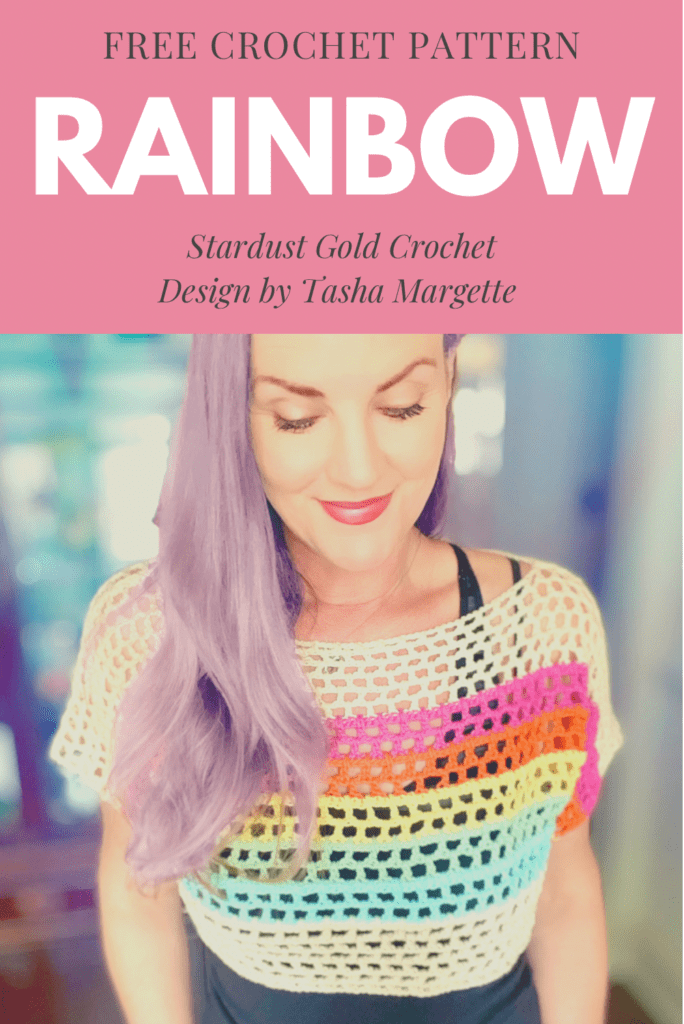
If I had a dime for every project I started that took two years to release…I’d be rich. Just kidding! I can say this free crochet crop top pattern design started simple, and when I started sizing it, it became an entirely different animal. 
I’ll detail its creation later; for now, know this crop top pattern is perfect for summer and great for beginners.
It’s definitely one to add to the list of free, easy crochet summer tops this year, and you’ll be happy you did.
Rainbow Mesh Free Crochet Crop Top Pattern Origins
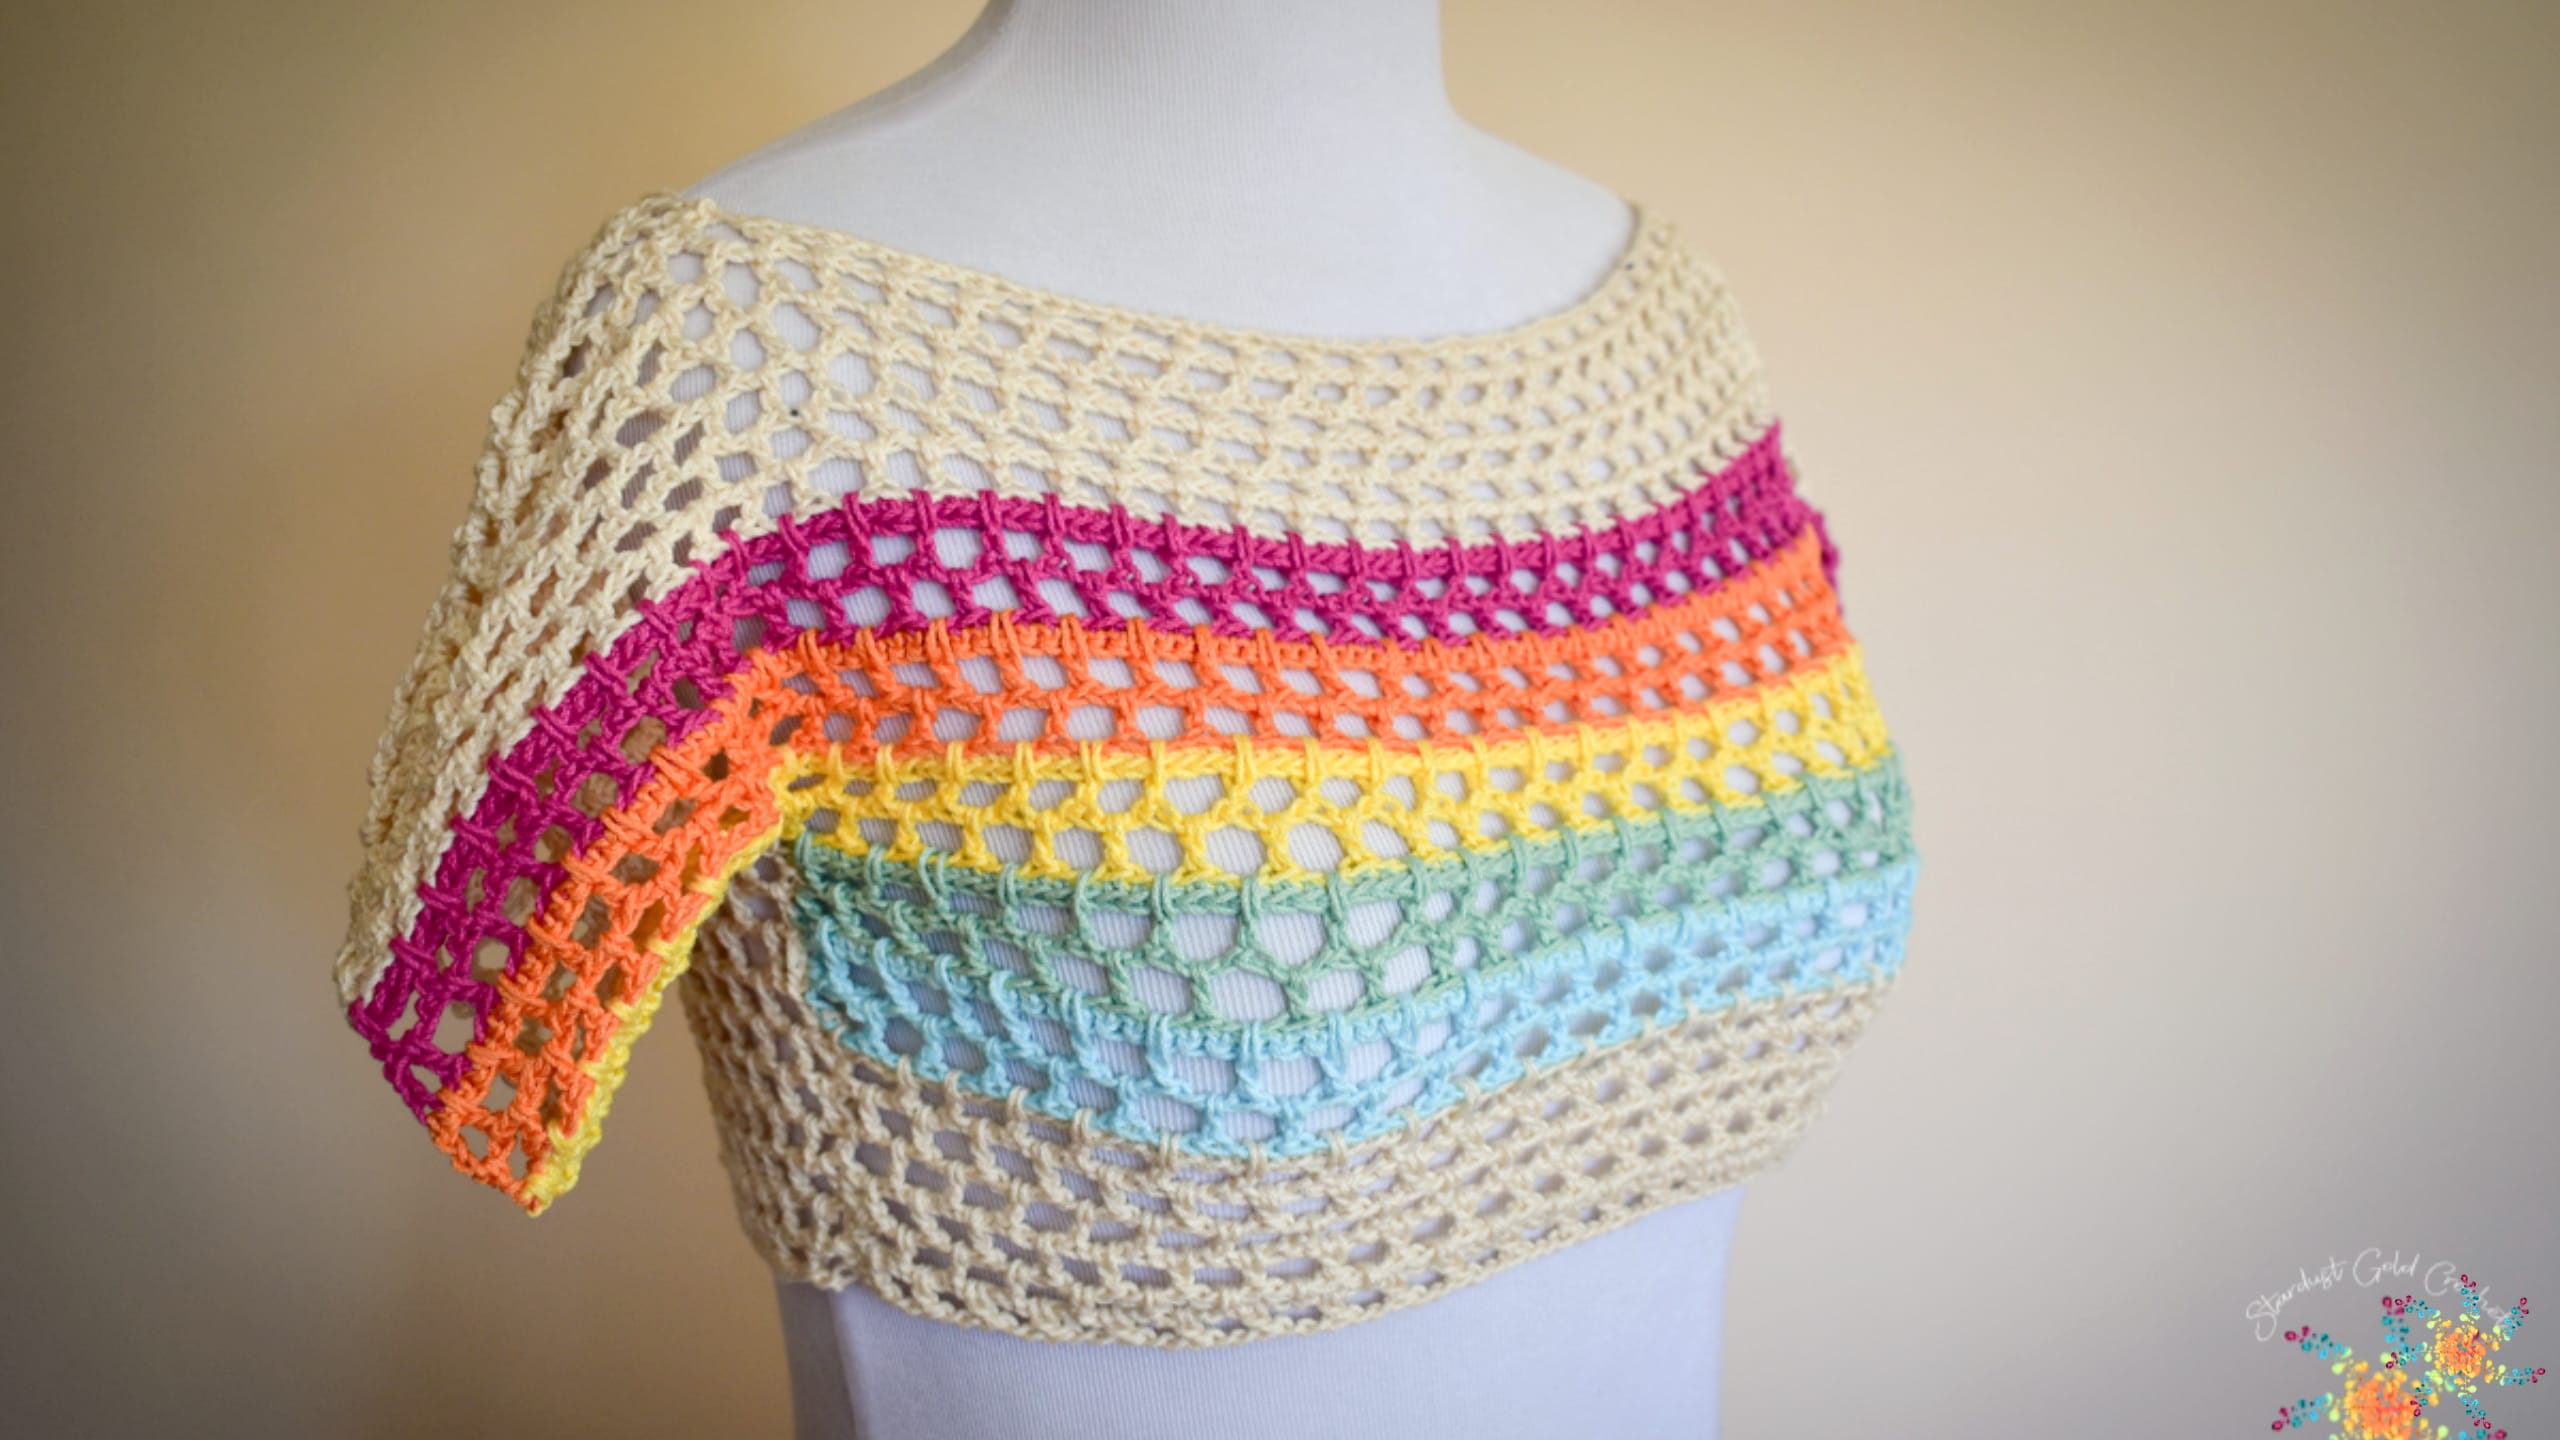
The Rainbow Mesh Tee uses chains and basic stitches. Single crochet and double crochet are the stars of this pattern, and the assembly is super simple too!
Here is how it all started; I set out to modify my honeycomb mesh crochet pattern and make a rainbow version of my favorite (and most popular) crochet top ever.
The original honeycomb mesh pattern is pretty straightforward, so naturally, I thought just making a few tweaks would be a-okay! Lol, nope.
This crop top pattern nearly killed me 
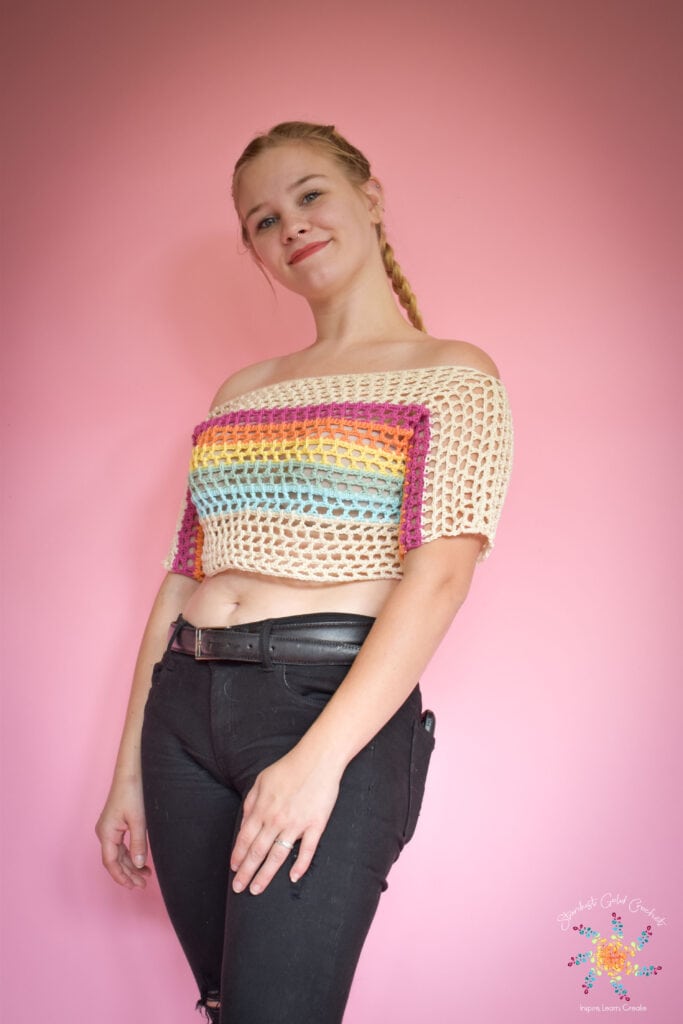
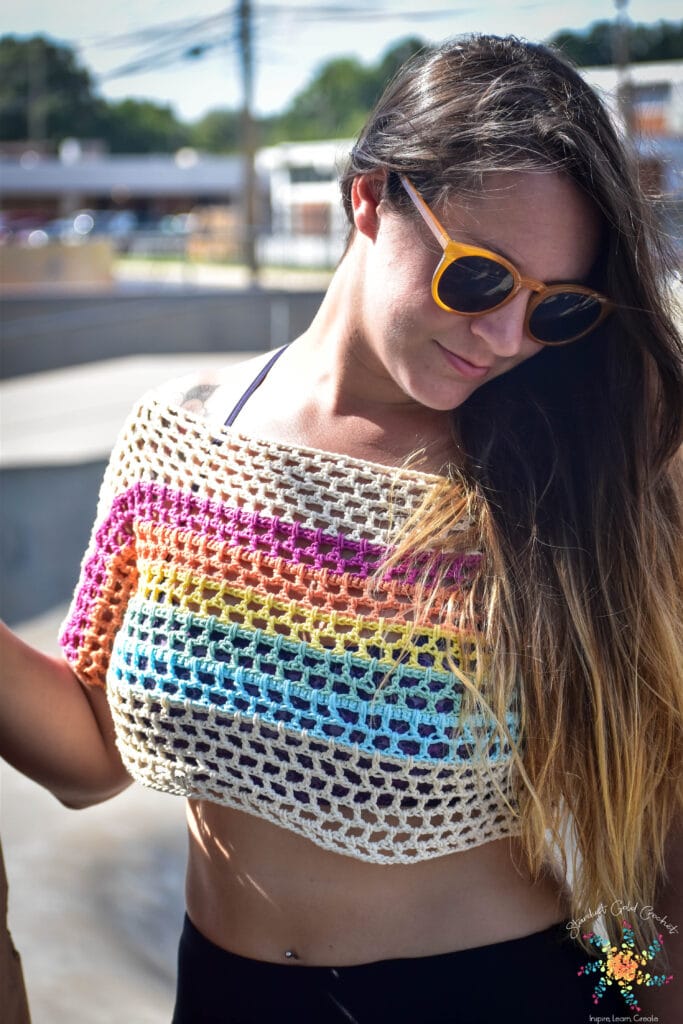
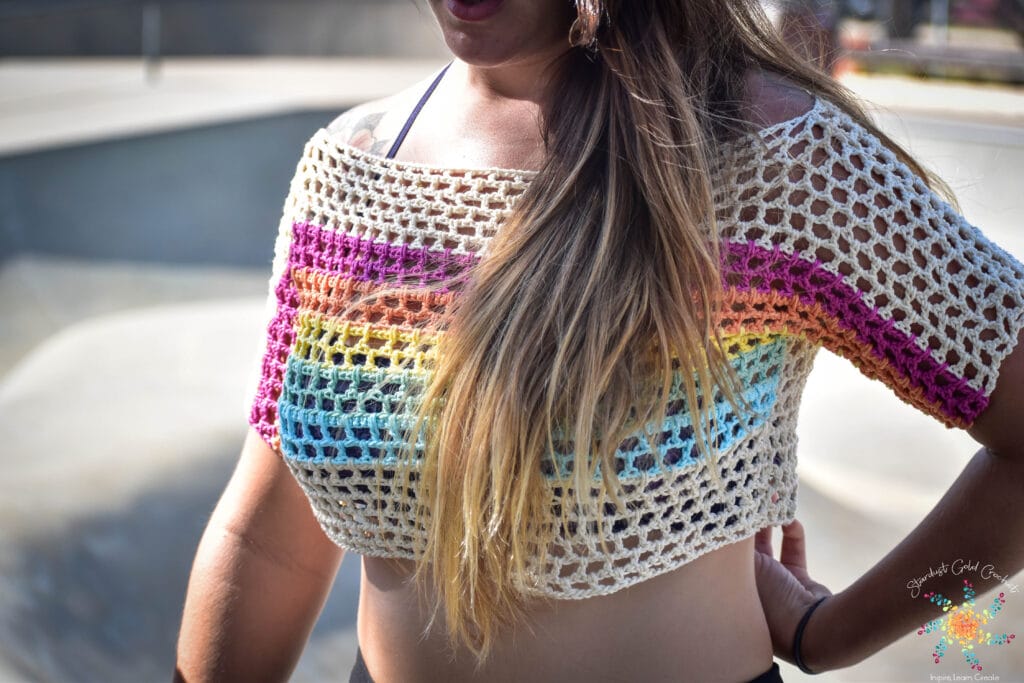
I created this out of my love of rainbows and mostly for my daughter Terra. She is pictured on the blog with my grandson (he was crying in the photo-shoot because, well… toddlers) He loved it when he was the center of attention 😀 lol.
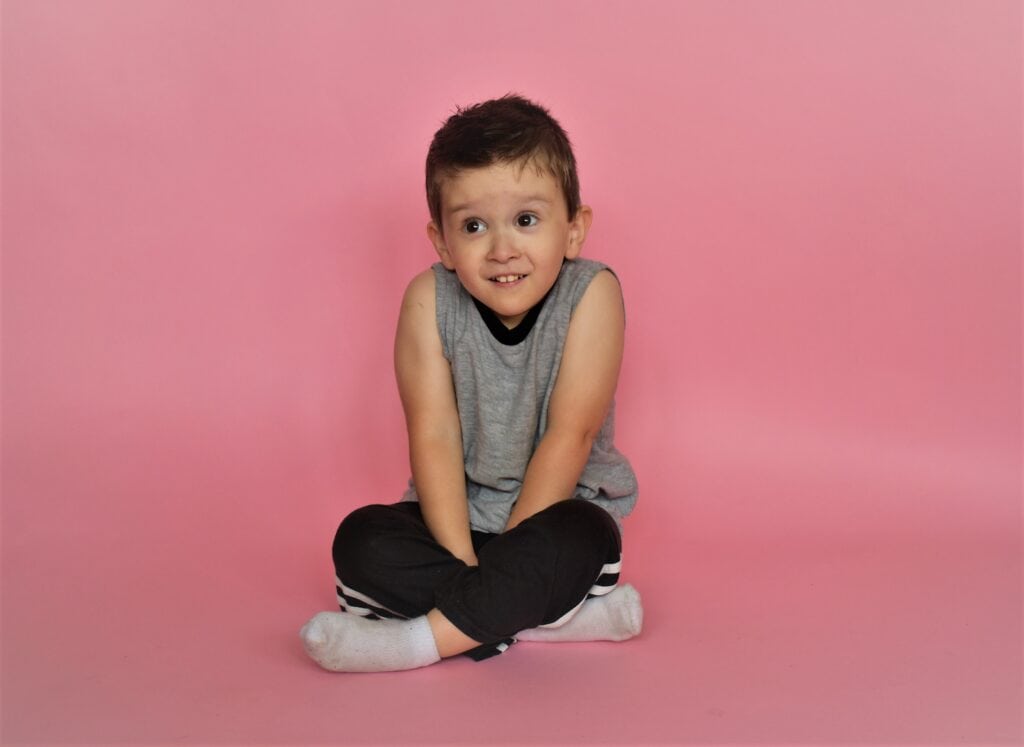
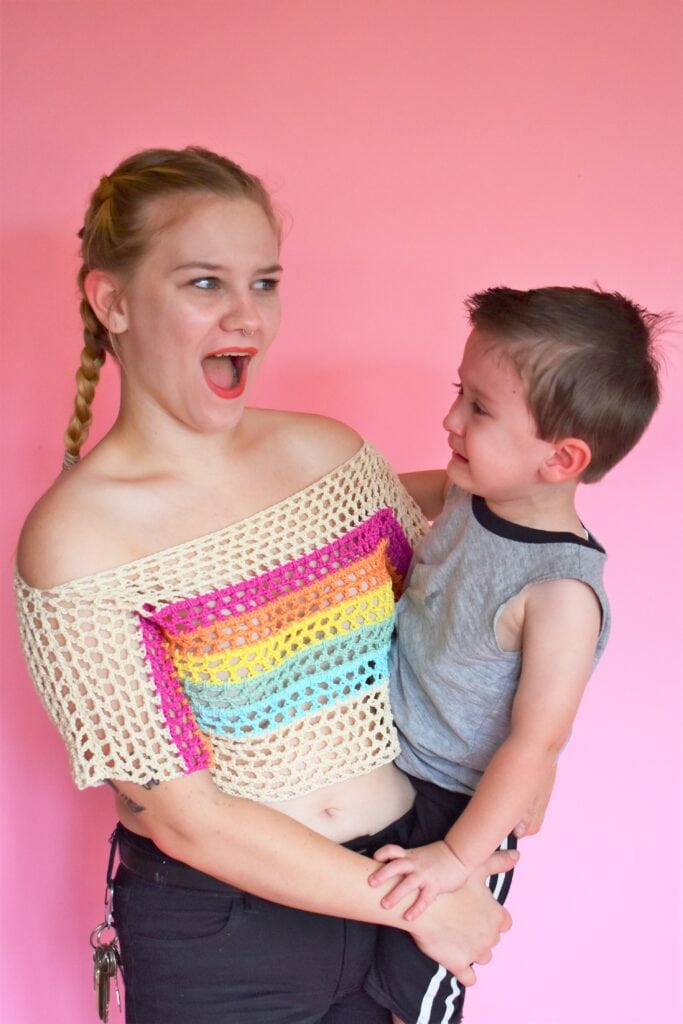
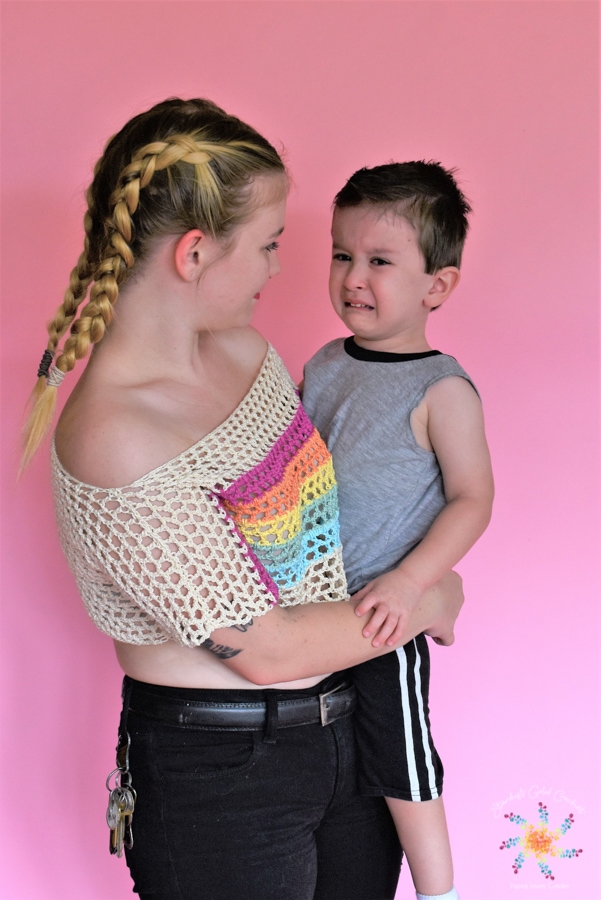
Despite it looking like a straightforward easy crop top pattern, there was some difficulty sizing it up. 
In this Easy Crochet Top Pattern, you will Learn…
- How to crochet a crop top.
- Front loop only (FLO) crochet.
- Working in the back loop only (BLO).
- Whipstitch assembly.
If you are looking for a drama-free crochet group, check out my pattern support group, Stardust Gold Crochet & Friends. We have fun and share crochet patterns, stories, and courses; you can ask me about any pattern in my library for support.
Video Tutorial for Visual Learners
I created a short video on how to work the honeycomb mesh stitch and how to work the front and back loop rows. Check it out on YouTube: Rainbow Mesh Tee Crop Top video or jump to the tutorial at the bottom of the page.
Rainbow Mesh Crochet Crop Top Pattern
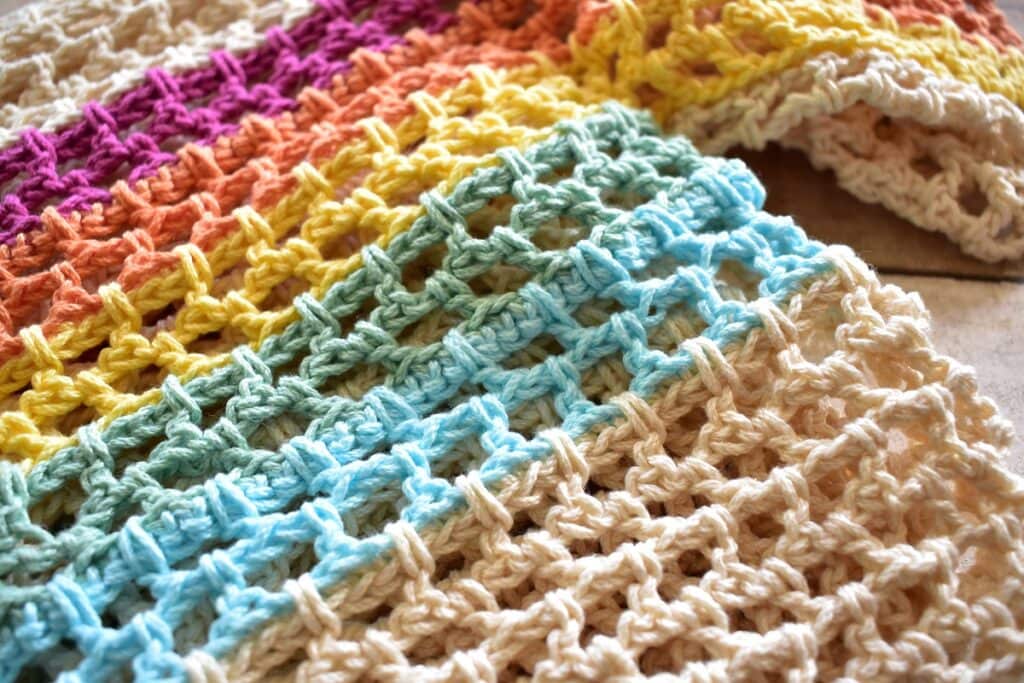
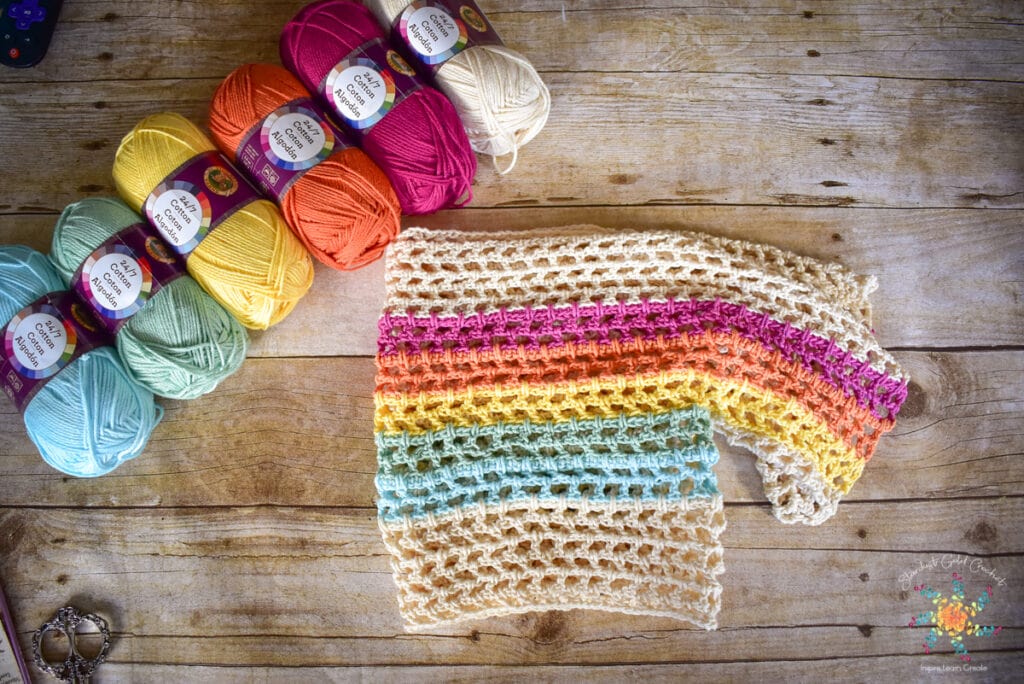
The Rainbow Mesh Tee is a free crochet crop top pattern made for the crochet beginner in mind. 100% cotton in stunning Lion Brand 24/7 Cotton, this pattern is fast, fun, and cool in the sun!
It’s all About the Yarn…
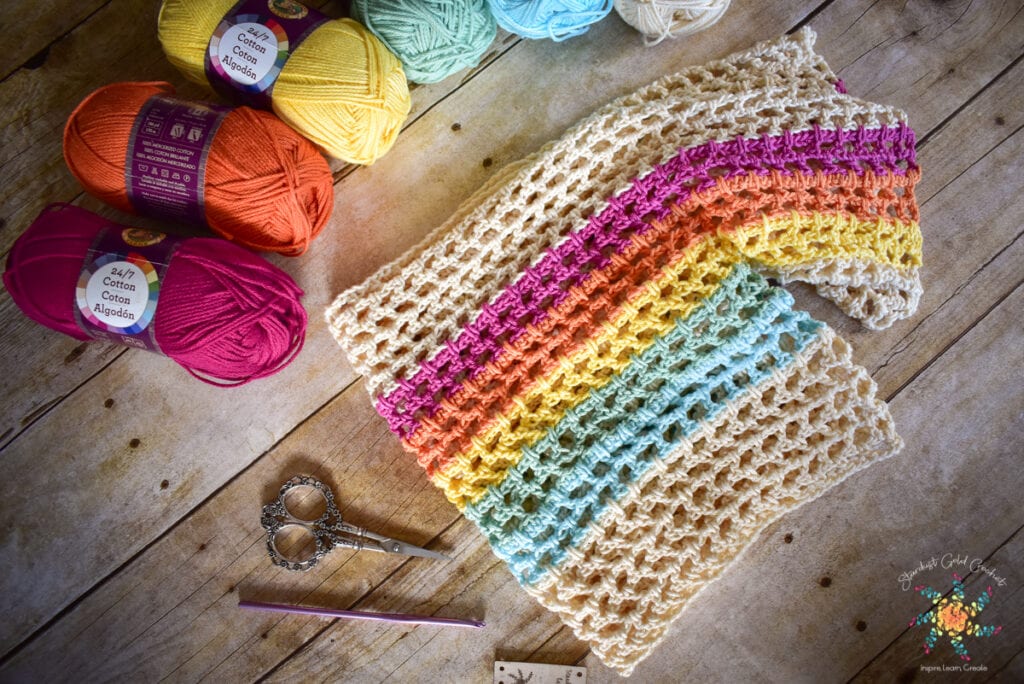
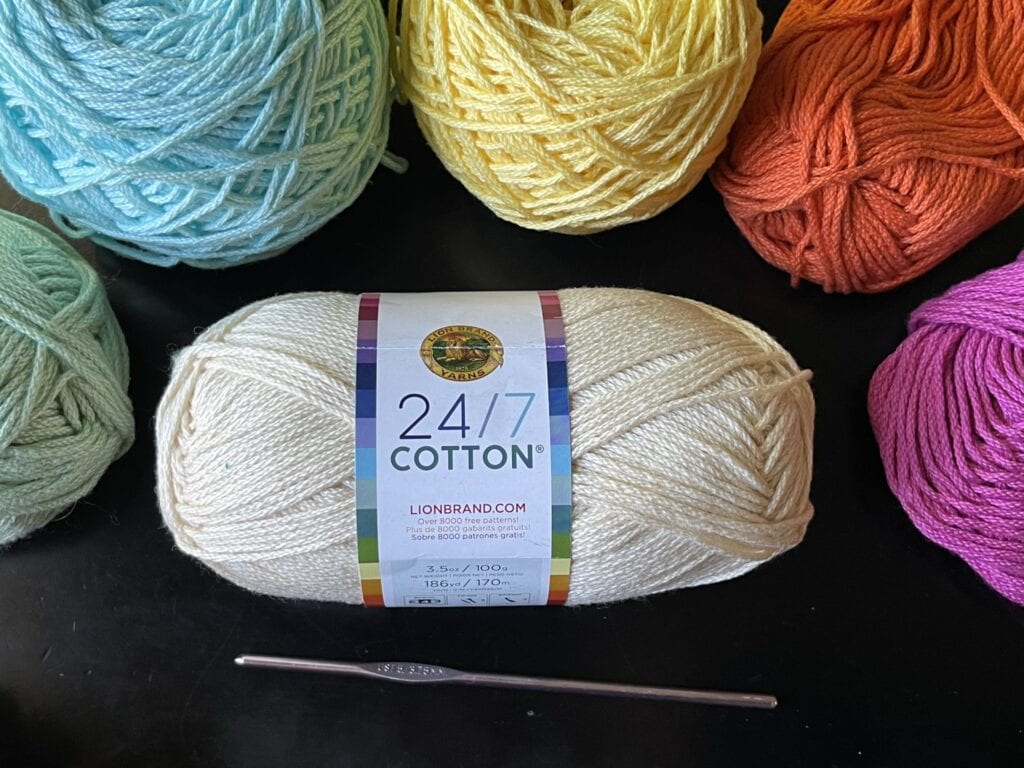
I used Lion Brand 24/7 Cotton for this pattern in all the glorious colors. If you want to change up the colors, they have so many colorways to choose from.
24/7 cotton stands the test of time of colorfastness and washing repeatedly. My mesh top from last summer is still very colorful and bright.
+ Skill Level:
Easy
+ Gauge
18 dc x 5 rows = 4 x 4” (10 x 10 cm)
+ Materials
Hook Size:
- 4.5 mm (US G) – you can use a 4 mm hook if you don’t have a 4.5 (it will not change size much, or work with a looser tension). This top stretches.
- Scissors
- Darning Needle
Suggested Yarn:
Colors:
- C1 (Ecru) 2 Skeins
- C2 (Rose) 1 Skein
- C3 (Tangerine) 1 Skein
- C4 (Lemon) 1 Skein
- C5 (Mint) 1 Skein
- C6 (Aqua) 1 Skein
Yarn Details:
100% Mercanized Cotton, 186 yds per skein (3.5 oz/100g)
+ Sizes
Sizes written as:
Youth/Adult XS, S, M, L, XL
Sizing Table (approximates):
| Size | Circumference: | Will Fit Sizes: |
| XS | 32” (81) | 28-30” (71 – 76) |
| S | 35” (88) | 32-34” (81 – 86) |
| M | 36” (91) | 36-38” (91 – 96) |
| L | 40” (101) | 40-42” (101 – 106) |
| XL | 44” (111) | 44-46” (111 – 116) |
Yardage Needed:
Because we use 6 colors, I recommend buying 2 of your main color (C1), and 1 skein of each other color. For all sizes, you will not need more than 2 skeins of your main color.
+ Abbreviations
| dc | double crochet |
| sc | single crochet |
| st(s) | stitch(es) |
| ch sp | chain space |
| sk | skip |
| ch(s) | chain(s) |
| * | repeat from * to end of row |
+ Stitch Guide
sc – single crochet
insert hook in indicated stitch, yo, draw up a loop, yo draw through 2 loops.
dc – double crochet
yo, insert hook in indicated stitch, *yo, draw through 2 loops – rep from * one more time.
+ Pattern Notes
- Ch 4 counts as 1 dc and a ch 2.
- Sizing is approximate.
- Counting tip – count the holes.
- Stitch and mesh counts are listed at the beginning of each size in the notes.
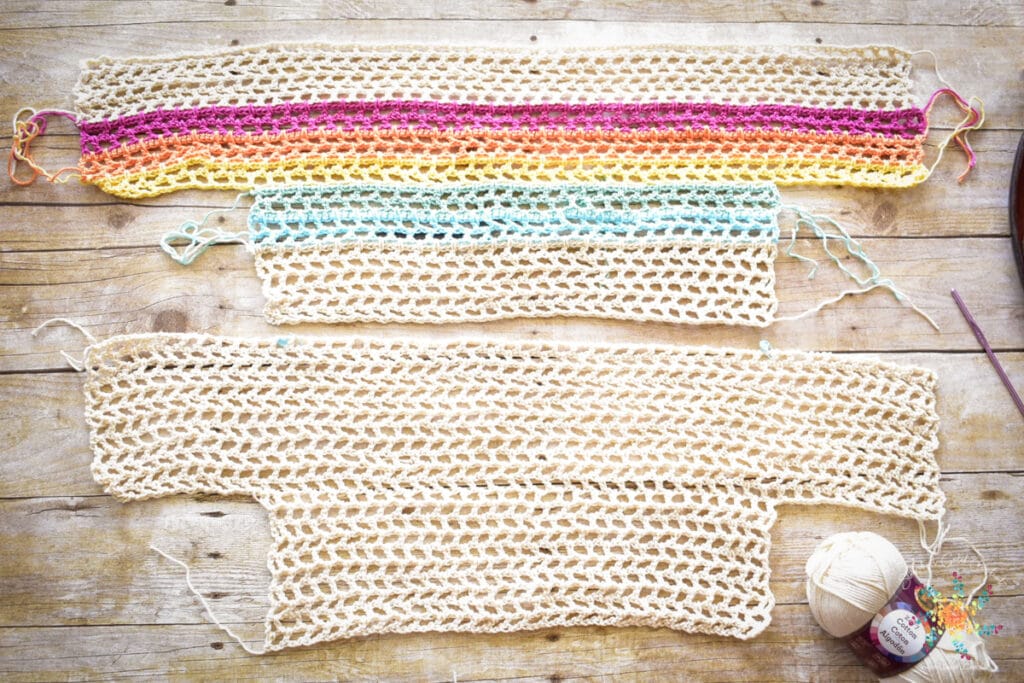
- Pattern construction – we create two panels (front and back) and sew them together.
- The pattern works top-down.
- Before sewing, make sure the right sides are facing each other.
+ Instructions
The Rainbow Mesh Tee is created by crocheting two panels (front and back panel). Front and back panel instructions are below. Find your size
Remember: this yarn and stitch will stretch about 2” once worn, and I’ve accounted for the stretch in the sizing tables, if it seems small when you first put it on, give it a day – it will stretch to perfect fit.
If you notice a mistake, please let me know! Despite rigorous testing, there may be something we missed! Leave a comment below to tell me you love it (or hate it!) lol
Rainbow Mesh Crochet Crop Top Pattern (scroll for various sizes)
+ Patterns
Rainbow Mesh Crochet Crop Top Pattern – Extra Small
Extra Small (XS):
- Each row on top half of sweater should have 45 mesh holes.
- Each double crochet row will have 46 dc’s (includes starting chain)
- Each single crochet row will have 135 sc (the sc row count does not mess up the pattern, so if you miss one or add one – so don’t sweat it!)
With C1 and 4.5 mm hook, chain 138.
Front Panel:
Mark the right side (RS) of your work with a stitch marker. This will help you remember which side is which when you sew them together.
Row 1 (RS): Dc in 6th ch from hook, *ch 2, sk 2 chs, dc in next ch, repeat from * to end.
Row 2 (WS): Ch 4, turn, *dc in next ch sp, ch 2, repeat from * to end – 46 dc’s (including chain at beginning of row).
Row 3 – 6: Repeat row 2, finish last stitch of row 6 with C2.
Row 7: (RS) Ch 1, turn, sc (BLO), in same as ch-1, *sc (BLO) in ea of next 2 chs, sc in dc, repeat from * to end, sc in each of next two chains.
Row 8: (WS) Repeat row 2, start in 2nd ch sp (enclose previous row with dc), when you reach the end, ch 1, dc in last sc.
Row 9: (RS) Repeat row 2, start in 1st ch sp, finish last dc with C3.
Row 10: (WS) Ch 1, turn, sc (FLO) in same as ch-1, *sc (FLO) in ea of next 2 chs, sc in dc, repeat from * to end, sc in next ch.
Row 11: (RS) Repeat row 2, start in 2nd ch sp (enclose previous row with dc), when you reach the end, ch 1, dc in last sc.
Row 12: (WS) Repeat row 2, finish last dc with C4.
Row 13: (RS) Repeat row 7.
Row 14: (WS) Repeat row 2, start in 2nd ch sp (enclose previous row with dc), when you reach the end, ch 1, dc in last sc.
Row 15: (RS) Repeat row 2, start in 1st ch sp – cut and tie off yarn.
Row 16: (WS) with C5 – Turn work, starting at the right, count in 7 squares and mark, do the same for the left side, attach C5 in first marked ch sp (work into a chain), ch 1, sc (FLO) in same as ch-1, sc (FLO) in each stitch and chain until you reach the next stitch marker, sc (FLO) in 1 chain of square with a stitch marker.
Row 17: (RS) Repeat row 2, start in 2nd ch sp (enclose previous row with dc), when you reach the end, ch 1, dc in last sc.
Row 18: (WS) Repeat row 2, finish last stitch with C6.
Row 19: (RS) Repeat row 7.
Row 20: (WS) Repeat row 2, start in 2nd ch sp (enclose previous row with dc), when you reach the end, ch 1, dc in last sc.
Row 21: (RS) Repeat row 2, finish last stitch with C1.
Row 22: (WS) Repeat row 10.
Row 23: (RS) Repeat row 2, (enclose previous row with dc), when you reach the end, ch 1, dc in last sc.
Row 24: (WS) Repeat row 2, start in 2nd ch sp (enclose previous row with dc), when you reach the end, ch 1, dc in last sc.
Row 25 – 27: (RS) Repeat row 2, leave a long tail for sewing up the side, weave in all tails.
Back Panel:
With C1 and 4.5 mm hook, chain 138.
Row 1 (RS): Dc in 6th ch from hook, *ch 2, sk 2 chs, dc in next ch, repeat from * to end.
Row 2 (WS): Ch 4, turn, *dc in next ch sp, ch 2, repeat from * to end – 46 dc’s (including chain at beginning of row).
Row 3 – 11: Repeat row 2, tie off, cut and leave a long tail.
Count 7 squares from the left and attach a stitch marker. Attach C1 in the 7th square from the right.
Row 12: Ch 4, *dc in next ch sp, ch 2*, repeat from * until you reach the next st marker (the last dc should be in the square with the stitch marker).
Row 13 – 21: Repeat row 2.
Cut, tie off, and leave a long tail for sewing.
See bottom of post for assembly instructions.
Rainbow Mesh Crochet Crop Top Pattern – Small
Small (S):
- Each row on top half of sweater should have 47 mesh holes.
- Each double crochet row will have 48 dc’s (includes starting chain)
- Each single crochet row will have 141 sc (the sc row count does not mess up the pattern, so if you miss one or add one – so don’t sweat it!)
With C1 and 4.5 mm hook, chain 144.
Front Panel:
Mark the right side (RS) of your work with a stitch marker. This will help you remember which side is which when you sew them together.
Row 1 (RS): Dc in 6th ch from hook, *ch 2, sk 2 chs, dc in next ch, repeat from * to end.
Row 2 (WS): Ch 4, turn, *dc in next ch sp, ch 2, repeat from * to end – 48 dc’s (including chain at beginning of row).
Row 3 – 6: Repeat row 2, finish last stitch of row 6 with C2.
Row 7: (RS) Ch 1, turn, sc (BLO), in same as ch-1, *sc (BLO) in ea of next 2 chs, sc in dc, repeat from * to end, sc in each of next two chains.
Row 8: (WS) Repeat row 2, start in 2nd ch sp (enclose previous row with dc), when you reach the end, ch 1, dc in last sc.
Row 9: (RS) Repeat row 2, start in 1st ch sp, finish last dc with C3.
Row 10: (WS) Ch 1, turn, sc (FLO) in same as ch-1, *sc (FLO) in ea of next 2 chs, sc in dc, repeat from * to end, sc in next ch.
Row 11: (RS) Repeat row 2, start in 2nd ch sp (enclose previous row with dc), when you reach the end, ch 1, dc in last sc.
Row 12: (WS) Repeat row 2, finish last dc with C4.
Row 13: (RS) Repeat row 7.
Row 14: (WS) Repeat row 2, start in 2nd ch sp (enclose previous row with dc), when you reach the end, ch 1, dc in last sc.
Row 15: (RS) Repeat row 2, start in 1st ch sp, cut and tie off.
Row 16: (WS) with C5 – Turn work, starting at the right, count in 8 squares and mark, do the same for the left side, attach C5 in first marked ch sp (work into a chain), ch 1, sc (FLO) in same as ch-1, sc (FLO) in each stitch and chain until you reach the next stitch marker, sc (FLO) in 1 chain of square with stitch marker.
Row 17: (RS) Repeat row 2, start in 2nd ch sp (enclose previous row with dc), when you reach the end, ch 1, dc in last sc.
Row 18: (WS) Repeat row 2, finish last stitch with C6.
Row 19: (RS) Repeat row 7.
Row 20: (WS) Repeat row 2, start in 2nd ch sp (enclose previous row with dc), when you reach the end, ch 1, dc in last sc.
Row 21: (RS) Repeat row 2, finish last stitch with C1.
Row 22: (WS) Repeat row 10.
Row 23: (RS) Repeat row 2, start in 2nd ch sp (enclose previous row with dc), when you reach the end, ch 1, dc in last sc.
Row 24: (WS) Repeat row 2, start in 1st ch sp.
Row 25 – 27: Repeat row 2,leave a long tail for sewing up the side, weave in all tails.
Back Panel:
With C1 and 4.5 mm hook, chain 144.
Row 1 (RS): Dc in 6th ch from hook, *ch 2, sk 2 chs, dc in next ch, repeat from * to end.
Row 2 (WS): Ch 4, turn, *dc in next ch sp, ch 2, repeat from * to end – 48 dc’s (including chain at beginning of row).
Row 3 – 11: Repeat row 2, tie off, cut and leave a long tail.
Count 8 squares from the left side and attach a stitch marker. Attach C1 in the 8th square from the right.
Row 12: Ch 4, *dc in next ch sp, ch 2*, repeat from * until you reach the next st marker (the last dc should be in the square with the stitch marker).
Row 13 – 22: Repeat row 2.
Cut, tie off, and leave a long tail for sewing.
See bottom of post for assembly instructions.
Rainbow Mesh Crochet Crop Top Pattern – Medium
Medium (M):
- Each row on top half of sweater should have 48 mesh holes.
- Each double crochet row will have 49 dc’s (includes starting chain)
- Each single crochet row will have 144 sc (the sc row count does not mess up the pattern, so if you miss one or add one – so don’t sweat it!)
With C1 and 4.5 mm hook, chain 147.
Front Panel:
Mark the right side (RS) of your work with a stitch marker. This will help you remember which side is which when you sew them together.
Row 1 (RS): Dc in 6th ch from hook, *ch 2, sk 2 chs, dc in next ch, repeat from * to end.
Row 2 (WS): Ch 4, turn, *dc in next ch sp, ch 2, repeat from * to end – 49 dc’s (including chain at beginning of row).
Row 3 – 6: Repeat row 2, finish last stitch of row 6 with C2.
Row 7: (RS) Ch 1, turn, sc (BLO), in same as ch-1, *sc (BLO) in ea of next 2 chs, sc in dc, repeat from * to end, sc in each of next two chains – 144 sc.
Row 8: (WS) Repeat row 2, start in 2nd ch sp (enclose previous row with dc), when you reach the end, ch 1, dc in last sc.
Row 9: (RS) Repeat row 2, start in 1st ch sp, finish last dc with C3.
Row 10: (WS) Ch 1, turn, sc (FLO) in same as ch-1, *sc (FLO) in ea of next 2 chs, sc in dc, repeat from * to end, sc in next ch.
Row 11: (RS) Repeat row 2, start in 2nd ch sp (enclose previous row with dc), when you reach the end, ch 1, dc in last sc.
Row 12: (WS) Repeat row 2, finish last dc with C3.
Row 13: (RS) Repeat row 7.
Row 14: (WS) Repeat row 2, start in 2nd ch sp (enclose previous row with dc), when you reach the end, ch 1, dc in last sc.
Row 15: (RS) Repeat row 2, start in 1st ch sp, finish last dc with C4.
Row 16: (WS) Repeat row 10.
Row 17: (RS) Repeat row 2, start in 2nd ch sp (enclose previous row with dc), when you reach the end, ch 1, dc in last sc, cut and tie off yarn.
Row 18: (WS) with C4, turn work, starting at the right, count in 8 squares and mark, do the same for the left side, attach yarn in first marked ch sp, ch 4, *dc in next ch sp, ch 2, repeat from * to end, finish last stitch with C5.
Row 19: (RS) Repeat row 7.
Row 20: (WS) Repeat row 2, start in 2nd ch sp (enclose previous row with dc), when you reach the end, ch 1, dc in last sc.
Row 21: (RS) Repeat row 2.
Row 22: (WS) Repeat row 10.
Row 23: (RS) Repeat row 2, start in 2nd ch sp (enclose previous row with dc), when you reach the end, ch 1, dc in last sc.
Row 24: (WS) Repeat row 2, start in 1st ch sp.
Row 25 – 28: Repeat row 2, leave a long tail for sewing up the side, weave in all tails.
Back Panel:
With C1 and 4.5 mm hook, chain 147.
Row 1 (RS): Dc in 6th ch from hook, *ch 2, sk 2 chs, dc in next ch, repeat from * to end.
Row 2 (WS): Ch 4, turn, *dc in next ch sp, ch 2, repeat from * to end – 49 dc’s (including chain at beginning of row).
Row 3 – 11: Repeat row 2, tie off, cut, and leave a long tail.
Count 8 squares from the left side and attach a stitch marker. Attach C1 in the 8th square from the right.
Row 12: Ch 4, *dc in next ch sp, ch 2*, repeat from * until you reach the next st marker (the last dc should be in the square with the stitch marker).
Row 13 – 24: Repeat row 2.
Cut, tie off, and leave a long tail for sewing.
See bottom of post for assembly instructions.

Rainbow Mesh Crochet Crop Top Pattern – Large
Large (L):
- Each row on top half of sweater should have 50 mesh holes.
- Each double crochet row will have 51 dc’s (includes starting chain)
- Each single crochet row will have 150 sc (the sc row count does not mess up the pattern, so if you miss one or add one – so don’t sweat it!)
With C1 and 4.5 mm hook, chain 153.
Front Panel:
Mark the right side (RS) of your work with a stitch marker. This will help you remember which side is which when you sew them together.
Row 1 (RS): Dc in 6th ch from hook, *ch 2, sk 2 chs, dc in next ch, repeat from * to end.
Row 2 (WS): Ch 4, turn, *dc in next ch sp, ch 2, repeat from * to end – 51 dc’s (including chain at beginning of row).
Row 3 – 6: Repeat row 2, finish last stitch of row 6 with C2.
Row 7: (RS) Ch 1, turn, sc (BLO), in same as ch-1, *sc (BLO) in ea of next 2 chs, sc in dc, repeat from * to end, sc in each of next two chains – 150 sc.
Row 8: (WS) Repeat row 2, start in 2nd ch sp (enclose previous row with dc), when you reach the end, ch 1, dc in last sc.
Row 9: (RS) Repeat row 2.
Row 10: (WS) Repeat row 2, start in 1st ch sp, finish last dc with C3.
Row 11: (RS) Ch 1, turn, sc (FLO) in same as ch-1, *sc (FLO) in ea of next 2 chs, sc in dc, repeat from * to end, sc in next ch.
Row 12: (WS) Repeat row 2, start in 2nd ch sp (enclose previous row with dc), when you reach the end, ch 1, dc in last sc.
Row 13: (RS) Repeat row 2.
Row 14: (WS) Repeat row 2, start in 1st ch sp, finish last dc with C4.
Row 15: (RS) Repeat row 7.
Row 16: (WS) Repeat row 2, start in 2nd ch sp (enclose previous row with dc), when you reach the end, ch 1, dc in last sc.
Row 17: (RS) Repeat row 2.
Row 18: (WS) Repeat row 2, start in 1st ch sp, cut yarn and tie off.
Row 19: (RS) Turn, starting at the right, count in 9 squares and mark, do the same for the left side, attach C5 in ch to the right of dc of first marked ch sp (see diagram), ch 1, sc in same, sc (FLO) in dc, *sc (FLO) in next dc, sc (FLO) in next two chs, repeat from * across until you reach next marker, sc (FLO) in dc and in next ch.
Row 20: (WS) Repeat row 2, (enclose previous row with dc), when you reach the end, ch 1, dc in last sc.
Row 21: (RS) Repeat row 2.
Row 22: (WS) Repeat row 2, start in 1st ch sp, finish last dc with C6.
Row 23: (RS) Repeat row 7.
Row 24: (WS) Repeat row 2, start in 2nd ch sp (enclose previous row with dc), when you reach the end, ch 1, dc in last sc.
Row 25: (RS) Repeat row 2.
Row 26: (WS) Repeat row 2, start in 1st ch sp, finish last dc with C1.
Row 27: (RS) Repeat row 11.
Row 28: (WS) Repeat row 2, (enclose previous row with dc), when you reach the end, ch 1, dc in last sc.
Row 29 – 32: Repeat row 2, leave a long tail for sewing up the side, weave in all tails.
Back Panel:
With C1 and 4.5 mm hook, chain 153.
Row 1 (RS): Dc in 6th ch from hook, *ch 2, sk 2 chs, dc in next ch, repeat from * to end.
Row 2 (WS): Ch 4, turn, *dc in next ch sp, ch 2, repeat from * to end – 51 dc’s (including chain at beginning of row).
Row 3 – 11: Repeat row 2, tie off, cut, and leave a long tail.
Count 8 squares from the left side and attach a stitch marker. Attach C1 in the 8th square from the right.
Row 12: Ch 4, *dc in next ch sp, ch 2*, repeat from * until you reach the next st marker (the last dc should be in the square with the stitch marker).
Row 13 – 28: Repeat row 2.
Cut, tie off, and leave a long tail for sewing.

Extra Large (XL):
- Each row on top half of sweater should have 53 mesh holes.
- Each double crochet row will have 54 dc’s (includes starting chain)
- Each single crochet row will have 159 sc (the sc row count does not mess up the pattern, so if you miss one or add one – so don’t sweat it!)
With C1 and 4.5 mm hook, chain 162.
Front Panel:
Mark the right side (RS) of your work with a stitch marker. This will help you remember which side is which when you sew them together.
Row 1 (RS): Dc in 6th ch from hook, *ch 2, sk 2 chs, dc in next ch, repeat from * to end.
Row 2 (WS): Ch 4, turn, *dc in next ch sp, ch 2, repeat from * to end – 54 dc’s (including chain at beginning of row).
Row 3 – 6: Repeat row 2, finish last stitch of row 6 with C2.
Row 7: (RS) Ch 1, turn, sc (BLO), in same as ch-1, *sc (BLO) in ea of next 2 chs, sc in dc, repeat from * to end, sc in each of next two chains – 159 sc.
Row 8: (WS) Repeat row 2, start in 2nd ch sp (enclose previous row with dc), when you reach the end, ch 1, dc in last sc.
Row 9: (RS) Repeat row 2.
Row 10: (WS) Repeat row 2, start in 1st ch sp, finish last dc with C3.
Row 11: (RS) Ch 1, turn, sc (FLO) in same as ch-1, *sc (FLO) in ea of next 2 chs, sc in dc, repeat from * to end, sc in next ch.
Row 12: (WS) Repeat row 2, start in 2nd ch sp (enclose previous row with dc), when you reach the end, ch 1, dc in last sc.
Row 13: (RS) Repeat row 2.
Row 14: (WS) Repeat row 2, start in 1st ch sp, finish last dc with C4.
Row 15: (RS) Repeat row 7.
Row 16: (WS) Repeat row 2, start in 2nd ch sp (enclose previous row with dc), when you reach the end, ch 1, dc in last sc.
Row 17: (RS) Repeat row 2.
Row 18: (WS) Repeat row 2, start in 1st ch sp, finish last dc with C5.
Row 19: (RS) Repeat row 11.
Row 20: (WS) Repeat row 2, start in 2nd ch sp (enclose previous row with dc), when you reach the end, ch 1, dc in last sc, cut yarn and tie off.
Row 21: (RS) Turn, starting at the right, count in 9 squares and mark, do the same for the left side, attach C5 in first marked ch sp, ch 4, *dc in next ch sp, ch 2, repeat from * to end.
Row 22: (WS) Repeat row 2, finish last stitch with C6.
Row 23: (RS) Repeat row 7.
Row 24: (WS) Repeat row 2, start in 2nd ch sp (enclose previous row with dc), when you reach the end, ch 1, dc in last sc.
Row 25: (RS) Repeat row 2.
Row 26: (WS) Repeat row 2, start in 1st ch sp, finish last dc with C1.
Row 27: (RS) Repeat row 11.
Row 28: (WS) Repeat row 2, start in 2nd ch sp (enclose previous row with dc), when you reach the end, ch 1, dc in last sc.
Row 29 – 34: (RS) Repeat row 2, leave a long tail for sewing up the side, weave in all tails.
Back Panel:
With C1 and 4.5 mm hook, chain 162.
Row 1 (RS): Dc in 6th ch from hook, *ch 2, sk 2 chs, dc in next ch, repeat from * to end.
Row 2 (WS): Ch 4, turn, *dc in next ch sp, ch 2, repeat from * to end – 54 dc’s (including chain at beginning of row).
Row 3 – 11: Repeat row 2, tie off, cut, and leave a long tail.
Count 8 squares from the left side and attach a stitch marker. Attach C1 in the 8th square from the right.
Row 12: Ch 4, *dc in next ch sp, ch 2*, repeat from * until you reach the next st marker (the last dc should be in the square with the stitch marker).
Row 13 – 29: Repeat row 2.
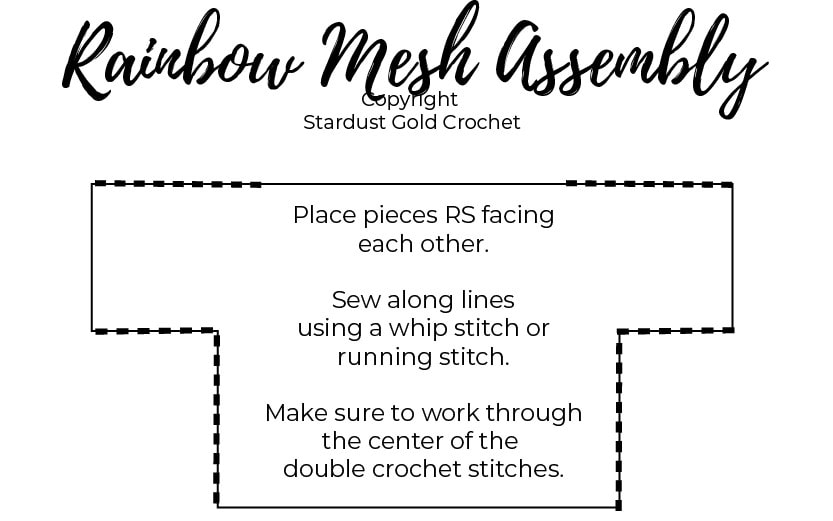
Assembly:
- Lay top right sides together, and sew along dotted lines.
- Use the table below as a guide on how many mesh holes to count in from each side.
- Use a whip stitch to make the seams secure.
Want to learn new stitches? Check out the Stitch Explorers Series or
better yet…get the latest on new stitches and premium patterns, by signing up for the Stargazers mailing list here.
RAINBOW MESH CROCHET cROP TOP PATTERN TUTORIAL
Congratulations! You Are Finished!
Pin it, Instagram it with #RainbowMeshCropTop or #StardustGoldCrochet
I hope you enjoyed creating this easy crochet crop top pattern! Please share your finished works with me by using the hashtags mentioned above, I would love to see them.
Please leave any comments below, and thanks for visiting!
This crochet crop top pattern is a lot of fun. Many say crochet is a cool weather hobby, but I really love the summer patterns and beach patterns! I have a few more of those in these posts. Check them out too and try something different! Tunisian Crochet is one of my favorites, and there is plenty of that too!
My socials
Facebook * Instagram * Ravelry * Etsy

*any FREE pdf download participants agree to my privacy policy.



I got a posting to say it was free, I came here and it says click jet for the pdf but when you click on the link, it gives an oops message. Is it a broken link?Mrs Franks
I just finished the small and it was big. I’m an xl-2xl and it fit me 😳🤔 I had my daughter try it and it was too big on her. It is cute maybe I will try the extra small.
Can you please tell me what size your models are wearing?
Hi Tasha! I’m so excited about trying your beautiful fun pattern out. Could you please tell me how many yards I would have to purchase if I wanted to make it out of one color? I’m a beginner so I’m not sure how to work this out. Thank you!
Super cute!! Shared 😉
Thanks Kat!