

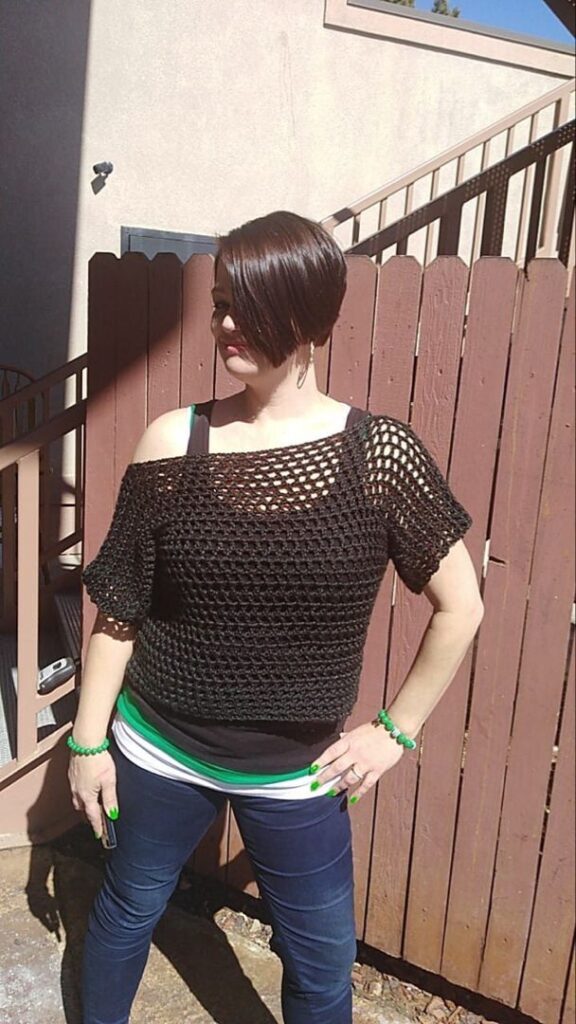
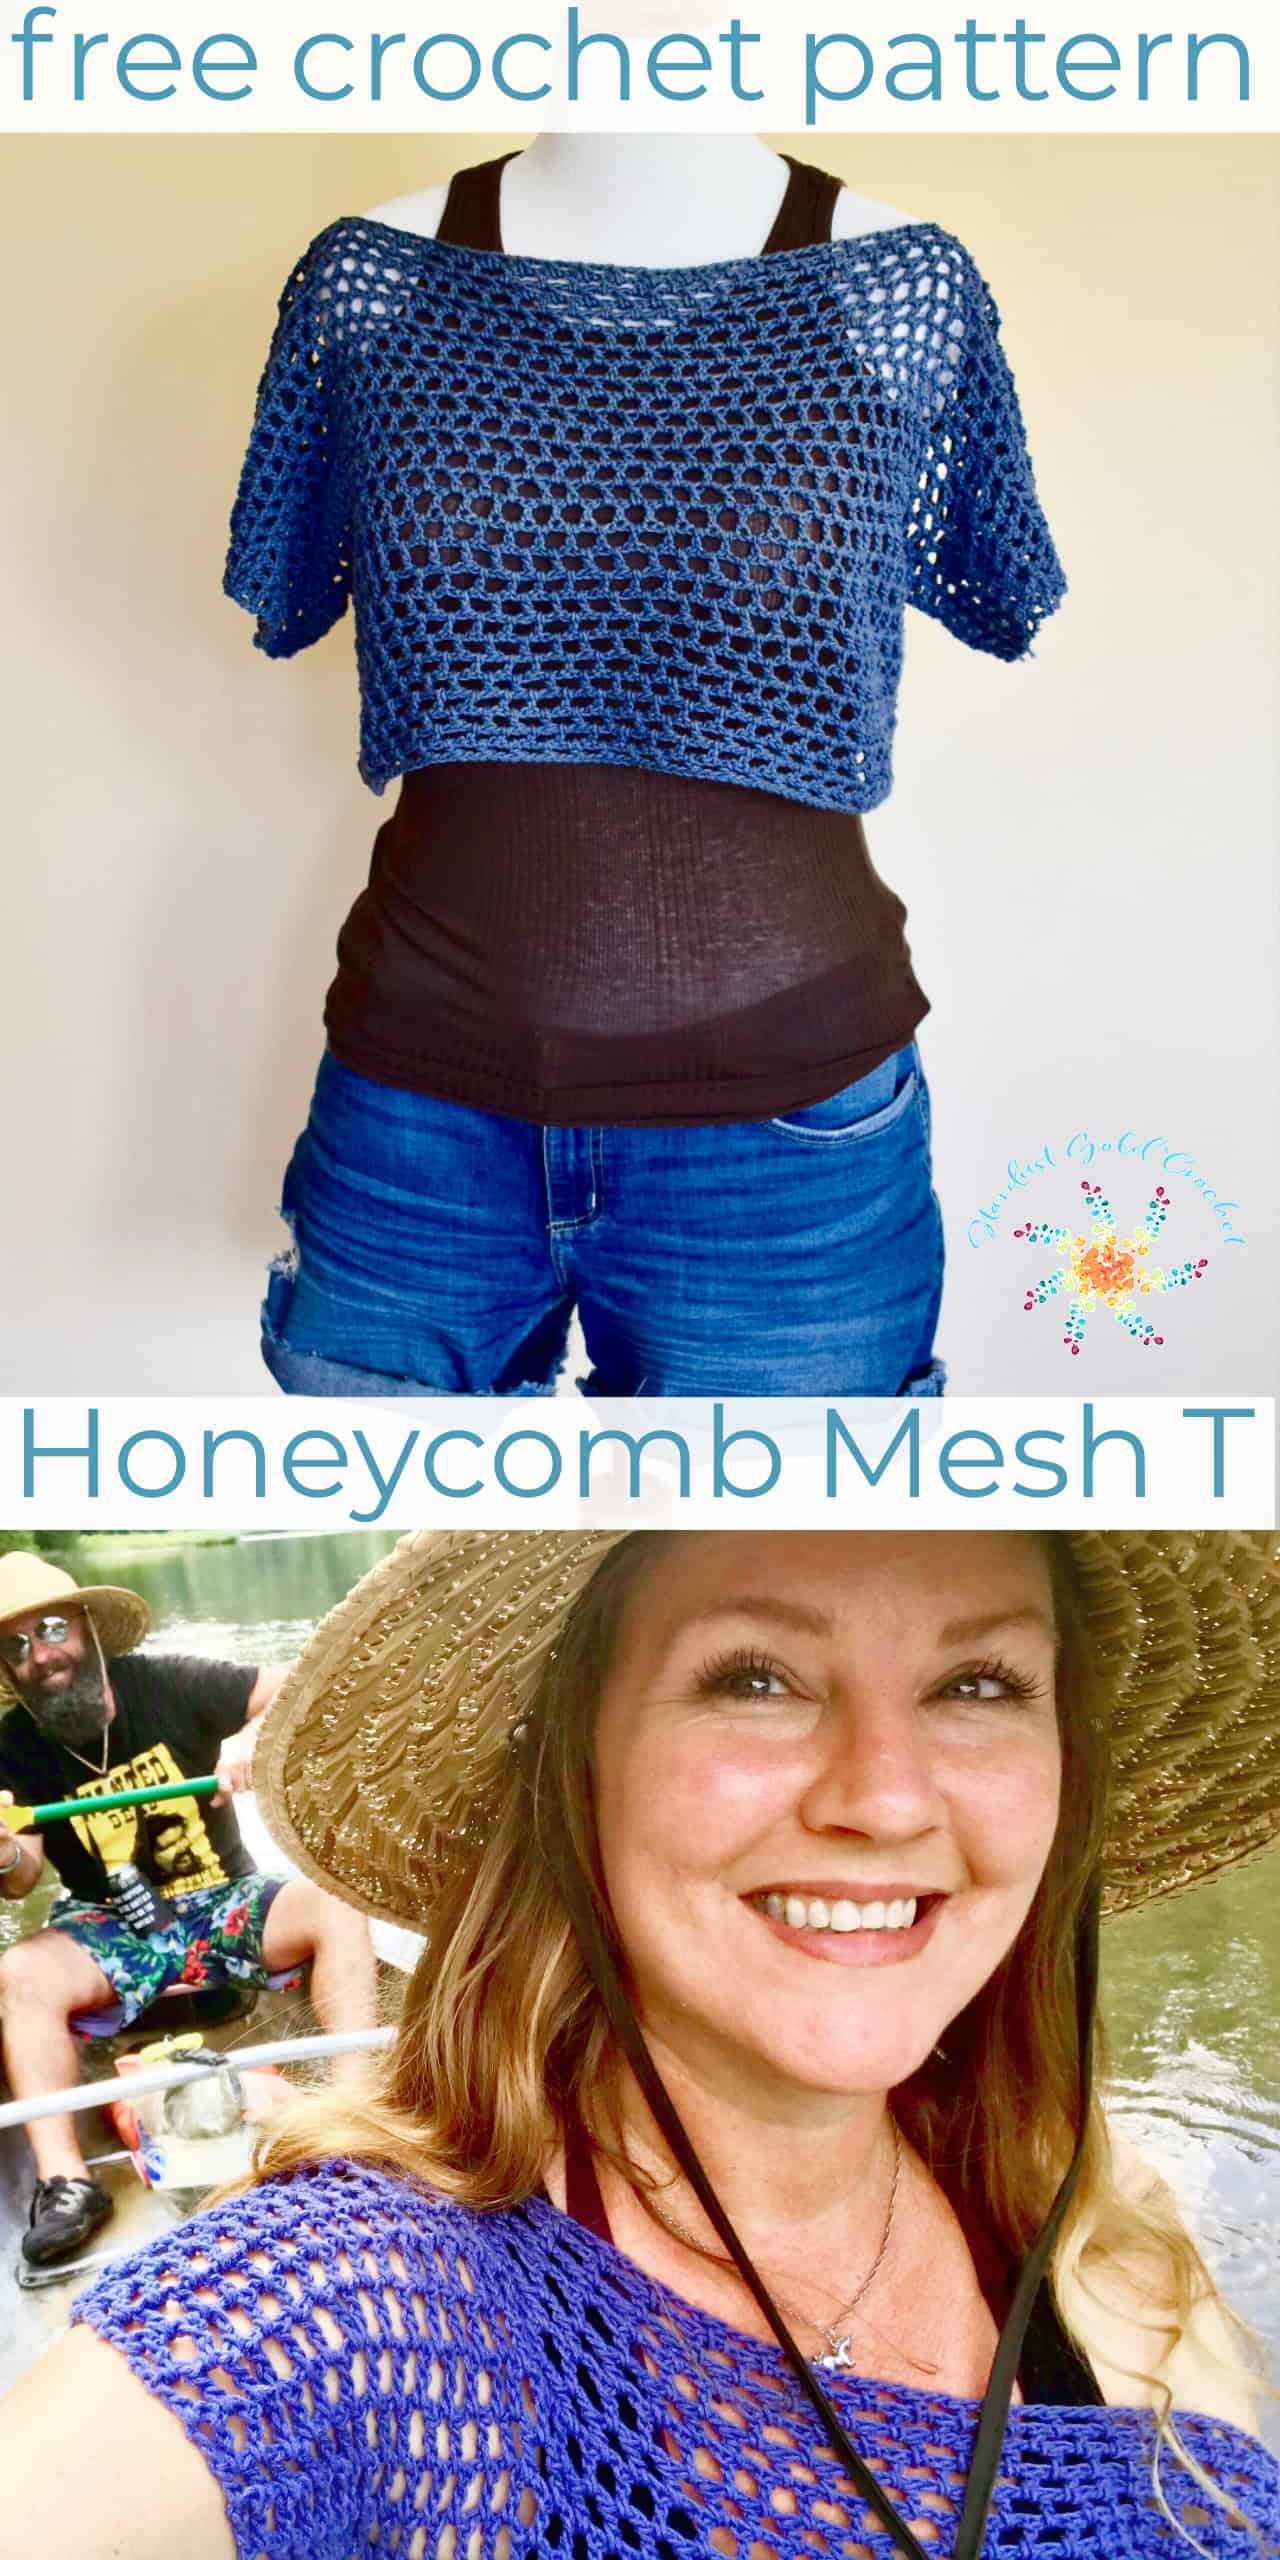
It’s still a little hot in Memphis, but the Honeycomb Mesh Tee crochet crop-top pattern is perfect for those hot summer days. I’ve been wearing this top all summer. For this free crochet pattern, I used Lion Brand 24/7 cotton. This is perhaps the easiest crochet crop-top pattern you’ll come across this year.
I used 24/7 cotton because of the lovely colors and awesome durability (sweat, to be exact). The yarn is cool and breathable and has a great stretch to it. Another positive is it is completely machine washable.
Thanks to everyone who has tagged or sent me photos of the finished top! I LOVE these!
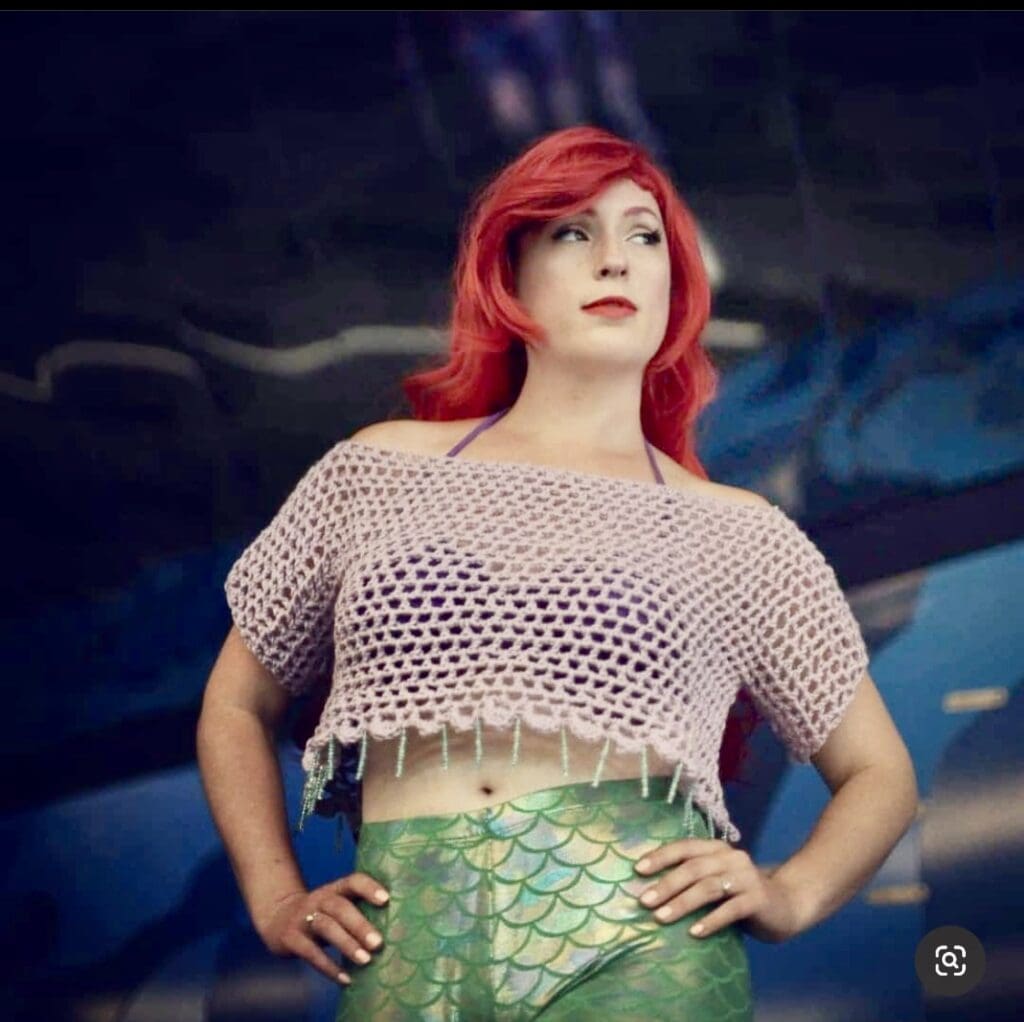
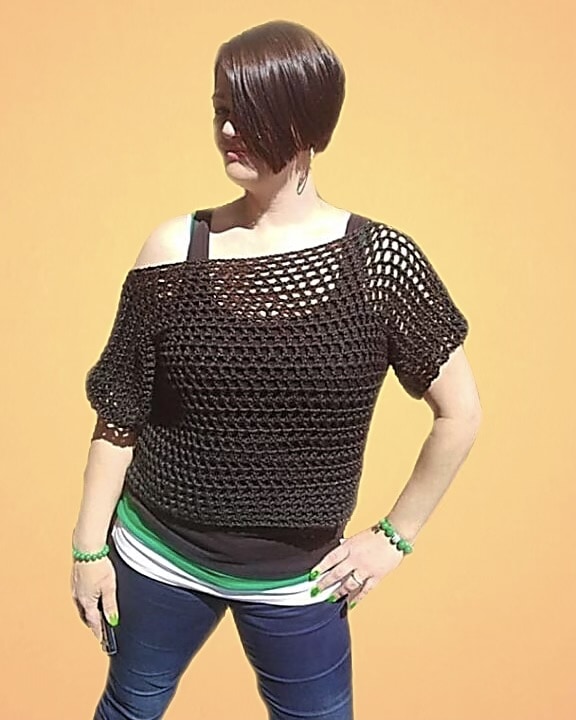
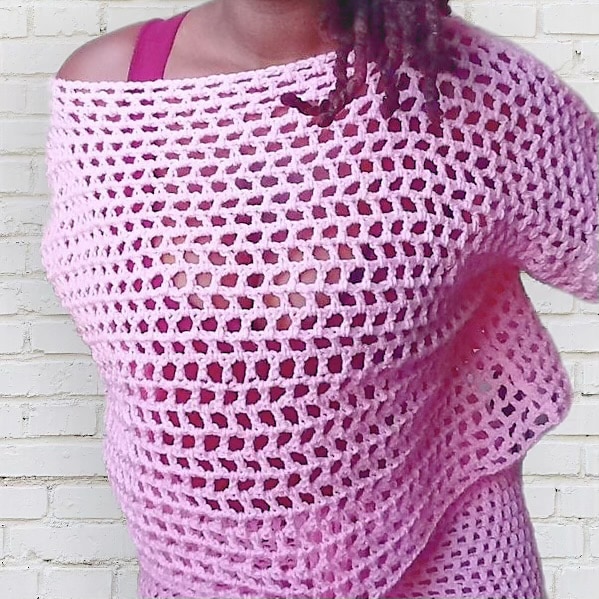
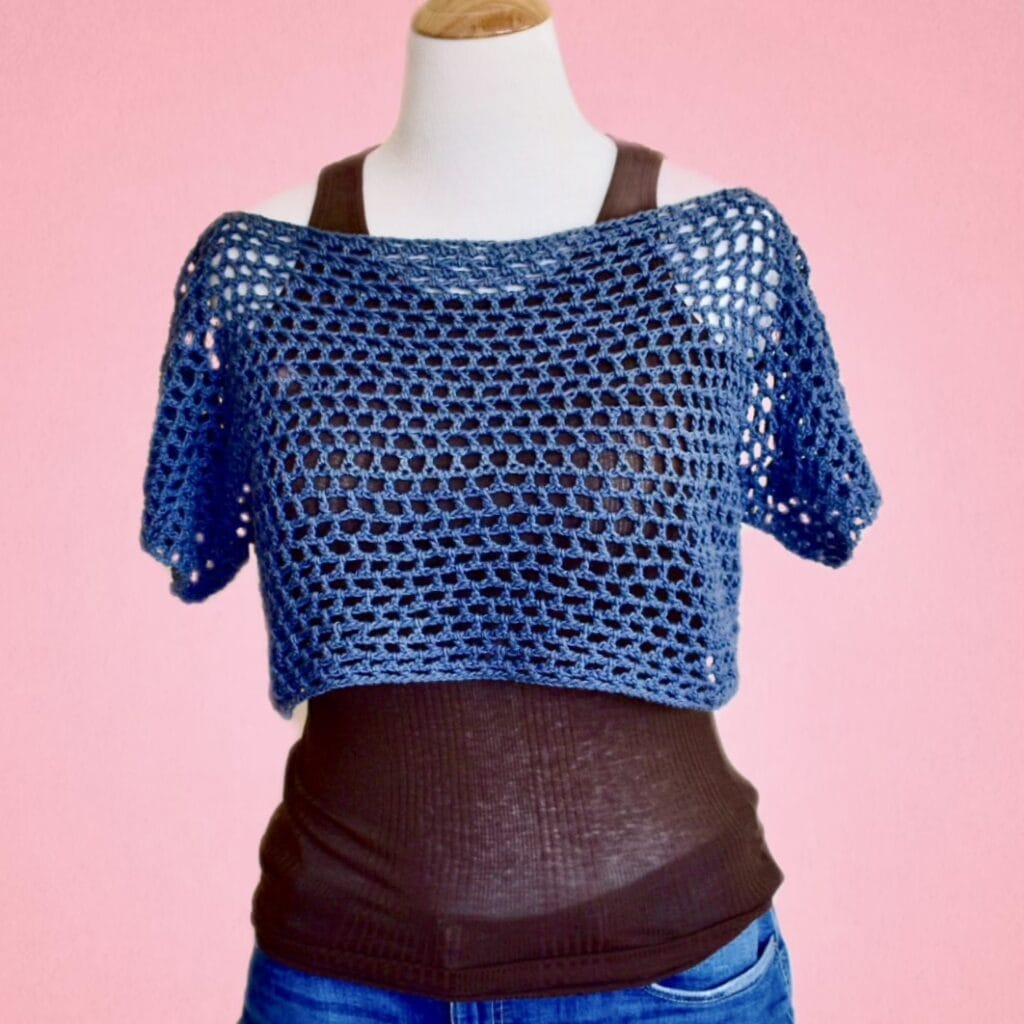
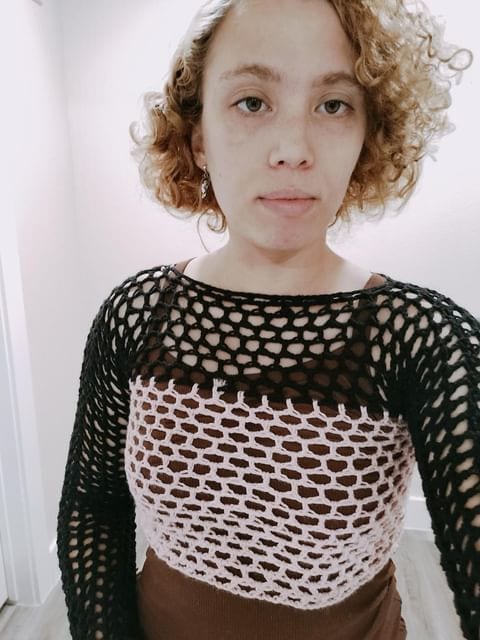
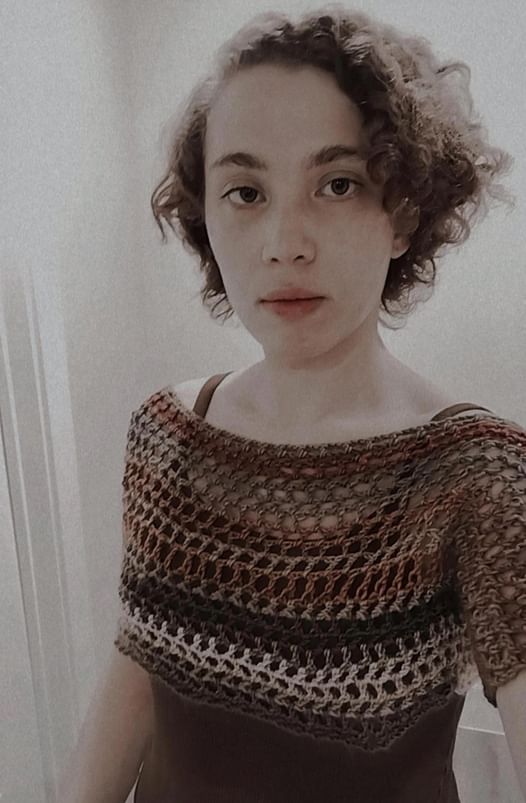
Table of contents
- You May Enjoy These Free Crochet Patterns
- Honeycomb Mesh Tee | Crochet Crop-Top Pattern
- + Skill Level Easy
- + Materials
- Honeycomb Mesh Tee Pattern
- Honeycomb Mesh Stitch Tutorial Video Tutorial Here
- For all sizes:
- + Creating the Neck Opening:
- + Creating the Rest of the Body:
- + Assembly
- SUMMER LOVERS BLOG HOP!
- How to Crochet The Honeycomb Mesh Stitch
For this pattern, I set out to create a simple mesh cropped tank that provides coverage but is also cool, airy and withstands all the summer elements. I took this canoeing, and it was perfect!
I hope you enjoy crocheting this easy pattern, and if you need pattern support or want to talk about crochet – I have a pattern support group called Stardust Gold Crochet & Friends.
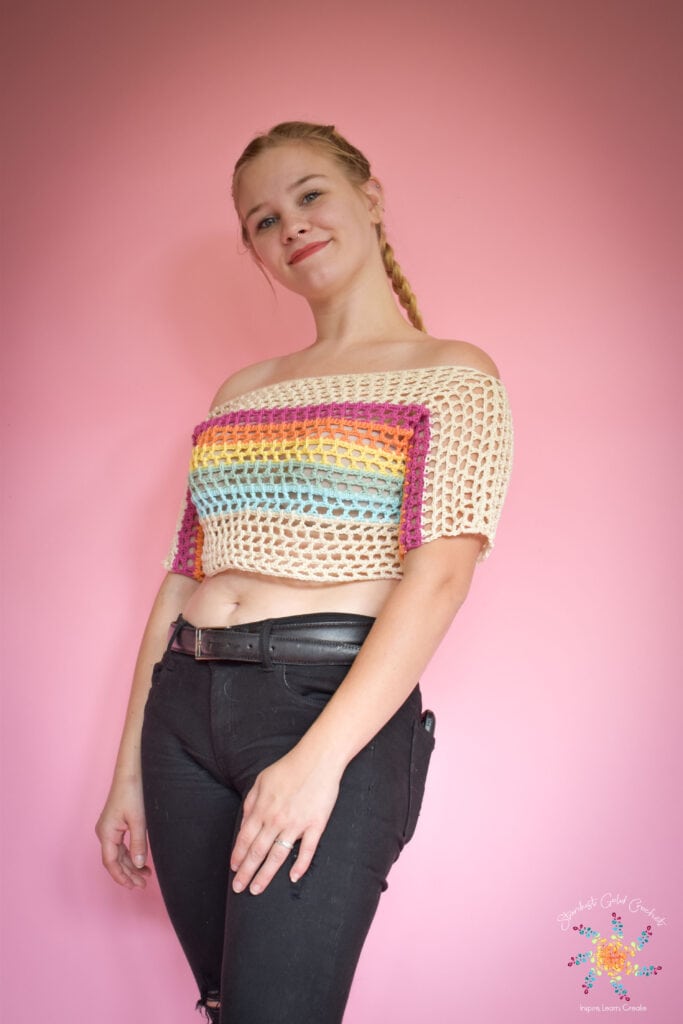
I created a rainbow version of this pattern called the Rainbow Mesh Crochet Crop Top and you can make it by clicking the title link. It super cute too!
You May Enjoy These Free Crochet Patterns
Honeycomb Mesh Tee | Crochet Crop-Top Pattern
If you have any questions about this pattern, please leave a comment below; I am happy to answer any questions. Let’s get started! I would love to see your finished patterns, if you have Instagram, Facebook, or a blog, please use hashtags
+ Skill Level Easy
Pattern Notes – Please Read!
- Because we are working with a mesh, we will count the squares, not the stitches.
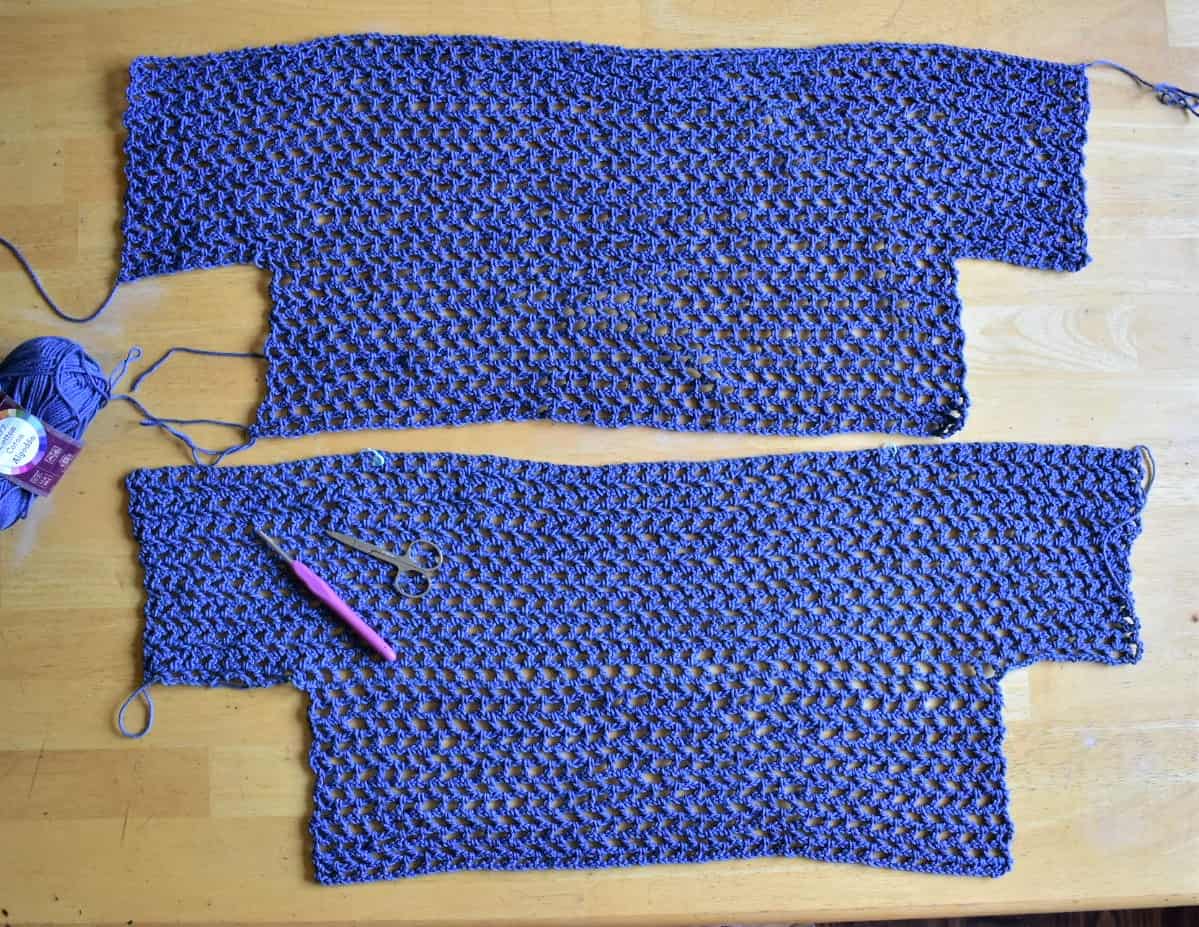
- Pattern is made by completing two panels and sewing them together, working from the top-down.
Tip: Counting for sizing – count each square; because of the mesh pattern, we work into the ch spaces of each square.
+ Materials
- Lion Brand 24/7 Cotton in any color you choose.
- Hook size: 4.5 mm.
- Darning Needle
- Scissors
- Stitch Markers
Honeycomb Mesh Tee Pattern
This table shows how my chains you need to start for each size. Chain that number of chains, then follow along with the pattern below.
I have created a full video tutorial on how to create the Honeycomb Mesh stitch if you get confused or need help with it. You can find that link below.
If you have any questions about the honeycomb mesh crochet crop-top pattern, please message me in my pattern support group called Stardust Gold Crochet & Friends.
Honeycomb Mesh Stitch Tutorial Video Tutorial Here
| Sizes | Chains | |
| Child | 4-6 | 126 |
| 6-8 | 129 | |
| 8-10 | 132 | |
| Youth/Adult | XS | 138 |
| Adult | S | 144 |
| M | 147 | |
| L | 153 | |
| XL | 162 | |
| XXL | 165 | |
| 1X | 171 | |
| 2X | 180 | |
| 3X | 192 |
For all sizes:
Create your starting chain according to the size chart above, then…
Row 1: dc in 6th ch from hook, *ch 2, sk 2, dc in next chain* – repeat from * to * to end of row.
Row 2: ch 4, turn. *dc in next ch sp, ch 2* – repeat from * to * until you reach end of row.
Row 3 – X: Repeat Row 2 – until you reach the desired number of rows or height in the table below.
Note: The height of the rows listed in the table below is your armhole depth. If you’d like, you customize this armhole depth by adjusting the number of rows, or you can use the following table, which is a general guide for armhole depth taken from the yarn council guidelines.
Remember: this yarn and stitch will stretch about 2”- 3″ when worn, and I’ve accounted for the stretch in the tables; if it seems small when you put it on, give it a day – it will stretch to perfect fit.
| Sizes | Rows | Armhole Depth | |
| Child | 4-6 | 8 | 4.5” |
| 6-8 | 9 | 5” | |
| 8-10 | 10 | 5” | |
| Youth/Adult | XS | 11 | 6” |
| Adult | S | 12 | 6” |
| M | 13 | 6.5” | |
| L | 16 | 7” | |
| XL | 17 | 7.5” | |
| XXL | 18 | 8” | |
| 1X | 20-21 | 8.5-9” | |
| 2X | 22-23 | 9-9.5” | |
| 3X | 23-24 | 9.5-10.5 |
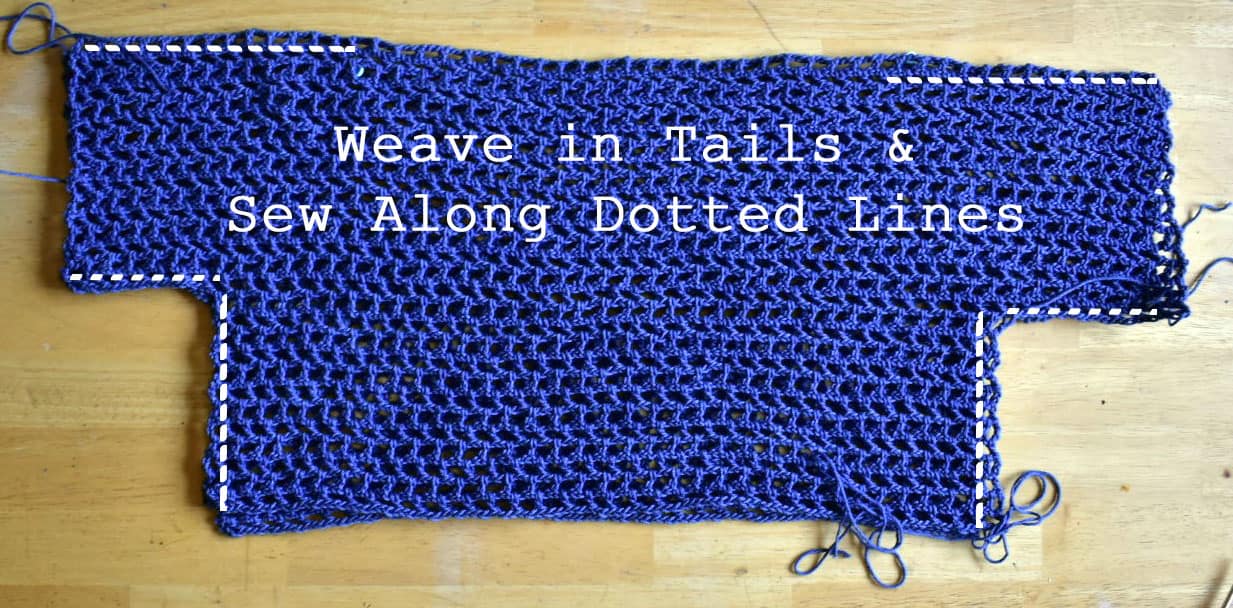
Once you reach the number of rows or measurements you wish, tie off, and weave in tails.
Next, we will mark the neck hole opening and sleeves; this is where we will create the remainder of the body. You can use different colored stitch markers, one color for the neck and another color for the body.
+ Creating the Neck Opening:
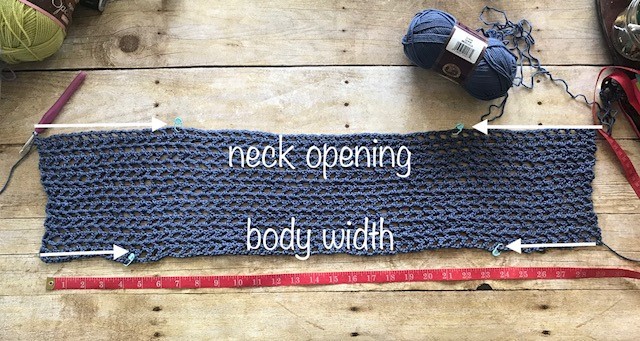
Using the table below. Starting with the 1st square at each edge, counting inward. Mark the final square (in the chain space) with a stitch marker.
Use the neck hole width guide to get an idea of how wide your neck hole should be (these averages are taken from the yarn council guides). This will stretch; if it seems too tight, don’t worry ;).
| Sizes | Sqs | Neck hole width guide | |
| Child | 4-6 | 10 | 7” |
| 6-8 | 12 | 8” | |
| 8-10 | 12 | 9” | |
| Youth/Adult | XS | 14 | 11” |
| Adult | S | 15 | 12” |
| M | 15 | 13” | |
| L | 16 | 14” | |
| XL | 16 | 15” | |
| XXL | 16 | 15” | |
| 1X | 16 | 16” | |
| 2X | 17 | 16” | |
| 3X | 18 | 17” |
Place the garment with the neck opening side closest to you. Use the table below to find the number of squares you will need for your size – start with the 1st square on your right and count inward to the left. Mark that final counted square with a stitch marker. Repeat this working from the right side, counting in toward the left.
| Sizes | Sqs | Sleeve depth from edge | |
| Child | 4-6 | 6 | 3” |
| 6-8 | 6 | 3.5” | |
| 8-10 | 7 | 4” | |
| Youth/Adult | XS | 7 | 4” |
| Adult | S | 8 | 4.5” |
| M | 8 | 4.5” | |
| L | 9 | 5” | |
| XL | 9 | 5.5” | |
| XXL | 10 | 6” | |
| 1X | 11 | 6.5” | |
| 2X | 12 | 7” | |
| 3X | 13 | 7.5” |
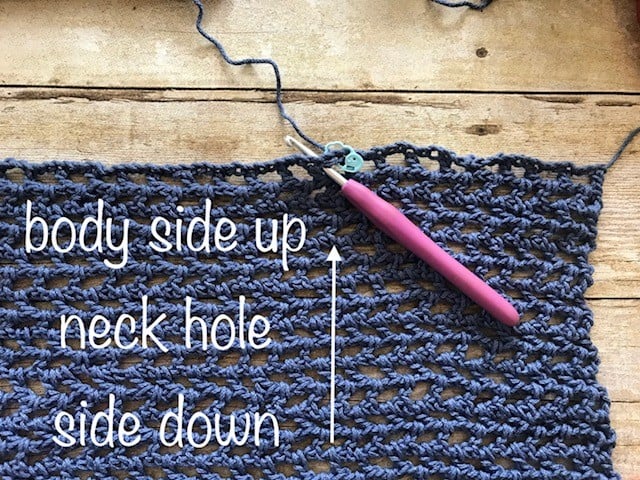
+ Creating the Rest of the Body:
I hope you are enjoying creating the honeycomb mesh crochet crop-top pattern and if you make one, please share and tag me on social media. I would love to see your work!
Attach yarn in the chain space with the 1st stitch marker (like photo below). Then work the following rows
Row 1: ch 4. *dc in next ch sp, ch 2* – repeat from * to * until you reach next st marker (the last dc of the row should be in the square with the stitch marker).
Row 2 – X (see table below): ch 4, turn. *dc in ch sp, ch 2* – repeat from * to * until you reach the number of rows in the table below.
Of course, the length of the top length is completely up to you! You can create more rows if you’d like, just remember to switch to a larger hook before your reach the top of the hips to give you a little more stretch on the hips.
The table below is how many body rows you’ll need to create a crochet crop-top.
| Sizes | Rows | |
| Child | 4-6 | 9 |
| 6-8 | 9 | |
| 8-10 | 9 | |
| Youth/Adult | XS | 10 |
| Adult | S | 10 |
| M | 11 | |
| L | 12 | |
| XL | 12 | |
| XXL | 13 | |
| 1X | 15 | |
| 2X | 16 | |
| 3X | 17 |
+ Assembly
Assembling this top is super easy! The perfect crochet crop-top pattern for beginner crocheters to learn how to assemble a pattern.
You will have two panels. Lay on top of each other and sew along the dotted lines as pictured below.
That’s it! You are finished!
SUMMER LOVERS BLOG HOP!
Thanks for taking part in the Summer Lovers Blog Hop! Get the free PDF pattern here NO COUPON CODE NEEDED – Honeycomb Mesh Tee
Happy Crocheting Friends!

How to Crochet The Honeycomb Mesh Stitch


How many yards of yarn do you need for an adult 3xl
I didn’t see anywhere that tells you how many skeins you need. Can you please tell me how many skeins I would need for a large or x-large? Thank you.
That all depends on the one you’re making. I used 3 skeins for my XL. If you use a different yarn or hook it will all vary.
I wear a size medium normally so I’m making the size M, however it SWALLOWS me. I know its supposed to be a bit big, but this is more of a 2XL or more. I made the gauge swatch with no problems. What have ai done wrong?
Thanks for this super easy pattern. One question, can one join theTwo together with single Crochet or slip stitch instead of doing a running stitch?
Did I miss it, or is there no sizing guide? Im not sure what size I would need to make!
I would love to be able to print and make this top, but I can’t find a way to print it. Everything that says Free Download, is for a free PDF converter and has nothing to do with the pattern. The Ravelry coupon is expired, but I don’t know why anyone would need a coupon for a free pattern. I’m incredibly frustrated. Please let me know how I can print this pattern.
Hello, I’d love to make the top too but the coupon link seems to have expired. Is there another way to get the free pdf?
When you say chain 4 and turn, DC into NEXT space, do you mean the space you are in, or the space after? I am dropping a space each row. I think I should be DC in same space after ch4.
If I’m using a thinner pure cotton yarn with recommended hook size of 2-3mm, should I double the number of chains needed (138×2) if I want to make XS size? This is my first time doing a crochet top and I’m glad I found an easy pattern to get me started.
Just realised using a 2.5mm hook on my yarn, making 138ch as instructed for XS seems to be just nice for me with alittle off shoulder sleeves so I’ll keep to them XS measurements. Will prolly need to adjust the body length as my squares are definitely smaller. Will let u know how it goes
I can’t wait to see it!
That’s a good question. What I would do is create a swatch using my recommended hook and yarn size. Then create a swatch using the hook and yarn size you want to use. Then modify your hook size accordingly. You may end up using quite a larger hook, but I bet it will be beautiful with a light weight yarn. I’ve thought about redoing it in a light weight yarn.
Perfect pattern for my daughter’s pops concert. Whipped it up in a day. And it looks so cute on her!![]()
Oh lovely! Can you share a pic with me!
Hi there, I have just completed my first ever crochet item, your shirt. But I haven’t assembled it yet. What is your best way to stitch together ? What do you use to join them together? Antoinette
This is a great crochet crop top pattern! I love the way it looks and it’s so easy to follow.
Thank you so much for the kind words!
Which side is the top? Should the foundation chain be the top of the garment? I’m finding that a lot of details have been left out of this.
Hi, I keep trying to download the free pdf for this pattern, but Ravelry say the coupon is expired?
I would like to make this top w/a shorter sleeve, more like a cap. What do you recommend for adult small stitch count?
Hi! So, with the 4.5 mm hook, the stitches will be quite loose I imagine? I am using a yarn that’s on the thinner size of worsted. I’m used to doing tight stitches for amigurumi! Thanks!
They are fairly loose. In hindsight, a thinner yarn would provide a better drape.
What if I want to makes the sleeves longer? Cute pattern. Thank you
To make the sleeves longer, you want to create more in the starting chain. It will throw it off a bit though.
Hi, I can’t find the amount of yarn I’ll need for this fabulous pattern…..please help!
How many ball of yarn do you need for an adult small?
For a small, you’ll need about 3 skeins.
How many skeins??
Sorry for the delay Mel! I’m not sure what happened to the yardage on this! I have to go back and find it in all my files :0
Just found it lol
Oh my I love this so much ty for sharing I’m gonna make a ton! Can I make this longer and go further than belly button or so? I would like it to almost my hips?
You’re welcome!!! Yes, you can make it longer 🙂
What size hook?
You have to buy the pattern to find out the hook size….
Just kidding! 😂. Of all the people who have visited this page, you are the first to inform me that I left out that most necessary part of the pattern! Thank you! I used a 4.5 mm hook. Thank you so much for pointing that out.