


Last Updated: April 3, 2023
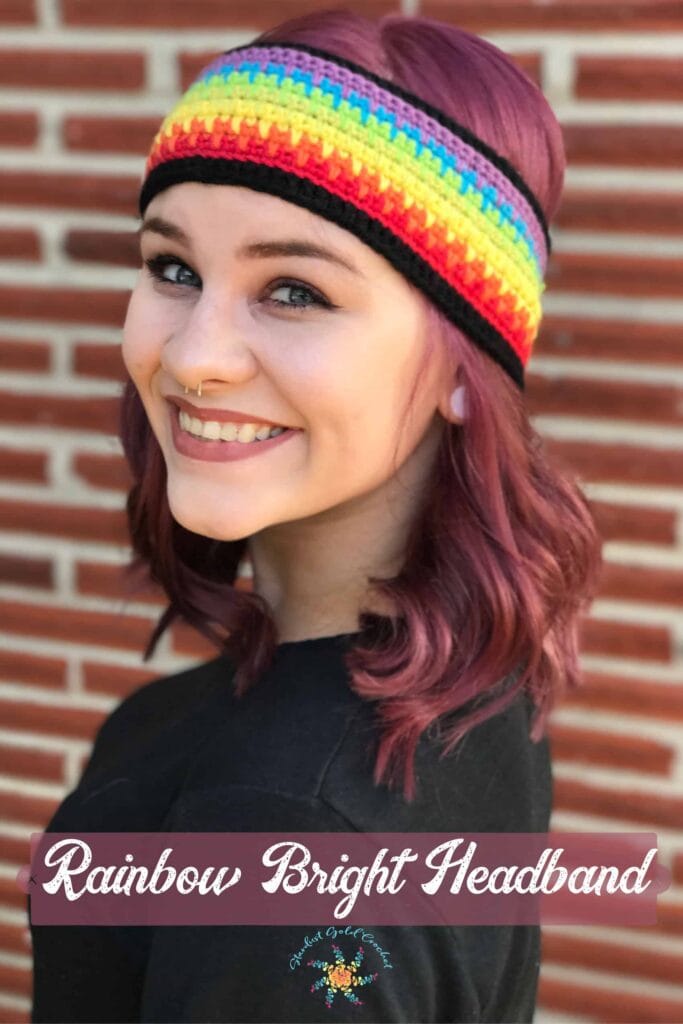
It’s PRIDE month! In honor of pride, I’m releasing my rainbow patterns as freebies! I just love rainbows…any and all rainbows <3. I created this pattern when I first started writing patterns – so go easy on me! This crochet rainbow headband pattern is easy to work up and fun to make.
I created this when I first started designing and learned a lot of new techniques since then. I will update the pattern soon, however, in the meantime…
Here are some of the changes I would make (and you can make these changes as you work the pattern if you’d like) :).
- Working it in the round would eliminate the need for a seam.
- Turning after each join, to get the same effect, without having to join with a seam.
- Seaming, the long ends, then create the border on top and bottom only.
So now we know what I *would* have done, let’s move on to the written pattern :).
Are you ready to make it? Let’s do this!
Pin it!

Skill Level:
Beginner to Easy
Gauge:
23 sts x 16 rows (sc) = 4” x 4” or 10 x 10 cm
This is a DIY to fit your measurements, however, pattern will fit 21 – 22″ head circumference.
Gauge directions:
ch 23 + 1, sc into 2nd ch from hook, and across row (23). ch 1, turn. *sc entire row, ch 1, turn. * *repeat* until you reach 16 rows.
Materials:
Suggested Yarn:
Any light worsted (3 weight, DK) yarn. I used Scheepjes Merino Soft.
Colors:
C1 = Picasso-Red (621), C2 = Van Eyck- Orange (645), C3 = Warhol-Yellow (640), C4 = Constable-Lt Green (629), C5 = Miro-Bright Green (646), C6 = Soutine-Blue (615), C7 = Monet-Purple (639)
Hook Size: 4mm USA G, or equivalent to achieve gauge. (Here is a link to a conversion chart if your needles are lettered or numbered: Hook Conversion Chart.)
Suggested Yarn Details:
50% Wool Superwash Merino x 25% Microfiber x 25% Acrylic – 50 grams = 105 m
Yardage Needed:
Less than 1 skein of each (for toddler size), you may need more of the red if you are making an older child cast cover.
- Scissors
- Darning Needle
Stitch Guide:
sl st – slip stitch
insert hook in indicated stitch. yo and pull through both loops on hook.
sc – single crochet
insert hook in indicated stitch, yo, draw loop up. yo, draw through both loops on hook.
dc – double crochet
yo, insert hook in indicated st. yo, draw up lp *yo, pull through 2 lps* – until one loop remains on hook.
sp st – spike stitch
insert hook at the base of the V of indicated stitch. yo, draw loop up to level of working row. yo, draw through both loops on hook.
Spike Stitch Tutorial:
Abbreviations:
| st(s) | stitch(is) |
| ch | chain |
| SPsc | spike single crochet (spike stitch) |
| dc | double crochet |
| sk | skip |
| st | stitch |
| *…* | *crochet instructions between asterisk* as many times or for how ever long as instructed. |
Finished Measurements:
Fits a standard 22″ head circumference
Adjusting the Size:
To adjust circumference, chain an even number of chains.
- Pattern is worked in rows.
- Border is added after main rows are complete and then seamed together.
- 1st stitch of each row is made in same as t-ch
- Tips: Merino Soft yarn is slippery and stretchy – the first few rows are tough. Merino Soft has a little stretch to it, but will draw in just a little. It also likes to twist, but don’t worry, it will lay flat when you are finished. My head measures 20” and I used 88 stitches +1 for turning chain. Try to crochet in the tails as you go, it will save time at the end. This pattern works in both loops, unless otherwise indicated.
- Remember to count your stitches.
- All rows should contain the same number of stitches.
- When working the spike stitches – you will skip the stitch behind it because it counts as a stitch (some people say under it) because it counts as a single crochet.
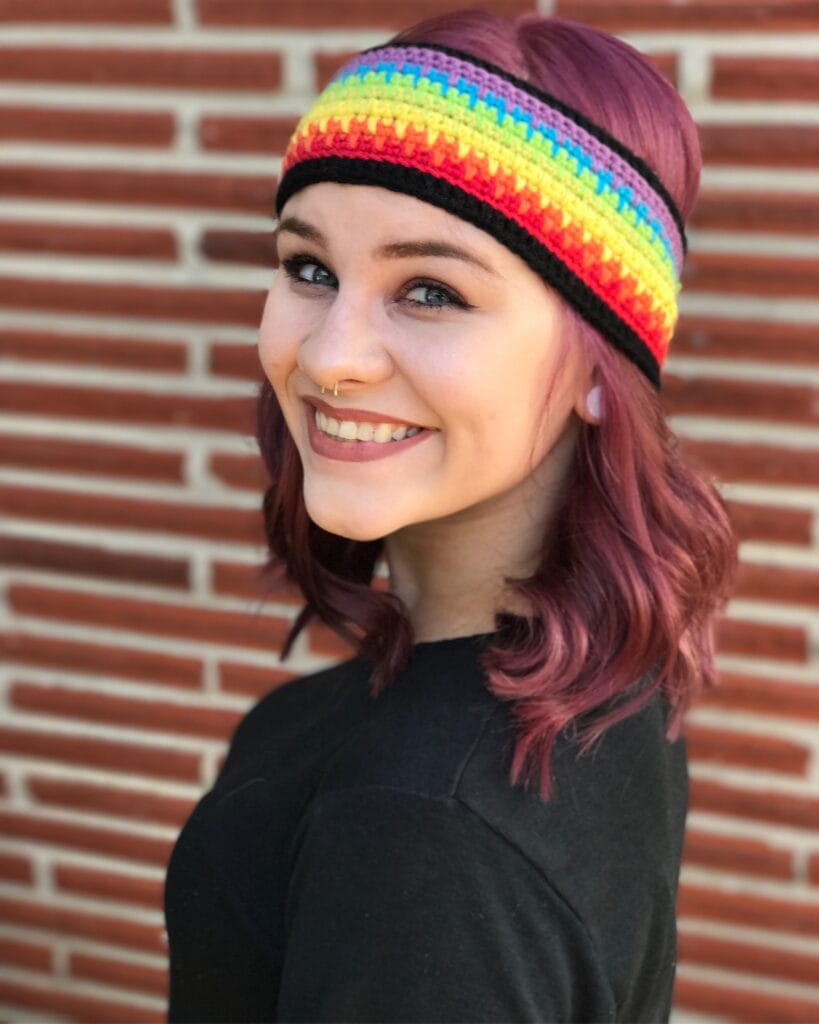
Rainbow Bright Crochet Headband (Pattern):
Chain 88 + 1 (or any even number of stitches)
R1 – C1: (Red) sc in 2nd chain from the hook and across entire row, ch1, turn.
R2 – C1: (Red) sc entire row, color change to C2 at end of row, ch1, turn. (please see this tutorial on how to change colors). First photo shows where to work in your first sc of each row at the base of the turning chain – second photo shows the beginning of a color change. To change colors, before completing the last stitch of the row, add your new color to your hook, and complete the single crochet with your new color.


R3 – C2: (Orange) sc in first two sts. *SPsc 1 – click here for tutorial video – aka long single crochet or spike single crochet) into hole below 2nd sc on current row (see photo). sc in next st* – rep *…* until there is one sc left. sc into last st of row, ch1, turn.


R4 – C2: (Orange) sc 1 in each st to end of row, color change to C3, ch1, turn.
R5 – C3: (Yellow) sc 1 in first st, *SPsc 1 below next sc. sc 1 in next st* – rep *…* to end, stop repeat when you have two sts left. sc 1 in ea of last two sts. ch1, turn.
R6 – C3: (Yellow) sc entire row. color change to C4, ch1, turn.
R7 – C4: (lt Green) sc 1 in ea of first two sts. *SPsc 1 below next sc, sc 1 in next st* – rep *…* to end. When you complete last spike st at end of row, there should be one st left. sc 1 in last st. ch1, turn.
R8 – C4: (lt Green) sc 1 entire row. color change to C5, ch 1, turn.
R9 – C5: (Bright green) sc 1 in first stitch. *SPsc below next sc, sc 1 in next st* – rep *…* to end, stop repeat when you have two sts left. sc 1 in ea of last two sts. ch1, turn.
R10 – C5: (Bright green) sc entire row. color change to C6, ch 1, turn.
R11 – C6: (Blue) sc 1 in ea of first two sts. *SPsc 1 below next sc, sc 1 in next st* – rep *…* to end of row. When you complete last spike st at end of row, there should be one st left. sc 1 into last st. ch1, turn.
R12 – C6: (Blue) sc entire row. color change to C7. ch1, turn.
R13 – C7: (Purple) sc 1 in first st. *SPsc 1 below next sc, sc 1 in next st* – rep *…* to end, stop repeat when you have two sts left. sc 1 in ea of last two sts. ch1, turn.
R14 – C7: (Purple) sc entire row. tie off, weave in tails.
Border:
I created a video tutorial for working the border. I will also write it out here for those who do not like videos 😉. So here we refer to each side as 1, 2, 3, & 4. Side 1 will be the purple row. Right side is the side where you can see the spikes of the spike stitches)
Side 1 – (purple row on top and right side facing you) – Attach yarn into the final stitch of the row of purple you just completed.
- Work a dc into the back loops of each st across entire row.
- When you complete the last dc of the row, work two dc’s into the top of the purple row.
Side 2 – Work 1 dc in each row on top of work (each color has two rows, so you will be working a total of 16 dc, with an extra two worked into the corner.)
Side 3 – (red foundation row) – Work 1 dc into each stitch of the foundation row (back loops only – this is a little tricky because this yarn is so stretchy and it’s the foundation chain, but make sure you don’t skip any sts)
- When you reach side 4, work two extra dc’s to into the corner to create a corner.
Side 4 – Work 1 dc into the top of each row (16 total)
- When you reach your starting point, join with a slip stitch into the top of the first dc and tie off.
sew ends together and…
Congratulations! You’re finished!
I’d love to see your work! Use hashtags on FB & IG
#stardustgoldcrochet #rainbowbrightheadband
Thanks for stopping by and making beautiful things with me,
If you’d like to collaborate with me, please send me a message or leave a comment, I would love to work with you!


All photos and pattern are property of Stardust Gold Crochet.
Feel free to sell items created from this pattern, but please do not copy, distribute, or sell this pattern as your own.
Love this! Happy Pride!