


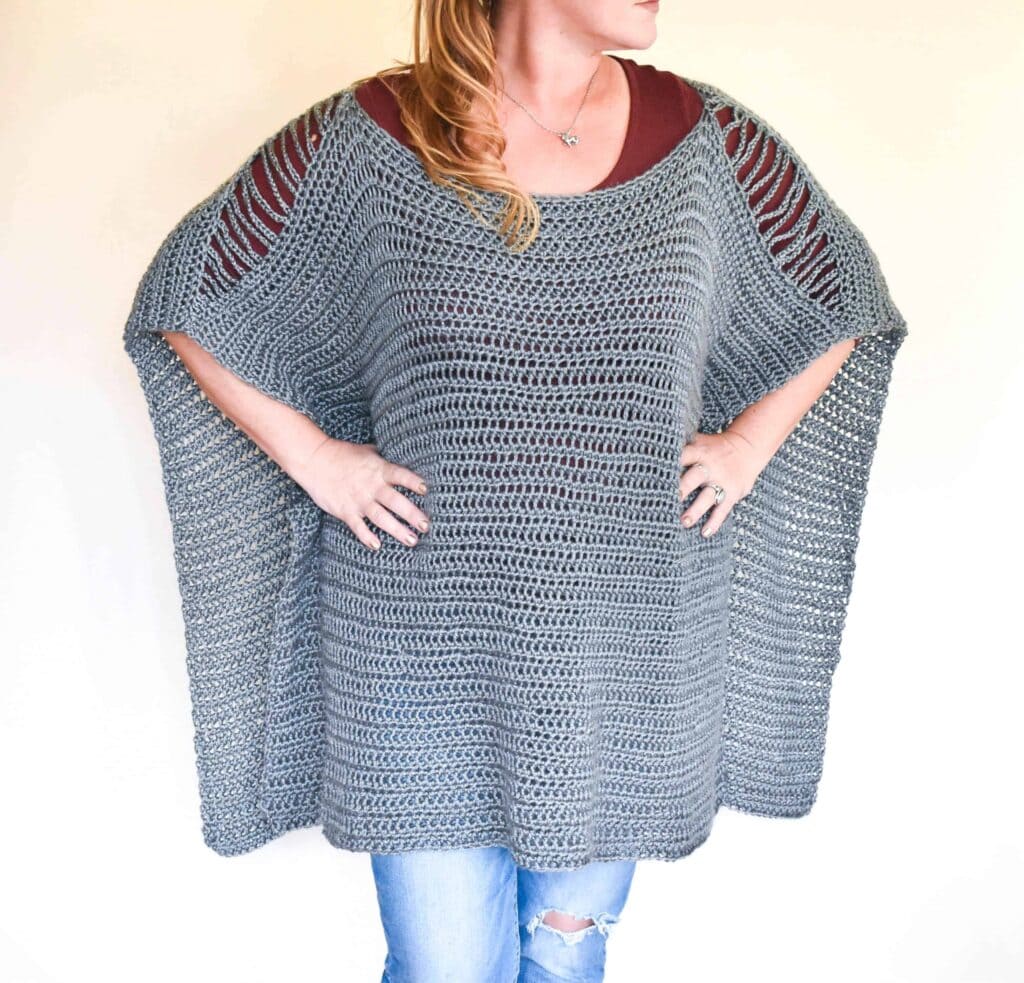
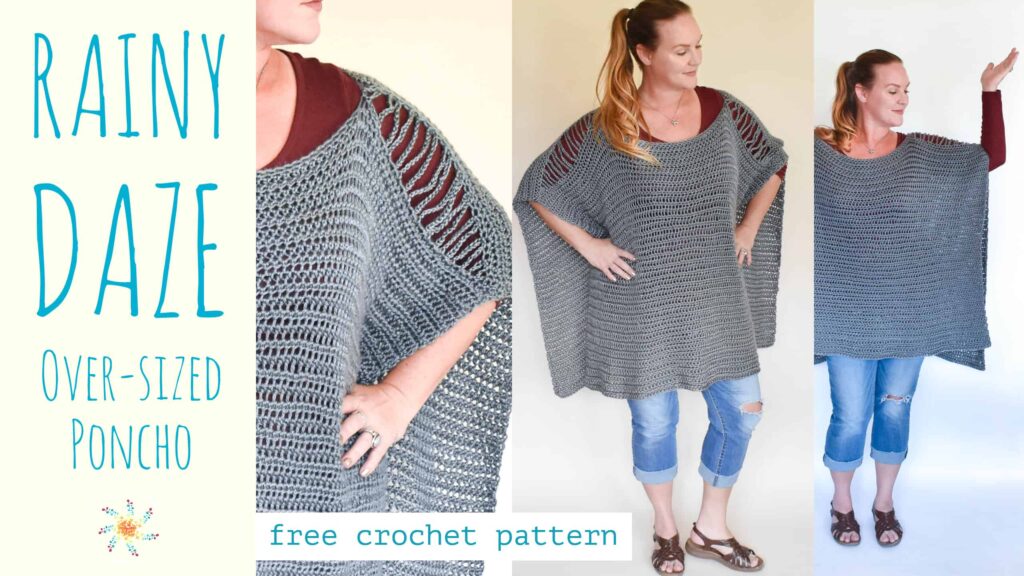
Who doesn’t love a cozy comfy rainy-day? I wanted to create something like Flashdance and Old Navy met at a coffee-house, drank too much coffee and had a crochet poncho baby! I hope you enjoy making this easy free crochet poncho pattern!
I hope you enjoy making it, it is very simple to create. 😊
Skill Building Blog Hoppers!
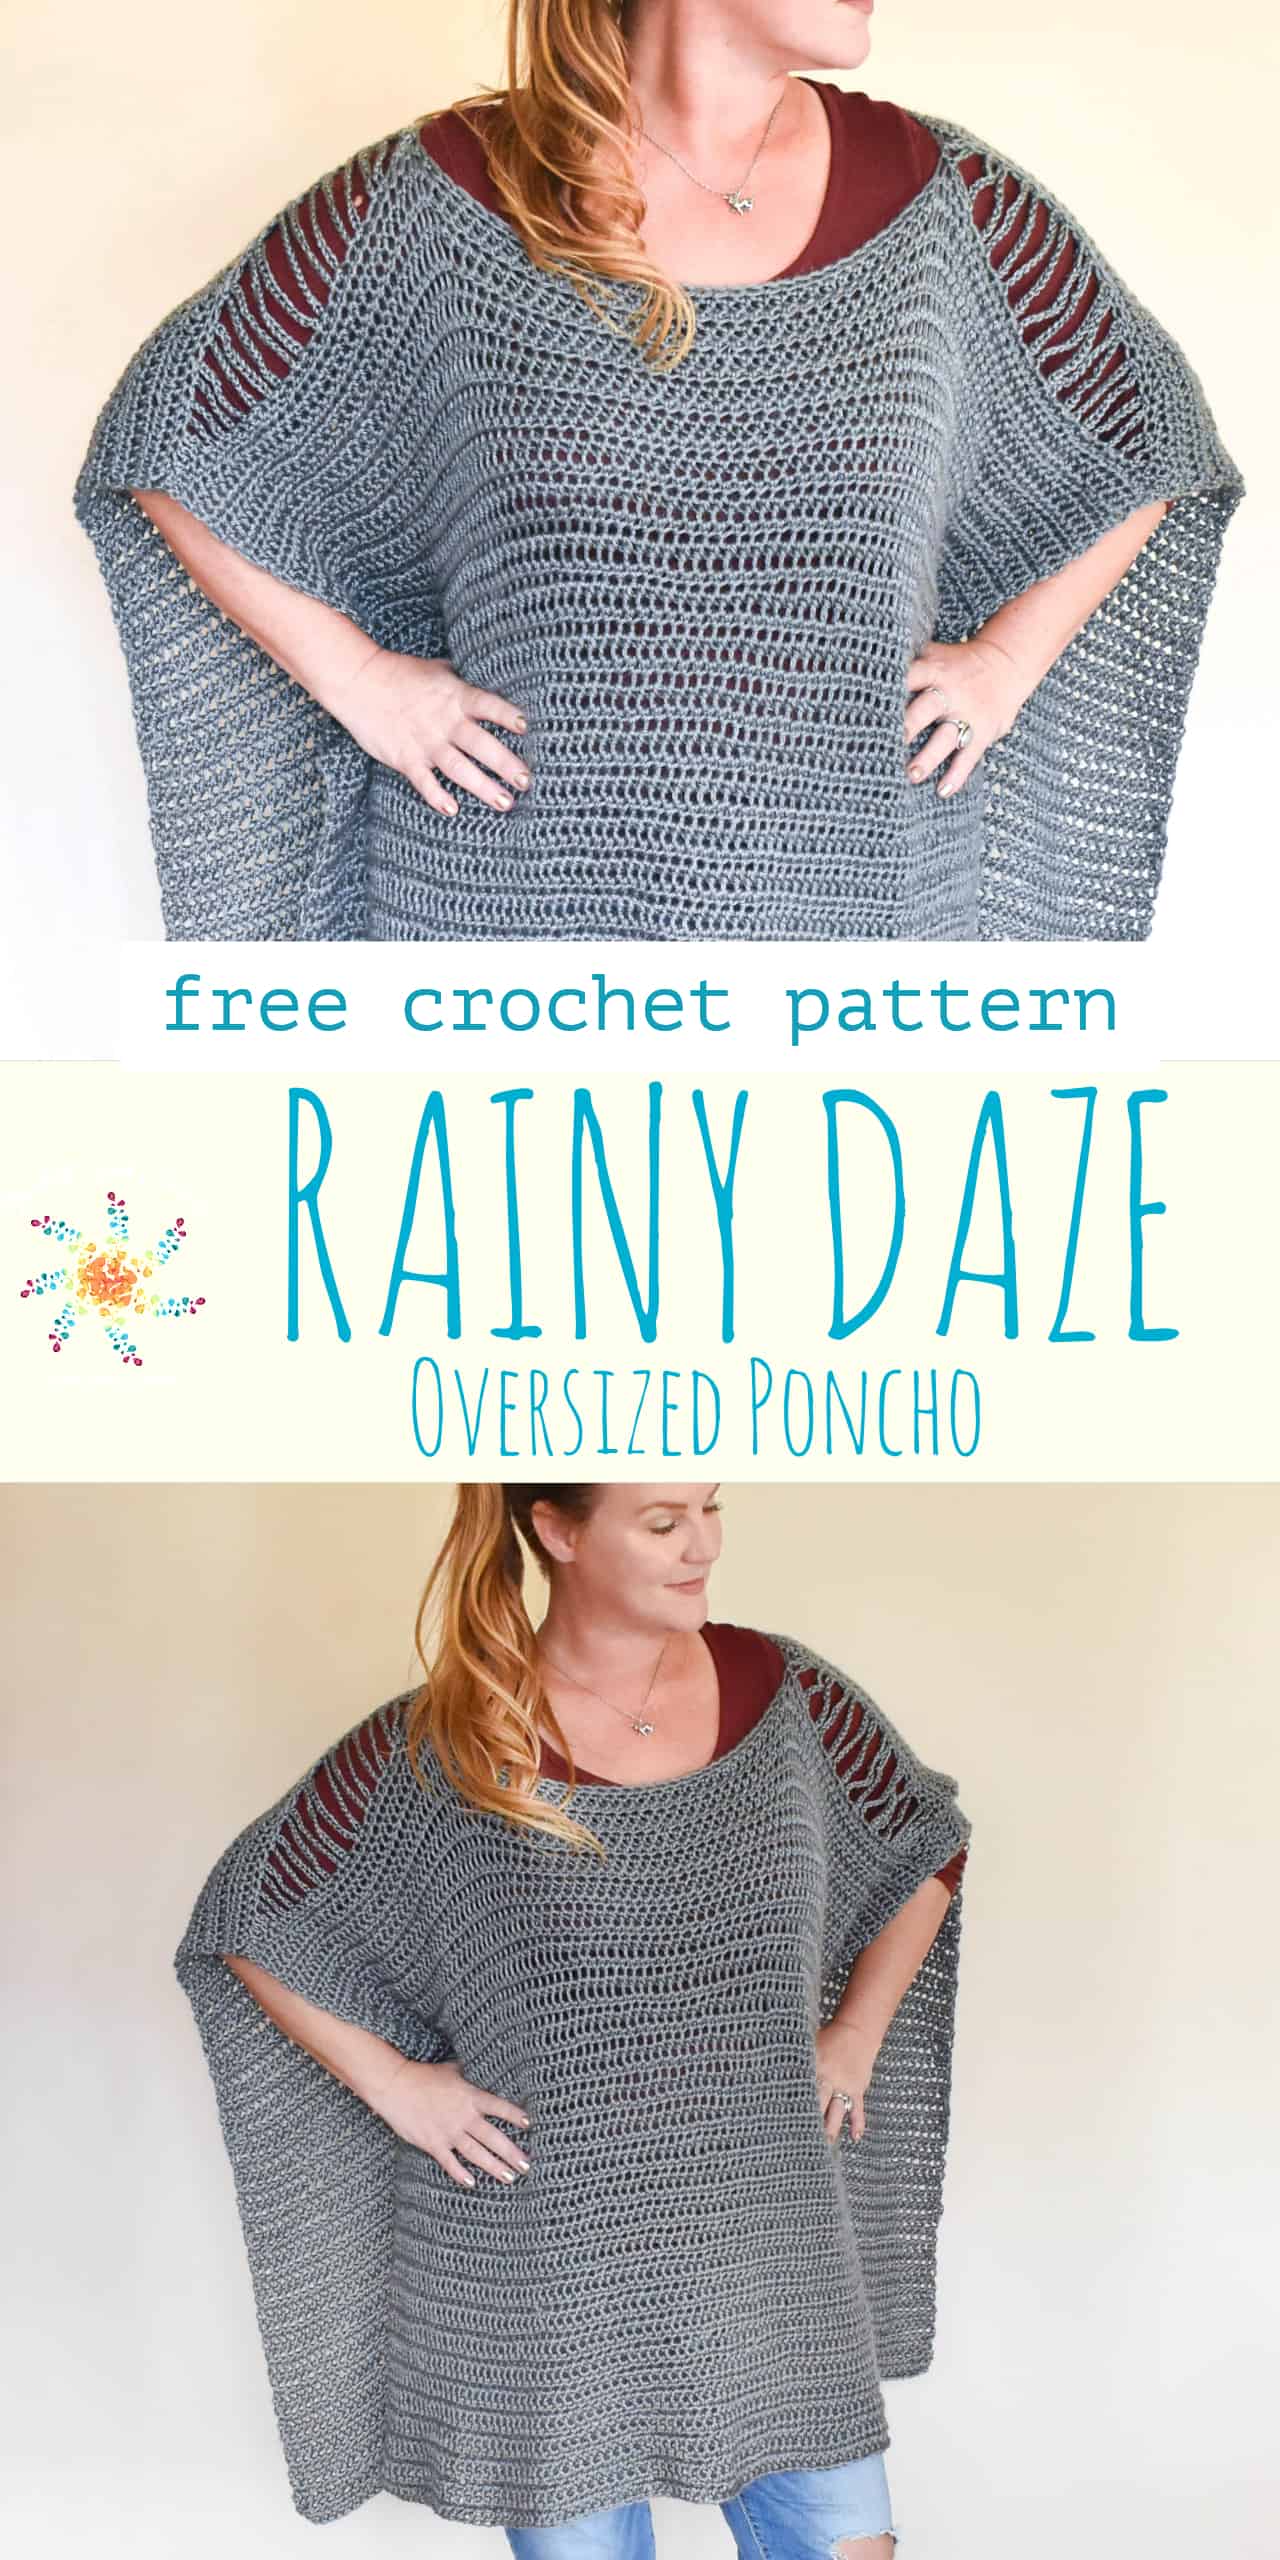
Scroll on down and find the download button to get the FREE PDF download today and thanks for being here!
If you have any questions about his pattern, please leave a comment on the blog post here – someone else may have the same questions. I’d love to see your finished Poncho.
Please tag me #stardustgoldcrochet #rainydazeponcho Thank you! Let’s get started! Oh yes – Make sure your gauge is proper, but this poncho is very forgiving! 😉
You can find the written pattern in my Ravelry & Rainy Daze Oversize Crochet Poncho stores if you prefer a printable.
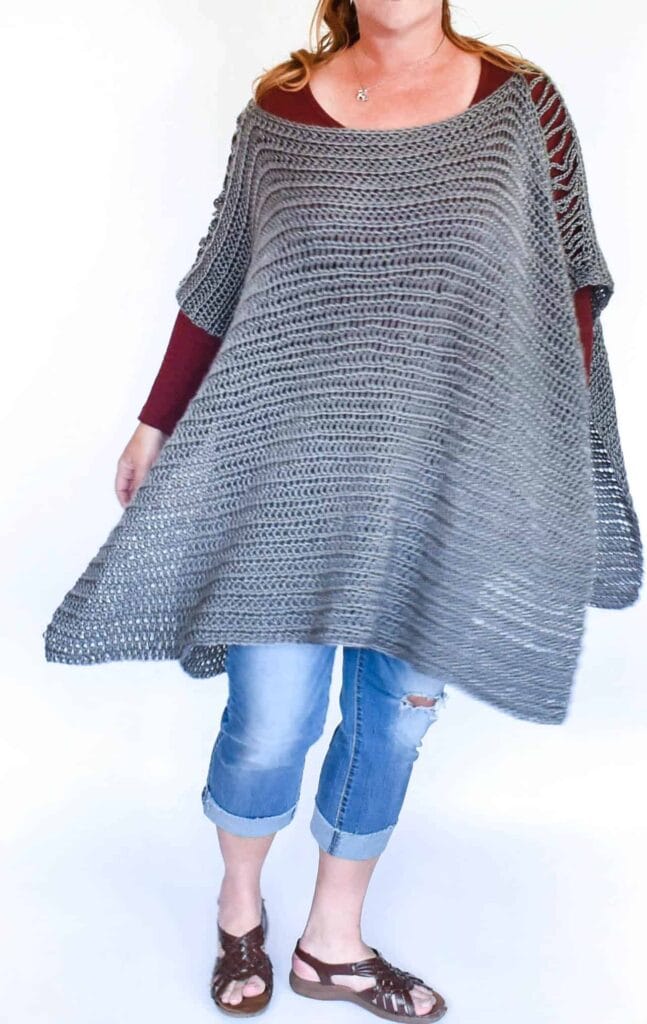
forgive the blurriness, but I was doing a little twirl!
It’s perfect for keeping warm at work, but still maintaining that fashion status, you can dress it up or dress it down. Change up the colors, use an ombre’ yarn, or even add some fringe! The possibilities are endless with this simple pattern.
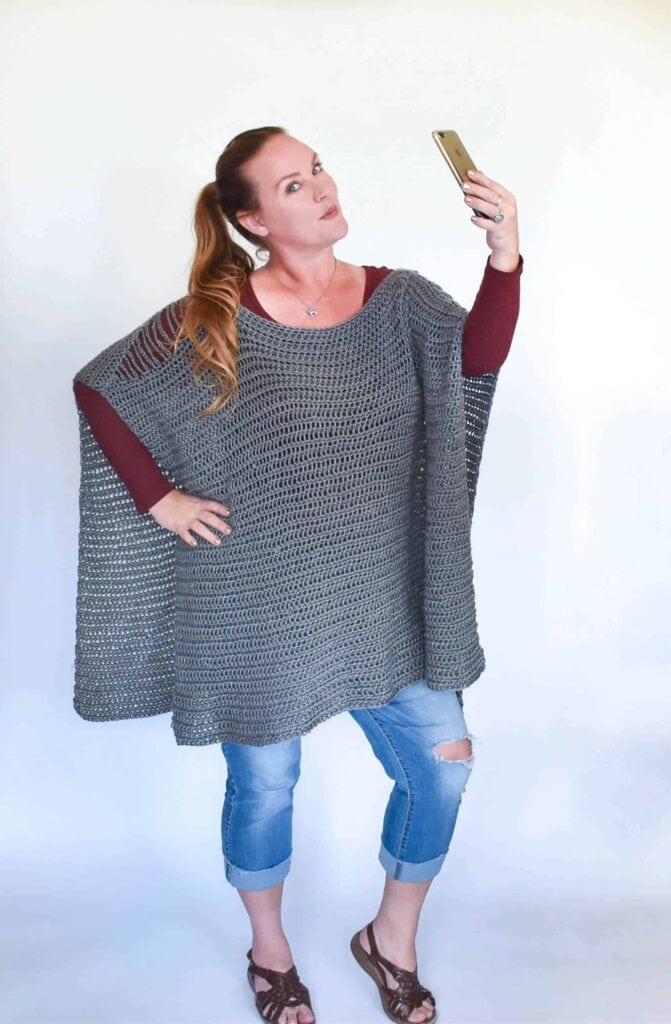
Oh yes, and it’s great for selfies too. 😘
Grab your hook and yarn, let’s get started!
What you need:
Materials:
Suggested Yarn:
Yarn Bee – Soft Secret (6oz, 300yds) in Smoke – you can find this yarn at Hobby Lobby.
This yarn isn’t available overseas, so if you want a yarn that has a very similar working feel and drape use this 👇
Great Yarn Substitution:
Caron Simply Soft the colorways are amazing.
here are some great deals for Caron Simply Soft on Amazon and if you do purchase from my links below – I may earn a small referral fee which helps keep my blog alive 💜 so thank you in advance 😉
Yardage Needed:
XL – 1500-1800 yards, L – 1500 yards, M & S – 1480-1500
- Hook Sizes: 6.5 mm (K) for main body, 5.5 mm (H)
- Scissors
- Darning Needle
- Gauge: 5 hdc x 3 rows = 4” x 4” (10 x 10 cm)
Directions for gauge: Create gauge using half double crochet and K (6.5mm Hook)
Abbreviations
| hdc | half double crochet |
| fhdc | foundation half double crochet |
| st | stitches |
| ch | chain |
| hk | hook |
| lp(s) | loop(s) |
| sl st | slip stitch |
| *…* | *repeat* instructions between *…* |
Stitch guide
sc – single crochet
insert hook in indicated stitch, yo, draw through both loops on hook
hdc – half double crochet
yo, insert hook in indicated stitch, yo, draw through all three loops on hook.
fhdc – foundation half double crochet
create a slip knot, ch 3, yo insert hook in first ch, *yo, pull up a loop (3 loops on hook), ch 1 through first loop on hook (hold onto that chain with thumb and finger – 3 loops on hook), yo, draw through all 3 loops on hook.* That is your first hdc. To create 2nd hdc and remaining, yo, insert hook into the ch 1 you are holding (grab both those loops) then repeat *…* Here is a video that may help you learn this: Click here or watch the video below.
This video is shot in HD, so if it looks grainy, just click the little ⚙ symbol on the bottom right hand side of the video to adjust the quality.
You can find the written pattern for $3.99 in my Ravelry & Rainy Daze Oversize Crochet Poncho stores if you prefer a printable.
PATTERN
To start…
We will create a foundation row using the foundation half double crochet stitch (fhdc). In this pattern it’s considered the first row because you are creating the chain and hdc stitches at the same time, so please count the fdhc row in your row counts. The stitch guide has detailed instructions on how to work the fhdc, with a helpful video link too.
Note: Stitch counts in parentheses at the end of each row are for sizes are as follows: XL (L, M, S)
Body Panels (Make 2)
The front and back are created exactly the same, except you’ll make the front panel slightly shorter.
Row 1: fhdc XL 101 (L-98, M-96, S-94) (or until your foundation chain measures XL 40” (101 cm) (L 39” (99 cm), M 37.75” (95.8 cm), S 36.5” (92.7 cm)
note: Using the K (6.5 mm) and suggested yarn, my starting foundation chain totaled 101 sts and measured approximately 40” (101 cm).
Rows 2 – XL 53 (L-52, M-51, S-50): Ch1, turn. hdc entire row [XL-101 (L-98, M-96, S-94)].
For front panel:
Work this many rows: XL – 50 (L-49, M-48, S-47)
Finishing
note: You can block the pieces at this point.
Creating the neck opening – My neck opening measures 14-14.5” (35.5-36.8cm) – this is the time to customize if you want a tighter neck hole (or looser), but I’ve laid out guidelines below.
Lay pieces flat with fhdc row on top (furthest away from you), lay one panel on top of the other and line them up.
Count from left to right and place a stitch marker in the 33 (33, 32, 31) stitch on both panels see diagram below for measurements.
Repeat on the other side by counting from right to left, and place a stitch marker in the 33 (33, 32, 31) stitch. Use a safety pin to connect the two pieces, or tie a piece of yarn through the pieces to keep them together
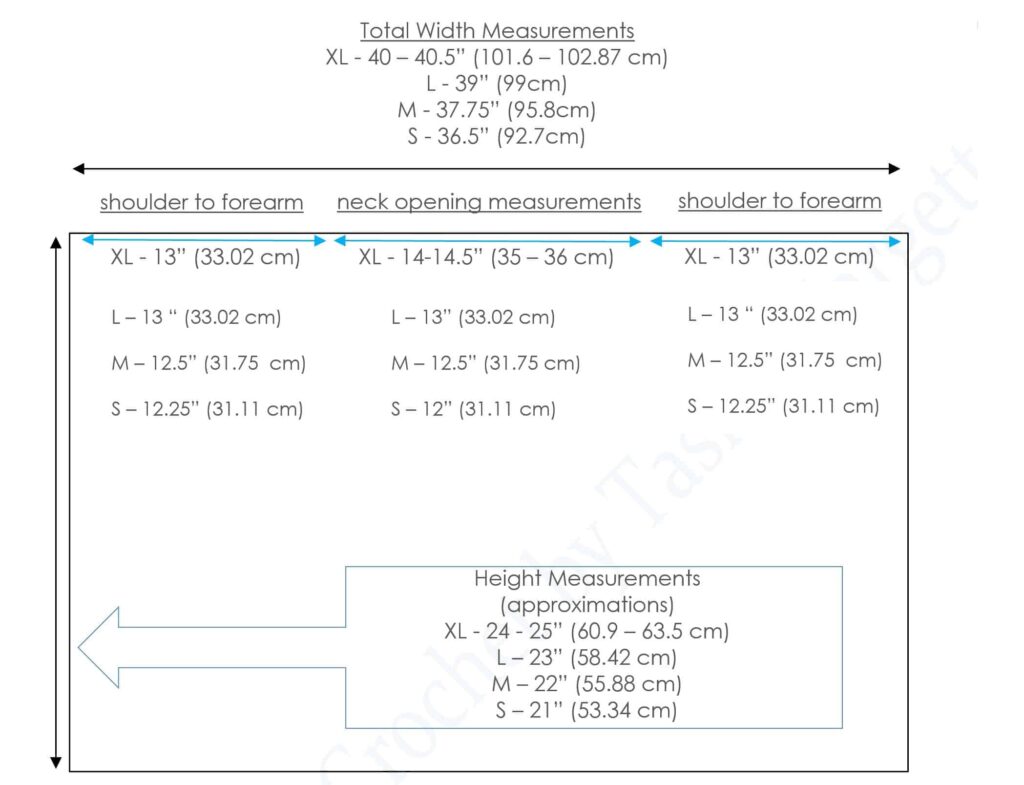
Next, slip it over your head to see how it lies on your shoulders. Reduce or increase by moving the stitch markers evenly (meaning if you move one, move the other too – either inward or outward) to make the opening smaller or larger. The diagram above can help you with sizing the neck opening.
Weave in the tails.
Piecing it together:
Place both panels together with neckline up. You’ll be working from right to left.
Like the diagram below:

Using an I hook (5.5 mm), and same yarn, attach yarn in the stitch marker place, and ch 1, sc in same space. We are going to piece the two panels together to create a lace from shoulder toward wrist.
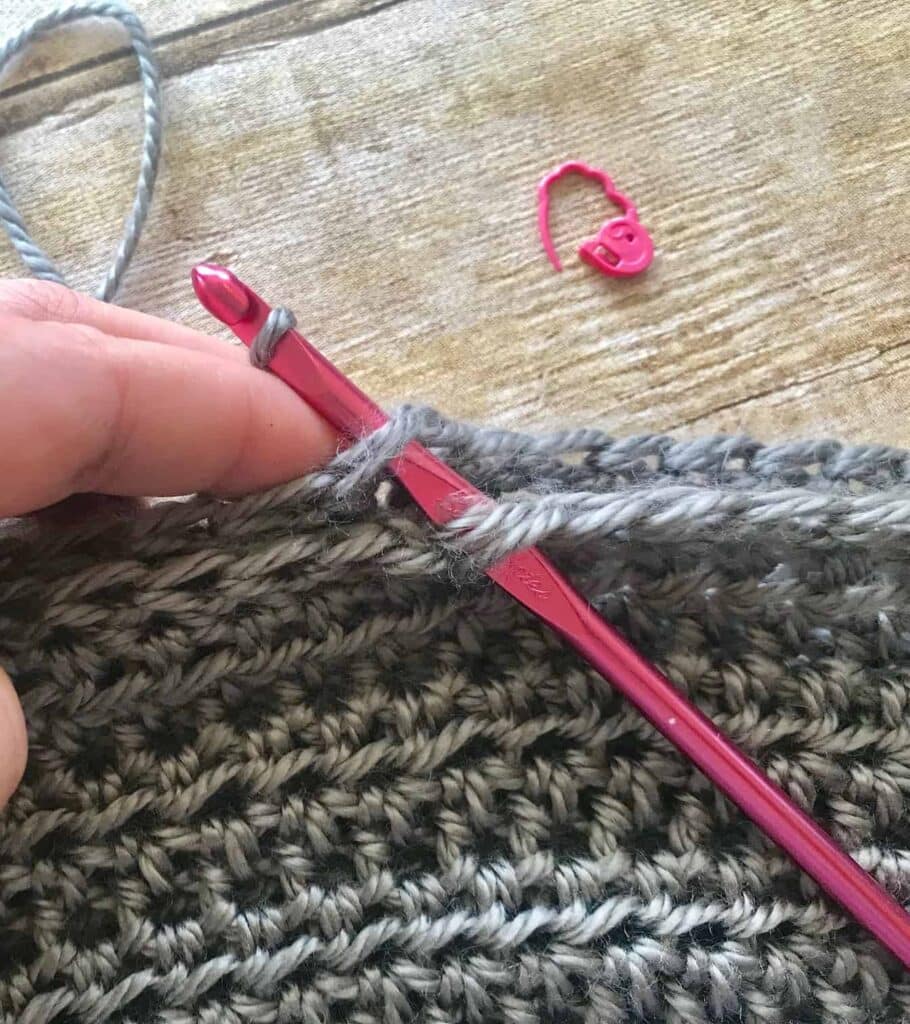
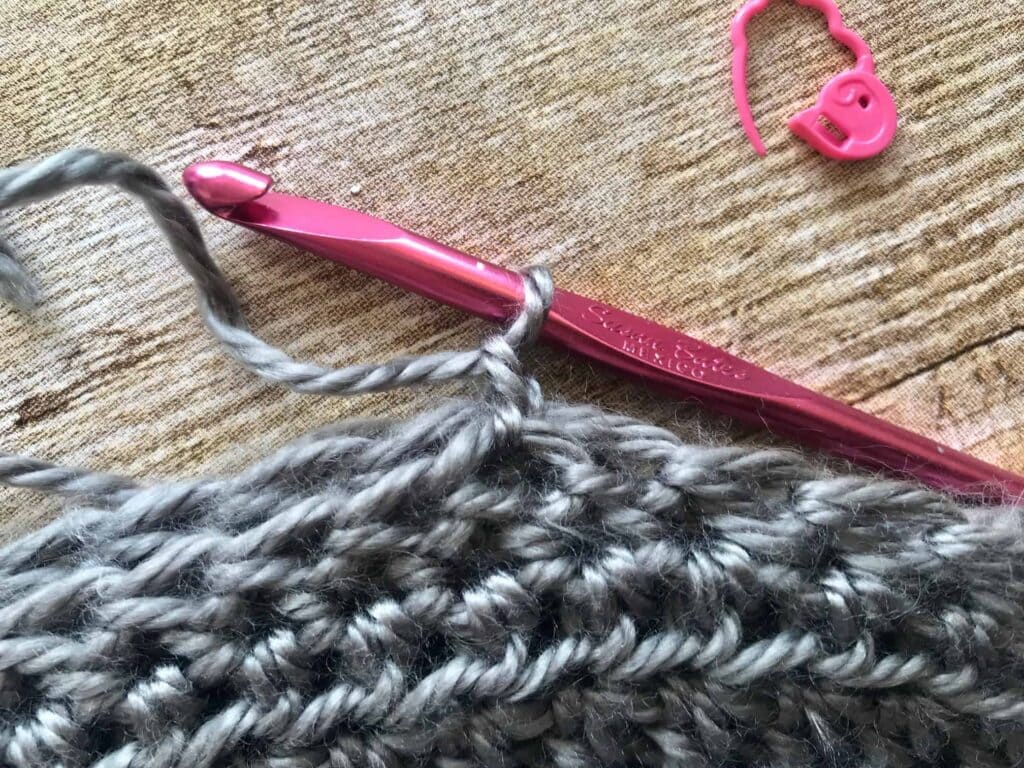
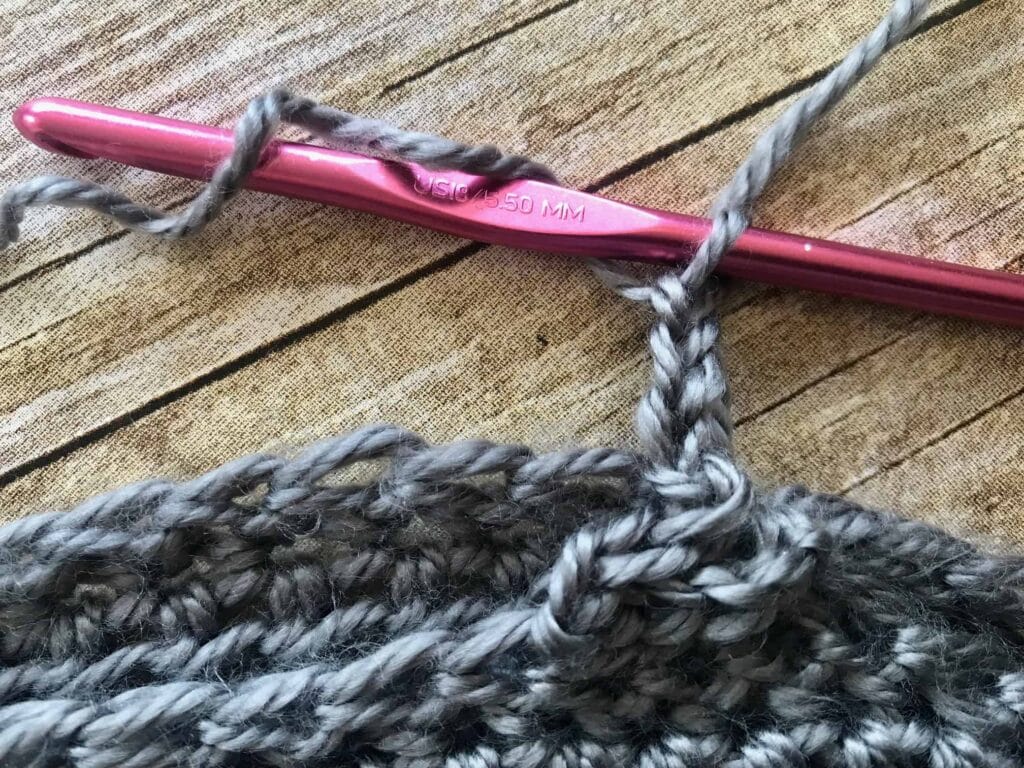
Row 1: ch 3, sk 2 on top panel, sl st in next st, ch 3. sl st into first st (sc) created when we pieced them together.
(photo below shows ch 3, sk 2 on top panel, sl st in next st on front panel and ch 3.)
Row 2: ch 3, sk 2 on back panel, sl st in next.
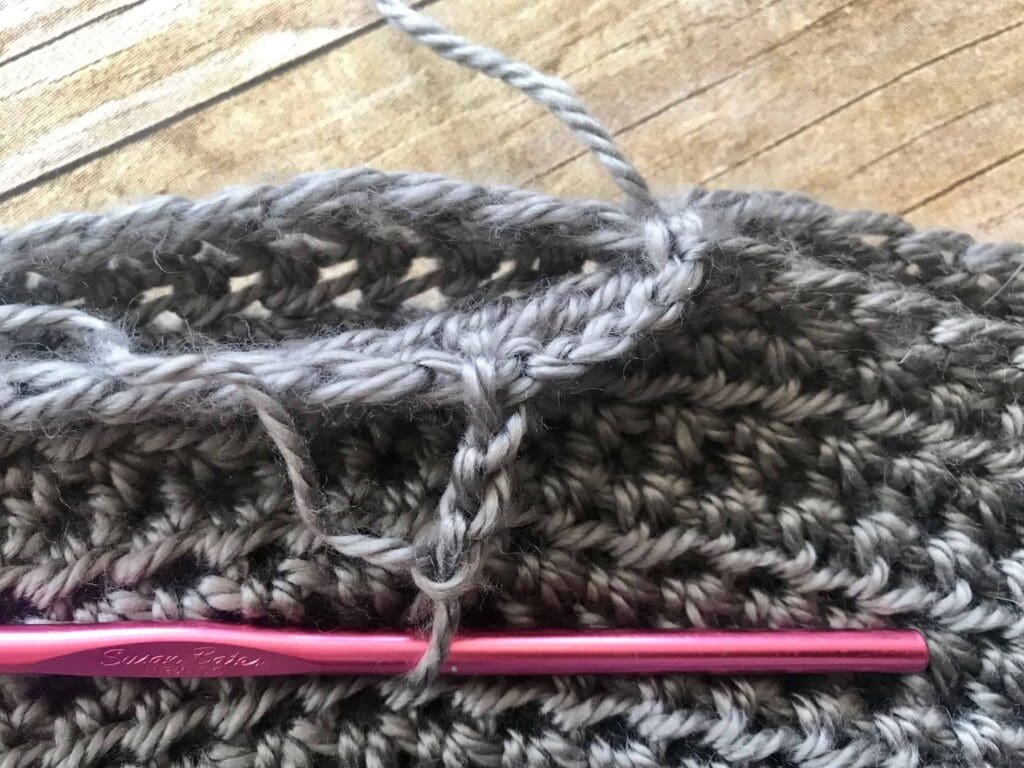
Row 3: ch 10, sl st in last worked stitch on front panel. sl st in next 2 sts.
(the photo below shows how it will look after you complete some of these rows as you work your way down the two panels)
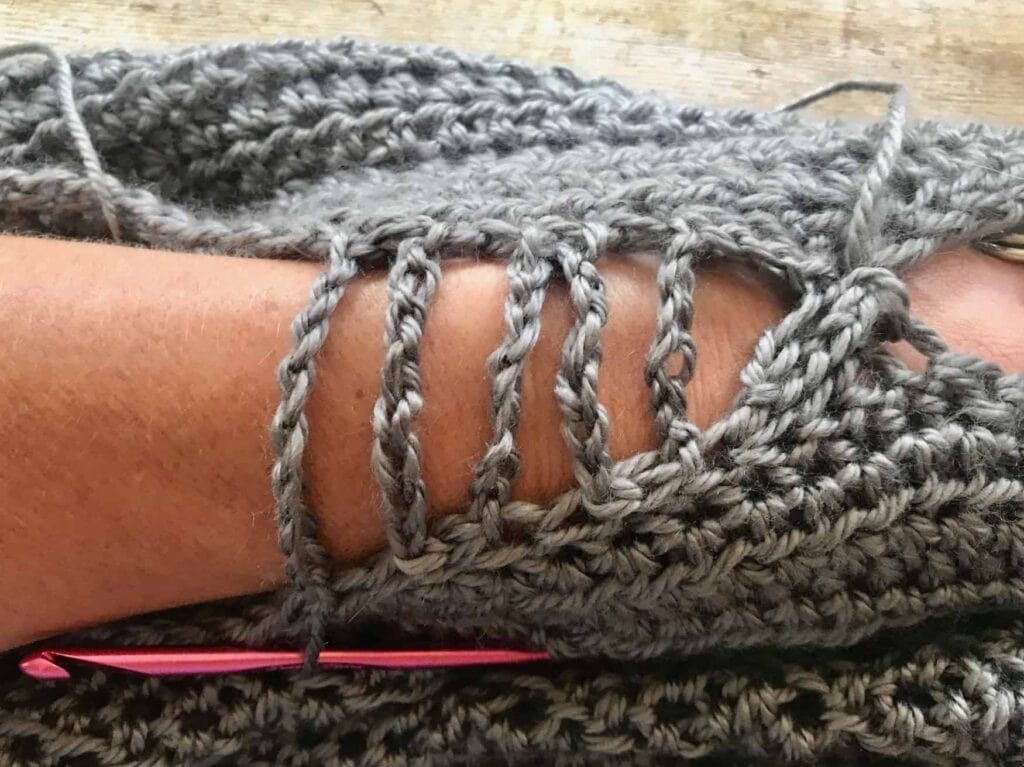
continue working rows until you reach the end.
Row 4: ch 10, sl st in next 3 sts on back panel.
Row 5: ch12, sl st in next 3 sts on front panel.
Row 6: ch 12, sl st in next 3 sts on back panel.
Row 7: ch 12, sl st in next 3 sts on front panel.
Row 8: ch 14, sl st in next 3 sts on back panel.
Row 9: ch 16, sl st in next 3 sts on front panel.
Row 10: ch 16, sl in next 3 sts on back panel.
Row 11: ch 16, sl st in next 3 sts on front panel.
Row 12: ch 14, sl st in next 3 sts on back panel.
Row 13: ch 14, sl st in next 3 sts on front panel.
Row 14: ch 12, sl st in next 3 sts on back panel.
Row 15: ch 10, sl st in next 3 sts on front panel.
Row 16: ch 10, sl st in next 3 sts on back panel.
Row 17: ch 8, sl st in next 3 sts on front panel.
Row 18: ch 6, sl st in next 3 sts on back panel.
Row 19: ch 4, sl st in next 3 sts on front panel.
Row 20: (XL, L) ch 3, sl st in next st on back panel. (M, S) ch 2, sl st in next st on back
Row 21: (XL, L) ch 2, sl st in next st on front panel. (M, S) ch 2, sl st in next st on front panel.
Row 22: (XL, L) ch 2, sl st in next st on back panel. (M, S) if you have any sts remaining, sl st both panels together until you have no more remaining sts.
(XL, L) if you have more than 4 sts left at this point – work the last 2 rows (21 & 22) one more time) then line up pieces and slip stitch last sts of rows together.
Flip and work the other arm in the same fashion.
Congratulations! You’re finished!
Looking for more free fun patterns? Check out these posts:


Thank you for this great pattern
can’t find free download button for today’s pattern
I found it under the grab the bonus picture
Looked and looked, wasted about 15 mins of my day and still couldnt find the free download button for today only