
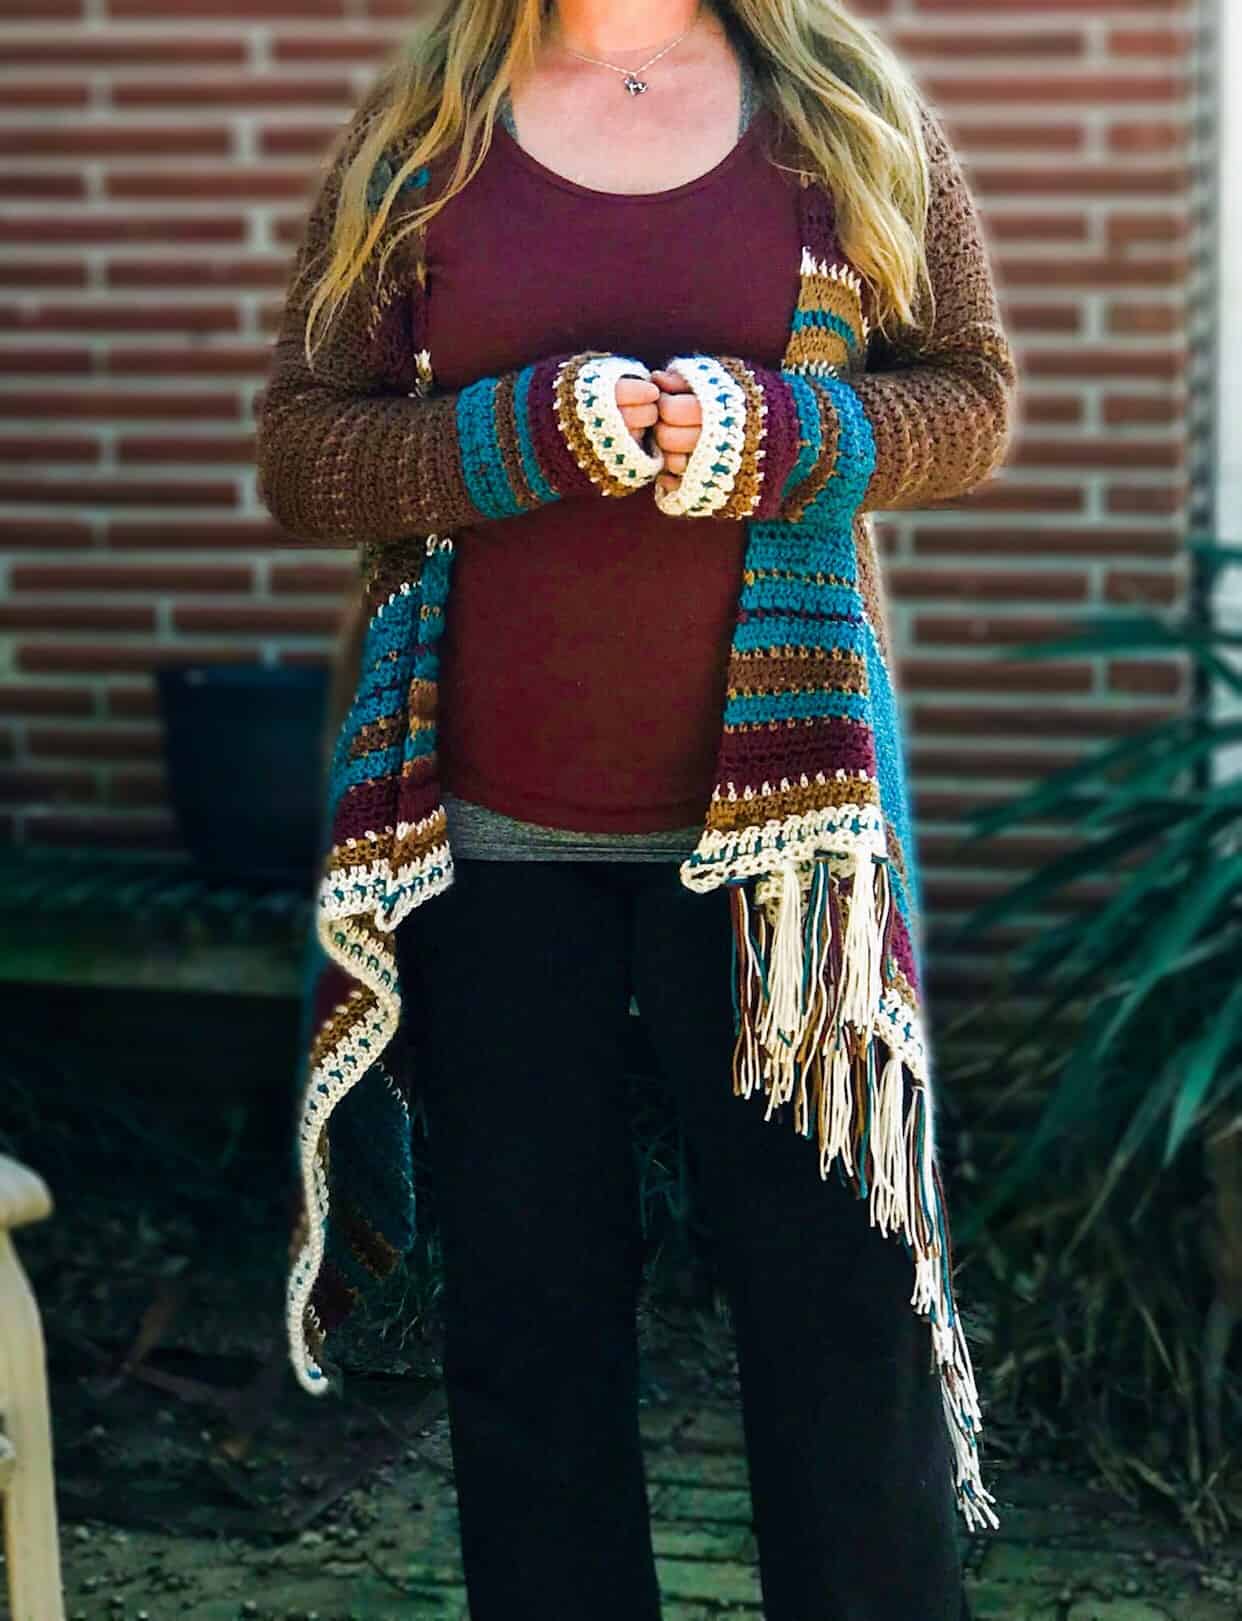
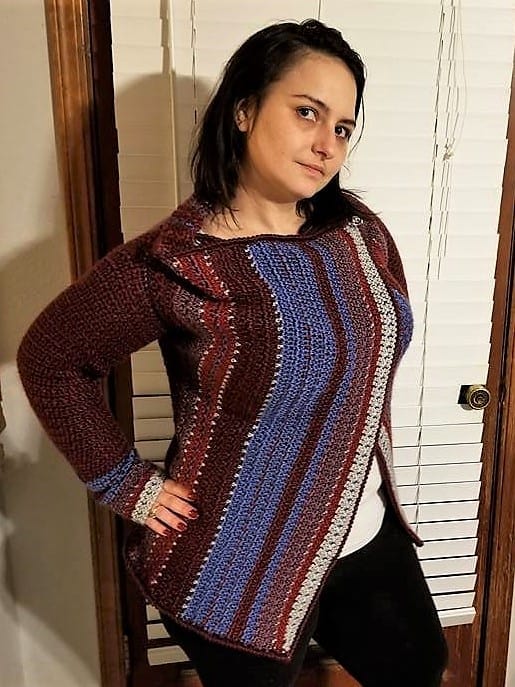
The Navajo Blanket Cardigan is a beginner-friendly crochet pattern created using basic stitches, the single crochet & double crochet. This pattern is written as a plus-size but has instructions for making it smaller within the pattern.
The Crochet Inspiration
The inspiration for this pattern was to challenge me and to create a cozy warm PLUS sized cardigan that looked kinda hippy but could also dress up nice too. You can modify this to a smaller size, and those instructions are below.
The Navajo style blankets are beautiful and even though this doesn’t have traditional Navajo patterns, my friend Crystal of The Crocheted Baby & Crochet-A-Memory said it reminded her of a Navajo blanket, so I said Yes! Hence, the name ;). Crystal is a member of the Chocktaw Nation too, so that makes me feel a little better.
Autumn Harvest Blog Hoppers
Thanks for being here! Scroll down to the Autumn Harvest graphic to get the download. Thanks for being here!
Pattern Support
Need Pattern Support? Join my Facebook group to talk about this design and any crochet support you need.
Shop the PDFs
Would you like the PDF? If you purchase from me, on my website, you have permanent access, like Ravelry and Etsy purchases, except we are cutting out the middle man! If you prefer to add them to your Ravelry or Etsy libraries, that is okay too. Please see links below for PDF’s
Let’s get started!

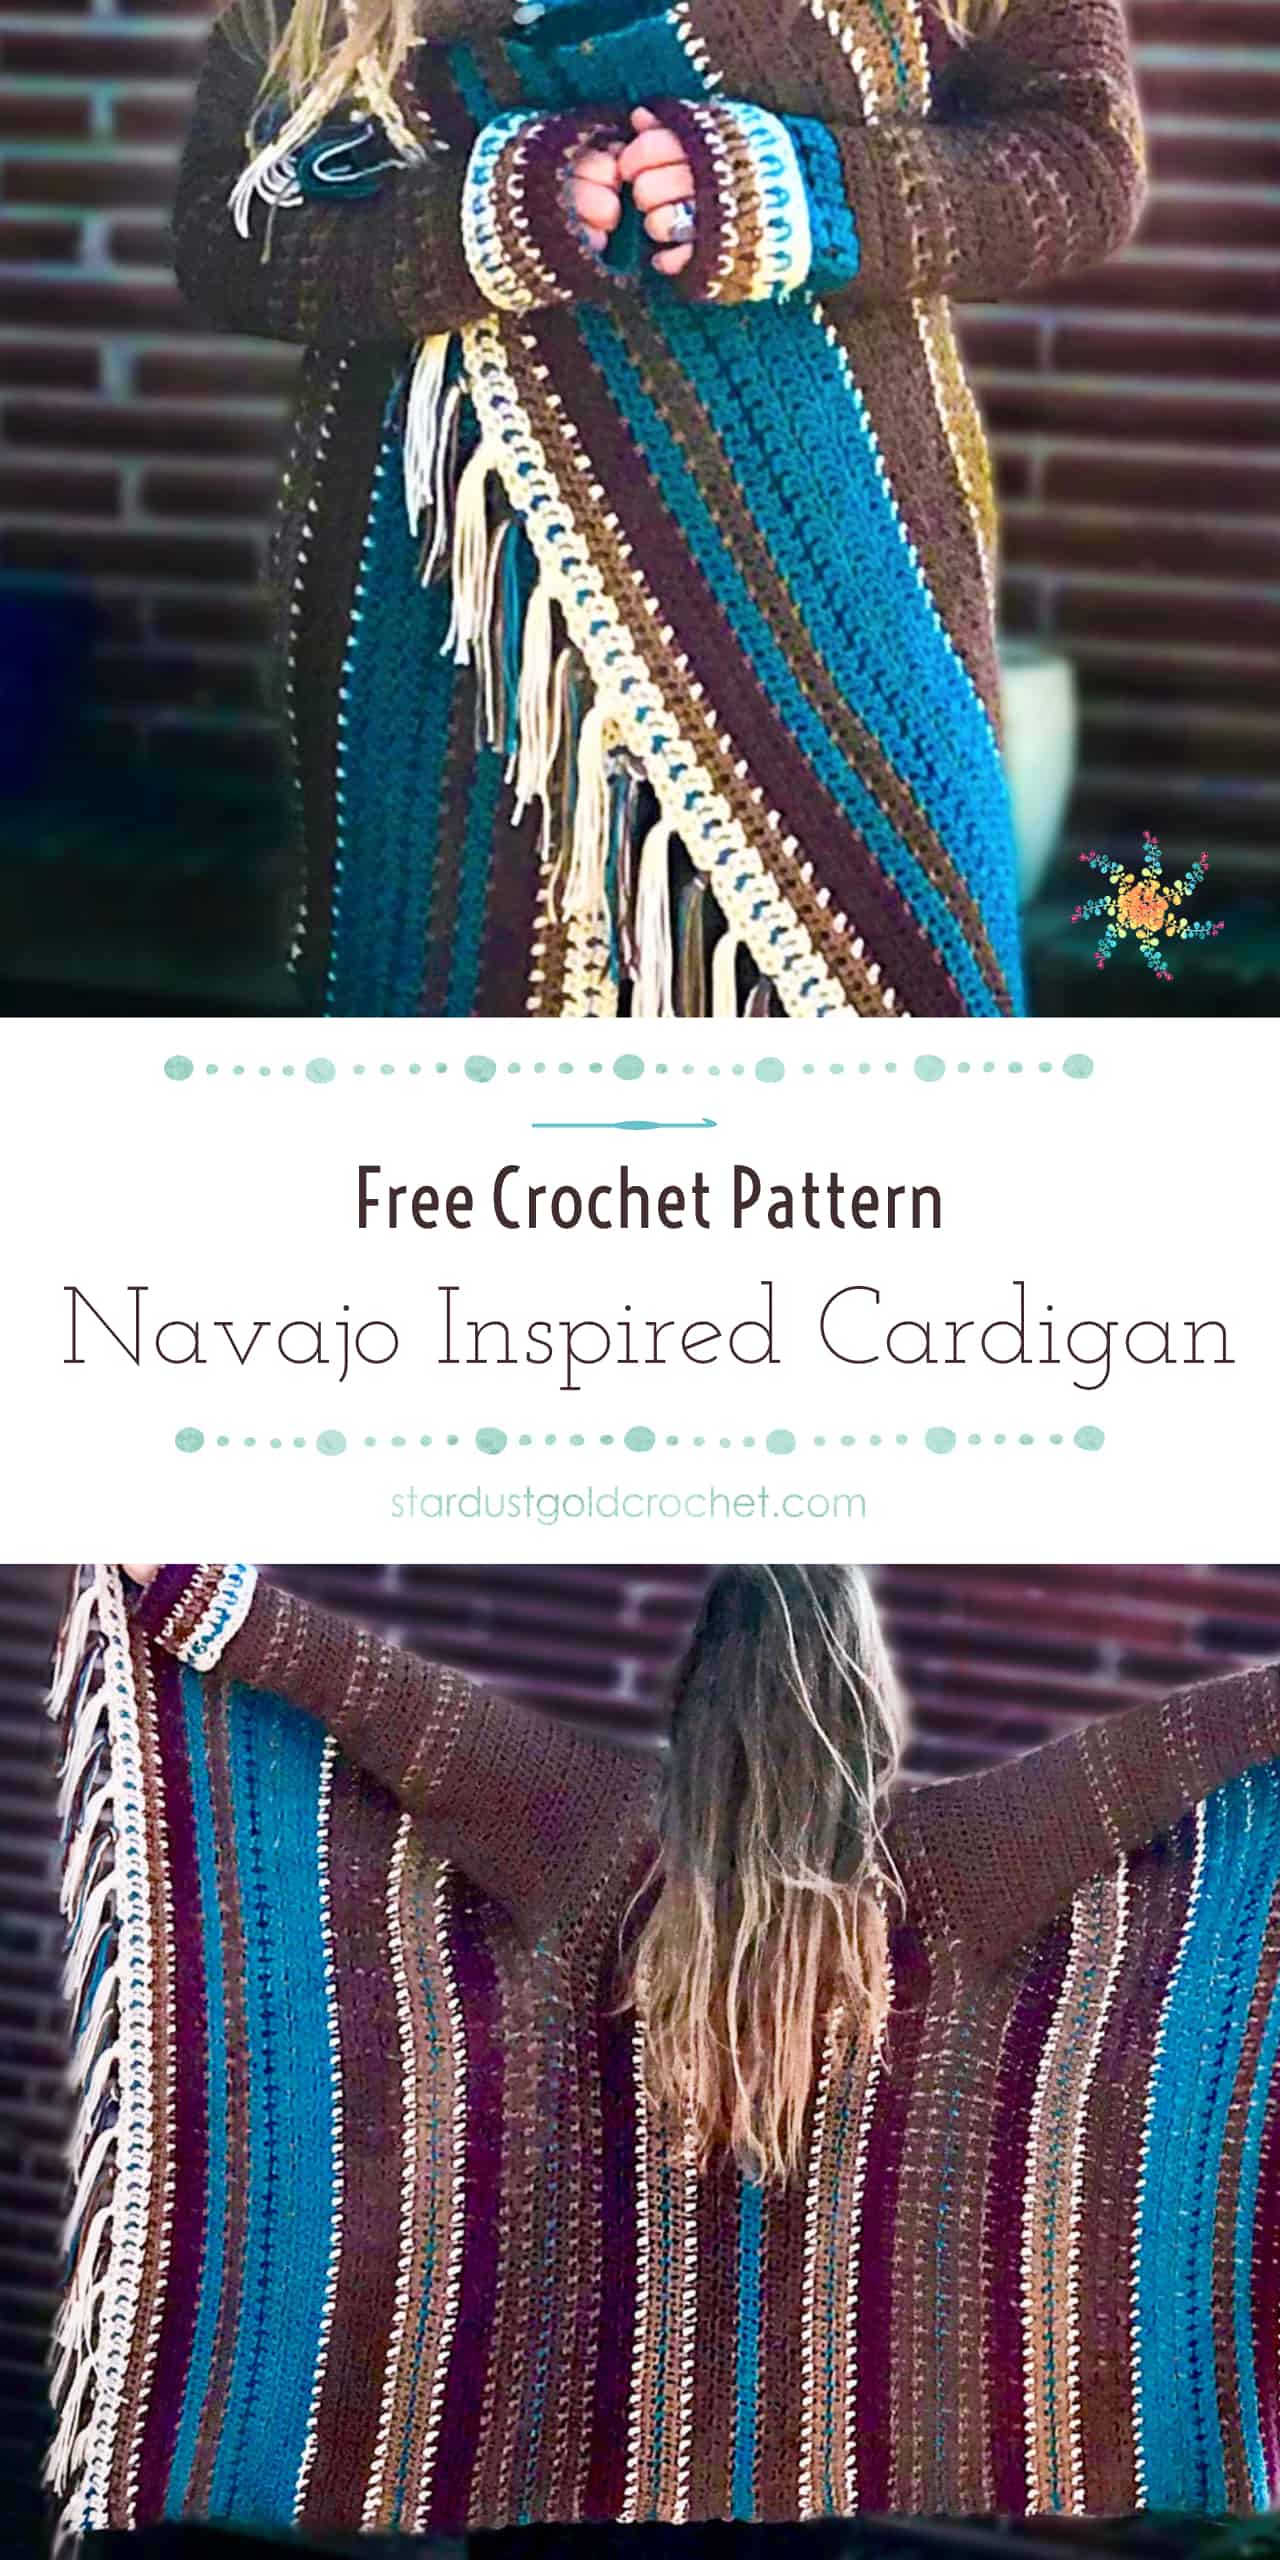
Navajo Inspired Blanket Cardigan
+ Skill Level
Beginner to Easy – this pattern contains only basic stitches. Piecing it together is easy and there is a full-color photo tutorial to help you.
Materials
- Suggested Yarn: All colors in pictured blanket poncho are Yarn Bee Soft Secret (6oz/170g – 300 yds/275m)
- Suggested Colors: C1 – Ivory C2 – Blue Teal C3 – Cocoa C4 – Cognac C5 – Burgundy
- Yardage needed: Pattern uses 2 full skeins of cocoa – with a little more of the third skein. You only need one skein of each of the other colors and you will have leftovers for those colors unless you choose to make it larger.
- Hook Size (s): 6mm (J) hook (main body), 5.5 mm (I) hook (sleeves)
- Scissors
- Darning Needle
- Stitch marker(s)
- 2 Buttons (1.5 – 2”)
Abbreviations:
| C(1-5) | color 1…5 |
| st(s) | st(s) |
| R | row |
| ch | chain |
| sc | single crochet |
| fsc | foundation single crochet |
| dc | double crochet |
| sk | skip |
| st | stitch |
| *…* | *crochet instructions between asterisk* repeated as many times as indicated |
Stitch Guide:
sc – single crochet – insert hook in indicated st, yo, draw up a loop, yo draw through both loops on hook.
dc – double crochet – yo, insert hook in indicated st, yo, draw up a loop, *yo, draw through 2 loops* – repeat from * to * until you have one loop left on the hook.
dc3tog – double crochet 3 together
(decreases by 2)
yo, insert hook in indicated st, yo, draw up a loop, yo, draw through 2 loops. *yo, insert hook in next st, yo, draw up a loop, yo, draw through 2 loops* repeat from * to * one more time, yo, draw through all four loops on hook.
fsc – foundation single crochet
create a slip knot. ch 2, insert hook in 1st chain. yo, draw up a loop. ch 1, yo, draw through both loops on hook. (2nd st) insert hook in bottom two loops of ch 1. yo, draw up a loop, ch 1, yo, draw through both loops (2 fsc created).
Sizing
The stitch counts in this pattern is basically a one size fits most. It is made to fit a woman size 14 – 16, but will fit smaller sizes too as oversized. Max measurements it will fit before modifying (if you decide to modify it): Bust – 41 – 45” / Waist: 36” – 40” / Hips: 45” – 50” / Biceps: 10” – 14”
How to modify size:
Make it longer or shorter:
Reduce or increase the number of stitches in the foundation chain – maintain an odd number of sts, i.e. (101, 99, 97).
To reduce the bust and hip circumference:
I recommend eliminating Rows 25, 26, 70, 80, 89 & 90. : That will reduce it by around 4”.
To increase bust & hip circumference:
I recommend adding one sc and one dc row after the same rows above mentioned above.
To reduce or increase armhole size:
Instructions are within the pattern. Making modifications to length will make stitch counts below inaccurate.
- All single crochet rows and double crochet rows are worked the exact same throughout the entire pattern unless otherwise indicated (as for armhole rows). You can find those under “special stitches” below.
- The first stitch of the single crochet rows are worked into the same space as the ch 1 at the beginning of each row.
- The first stitch of the double crochet rows are worked into the first ch sp of each previous row (unless indicated otherwise)
- Stitch count is 101 throughout
entire main body. - I can tell you that I accidentally added and skipped stitches a few times while working on this pattern, so make sure to count your stitches occasionally. I find counting them on the dc rows is easiest. This pattern is very forgiving though, so don’t fret if your counts are not perfect, just make sure to increase or decrease at the end of the double crochet rows to fix it. If you find your single crochet row stitches off, – just make sure you end your last stitch with
a single crochet until you get back to 101. - Ch 2’s count as
a st itch and - Ch1’s do not count as st and not counted in stitch count.
Notes:
When Crystal was testing this pattern, her gauge was tighter than mine, and her cardigan ended up being shorter compared to mine. I worked very loosely for this pattern. So make sure the gauge matches or you will need to modify your size or increase your needle size to make it match. The cardigan is meant to be loose and flow, but ultimately, this is yours to do with what you please ;). lol.
Special Stitches
This pattern consists of repeating rows of a single crochet pattern, and a double crochet pattern. Those stitch patterns are laid out below. The table below will list either “sc” or “dc,” which means to work those rows using the stitch patterns below.
Single crochet rows (listed as “sc” in the pattern):
*sc 1, ch 1, sk 1* – repeat *…* to end of row. sc in last st of the row, ch 2, turn.
Double crochet rows (listed as “dc” in the pattern):
*dc 1 in ch 1 sp, dc 1* – repeat *…* to end of row. ch 1, turn.
Pattern:
Main Body (6 mm, J Hook):
R1: C1 – fsc 101, ch 1, turn.
R2: C1 – sc 1, ch 2, sk 2, sc 1 in each fsc to end.
using the special stitch patterns mentioned above, complete the following rows – remember that “sc” and “dc” below refers to the stitch patterns above in the special stitches, here and throughout – unless otherwise indicated.
| R3 | sc | C2 |
| R4 | dc | C1 |
| R5 | sc | C3 |
| R6 | dc | C4 |
| R7 | sc | C1 |
| R8 | dc | C5 |
| R9 | sc | C5 |
| R10 | dc | C5 |
| R11 | sc | C4 |
| R12 | dc | C2 |
| R13 | sc | C4 |
| R14 | dc | C3 |
| R15 | sc | C4 |
| R16 | dc | C2 |
| R17 | sc | C5 |
| R18 | dc | C2 |
| R19 | sc | C4 |
| R20 | dc | C2 |
| R21 | sc | C2 |
| R22 | dc | C2 |
| R23 | sc | C1 |
| R24 | dc | C3 |
| R25 | sc | C3 |
| R26 | dc | C3 |
| R27 | sc | C3 |
| R28 | dc | C3 |
| R29 | sc | C1 |
| R30 | dc | C4 |
| R31 | sc | C2 |
| R32 | dc | C4 |
| R33 | sc | C1 |
| R34 | dc | C5 |
| R35 | sc | C5 |
| R36 | dc | C5 |
| R37 | sc | C4 |
| R38 | dc | C3 |
| R39 | sc | C4 |
| R40 | dc | C3 |
R41 (armhole row) C2:
Lay piece flat with buttonhole on your left side. Measure 5” down the edge. Place st marker. Mine was 14 sts and I placed my st marker in the 15th st.

Measure from stitch marker down 8.5” – 9.0” (or however large you would like your armhole) Place stitch marker. My armhole was 26 sts including the blue st marker below.

Work the sc pattern until you reach your first st marker (mine was 63 sts). Count the number of sts in your armhole. Chain that number of sts (mine was 26).


Continue working the sc pattern start working in the 27th st (or where you placed your st marker).
| R42 | dc | C3 |
| R43 | sc | C4 |
| R44 | dc | C3 |
| R45 | sc | C4 |
| R46 | dc | C5 |
| R47 | sc | C5 |
| R48 | dc | C5 |
| R49 | sc | C1 |
| R50 | dc | C4 |
| R51 | sc | C2 |
| R52 | dc | C4 |
| R53 | sc | C1 |
| R54 | dc | C3 |
| R55 | sc | C3 |
| R56 | dc | C3 |
| R57 | sc | C4 |
| R58 | dc | C2 |
| R59 | sc | C4 |
| R60 | dc | C3 |
| R61 | sc | C3 |
| R62 | dc | C3 |
| R63 | sc | C1 |
| R64 | dc | C4 |
| R65 | sc | C2 |
| R66 | dc | C4 |
| R67 | sc | C1 |
| R68 | dc | C5 |
| R69 | sc | C5 |
| R70 | dc | C5 |
| R71 | sc | C4 |
| R72 | dc | C3 |
| R73 | sc | C4 |
| R74 | dc | C3 |
R75 (armhole row) C2:
Repeat instructions for the previous armhole, using the same stitch counts. I am wording it like this because yours may be different than mine if you modified the size. Otherwise, use my recommended counts.
| R76 | dc | C3 |
| R77 | sc | C4 |
| R78 | dc | C3 |
| R79 | sc | C4 |
| R80 | dc | C5 |
| R81 | sc | C5 |
| R82 | dc | C5 |
| R83 | sc | C1 |
| R84 | dc | C4 |
| R85 | sc | C2 |
| R86 | dc | C4 |
| R87 | sc | C1 |
| R88 | dc | C3 |
| R89 | sc | C3 |
| R90 | dc | C3 |
| R91 | sc | C3 |
| R92 | dc | C3 |
| R93 | sc | C1 |
| R94 | dc | C2 |
| R95 | sc | C2 |
| R96 | dc | C2 |
| R97 | sc | C4 |
| R98 | dc | C2 |
| R99 | sc | C5 |
| R100 | dc | C2 |
| R101 | sc | C4 |
| R102 | dc | C3 |
| R103 | sc | C4 |
| R104 | dc | C2 |
| R105 | sc | C4 |
| R106 | dc | C5 |
| R107 | sc | C5 |
| R108 | dc | C5 |
| R109 | sc | C1 |
| R110 | dc | C4 |
| R111 | sc | C3 |
| R112 | dc | C1 |
| R113 | sc | C2 |
R114:
with C1 – ch 2, dc in ch sp, ch 2, sk 2, dc remainder of row. Cut, tie, and weave in all tails.
Sleeves (make 2):
If you want to modify the width or length of the sleeves, you can simply reduce the starting fsc around the wrist – keep the sts an odd number to maintain the pattern – however, modifying it will change st counts below. Make sure your stitch count on row 56 matches the number of sts surrounding your armhole for sewing together.
Hook: I-9 (5.5mm)
R1: C1 – fsc 35, ch 1.
R2: sc 35 (this row is a regular single crochet row, not the sc special stitch pattern).
complete the following rows using the “sc” and “dc” stitch pattern from special stitches – stitch counts are in the last column
| R3 | sc | C2 | (35) | |
| R4 | dc | C1 | (35) | |
| R5 | sc | C3 | (35) | |
| R6 | dc | C4 | (35) | |
| R7 | sc | C1 | (35) | |
| R8 | dc | C5 | (35) | |
| R9 | sc | C5 | (35) | |
| R10 | dc | C5 | (35) | |
| R11 | sc | C4 | (35) | |
| R12 | dc | C2 | (35) | |
| R13 | sc | C4 | (35) | |
| R14 | dc | C3 | (35) | |
| R15 | sc | C4 | (35) | |
| R16 | dc | C2 | (35) | |
| R17 | sc | C3 | (35) | |
| R18 | dc | C2 | (35) | |
| R19 | sc | C3 | (35) | |
| R20 | dc | C3 | (35) | |
| R21 | sc | C3 | (35) | |
| R22 | dc | C3 | (35) | |
| R23 | sc | C4 | (35) | |
| R24 | dc | C3 | (35) | |
| R25 | sc | C4 | (35) |
note: For the following rows you’ll be making increases on the dc rows only as indicated in the table – this will add 2 sts to each dc row, except the very last row, which will add an additional dc. To make these increases, make one extra dc at the beginning and one extra dc in the last st of each dc row.
complete the following rows using the “sc” and “dc” stitch pattern from special stitches.
| R26 | dc | C3 | (37) | inc | |
| R27 | sc | C3 | (37) | ||
| R28 | dc | C3 | (39) | inc | |
| R29 | sc | C3 | (39) | ||
| R30 | dc | C3 | (41) | inc | |
| R31 | sc | C4 | (41) | ||
| R32 | dc | C3 | (43) | inc | |
| R33 | sc | C4 | (43) | ||
| R34 | dc | C3 | (45) | inc | |
| R35 | sc | C3 | (45) | ||
| R36 | dc | C3 | (47) | inc | |
| R37 | sc | C3 | (47) | ||
| R38 | dc | C3 | (49) | inc | |
| R39 | sc | C4 | (49) | ||
| R40 | dc | C3 | (51) | inc | |
| R41 | sc | C4 | (51) | ||
| R42 | dc | C3 | (53) | inc | |
| R43 | sc | C3 | (53) |
Notes for Rows 44 & Rows 45 – 56:
R44 – you will complete as normal, however, you will add one extra dc in the last st – giving you a stitch count of 56 – this count should match the number of stitches surrounding your armhole. If you modified the armhole – your stitch counts will be different than what is below. Just make sure your final row matches the number of sts of your armhole.
R’s 45–56 – the extra stitch will make the single row pattern shift a bit. please complete the pattern and do 1 sc at the end of the row. Because the sc row pattern is shifted, the dc row will begin in the first sc from previous row, then into the ch sp. for dc rows – continue working 1 dc in each sc from previous row and 1 dc into each ch sp from prev row.
| R44 | dc | C3 | (56) | inc(3) | |
| R45 | sc | C3 | (56) | ||
| R46 | dc | C3 | (56) | ||
| R47 | sc | C3 | (56) | ||
| R48 | dc | C3 | (56) | ||
| R49 | sc | C3 | (56) | ||
| R50 | dc | C3 | (56) | ||
| R51 | sc | C3 | (56) | ||
| R52 | dc | C3 | (56) | ||
| R53 | sc | C3 | (56) | ||
| R54 | dc | C3 | (56) | ||
| R55 | sc | C3 | (56) | ||
| R56 | dc | C3 | (56) |
finished with arms. –
cut, tie, and weave in all tails –
Collar:
After working this pattern, I realized it was a little loose on top, so I decided to add a collar of decrease stitches on the backside to draw it all together. Here is how to add the collar. This is adjustable. You can make it tighter if need be or even taller if you’d like, using a fancy border too!
With WS facing you (the inside of the cardigan)…
Row 1: insert hook in top of the first dc row, ch 2. *dc3tog* (this means you work one dc over three sts)– see photo and stitch guide to help you work this stitch. Of course, you can use or create any style of border you’d like :).

+ Assembly:
How to construct the cardigan and sew it together.

Ever wonder how big your blanket will be?
Piecing it Together:
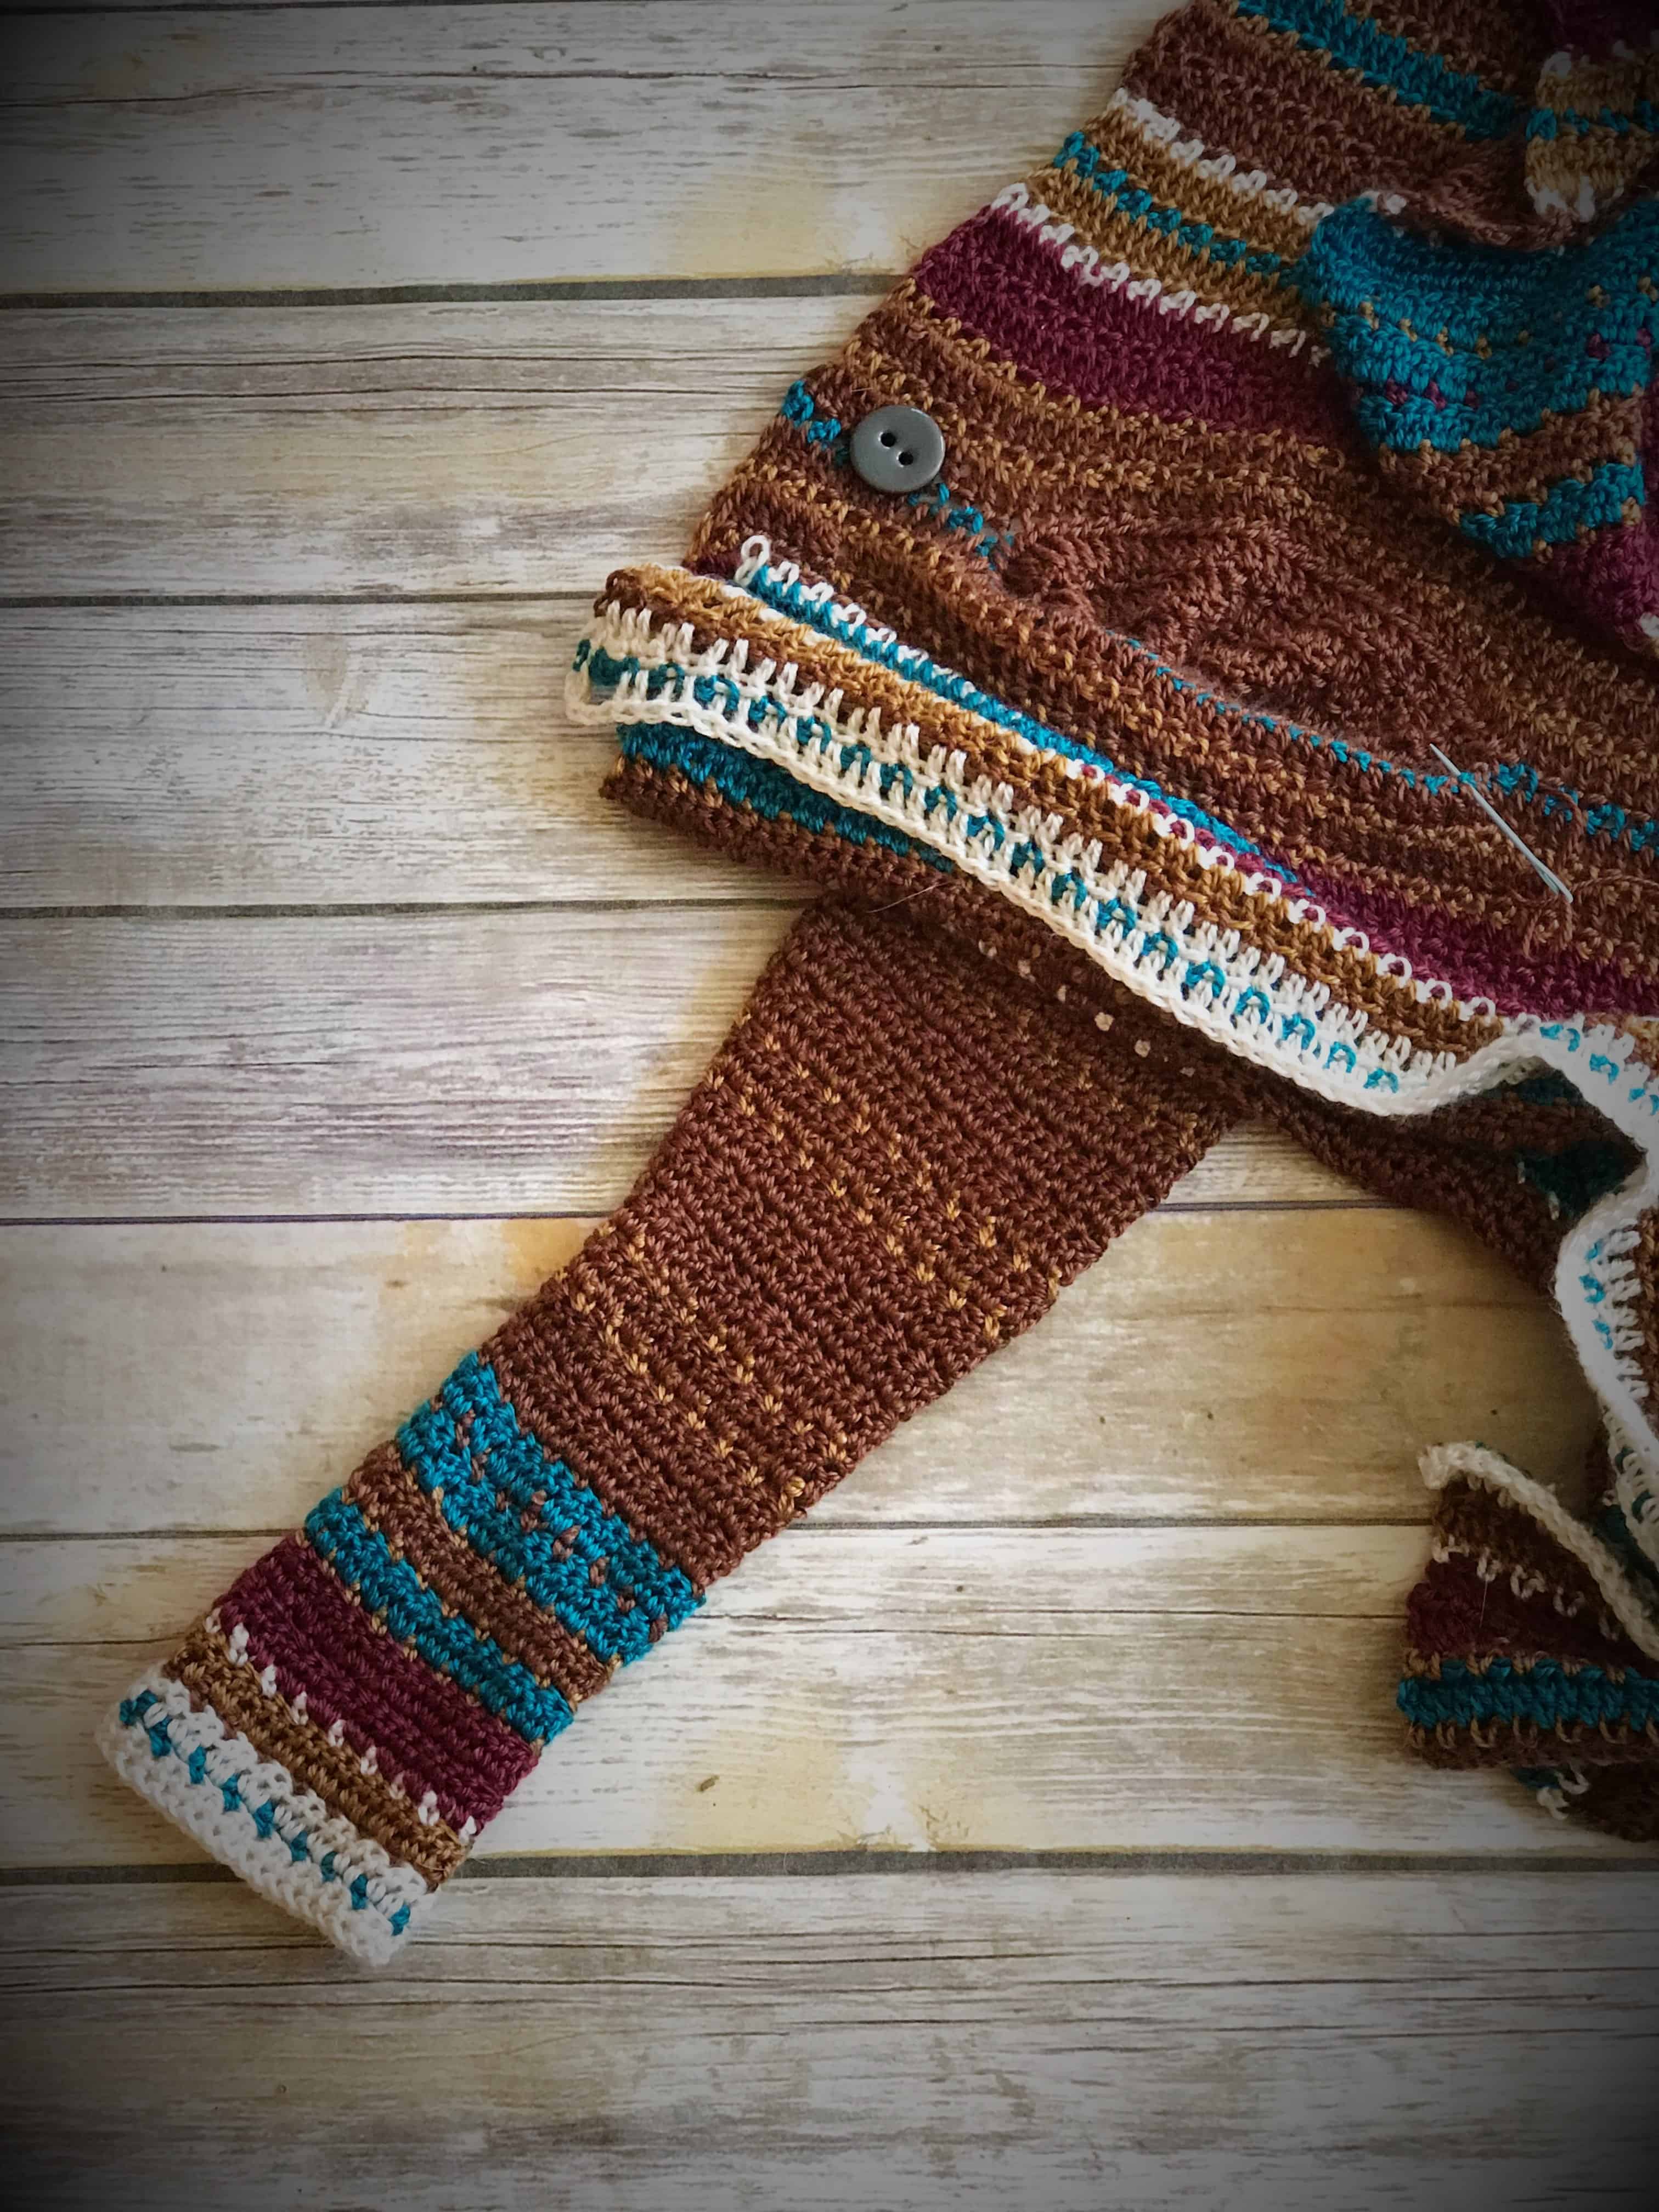
Arms
The “wrong” side looks likes this:

The “right” side (outside) looks like this:

With the right side facing you…

use the dark brown to whip the main part of the sleeves together, and white to do the cuff.
Use white to sew the bottom portion of the sleeve.

Sewing the arms to the body
Whipstitch arms to the body. Arms will be right side out when you insert them into the armhole. Align the seam of the arm, to the bottom of the armhole. Stitch through all four loops (2 top loops of the arm, 2 top loops of the armhole as pictured below).


Adding the tassels
For the tassels, I used varying rows of all white and a mix of all five colors. Measure out pieces in 12” strips using 5 strands. For the white, use 5 strands of white. For the mixed, use 5 strands, one of each color. Fold them in half. Insert hook into where you will create the tassel. Lay the center of the strands over the hook and wrap around the hook as best you can. pull through halfway. Insert your fingers into the loop and draw through all the strands pulling it tight.

I spaced them as pictured below – inserting into the bottom-most space, skipping one of the blue dot, and inserting into the next. Alternating colored strands with white strands.

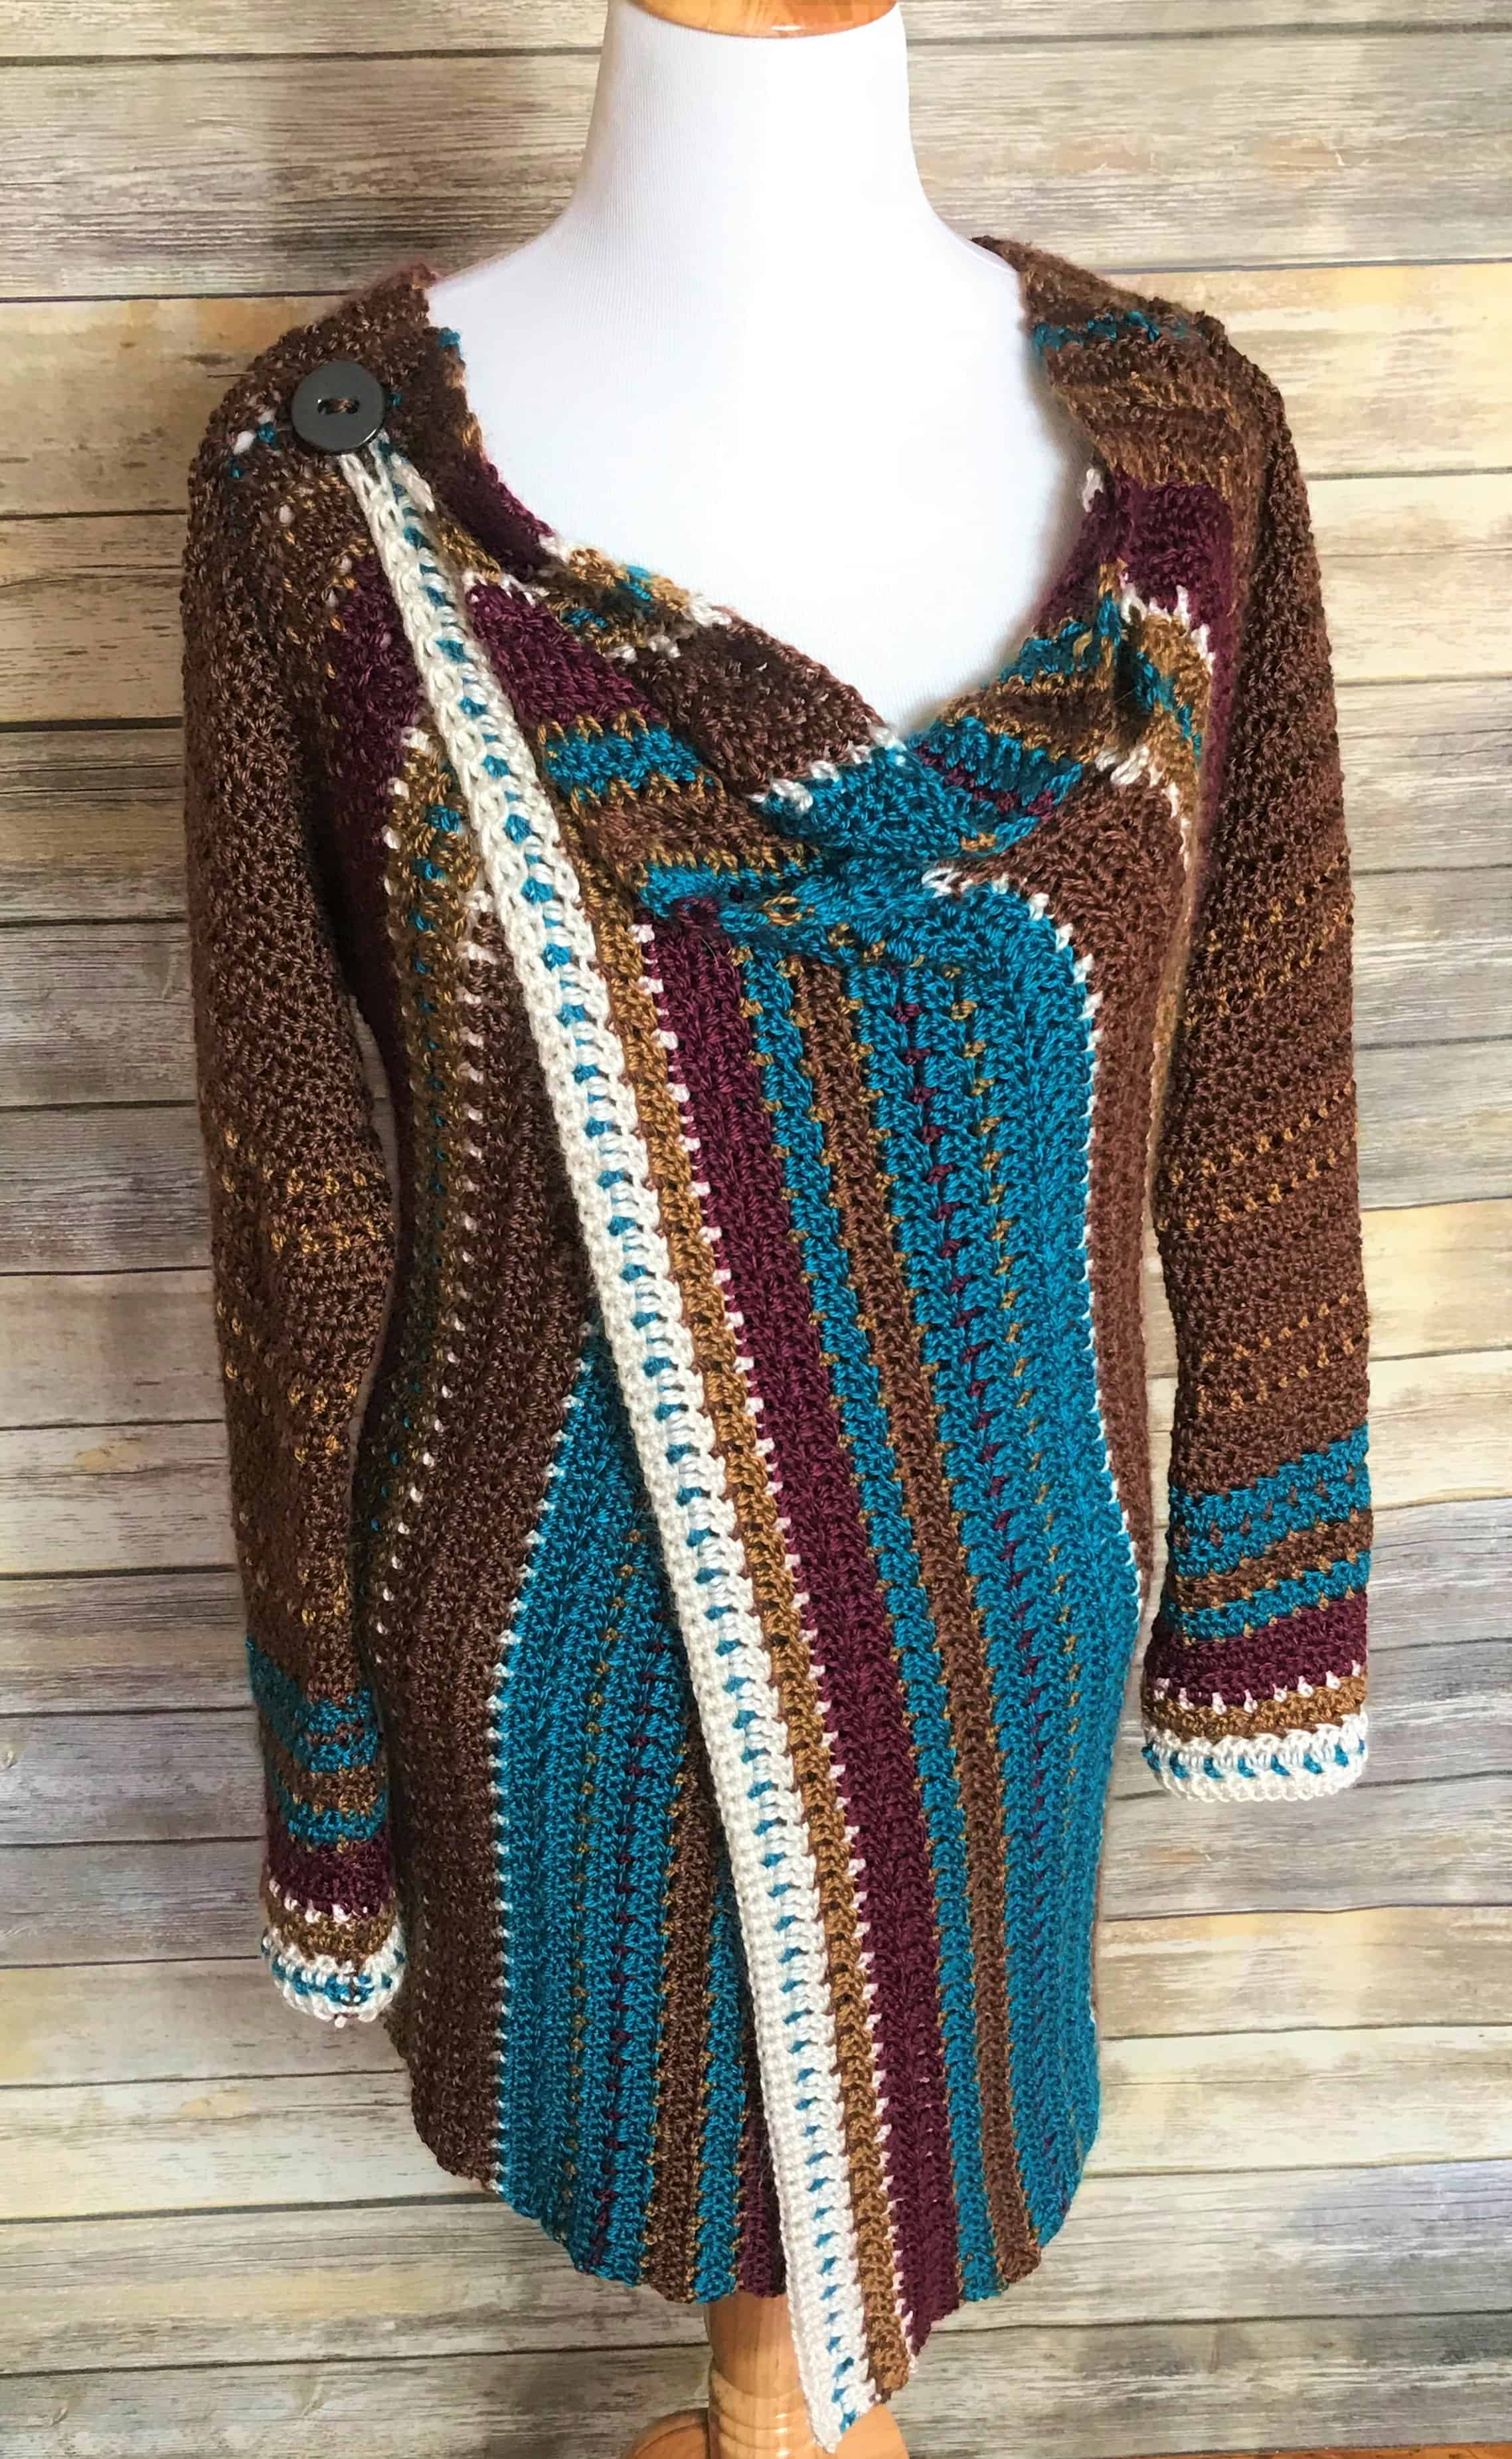
Adding the buttons
Button placement is your preference on how you’d like your cardigan to lay. I place my outside button on my right shoulder. The inside button is on the inside left shoulder (not a mirror image, I mean right and left as if I am wearing it, not looking at it).
Space button about an inch from the top of armhole as pictured here:

Congratulations! You’re finished!
PDF’S are available on Etsy & Ravelry – click photos to take you there.
Autumn Harvest Blog Hop
Hi friends! By now, I’m sure you know to do everything! Get the Navajo Cardigan PDF here or click the image below.

Also, the sleeves are fairly long. I like long sleeves, and the cuff is able to fold up nicely too. If you want shorter sleeves, I recommend removing rows closest to the top of the sleeve. There are more detailed instructions on how to do this inside the pattern :).
I hope you enjoy this pattern! Please tag me or make a project so I can see what lovely colors you all come up with! <3


It will not let me put my email in for the Navajo blanket sweater please help
Still not working, still sane message. As I’m not the only one. There must be a technical issue somewhere that’s allowing us to enter our email address but then errors…might be as already subscribed. Nothing works.
I am really excited to make this! I just saw the pattern, so I need to get the yarn, but this is essentially the exact same as a cardigan I bought in the past that was my absolute favorite. I always said it looked like a blanket with sleeves! Now, since that one has been lost to the annals of time, I can make another, but with my own colors!
👋 everything I try to get today’s Navajo sweater it says so.ething went wrong. Please helpDebbie
Where do we find the gauge? I really want to make this and bought all of the yarn already
Made this with similar colors, as I had most of them in my stash. Added a hood instead of a collar. So many compliments.
Do you have an idea on what the gauge should be? Wanting to make this for my sister’s birthday
I really like this item. Is there a way to make it without the sleeves, just as a blanket?Thanks.
Same. I would love to make this as a blanket for my mother.
Hi, I’m making this pattern but with a #6 bulky yarn could you tell me how far in inches from the outside do you put the arm holes , since my row count is way off, thank you! It’s a great pattern! Very excited about it
I’m just now seeing this. Are you still having trouble?
You say gauge should match but don’t mention it, also what size is the wool, I have to substitute
Do you have gauge measurements? I saw a remark about making sure gauge matches but don’t see it listed.
I love this look, and want to get to it. Do you have any pictures that show the collar in more detail? I get that it’s just one row to pull that area together, but I can’t see it in these pictures.
I did find a more details picture, but how can I send it to you?
LOVE this pattern !
Thank you! So happy you like it 🙂
Thanks Daisy!
This is so pretty! I’m a sweater person. I’m going to save this pattern for later (currently have along queue of to-dos!). Every time I crochet a sweater for myself it doesn’t fit lol. Hopefully I’ll get this one right.
this looks perfect to wear here in the south, where it’s not too cold – I love the pattern and colors you chose!