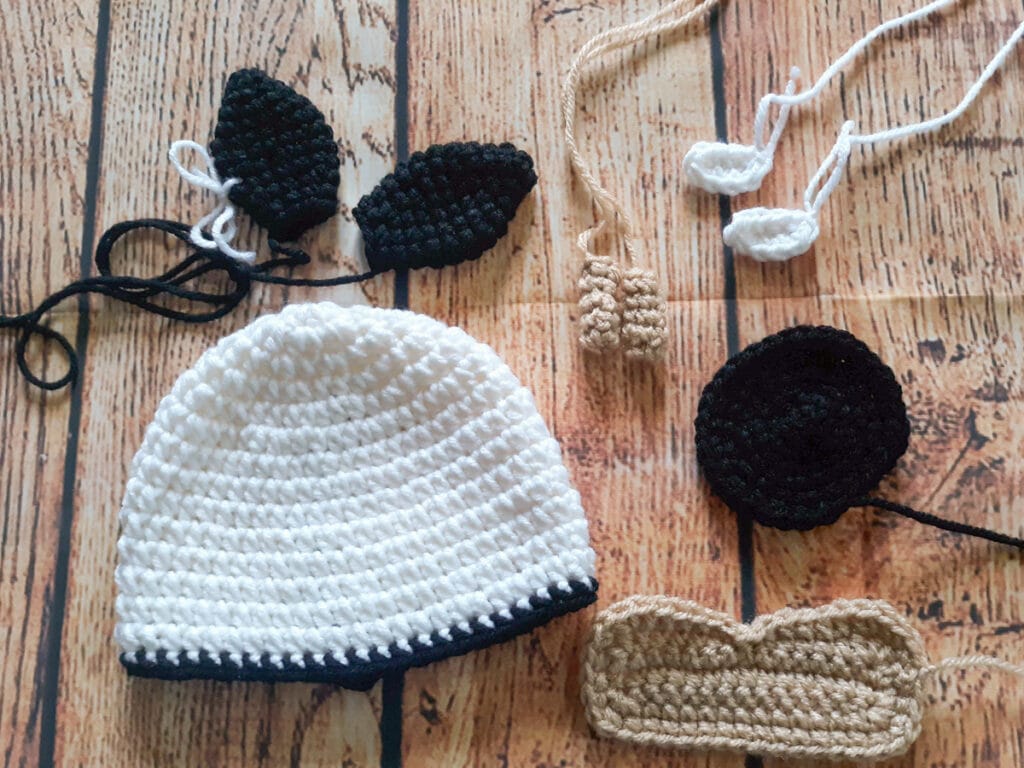
The Black & White Cow Crochet Beanie pattern is just about the cutest thing ever! This adorable baby beanie is premiering here today for the first time ever! Kat is kind enough to be a guest blogger for today’s FREE pattern in the Autumn Harvest Blog Hop! (Such a kind and GENEROUS) thing of her to do! Thank you Kat! Show her some love and head over to her Ravelry & Etsy stores to check out her other patterns.
Thanks for being here and thanks to Kat for guest blogging today! This adorable cow baby crochet beanie uses basic stitches and assembly making it a great beginner crochet project. This cute crochet project is written in two sizes – newborn & 3 – 6 months.
Grab the bundle!
You can find all 31 beautiful crochet patterns in PDF form in the bundle. This crochet bundle is available until August 31st and then it goes away!
Katherine Rombold-Tarr of Kat’s Krafty Crochet Korner

A little about me:
I’m 29. I’ve been crocheting since I was 11, so this year I have 18 years under my belt! I love to help people, so for 11 years I’ve worked as a CNA. I love cats , so I have 3 of them. My husband and I have 2 sons together. The 3 of them are the lights of my life Now I am lucky enough to run my own business where I design and sell crochet patterns, as well as my finished makes.
Black & White Crochet Cow Beanie Pattern
Materials Needed:
- H/5 MM hook for Newborn Size
- J/6 MM hook for 3-6 month Size
- Worsted (#4) Weight yarn – black, white, and light tan
- Yarn Needle
- [1] 3/4 inch black button for eye
- [1] 3/4 inch white button for eye
- [2] 1/2 inch black buttons for nose
Measurements:
Finished hat dimensions are for newborn up to 15″ circumference and 3-6 months up tp 17″ circumference. Newborn size should be 6.5″ wide by 5″ tall when flattened and unstretched. 3-6 month size should be 7.25″ wide by 5.5″ tall when flattened and unstretched.
Pattern Notes:
- This pattern is written in US terms.
- Beginning ch does not count as a st.
- Join the first stitch of the row.
Abbreviations & Terms – US Terminology:
| Ch | chain |
| St | stitch |
| Sl st | Slip stitch |
| Sc | Single crochet |
| Hdc | Half double crochet |
| Inc | Increase |
| Dec | Decrease |
| (to) | Repeat the instructions between (_) as many times indicated. |
| [ ] | Stich count |
| Join | Join |
| FO | Finish Off |
Black & White Crochet Cow Beanie Pattern
Let’s Begin!
If you have any trouble working the Black & White Cow Crochet Beanie Pattern, please feel free to contact Katherine here.
Hat:

With white yarn
R1: Ch 2, hdc 8 into 1st ch, join to 1st st, do not turn [8]
R2: Ch 1, hdc inc in each st around, join [16]
R3: Ch 1, (hdc inc, hdc) around, join [24]
R4: Ch 1, (hdc in 2 sts, hdc inc) around, join [32]
R5: Ch 1, (hdc inc, hdc in next 3 sts) around, join [40]
R6: Ch 1, (hdc in 4 sts, hdc inc) around, join [48]
R7: Ch 1, hdc in each st around, join [48]
R8-14: Repeat R7 (Your seam will travel diagonally a bit, but shouldn’t be too noticeable) [48]
R15: Change yarn to black. Ch 1, sc in each st around, join [48] FO.
Ears:

(Make two) With black yarn
R1: Ch 2, sc 4 into the 1st ch (do not join, continue in a spiral) [4]
R2: (Sc, inc) x2 [6]
R3: (Inc, sc) x3 [9]
R4: (Sc in 2 sts, inc) x3 [12]
R5: (Inc, sc in 3 sts) x3 [15]
R6 & 7: Sc around [15]
R8: (Dec, sc in 3 sts) x3 [12]
R9: Sc around [12]
R10: (Dec, sc in 2 sts) x3 [9]
R11: Sc around [9] Sl st in next st, FO. Leave a long tail for sewing ears to the hat. Inner Ear: (Make two) With white yarn Ch 5, sc in 2nd ch from the hook, sc in the next 2 sts, 3 sc in last st, turn your work to sc down the underside of the ch, sc in next 2 sts, inc in last ch, join to 1st st. FO, leaving a long tail for sewing.
Inner Ears: (Make two)

With white yarn
Ch 5, sc in 2nd ch from the hook, sc in the next 2 sts, 3 sc in last st, turn your work
to sc down the under side of the ch, sc in next 2 sts, inc in last ch, join to 1st st.
FO, leaving long tail for sewing.
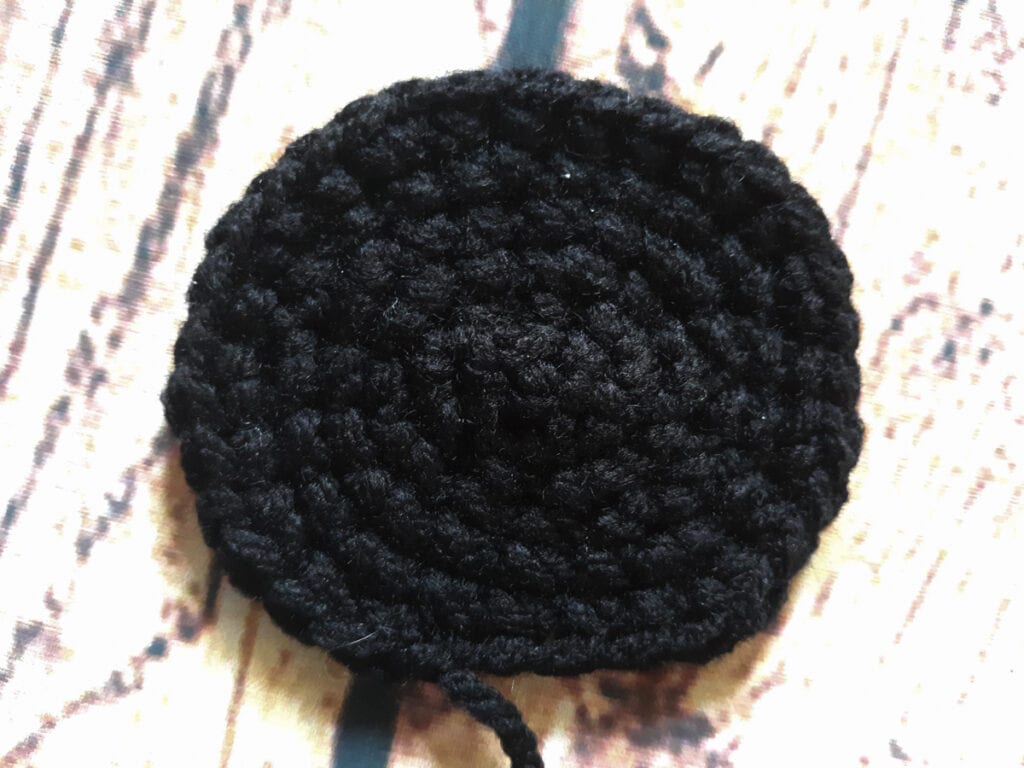
Eye Patch:

With black yarn
R1: Ch 3, sc in 2nd ch from the hook, sc 3 in the next ch, turn your work to sc in the underside of the ch, 2 sc in the next ch (do not join, continue working in a spiral) [6]
R2: (Sc in 2 sts, 3 sc in the next st) x2 [10]
R3: (Sc, inc) x5 [15]
R4: Sc in the next 3 sts, inc, sc in the next 2 sts, inc, sc in the next 4 sts, inc, sc in the next 2 sts, inc [19]
R5: (Sc in 3 sts, inc) x4, sc in next 2 sts, inc [24]
R6: Sc in the next 4 sts, (inc, sc) x4, sc in the next 3 sts, (inc, sc) x4, sc in the next st, sl st in next, FO. Leave a long tail for sewing.
Muzzle:

With tan yarn
R1: Ch 15, sc in 2nd ch from the hook, sc across, Turn [14]
R2 & 3: Ch 1, sc in each st across, turn [14]
R4: Ch 1, 3 hdc in the 1st st, hdc in the next st, sc in the next 4, sl st in the next 2, sc in the next 4, hdc in the next, 3 hdc in the last st, (turn your piece to work along the side), sc into the end of R2, 3 sc into the end of R1, (turn your piece to work along the beginng ch), sc 12 across the bottom, 3 sc in the last ch, (turn piece to work along the other side), sc in the end of R2, join to the 1st st of the round. [38]
R5: Ch 1, sc in the 1st st, sc inc in the next, hdc inc in the next, hdc in next 2 sts, sc in next 3 sts, sl st in next 2, sc in next 3, hdc in next 2, hdc inc in the next, sc inc in the next, sc in the next 3 sts, sc inc in next, sc in the next 14 sts, sc inc in the next, sc in the next 2 sts, join, FO, leave long tail for sewing and attaching the nose buttons [44]
Horns: (make Two):

With tan yarn
R1: Ch 2, sc 5 into the 1st ch, (do not turn, continue working in a spiral) [5]
R2 – 5: Sc around [5]
Sl st into the next st, FO, leave a long tail for sewing.
Finishing:

- Start by sewing in your ends on the hat.
- Sew the inner ear onto the ears (make sure not to sew through both sides of the ear)
- Flatten the hat to see where to place the ears best – I like to place mine between rows 5 and 6.
- Sew the horns to the hat just inside the ears – I like to place mine on row 4, then I like
to center the muzzle on the lower rows of the hat and sew it on.
- Finally, I place the eye patch just above the muzzle and on the right side of the hat.

Assembly Notes:
- When all these pieces are sewn down, I weave in all my ends for the ears and horns.
- I use the eye patch tail to sew the buttons on for both eyes, and then use the muzzle tail to sew on both nostrils.
- I place the eyes just on the inside of the middle 8 sts of the muzzle between rows 7 and 8.
- I place the nostrils at either end of rows 1 and 2 of the muzzle.
- Once the eyes and nostrils are sewn in place, I finish weaving in my ends, and we’re done
Enjoy your little one’s new hat.

Thanks so much for completing my pattern 🙂
If you have any questions, please feel free to ask! I always encourage you to add a project to Ravelry with your own pictures and interpretation.
Katherine Rombold-Tarr

Katherine Rombold-Tarr is a crochet designer and friend – you can find her on Facebook, Instagram & Etsy. Stop by and say hello!
Also, since I’m on IG, please use hasthtags #katskraftykorner and, for this pattern, #BlackNWhiteBabyCowHat as I’d love to see your makes on there as well!
Please do not duplicate or copy my pattern in any way. Give credit where credit is due, as always.
Thanks for being here!
Thanks to Kat for sharing her super cute pattern as a part of the Autumn Harvest Blog Hop! Kat has two more patterns coming up in the hop, but she is not a blogger – so she granted permission to share her beautiful patterns exclusively here.
Join the hop here – when the hop is over, the blog post will be turned into a round up.


flexoffers


love this Thank you