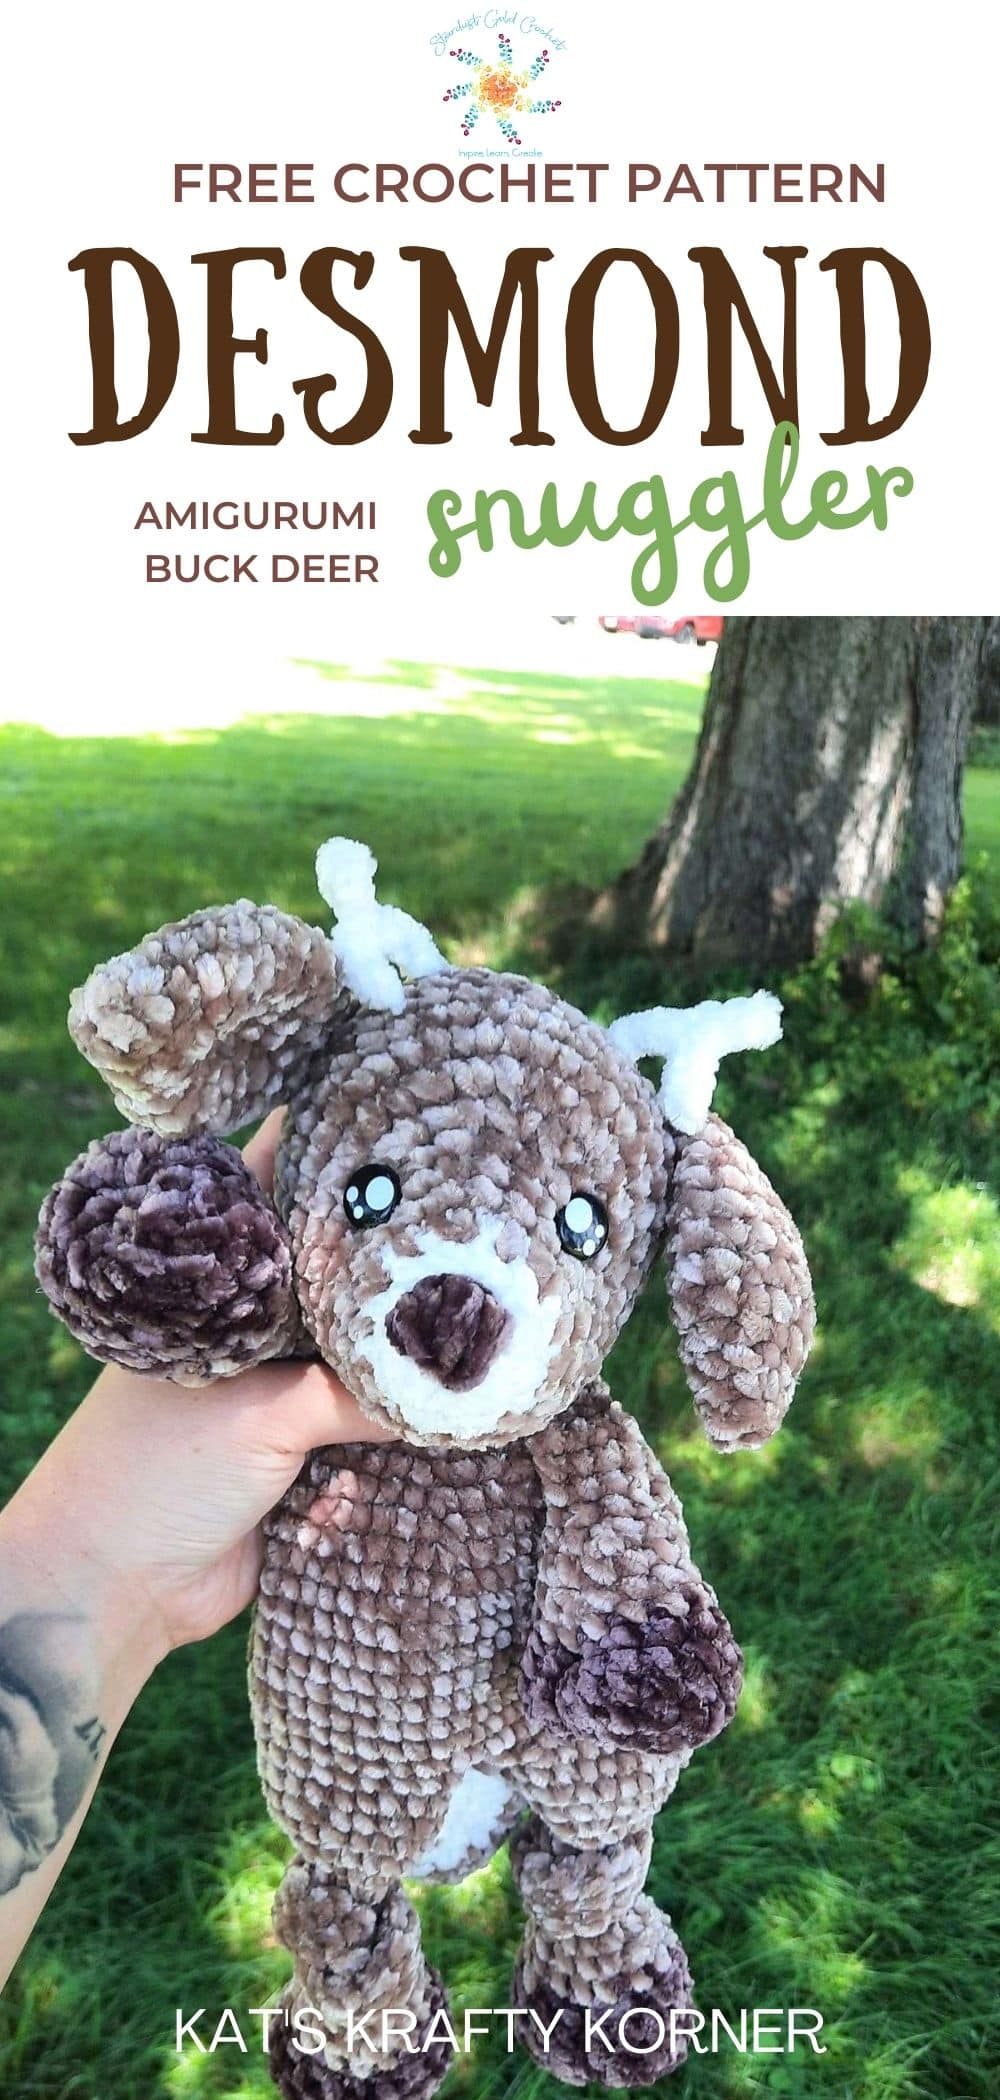
Desmond the Amigurumi Buck Deer Crochet Pattern is a never before released pattern! Kat is kind enough to be a guest blogger for today’s FREE pattern in the Autumn Harvest Blog Hop! (Such a kind and GENEROUS) thing of her to do! Thank you Kat! Show her some love and head over to her Ravelry & Etsy stores to check out her other patterns.
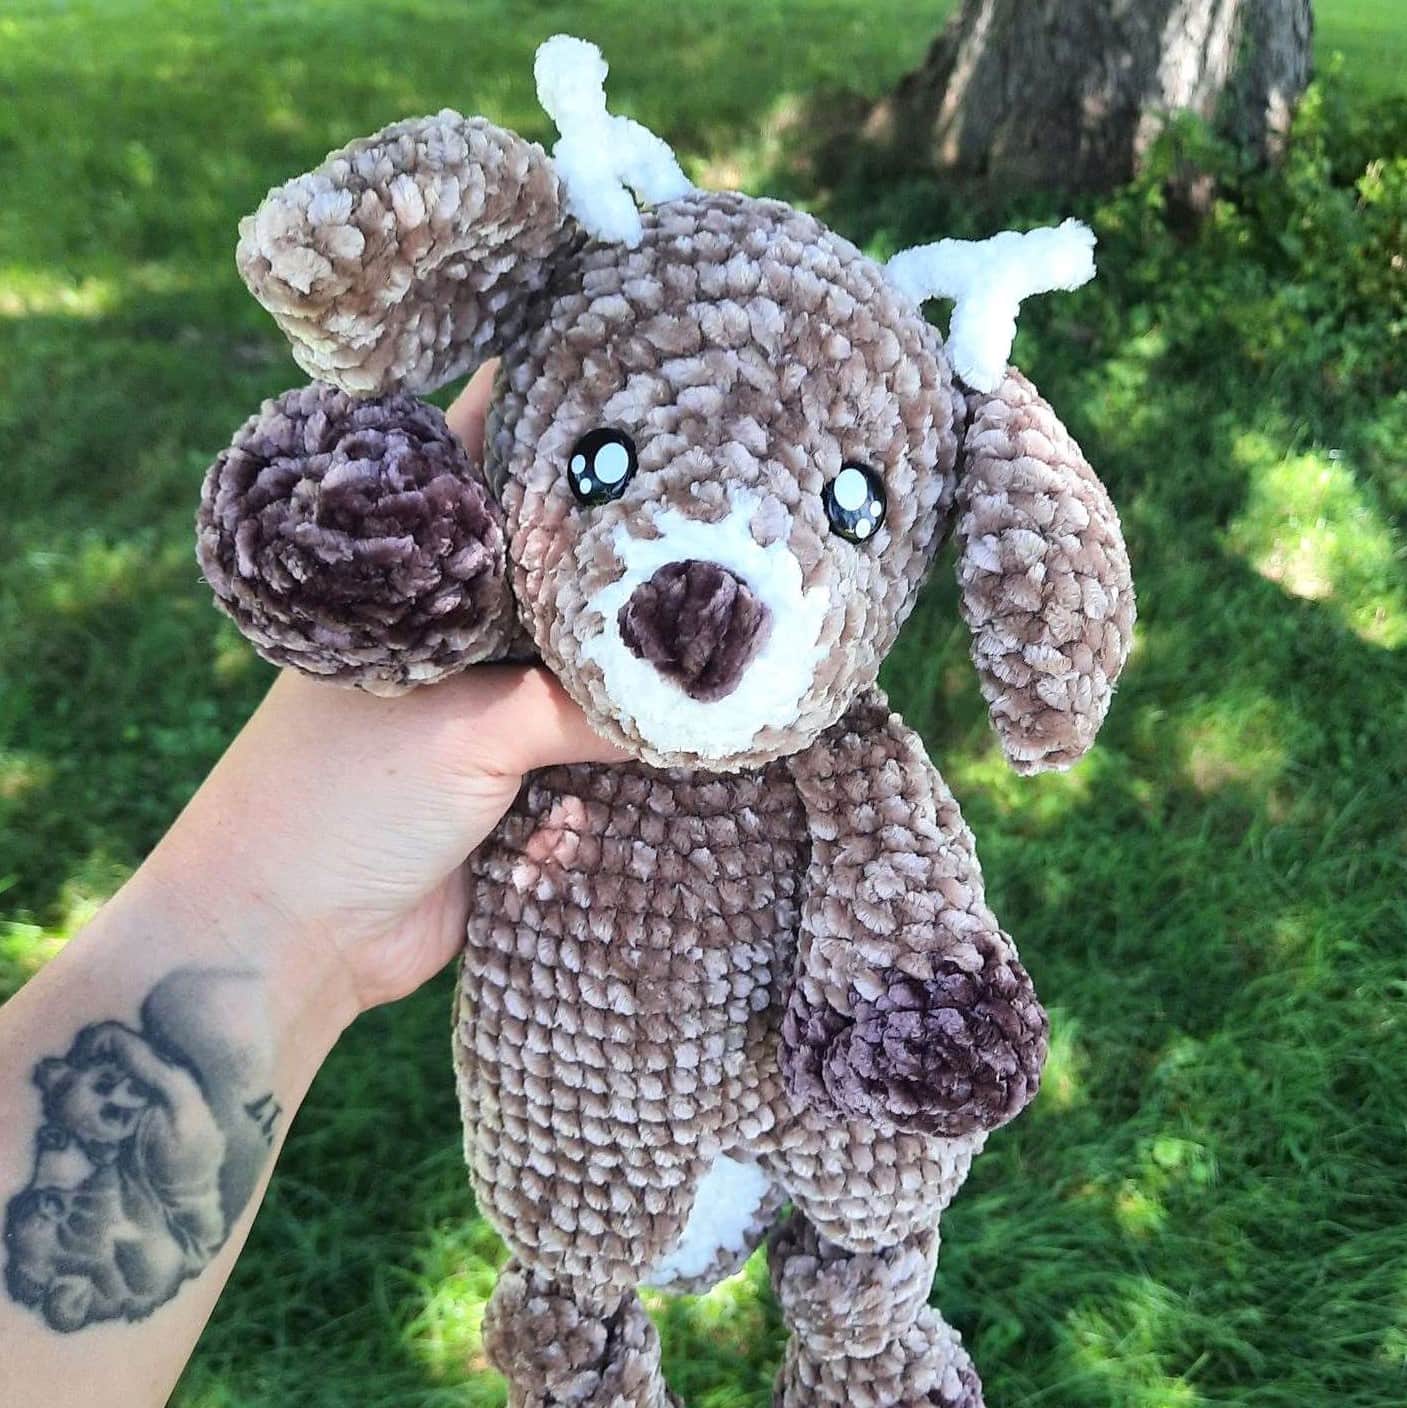
Thanks for being here and thanks to Kat for guest blogging today! This crochet snuggler is so cute, soft, and perfect for the nature lover in your family. It blends a little amigurumi and lovey to create a beautiful and lovely crochet deer snuggler.
Katherine Rombold-Tarr of Kat’s Krafty Crochet Korner
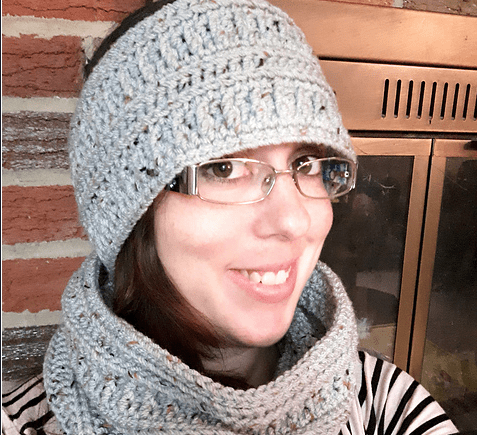
A little about me:
I’m 29. I’ve been crocheting since I was 11, so this year I have 18 years under my belt! I love to help people, so for 11 years I’ve worked as a CNA. I love cats , so I have 3 of them. My husband and I have 2 sons together. The 3 of them are the lights of my life Now I am lucky enough to run my own business where I design and sell crochet patterns, as well as my finished makes.
Desmond Buck Deer Snuggler Pattern
Materials:
- 6mm hook
- Worsted (#5) weight velvet yarn – 150 yards – white, dark brown, and tan
- (2) 16 mm safety eyes
- Polyfill – 5 oz
- Scissors
- Sewing needle
- Stitch Markers
Abbreviations & Terms – US Terminology:
| ch | chain |
| sc | single crochet |
| inc | increase – work 2 stitches in the same stitch |
| dec | decrease – single crochet 2 together |
| (W) | change to white |
| (T) | change to tan |
| R | round |
| st(s) | stitch(es) |
| * to * | repeat instructions between the * as directed |
| FO | finish off |
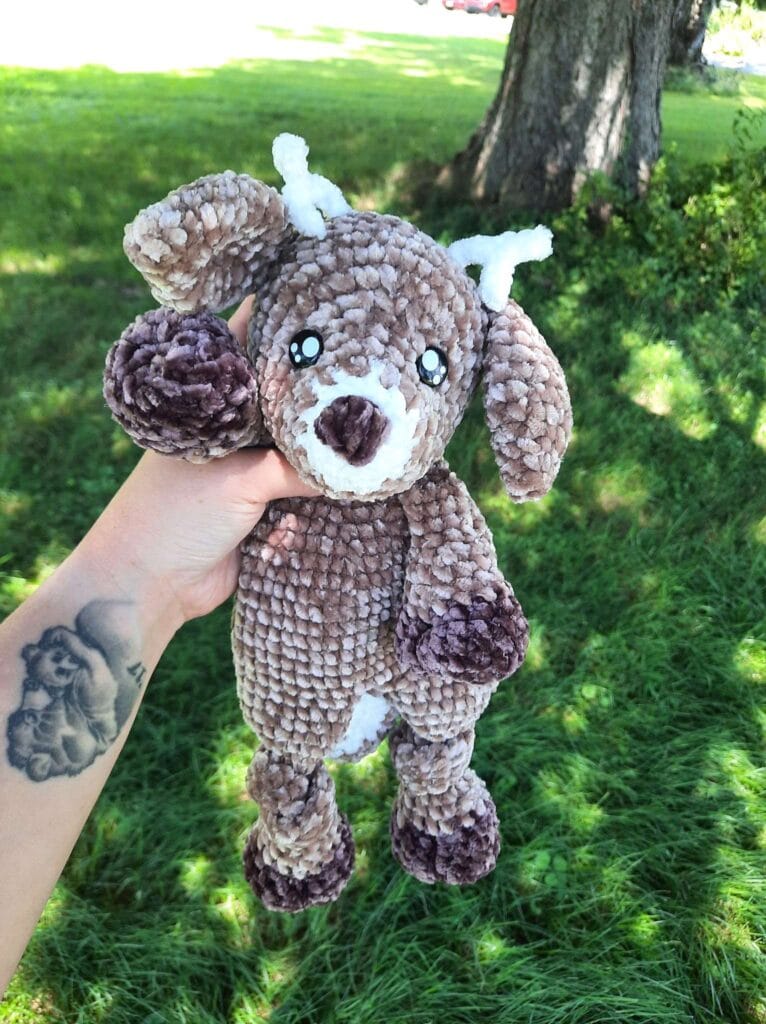
Desmond the Amigurumi Buck Deer Snuggler Pattern
Pattern Notes:
Measurements: This pattern creates a 14″ tall crocheted deer snuggler. You can use whatever hook size you prefer to achieve tight stitches, but this may effect your overall size.
Sizing: I use the yarn Under (YU) technique. This gives a slightly shorter single crochet. If you use the yarn Over (YO) technique, it may give you a slightly taller cow. YU stitches stack straighter on top of each other compared to YO stitches in the round, so if using YO instead, you may need to shift your arm, eye, and ear placements over by 1 stitch in each of their rows. (1 stitch over for arms, 1 for eyes, and 2 for ears) You will need to know graph work to frequently change color in the same row, for the tail.
- Worked in continuous rounds.
- Legs and body are all one piece.
- Arms and tail are crocheted to the body.
- Ears are crocheted to the head.
- Antlers and head are one piece.
- Nose gets embroidered on.
- Head gets sewn to the body.
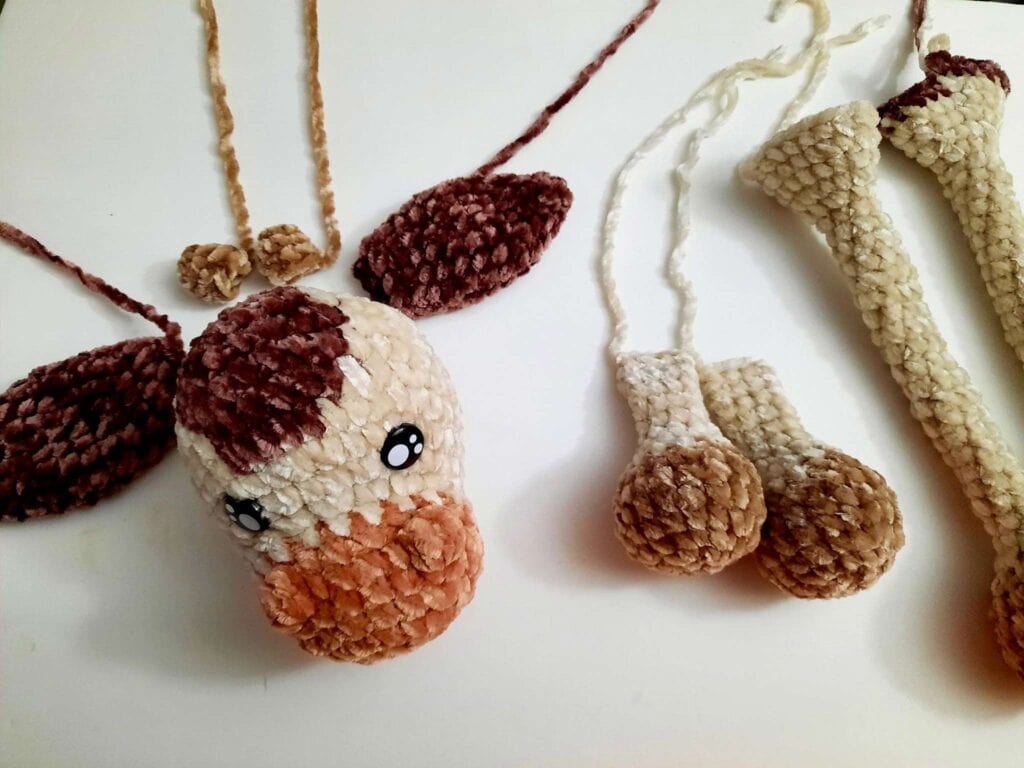
Ears (Make 2):
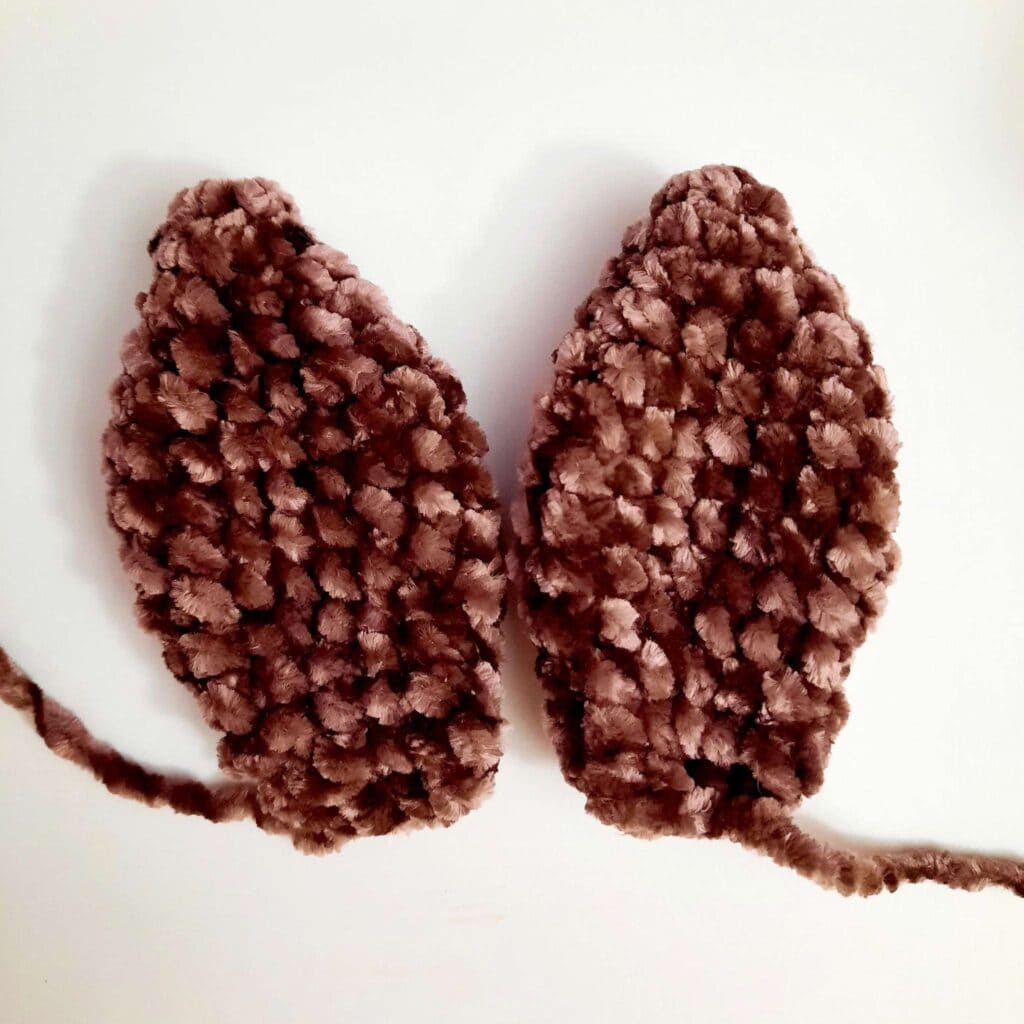
Use tan.
R1. Ch 2, sc 4 into 1st ch [4]
R2. *Inc, sc* x2 [6]
R3. *Inc, sc* x3 [9]
R4. *Sc 2, inc* x3 [12]
R5. *Sc 2, inc* x4 [16]
R6 – R9. Sc around [16]
R10. *Dec, sc 2* x4 [12]
R11. Sc around [12]
R12. *Dec, sc* x4 [8]
Flatten the opening.
R13. Sc 3 through both layers of your flat top. [3]
FO. Leave short tails. You will crochet these on to head.
Please take photos of the ears and arms
arms (Make 2):
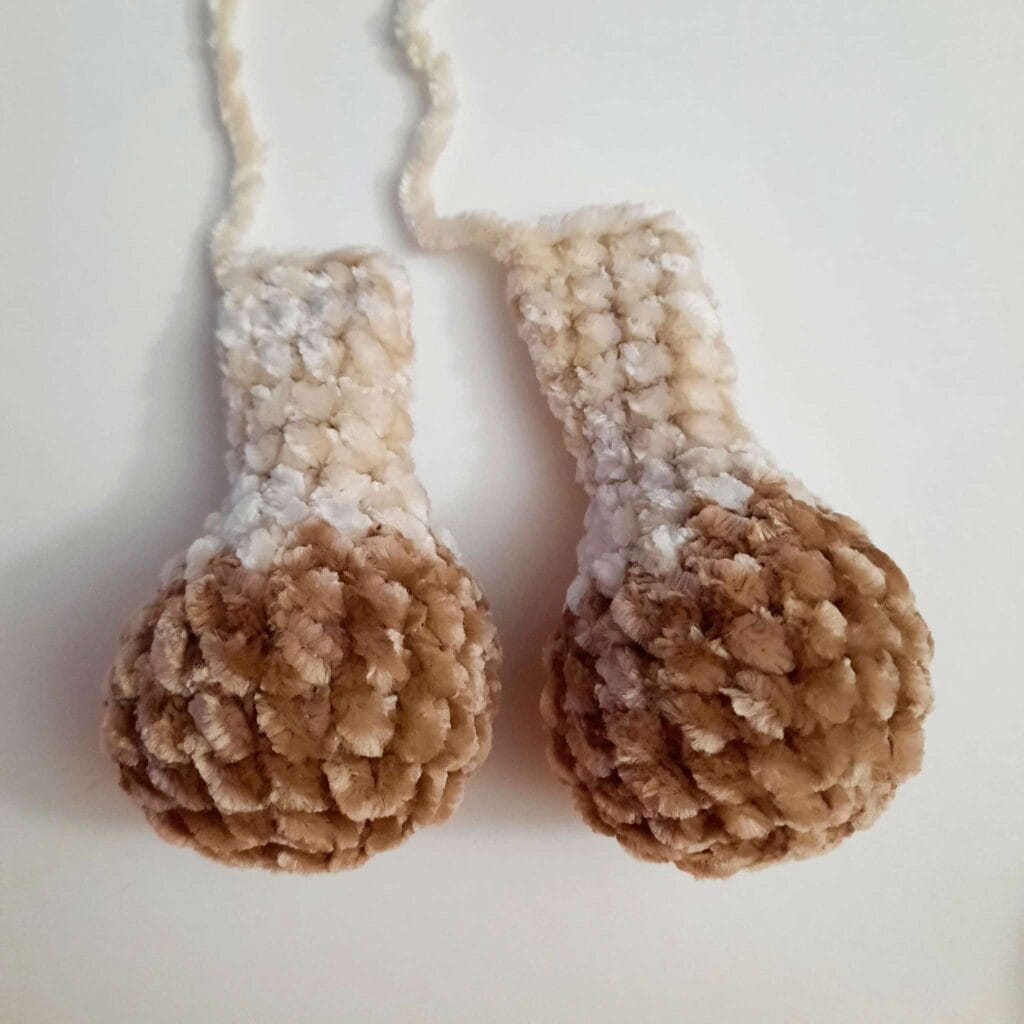
Start with dark brown. Leave 12 inch tail to start your first row. This will be used for hoof detail later on.
R1. Ch 2, 6 sc into 1st ch [6]
R2. Inc around [12]
R3. *Inc, sc* x6 [18]
R4 – R6. Sc around [18]
R7. *Dec, sc 4* x3 [15]
Change to tan.
R8. Sc around [15]
Stuff hoof.
R9. *Dec, sc 3* x3 [12]
R10. Sc around [12]
R11. *Dec, sc* x4 [8]
R12 – R16. Sc around [8]
Do not stuff rest of arm.
Flatten the opening.
R16. Sc 3 through both layers of your flat top. [3]
FO. Leave short tails. You will crochet these on to body.
Tail:
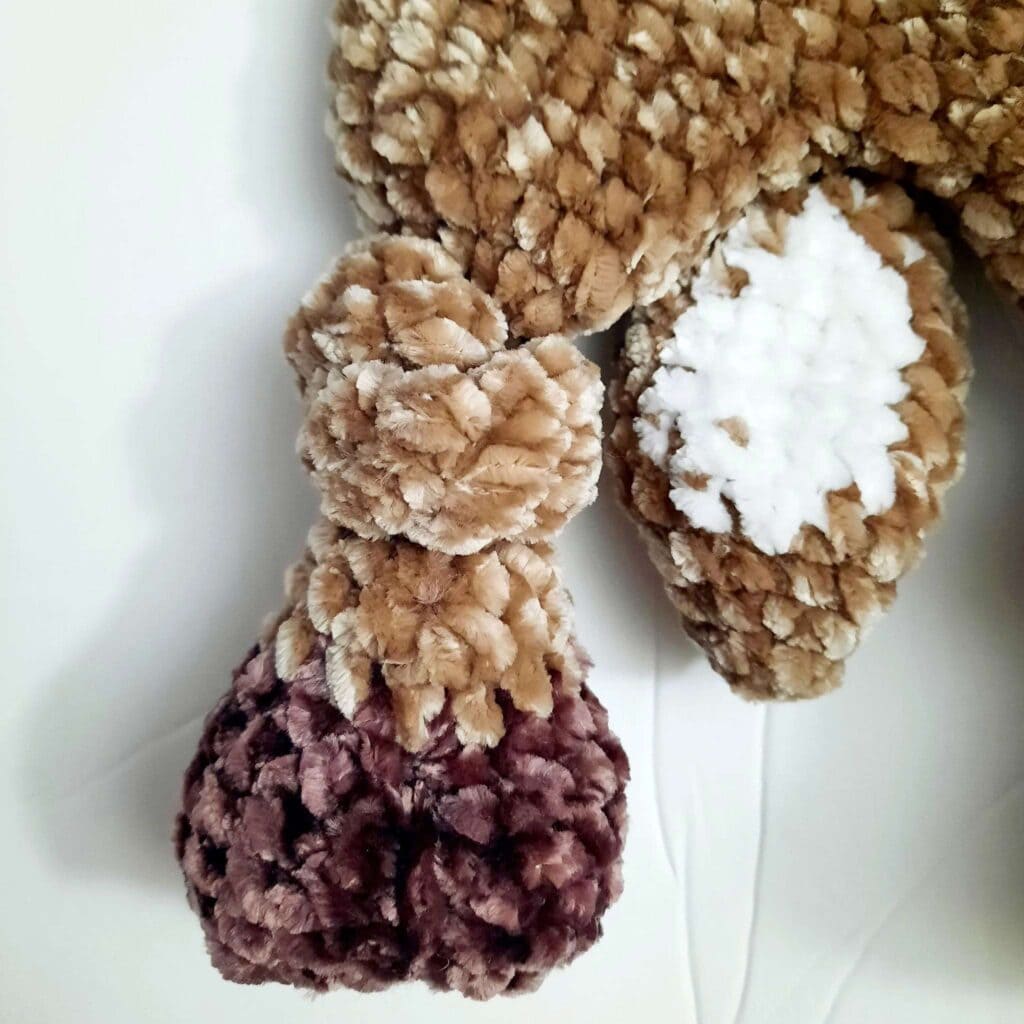
Start with tan.
R1. Ch 2, sc 4 into 1st ch [4]
R2. *Inc, sc* x2 [6]
R3. *Inc, sc* x3 [9]
R4. *Sc 2, inc* x3 [12]
R5. Sc 5, (W) sc 2 (T) sc 5 [12]
R6 – R8. Sc 4, (W) sc 4, (T) sc 4 [12]
R9. Sc 5, (W) sc 2, (T) sc 5 [12]
R10. Sc around [12]
R11. Dec around [6]
Sl st in next 2. Flatten the opening.
R12. Sc 2 through both layers of your flat top [2]
FO. Leave short tails. You will crochet this to head.
Head:
Start with white.
R1. Ch 2, 6 sc into 2nd ch from hook [6]
R2. *Inc, sc* x3 [9]
R3. Sc around [9]
R4. *inc, sc 2* x3 [12]
Change to tan.
R5. *Sc, inc* x6 [18]
R6. Sc around [18]
R7. *Inc, sc 5* x3 [21]
R8. *Inc, sc 6* x3 [24]
Place stitch markers in 8th and 16th sts to later place safety eyes.
R9. Sc 8, inc, sc, inc x4, sc, inc, sc 8 [30]
R10. Sc 11, inc, sc, inc x4, sc, inc, sc 11 [36]
R11 – R14. Sc around [36]
Start Stuffing.
R15. (If you’d like to make a Doe instead of a Buck, sk all directions using (W)) Sc 10, sc 3 through both ear and head, sc 2, (W) ch 8, sl st in 2nd ch from hook and in next 2 ch, ch 4, sl st in 2nd ch from hook and in next 6 ch (you just made the first antler), (T) sc 6, (W) ch 8, sl st in 2nd ch from hook and in next 2 ch, ch 4, sl st in 2nd ch from hook and in next 6 ch, (T) sc 2, sc 3 through both ear and head, sc 10 [36 sc]
R16. Sc around, skipping over antlers made [36]
R17. *Dec, sc 4* x6 [30]
Place safety eyes and secure backings.
R18. *Dec, sc 3* x6 [24]
R19. *Dec, sc 2* x6 [18]
R20. *Dec, sc* x6 [12]
R21. Dec around [6]
Finish stuffing. FO. Leave long tail for cinching hole closed.
Legs (Make 2):
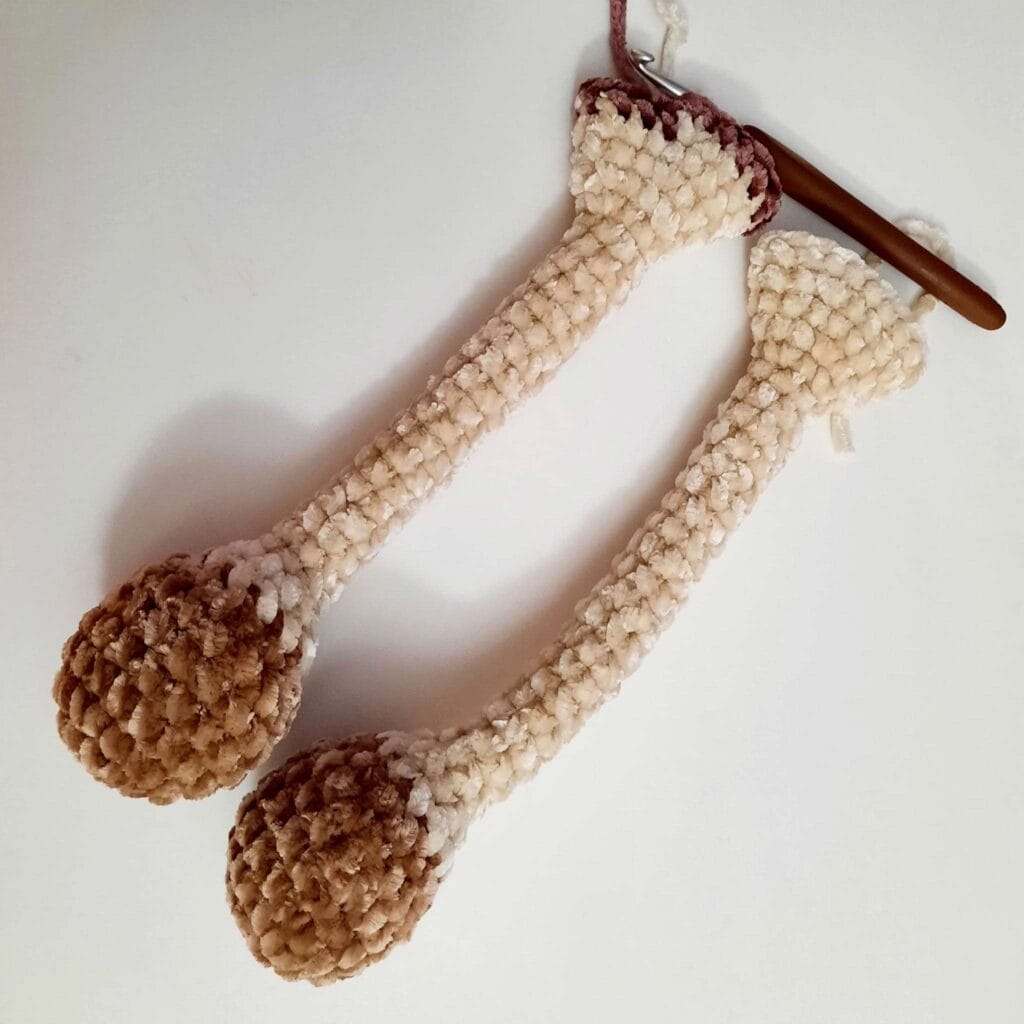
Do not FO after second leg.
Start with dark brown.
Leave 12 inch tail to start your first row. This will be used for hoof detail later on.
R1. Ch 2, 6 sc into 1st ch [6]
R2. Inc around [12]
R3. *Inc, sc* x6 [18]
R4 – R7. Sc around [18]
R8. *Dec, sc 4* x3 [15]
Change to tan.
R9. Sc around [15]
Stuff hoof.
R10. *Dec, sc 3* x3 [12]
R11&12. Sc around [12]
R13. *Dec, sc* x4 [8]
R14 – 30. Sc around [8]
R31. *Inc, sc* x4 [12]
R32. *Sc 2, inc* x4 [16]
R33. Sc around [16]
R34. *Inc, sc 3* x4 [20]
R35 & R36. Sc around [20]
Do not stuff remainder of leg.
For second leg, Do Not FO.
Sl st in next st. FO. Leave short tail. Legs will be crocheted together and continue on to
the body.
Body:
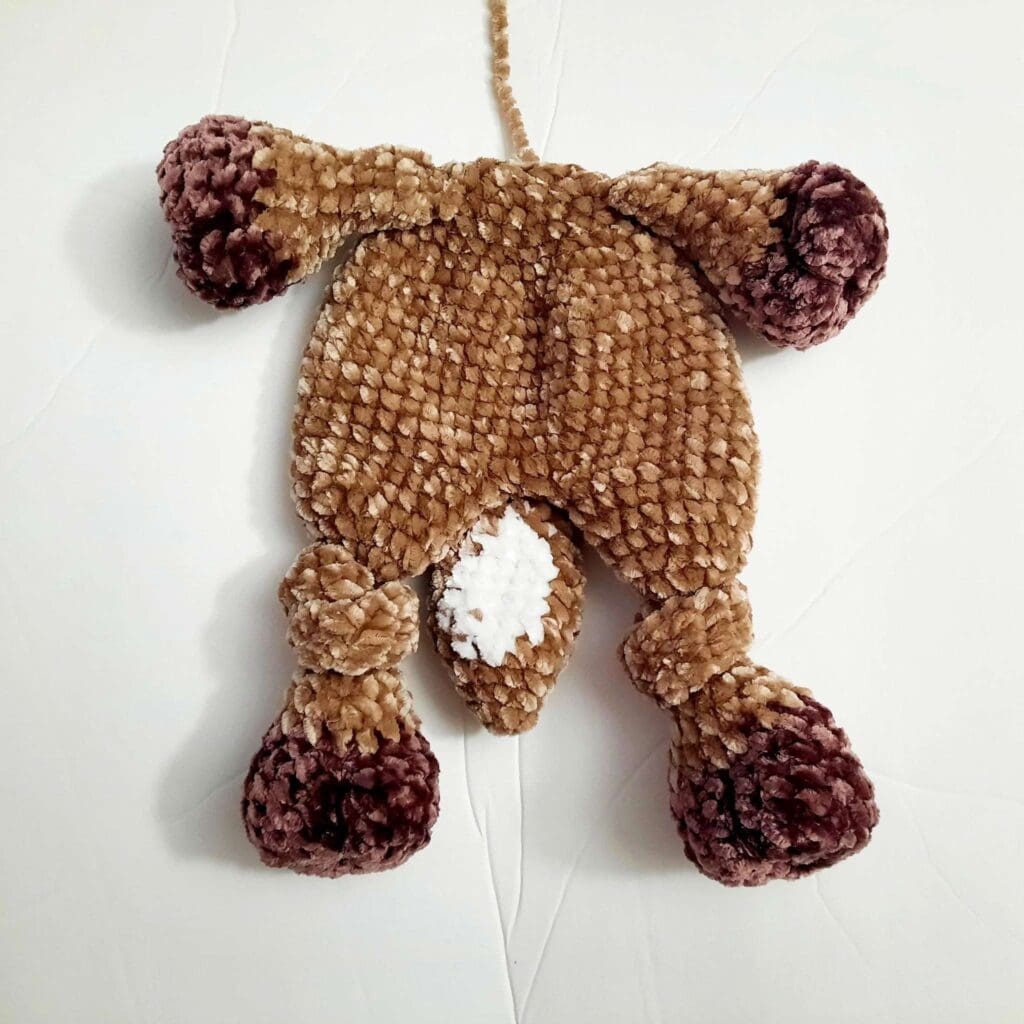
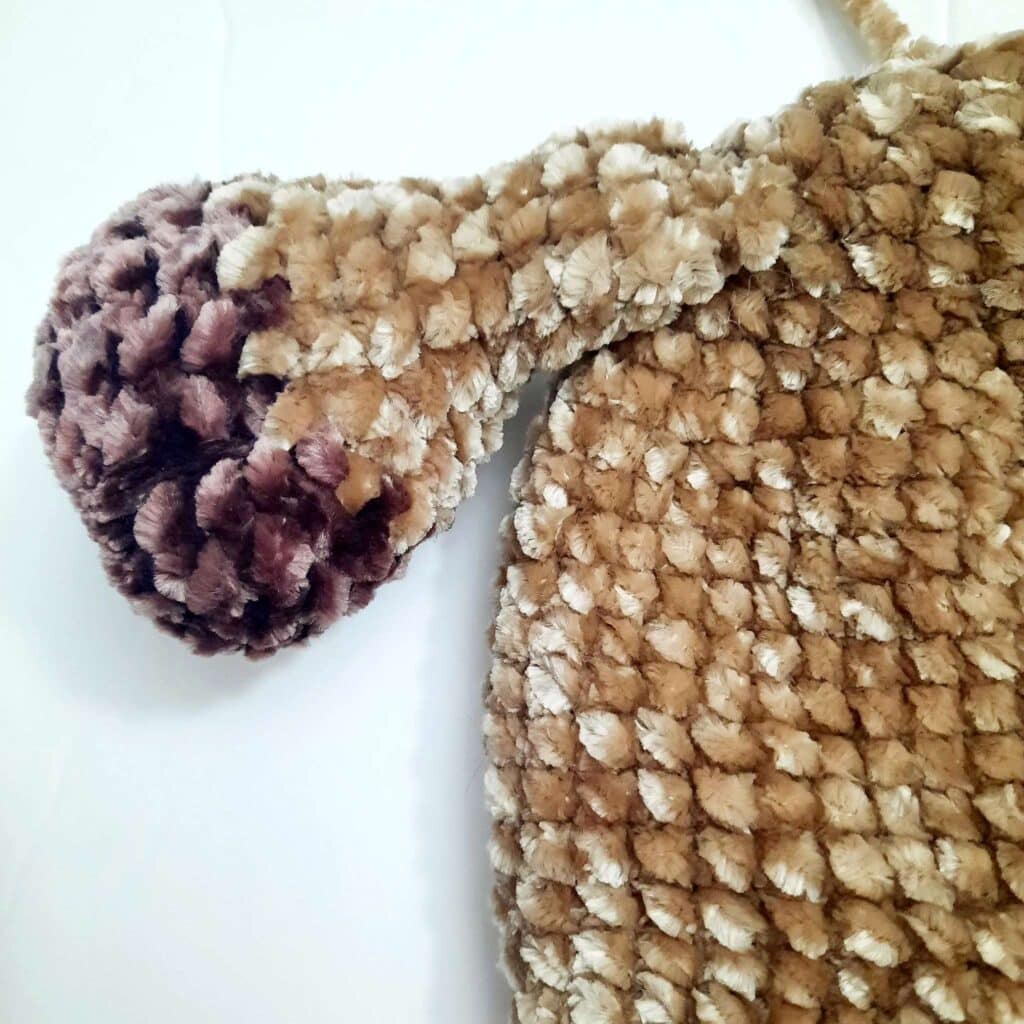
R1. Ch 2, sc into the sl st of 2nd leg, sc 19 around 2nd leg, sc 2 across connecting ch, sc
into next st on 1st leg, sc 19, sc 2 across connecting ch [44 sc]
R2. Sc 19, Inc x4, sc 21[48]
R3. Sc 46, sc 2 through both tail and body (while white patch faces down) [48]
R4 – R9. Sc around[48]
R10. *Dec, sc 4* x8 [40]
R11. Sc around [40]
R12. *Dec, sc 3* x8 [32]
R13. *Dec, sc 2* x8 [24]
R14. Sc around [24]
R15. Sc 6, sc 3 through both layers of first arm and body, sc 6, Sc 3 through both layers
of second arm and body, sc 6 [24]
R16. *Dec, sc* x8 [16]
R17. Dec x8 [8]
Sl st in next st. Leave long tail for sewing to head. Do not stuff.
Sew body to bottom center of the head.
Tie each leg into a knot.
Use long strands at the beginning of each hoof to sew through the center of R1 up
through the most frontward st of the last row using dark brown, then around and back
through the same spaces, 3 times, pulling tight enough to shape the hoof. Weave in ends.

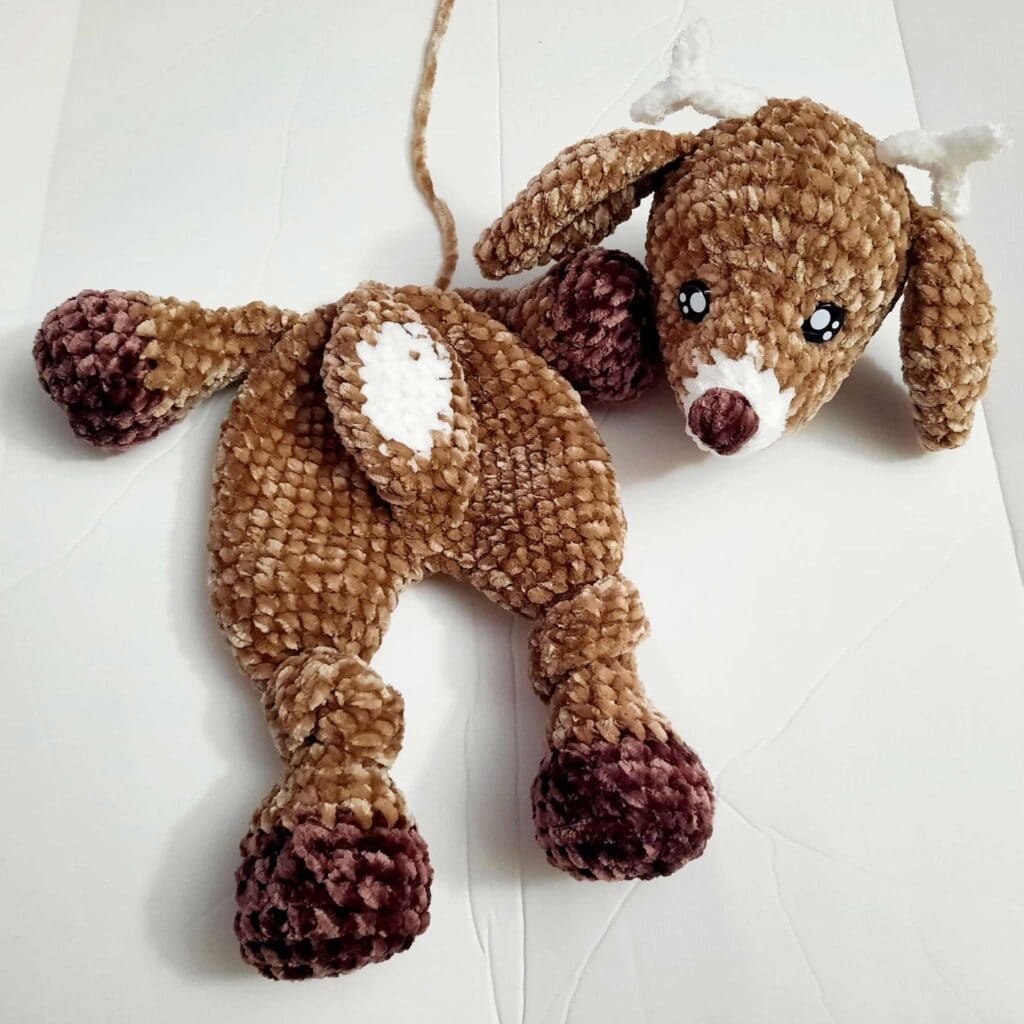
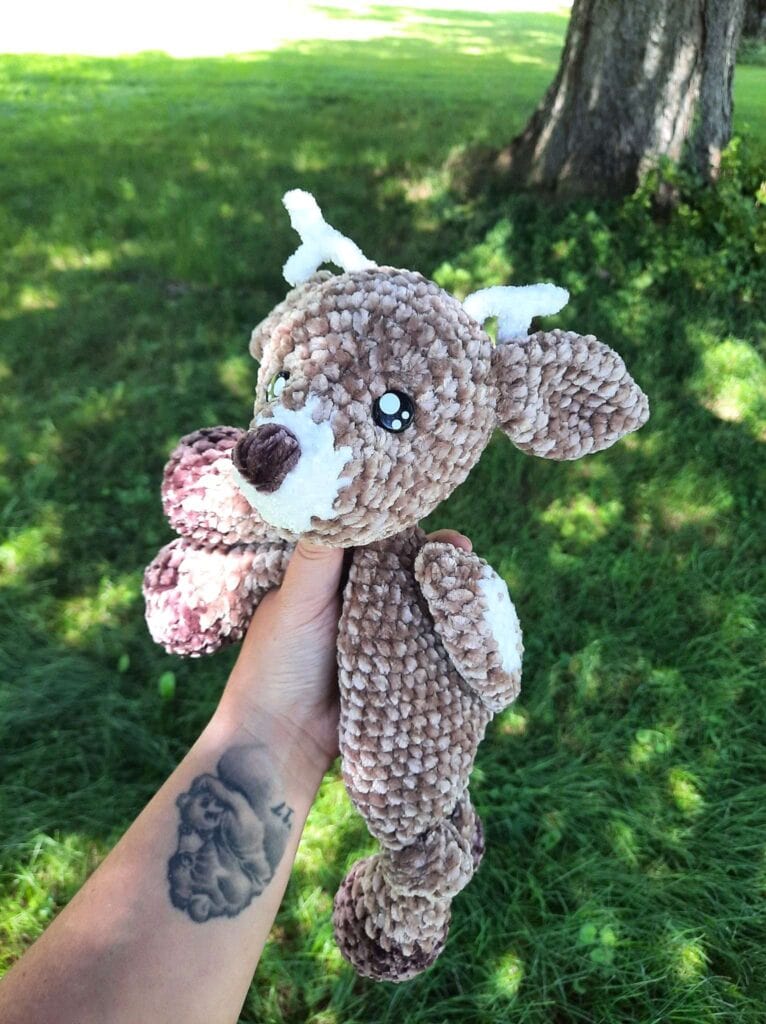
All Done!!
Thanks so much for completing my pattern 🙂
If you have any questions, please feel free to ask! I always encourage you to add a project to Ravelry with your own pictures and interpretation.
More Free Crochet Patterns…
If you love making kids projects, I have a few cute and crochet kid patterns here >>>
Katherine Rombold-Tarr

Katherine Rombold-Tarr is a crochet designer and friend – you can find her on Facebook, Instagram & Etsy. Stop by and say hello!
Also, since I’m on IG, please use hasthtags #katskraftykorner and, for this pattern, #DesmondBuckDeerSnuggler as I’d love to see your makes on there as well!
Please do not duplicate or copy my pattern in any way. Give credit where credit is due, as always.
Thanks for being here!
Thanks to Kat for sharing her super cute pattern as a part of the Autumn Harvest Blog Hop! Kat has two more patterns coming up in the hop, but she is not a blogger – so she granted permission to share her beautiful patterns exclusively here.
Join the hop here – when the hop is over, the blog post will be turned into a round up.




I’m having difficulty understanding the ears
cute