
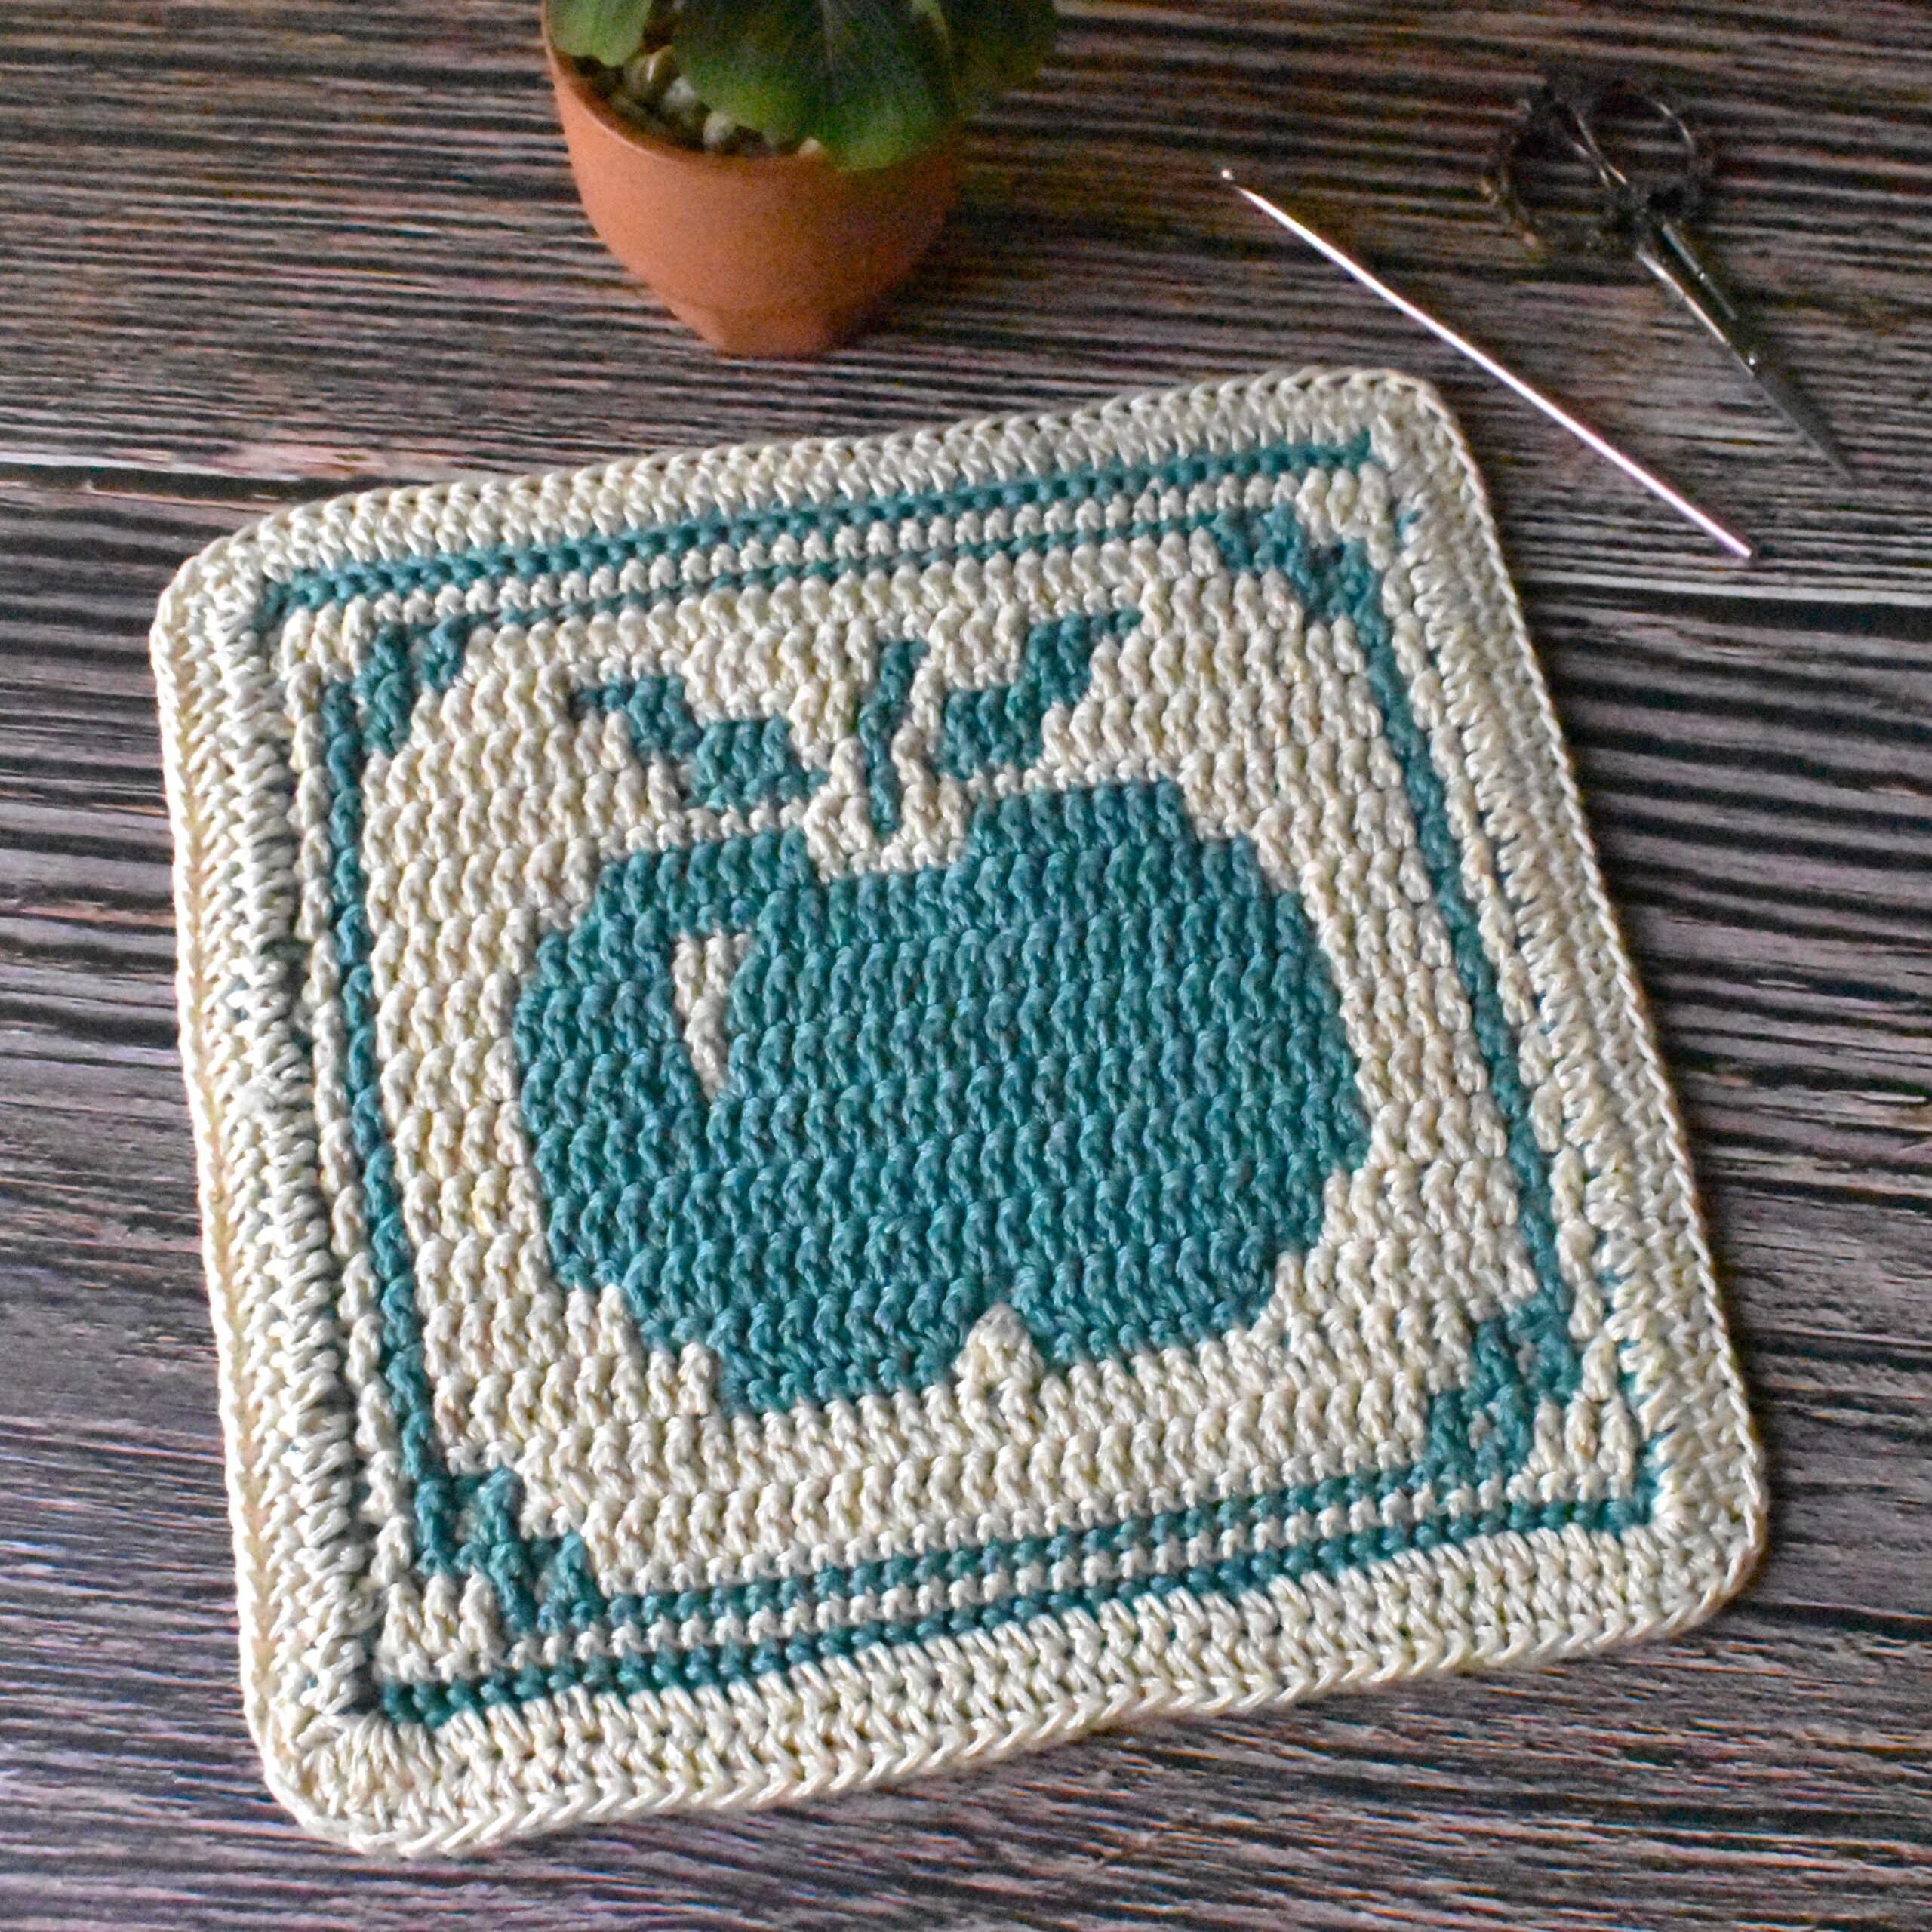
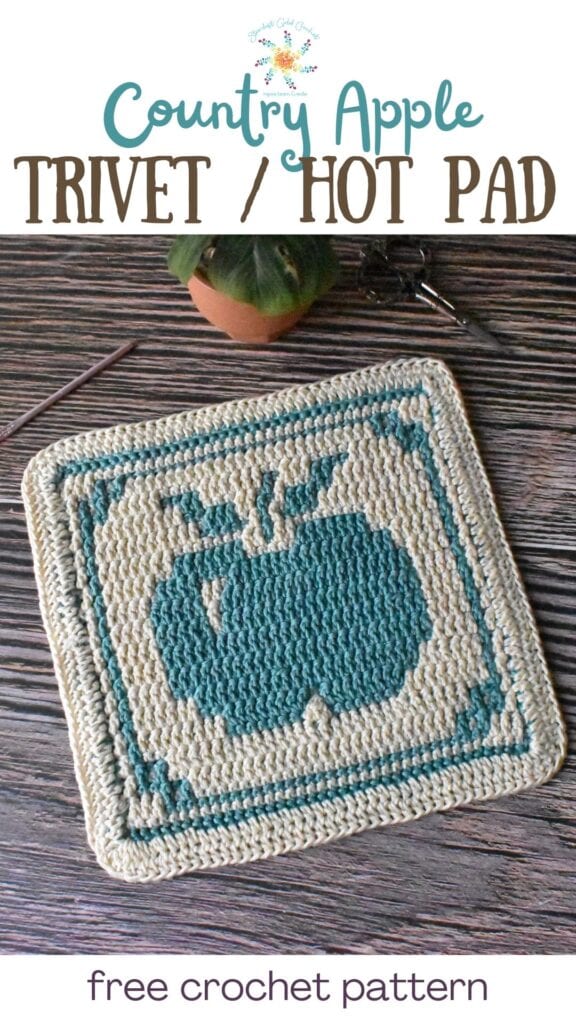
🍎 Fall is in the air 🍂, and what better way to celebrate the season than with a cozy Country Apple Mosaic Crochet Trivet? This design is part of my Fall Trivet Series, created with 100% cotton yarn—making it both beautiful and practical for your autumn kitchen.
This mosaic crochet pattern works up in two classic colors—deep red and warm ecru—to showcase a timeless apple motif. Perfect as a trivet to protect your surfaces, a hot pad for warm dishes, or simply as a festive fall decoration, it’s a beautiful way to bring the harvest season indoors. 🍁
Inside this blog post, you’ll find:
- A full list of materials 🧶
- A detailed, step-by-step tutorial with helpful tips 👍
- Links to video tutorials for those new to mosaic crochet 🎥
- Inspiration photos of the finished Country Apple Trivet 🤩
This is an intermediate-level pattern designed for crocheters with some mosaic crochet experience. If you’re brand-new to mosaic, the included video resources will walk you through the basics so you can give it a try.
Let’s get started!
Crochet Pattern Support
I hope you enjoy this easy pattern. Pattern support? Head over to Stardust Gold Crochet & Friends.
- If you are looking for a drama-free crochet group, check out my pattern support group, Stardust Gold Crochet & Friends
- We have fun and share crochet patterns, stories, and courses; you can ask me about any pattern in my library for support.

New to Mosaic Crochet?
If you are new to mosaic crochet, please scroll on down to the bottom of the post for a walk through and video link. It’s easier than you think!
Table of contents
- Inside this blog post, you’ll find:
- New to Mosaic Crochet?
- Country Apple Mosaic Crochet Trivet Pattern
- Abbreviations / Legend
- How to Start the Apple Trivet
- Country Apple Mosaic Crochet Trivet Pattern
- Envelope Border Instructions for Country Apple Mosaic Crochet Trivet
- Autumn Harvest Blog Hoppers!
- Thanks friends!
- Grab the PDF
Country Apple Mosaic Crochet Trivet Pattern
Abbreviations / Legend
| Square | Abbreviation | Description |
| A | With Color A, BBS in 1st stitch, Ch 1 | Beginning Border Stitch |
| B | With Color B, BBS in 1st stitch, Ch 1 | Beginning Border Stitch |
| Empty Square (colored or not) | BLOsc | Back Loop Only Single Crochet |
| Squares with X (colored or not) | FLOdc | Front Loop Only Double Crochet |
| Blank + | Ch 1, EBS in the last stitch | Ending Border Stitch |
| Colored + | Ch 1, EBS in the last stitch | Ending Border Stitch |
| FLOdc3tog | Front Loop Only Double Crochet 3 Together | |
| Yo | Yarn Over | |
| Dc | Double Crochet | |
| Sc | Single Crochet | |
| Hdc | Half Double Crochet | |
| BLO | Back Loop Only |
Stitch Guide
BBS – Beginning Border Stitch: It’s a single crochet stitch, placed between the V of the stitch below. Insert your hook into the designated stitch or space. Yo and pull up a loop. Yarn over again and draw the yarn through both loops on the hook. (it’s a single crochet)
BLOsc – Back Loop Only Single Crochet: Insert your hook into the back loop only of the designated stitch. Wrap the yarn over your hook and pull up a loop. Yarn over again and draw the yarn through both loops on the hook.
FLOdc – Front Loop Only Double Crochet (aka drop down dc): Yo, insert your hook into the front loop only 2 rows down. Yo and pull up a loop. Yarn over and draw through two loops on the hook.
FLOdc3tog – Front Loop Only Double Crochet 3 Together: *Yo, insert hook into indicated stitch, yo, pull up a loop, yo and pull through 2 loops*. Insert hook in next stitch and repeat from * to *, yo, pull through all 4 loops on the hook.
EBS – Ending Border Stitch: Insert your hook into the designated stitch or space. Wrap the yarn over your hook and pull up a loop. Yarn again and pull yarn through both loops on the hook. Fasten off the yarn. (it’s a single crochet)
Dc – Double Crochet: Yo, insert hook in indicated stitch. Yo and pull up a loop. Yo and pull through two loops (2 times).
Sc – Single Crochet: Insert hook in indicated stitch. Yo and pull up a loop. Yo and pull through both loops on the hook.
Hdc – Half Double Crochet: Yo, insert hook in indicated stitch. Yo and pull up a loop. Yo and pull through all three loops on the hook.
Surface Stitch: Create a slip knot, remove it from your hook. Insert your hook into the indicated stitch. Add slip knot back on hook and pull to the surface of your work. Insert hook in next indicated space, grab yarn from below and pull up through your work and immediately through the loop on your hook. Repeat that around your work as needed.
Fsc – Foundation Single Crochet: Step 1: Create a slip knot. Ch 2. Insert the hook in the 1st chain. Yo, draw up a loop. Ch 1. Yo, draw through both loops on the hook. Step 2: (2nd st) Insert hook in the bottom two loops of the ch-1 created in Step 1. Yo, draw up a loop. Ch 1. Yo, draw through both loops (2 fsc created).
Recommended Yarn & Yardage Details:
I created this hot pad using Lion Brand’s 24/7 Cotton. Yarn Details: 100% Mercerized Cotton, 186 yds (170 m) per 3.5 oz (100 g) skein – Lion Brand Yarn 24/7 Cotton
You can use any weight yarn you’d like of course, however, using a 4 weight or smaller yarn is recommended – also use 100% cotton for heat purposes – otherwise it can cause a fire.
Size Measurements:
- 10” (25 cm) x 10” (25 cm) approximately
Estimated Yardage:
Color A (MC – Dragonfly): Approximately 1 – 2 skeins (for reversible)
Color B (CC – Ecru): 1 – 2 skeins (for reversible)
I ended up using 1 skein each doing reversible, but to be safe I’d get two of each color.
Recommended Hook Size:
4.5 mm (USA 7/G+ crochet hook)
How to Start the Apple Trivet
I did a reversible mosaic crochet for this pattern because it creates a very thick hot pad using 100% cotton to keep your table safe. Please read down for help on working it in a reversible mosaic crochet – with a link to a helpful tutorial if you are new to it. If you choose to do just one sided, I recommend creating a back piece to help with the thickness.
Starting Row:
- You can choose to work a Foundation Single Crochet Row of 39 or do a chain of 40 and work a row of single crochets back through the chain, starting at 2nd ch from hook.
- Just remember that your first row of single crochet is the first row of your chart.
- Foundation Crochet Row: After working your foundation row, begin working Row 2 of the chart.
- Starting Chains: After crocheting your starting chain, sc in the 2nd ch from the hook and across. Tie off. Add your yarn and begin working Row 2 of the chart.
Reversible Mosaic Crochet
Reversible Mosaic Crochet is created by working the back side of the work at the same time you work the front side. It may sound a little confusing at first (and it takes a little time to get used to it) but it creates a mirror image of the front side and it is absolutely beautiful!
I used this reversible mosaic crochet tutorial to learn how to do reversible mosaic crochet and it worked great!
 |  |
Country Apple Mosaic Crochet Trivet Pattern
Pattern Notes:
- Work from Right to Left – leaving a short tail on each end.
- Ch 1, cut & tie off at the end of each row.
- Repeat the stitches between the […].
- When you see this on Row 9 in the pattern, you are working a FLOdc3tog over stitches 19, 20 & 21. All stitches on Row 8 are worked normal – as BLOsc (if working non-reversible), and for reversible, FLOdc into the stitches on the reverse side with anchoring (in the reversible crochet tutorial).

- Envelope border instructions are below along with other border ideas and picture tutorials.


For THIS pattern Row 36 is the “catch up” row.
← Row 1 [RS]: With Color A, BBS in 1st stitch, ch 1, BLOsc x37, ch 1, EBS in last stitch.
← Row 2 [RS]: With Color B, BBS in 1st, BLOsc x37, ch 1, EBS in last stitch.
← Row 3 [RS]: With Color A, BBS in 1st stitch, ch 1, FLOdc x3, BLOsc x31, FLOdc x3, ch 1, EBS in last stitch.
← Row 4 [RS]: With Color B, BBS in 1st, BLOsc x3, FLOdc x1, BLOsc x1, FLOdc x1, BLOsc x25, FLOdc x1, BLOsc x1, FLOdc x1, BLOsc x3, ch 1, EBS in last stitch.
← Row 5 [RS]: With Color A, BBS in 1st stitch, ch 1, FLOdc x1, BLOsc x5, FLOdc x25, BLOsc x5, FLOdc x1, ch 1, EBS in last stitch.
← Row 6 [RS]: With Color B, BBS in 1st, [BLOsc x1, FLOdc x1] 2 times, BLOsc x29, [FLOdc x1, BLOsc x1] 2 times, ch 1, EBS in last stitch.
← Row 7 [RS]: With Color A, BBS in 1st stitch, ch 1, FLOdc x1, BLOsc x3, FLOdc x29, BLOsc x3, FLOdc x1, ch 1, EBS in last stitch.
← Row 8 [RS]: With Color B, BBS in 1st, BLOsc x1, FLOdc x1, BLOsc x33, FLOdc x1, BLOsc x1, ch 1, EBS in last stitch.
← Row 9 [RS]: With Color A, BBS in 1st stitch, ch 1, FLOdc x1, BLOsc x1, FLOdc x8, BLOsc x8, FLOdc3tog (working into stitches 19, 20 & 21 from Row 7), BLOsc x8, FLOdc x8, BLOsc x1, FLOdc x1, ch 1, EBS in last stitch.
← Row 10 [RS]: With Color B, BBS in 1st, BLOsc x1, FLOdc x1, BLOsc x8, FLOdc x8, BLOsc x1, FLOdc x8, BLOsc x8, FLOdc x1, BLOsc x1, ch 1, EBS in last stitch.
← Row 11 [RS]: With Color A, BBS in 1st stitch, ch 1, FLOdc x1, BLOsc x1, FLOdc x6, BLOsc x21, FLOdc x6, BLOsc x1, FLOdc x1, ch 1, EBS in last stitch.
← Row 12 [RS]: With Color B, BBS in 1st, BLOsc x1, FLOdc x1, BLOsc x6, FLOdc x21, BLOsc x6, FLOdc x1, BLOsc x1, ch 1, EBS in last stitch.
← Row 13 [RS]: With Color A, BBS in 1st stitch, ch 1, FLOdc x1, BLOsc x1, FLOdc x4, BLOsc x25, FLOdc x4, BLOsc x1, FLOdc x1, ch 1, EBS in last stitch.
← Row 14 [RS]: With Color B, BBS in 1st, BLOsc x1, FLOdc x1, BLOsc x4, FLOdc x25, BLOsc x4, FLOdc x1, BLOsc x1, ch 1, EBS in last stitch.
← Row 15 [RS]: With Color A, BBS in 1st stitch, ch 1, FLOdc x1, BLOsc x1, FLOdc x4, BLOsc x25, FLOdc x4, BLOsc x1, FLOdc x1, ch 1, EBS in last stitch.
← Row 16 [RS]: With Color B, BBS in 1st, BLOsc x1, FLOdc x1, BLOsc x4, FLOdc x25, BLOsc x4, FLOdc x1, BLOsc x1, ch 1, EBS in last stitch.
← Row 17 [RS]: With Color A, BBS in 1st stitch, ch 1, FLOdc x1, BLOsc x1, FLOdc x4, BLOsc x25, FLOdc x4, BLOsc x1, FLOdc x1, ch 1, EBS in last stitch.
← Row 18 [RS]: With Color B, BBS in 1st, BLOsc x1, FLOdc x1, BLOsc x4, FLOdc x5, BLOsc x1, FLOdc x19, BLOsc x4, FLOdc x1, BLOsc x1, ch 1, EBS in last stitch.
← Row 19 [RS]: With Color A, BBS in 1st stitch, ch 1, FLOdc x1, BLOsc x1, FLOdc x4, BLOsc x5, FLOdc x1, BLOsc x19, FLOdc x4, BLOsc x1, FLOdc x1, ch 1, EBS in last stitch.
← Row 20 [RS]: With Color B, BBS in 1st, BLOsc x1, FLOdc x1, BLOsc x4, FLOdc x5, BLOsc x2, FLOdc x18, BLOsc x4, FLOdc x1, BLOsc x1, ch 1, EBS in last stitch.
← Row 21 [RS]: With Color A, BBS in 1st stitch, ch 1, FLOdc x1, BLOsc x1, FLOdc x4, BLOsc x5, FLOdc x2, BLOsc x18, FLOdc x4, BLOsc x1, FLOdc x1, ch 1, EBS in last stitch.
← Row 22 [RS]: With Color B, BBS in 1st, BLOsc x1, FLOdc x1, BLOsc x5, FLOdc x4, BLOsc x3, FLOdc x16, BLOsc x5, FLOdc x1, BLOsc x1, ch 1, EBS in last stitch.
← Row 23 [RS]: With Color A, BBS in 1st stitch, ch 1, FLOdc x1, BLOsc x1, FLOdc x5, BLOsc x23, FLOdc x5, BLOsc x1, FLOdc x1, ch 1, EBS in last stitch.
← Row 24 [RS]: With Color B, BBS in 1st, BLOsc x1, FLOdc x1, BLOsc x7, FLOdc x7, BLOsc x5, FLOdc x7, BLOsc x7, FLOdc x1, BLOsc x1, ch 1, EBS in last stitch.
← Row 25 [RS]: With Color A, BBS in 1st stitch, ch 1, FLOdc x1, BLOsc x1, FLOdc x7, BLOsc x7, FLOdc x2, BLOsc x1, FLOdc x2, BLOsc x7, FLOdc x7, BLOsc x1, FLOdc x1, ch 1, EBS in last stitch.
← Row 26 [RS]: With Color B, BBS in 1st, BLOsc x1, [FLOdc x1, BLOsc x16] 2 times, FLOdc x1, BLOsc x1, ch 1, EBS in last stitch.
← Row 27 [RS]: With Color A, BBS in 1st stitch, ch 1, FLOdc x1, BLOsc x1, FLOdc x11, BLOsc x4, FLOdc x1, BLOsc x1, FLOdc x1, BLOsc x4, FLOdc x11, BLOsc x1, FLOdc x1, ch 1, EBS in last stitch.
← Row 28 [RS]: With Color B, BBS in 1st, BLOsc x1, FLOdc x1, BLOsc x11, FLOdc x3, BLOsc x2, FLOdc x1, BLOsc x2, FLOdc x3, BLOsc x11, FLOdc x1, BLOsc x1, ch 1, EBS in last stitch.
← Row 29 [RS]: With Color A, BBS in 1st stitch, ch 1, FLOdc x1, BLOsc x1, FLOdc x9, BLOsc x5, FLOdc x2, BLOsc x2, FLOdc x1, BLOsc x5, FLOdc x9, BLOsc x1, FLOdc x1, ch 1, EBS in last stitch.
← Row 30 [RS]: With Color B, BBS in 1st, BLOsc x1, FLOdc x1, BLOsc x9, FLOdc x2, BLOsc x6, FLOdc x1, BLOsc x4, FLOdc x2, BLOsc x9, FLOdc x1, BLOsc x1, ch 1, EBS in last stitch.
← Row 31 [RS]: With Color A, BBS in 1st stitch, ch 1, FLOdc x1, BLOsc x3, FLOdc x5, BLOsc x4, FLOdc x6, BLOsc x2, FLOdc x3, BLOsc x4, FLOdc x5, BLOsc x3, FLOdc x1, ch 1, EBS in last stitch.
← Row 32 [RS]: With Color B, BBS in 1st, [BLOsc x1, FLOdc x1] 2 times, BLOsc x29, [FLOdc x1, BLOsc x1] 2 times, ch 1, EBS in last stitch.
← Row 33 [RS]: With Color A, BBS in 1st stitch, ch 1, FLOdc x1, BLOsc x5, FLOdc x25, BLOsc x5, FLOdc x1, ch 1, EBS in last stitch.
← Row 34 [RS]: With Color B, BBS in 1st, BLOsc x3, FLOdc x1, BLOsc x1, FLOdc x1, BLOsc x25, FLOdc x1, BLOsc x1, FLOdc x1, BLOsc x3, ch 1, EBS in last stitch.
← Row 35 [RS]: With Color A, BBS in 1st stitch, ch 1, FLOdc x3, BLOsc x31, FLOdc x3, ch 1, EBS in last stitch.
← Row 36 [RS]: BBS in first stitch, ch 1, work this row the same as others, focusing on dropping down on the reverse side, ch 1, EBS in last stitch.
Optional Row: (Sometimes to even out the pattern you may need to add an extra row when working reversible mosaic crochet)
← Row 37 [RS]: BBS in first stitch, ch 1, sc in each stitch across, ch 1, EBS in last stitch.
Tie off and weave in all tails, then move on to creating the border below…
Total: BLOsc x789, FLOdc x506, ch 1, EBS in last stitch x35, With Color A, BBS in 1st stitch, ch 1 x18, With Color B, BBS in 1st x17.
Graph

Envelope Border Instructions for Country Apple Mosaic Crochet Trivet
I used an envelope border for this trivet and the others in the series. Here’s how to do it, and there is a picture tutorial on the following pages (below)
🌸 Step 1: Create the Surface Stitch Border
- Follow the Envelope Border technique (below) to add a surface stitch along both sides of your project.
- Side 1: I start in the top right corner and work through two loops of 36. Side 2: Work into the ch 1 spaces created at the end of each row. Side 3 (bottom): Work through 2 loops of foundation row. Side 4: Same as Side 2.
- Turn your piece as needed to work along the edges.
🌸 Step 2: Work Half Double Crochets
- After making the surface stitch, work half double crochets (hdc) into the back loop only of the surface stitch around – do 3 hdc in the corner stitches to round it out.
🌸 Step 3: Side 2
- Flip your project over.
- Repeat Steps 1 & 2.
- When creating the surface stitch on the second side, align it directly underneath the stitch from the first side to keep the border neat and uniform.
🌸 Step 4: Finish the Sides
- Once both sides are bordered with hdc in the back loops, tie off the yarn and weave in any loose tails.
🌸 Step 5: Join and Close the Borders
- Join a Color A or Color B (your choice – I used ecru for my join on this one) in the stitch just to the left of your corner stitches along the top right edge.
- Holding the front and back of the envelope border together, work half double crochets through both layers to join them — this also encloses any yarn tails inside.
🌸 Step 6: Final Touches
- Tie off and weave in all remaining tails.
- You’re done!
Steam blocking or wet blocking makes these trivets look picture perfect!

Enclosing the Tails
This pattern contains an envelope border to enclose the tails. I recommend tying and securing the tails before creating the envelope border, but it’s not necessary – picture tutorial is below for how to create the border. It’s easier than you think!
Envelope Border Pattern
Watch the tutorial video on YouTube here >>> Easy Envelope Border Tutorial to get you up to speed on creating this fun border to hide those pesky crochet tails! Then come back here and follow the written instructions.
- Follow instructions in the stitch guide to begin working the surface stitch, then…
- Work surface stitch around the entire pattern, join into the first surface stitch, cut & tie off.
- Round 1: (RS) Insert hook in any surface stitch (BLO). Hdc (BLO) in each surface stitch around, creating 3 hdc in each corner, join with a slip stitch in 1st hdc.
- Flip to the WS and repeat Steps 1 – 2, work your surface stitch just below the horizontal surface stitches from Round 1..
- After both sides are complete, insert hook in 1st stitch to the left of any corner, ch 1, hdc through the top two loops of each WS & RS all the way around, tucking tails in as you go.
- Join with invisible join, tie off and weave in any leftover tails.
Autumn Harvest Blog Hoppers!
Click the image to go to the pattern – tap twice on the image on mobile.

Thanks friends!
Thanks for crocheting the Pumpkin Mosaic Crochet Hot Pad & share your finished patterns with me! Tag me #stardustgoldcrochet
Grab the PDF
If you prefer a PDF written pattern, grab it here >>> Country Apple Mosaic Crochet Hot Pad PDF


Anyone that can send me the Apple Trivet for Day 28 please send to [email protected]. I’m happy to send you any patterns I got that didn’t work for you to get as well. It’s not fair when you do everything required and it still doesn’t work.
The patterns can’t go to your email, when you put in your name and email and get, “Something went Wrong, Try Again!” I have tried over and over, and even used a different browser, and still get the same. They can’t go to my email when they can’t get past that “Something went Wrong, Try Again!” The only ones I have were the ones that I got from previous years. I still haven’t got the Apple trivet. I tried multiple times today and still get “Something went Wrong, Try Again!”
As I have found most of these links don’t work even when code to get on Ravelry codes never worked
They go to your email – but this one I forgot to publish the pattern! Sorry about that. It’s fixed now.
Like everyone above. I’m finding “Page not found”. Had difficulties with the moon and bat C2C. Technology is making this impossible. Hope it will get fixed, for future dates and that somehow we are able to get the patterns we have not been able to get the links to work.
They go to your email – but this one I forgot to publish the pattern! Sorry about that. It’s fixed now.
Same as everyone else. Link not working. Super cute pattern though. I hope it gets fixed before I leave for the holiday weekend- no internet where I’m going.
Link still not working. I did send an email around 830am to say it didnt work as well.
They go to your email – but this one I forgot to publish the pattern! Sorry about that. It’s fixed now.
They go to your email – but this one I forgot to publish the pattern! Sorry about that. It’s fixed now.
Tried this super early and it’s still not working.
They go to your email – but this one I forgot to publish the pattern! Sorry about that. It’s fixed now.
Neither link for this blog hop item works: I get a “page not found” error.
They go to your email – but this one I forgot to publish the pattern! Sorry about that. It’s fixed now.
Here we go again. Another pattern that we can’t get. Don’t you just love technology. NOT!!! I surrender. I tried numerous time to no avail.
They go to your email – but this one I forgot to publish the pattern! Sorry about that. It’s fixed now.
still says pattern not found
They go to your email – but this one I forgot to publish the pattern! Sorry about that. It’s fixed now.
Hi Tasha, I’m having the same problem as everyone else. The link is not working. Says page not found.
They go to your email – but this one I forgot to publish the pattern! Sorry about that. It’s fixed now.
Me as well – Page not Found on both links – box and PDF
They go to your email – but this one I forgot to publish the pattern! Sorry about that. It’s fixed now.
Hi, I’m a lefty, Will it matter if I start on the left instead of the right and work the pattern?Thank you.
No, not for these.
Link doesn’t work
They go to your email – but this one I forgot to publish the pattern! Sorry about that. It’s fixed now.
I just checked and it says page not found too.
They go to your email – but this one I forgot to publish the pattern! Sorry about that. It’s fixed now.
Hi Tasha,The link for today’s pattern doesn’t work (8/28/25). Thanks for any help.
They go to your email – but this one I forgot to publish the pattern! Sorry about that. It’s fixed now.
I had the same problem. It says Page not found. For yesterday’s C2C bat and moon pattern, I always got the Something Went Wrong, Please Try Again. No matter how many times I try I get that answer. Did anyone else have success in getting these patterns?
Yes, I had to email that I couldn’t subscribe for any pattern anymore.
They go to your email – but this one I forgot to publish the pattern! Sorry about that. It’s fixed now.
They go to your email – but this one I forgot to publish the pattern! Sorry about that. It’s fixed now.
the pattern of Country Apple Mosaic Crochet Trivet Pattern the link is not working. it is coming up page not found for today’s pattern.
for me as well
They go to your email – but this one I forgot to publish the pattern! Sorry about that. It’s fixed now.
Just tried again and still not working.
They go to your email – but this one I forgot to publish the pattern! Sorry about that. It’s fixed now.
They go to your email – but this one I forgot to publish the pattern! Sorry about that. It’s fixed now.