

It’s Summer! Finally!  I don’t know about you, but I
  love the heat. June was Pride
  Month, and I thought I would dust off one of my very first patterns and create a full tutorial for it!
As you may know, I love rainbows; this rainbow crochet bikini top pattern is sooooo easy, you will be amazed. Here you will find the perfect free crochet bikini top pattern tutorial for beginners!
When I started crocheting again after many years of crochet silence, I wanted to learn to crochet a bikini top. I am so grateful for YouTube and all the free tutorials out there because they made it so easy to come up with one of my own (in a rainbow, of course). 
I was very new to writing crochet patterns, though, so my sizing instructions were rather vague. Thankfully, I discovered an easy way to increase or decrease the size of the cup with a few simple tweaks!
For weekly updates and pattern releases, join my Stardust Gold Crochet Stargazers newsletter – this link will open in a new tab. I do not spam (because I hate spam too – who needs 10,000 e-mails right?)
In this post, you will learn:
- How to crochet a bikini top.
- Changing colors in crochet.
- How to customize the size of your crochet bikini top.
- Dc3tog (double crochet 3 together).
- Tr3tog (treble crochet 3 together).
- Sc2tog (single crochet 2 together) – a decrease stitch.
- Extended single crochet.
- Half double crochet.
- Crochet loop chain.
If you are new to crocheting, or a crochet beginner, you will find this crochet bikini top a perfect fit to learn new crochet stitches. I’ve included a full video tutorial that covers all these stitches, including the stitches listed above.
Best of all, you will find that these stitches are not as difficult as you think! I found a new way to create a chain that is different than the somewhat difficult i-cord. I tried the i-cord and it’s just so time-consuming.
This new technique to create a crochet cord that also doubles as a starting chain will have you coming up with new ways to implement it in your crochet projects – for sure!
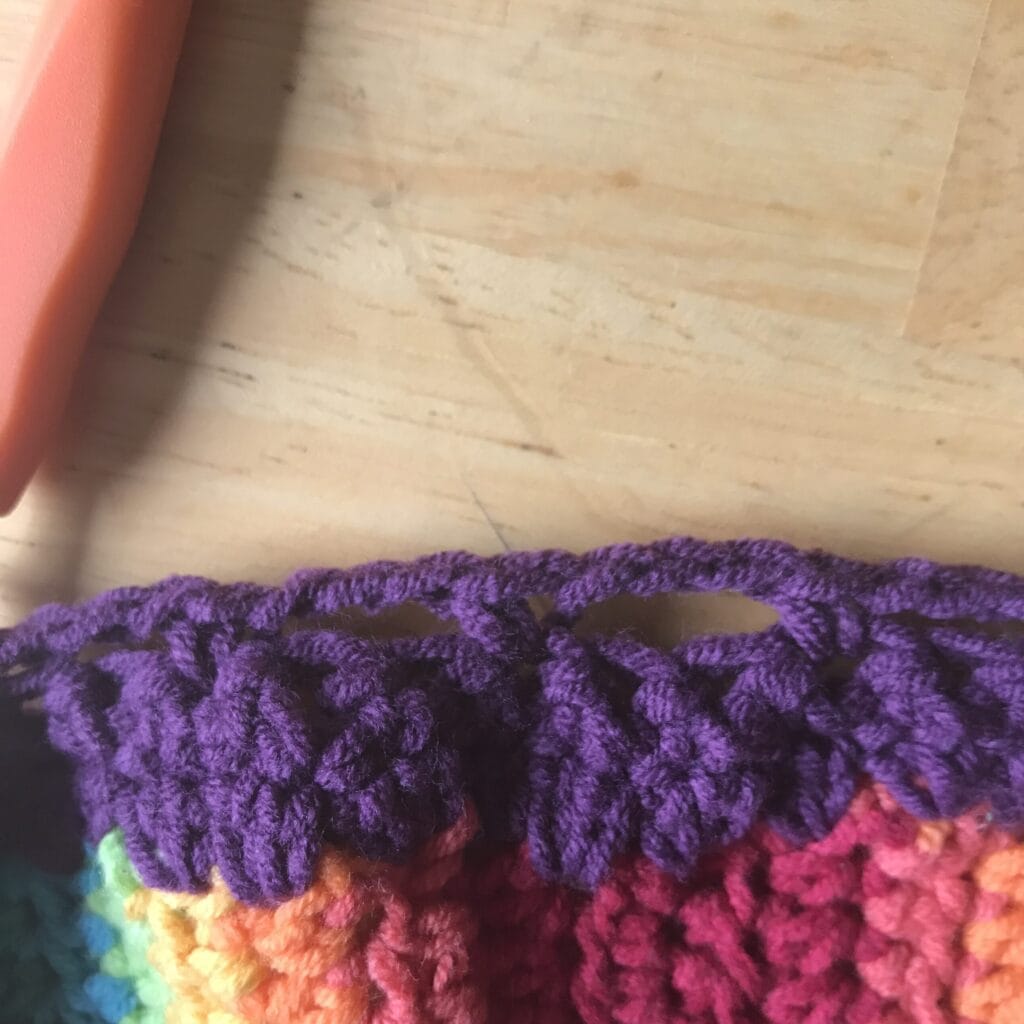
In the original pattern, I released quite a few years ago (pictured below with purple trim), I used Scheepjes yarn in a 3-weight, with a 3.5 mm hook and it is a size XL (chest size C cup, 40″ circumference – bra size 38-40C).
Table of contents
- In this post, you will learn:
- Video Tutorial for Visual Learners
- Rainbow Crochet Bikini Top Tutorial
- LIFETIME MEMBERS :
- It’s all About the Yarn…
- Skill Level:
- Gauge
- Materials
- Sizes
- + Abbreviations
- Stitch Guide
- Instructions
- Pattern Notes
- You May Enjoy These Free Crochet Patterns
- Pattern
- Version 2: Rainbow Crochet Bikini
- Finishing Touches
- Creating the Cords
- RAINBOW CROCHET BIKINI VIDEO TUTORIAL
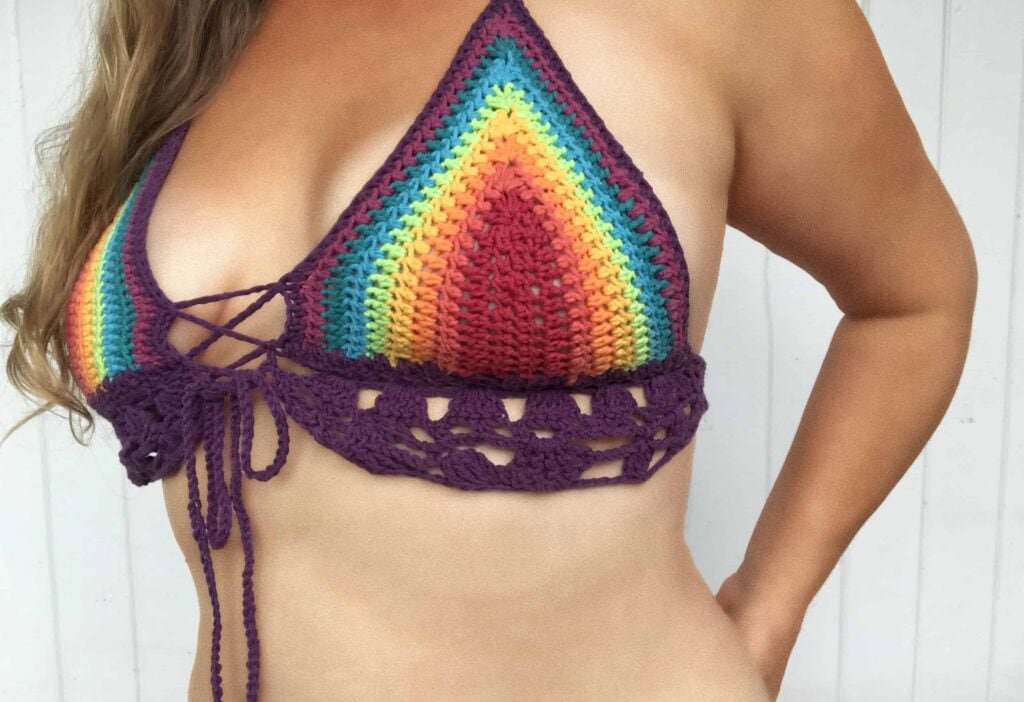
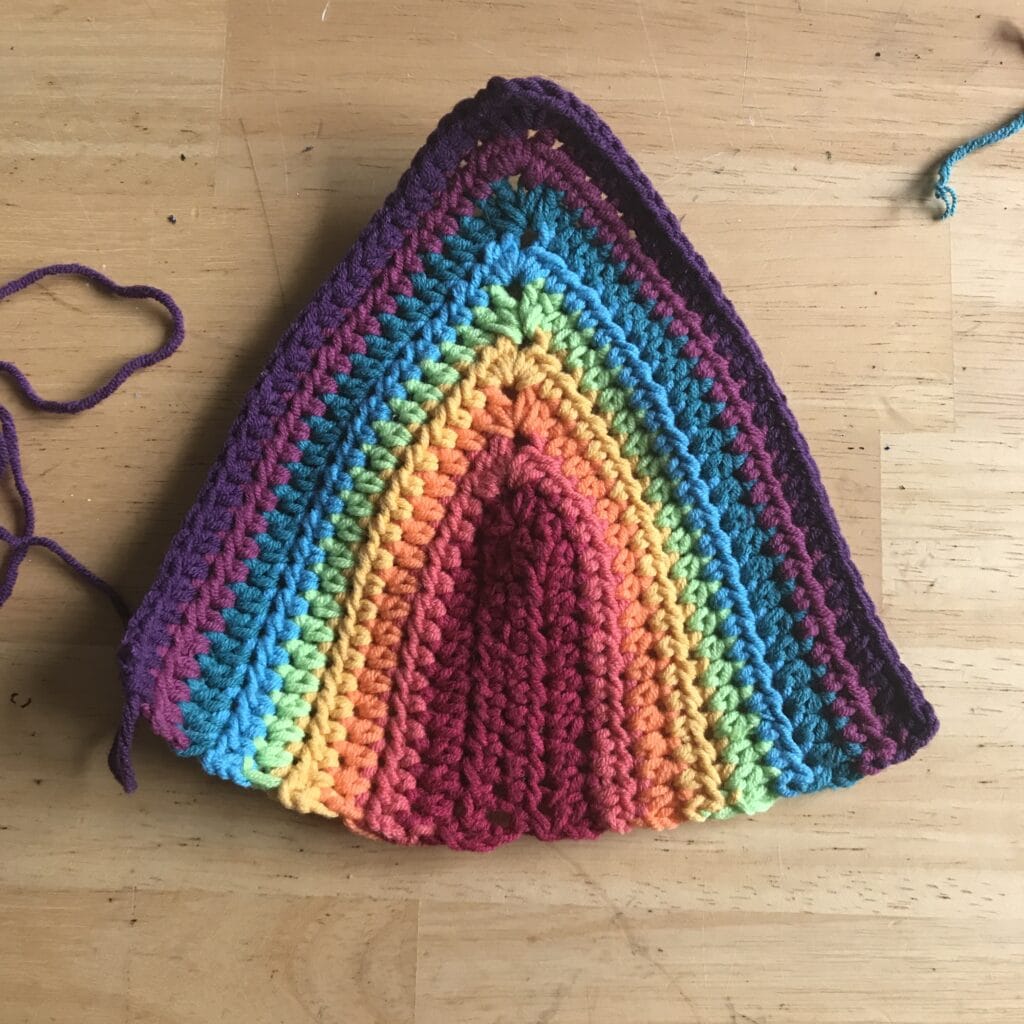
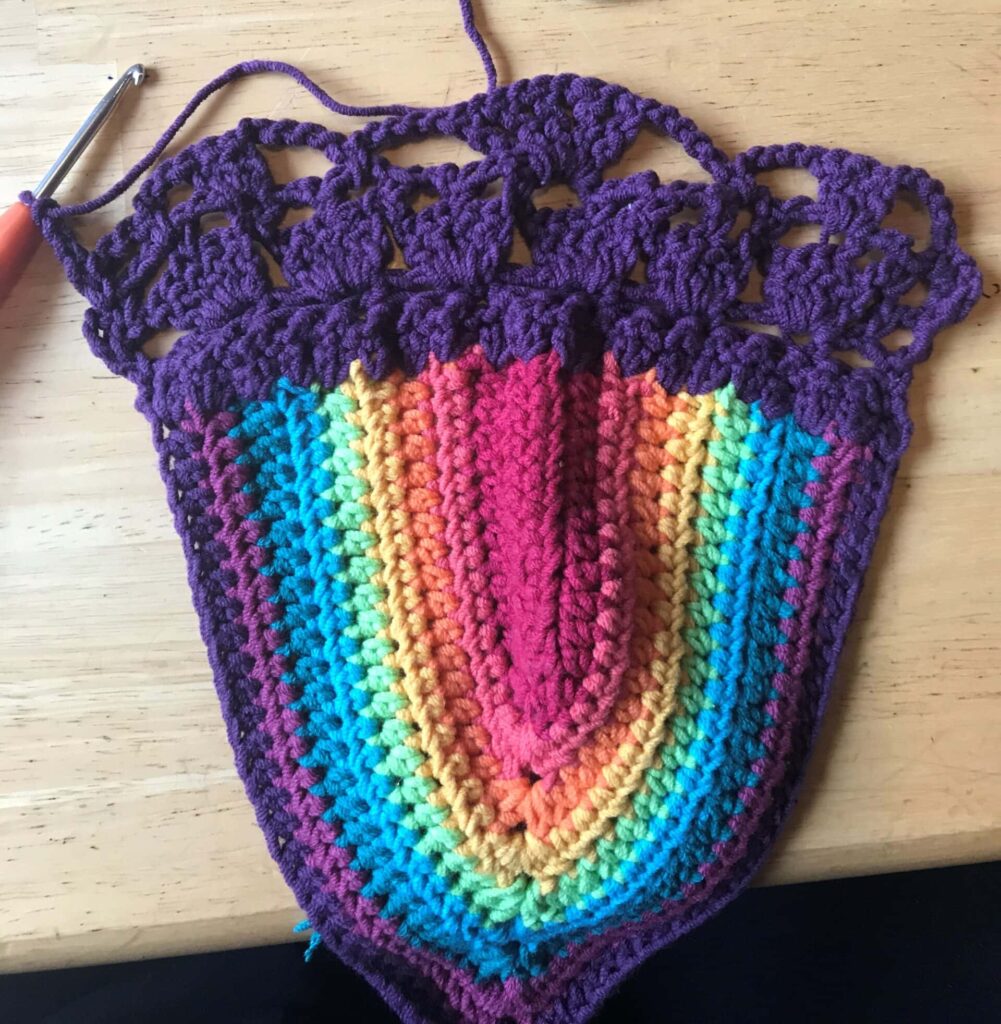
VERSION 1:  Rainbow Crochet Bikini Top (XL – 38C Cup) Using 3.5 mm hook and relaxed tension.

VERSION 1: Rainbow Bikini Front
For the crochet bikini video tutorial, I mixed it up a little by adding I Love This Cotton because I ran out of a few of the colors in Scheepjes. Unfortunately, the weights are slightly different, but in the end, it didn’t seem to make much of a difference.
As you can see, version 1 (purple trim) varies from the new version, but both are extremely beautiful, and I love the new Teal color! Of course, you can use whatever yarn you have in your stash that fits and works best for your appearance.
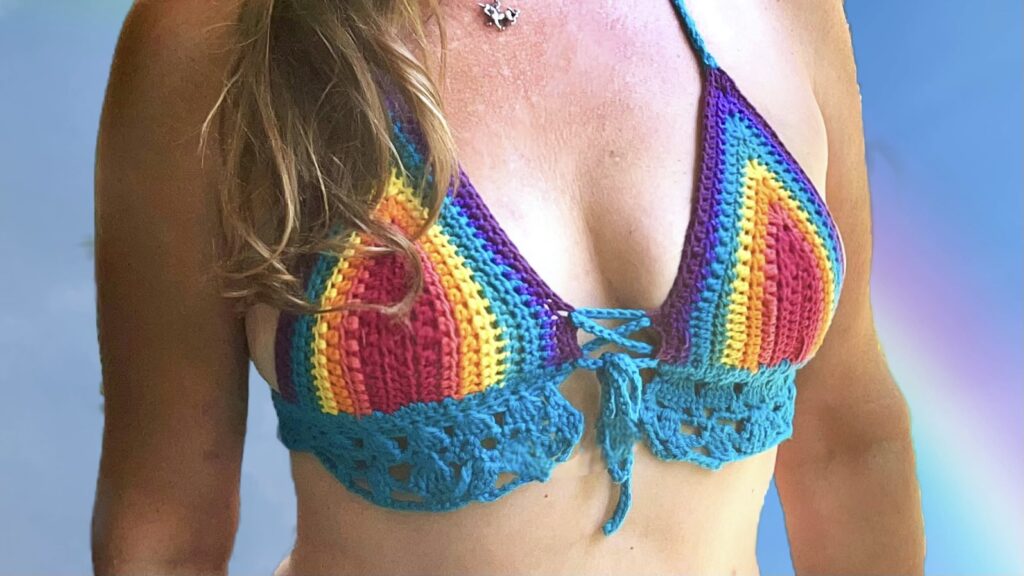
VERSION 2: Rainbow Crochet Bikini Top (Medium 36B Cup) 8 colors using a 3.75 mm hook and medium to loose tension – I lost 65 lbs!
Video Tutorial for Visual Learners
I created a full video tutorial for Version 2: (seen above with blue border). Check it out on YouTube: Crochet Bikini Top Tutorial or jump to the tutorial in this post on Version 2 of the Rainbow Crochet Bikini Top. The video has audio, and text titles to help those with hearing impairment.
Below you will find the written patterns for Version 1 & Version 2. The first part of the video and how to make the cup are the same for both patterns. The only difference between the two patterns is the decorative border, and they differ only slightly.
The video tutorial will help you create both versions but come back to this post to finish the border if you decide to work Version 1.
NOTE  :
:
 :
: In the video tutorial (version 2) for medium size, I use 8 colors – version 1 below lists all 9 colors. I used 8 to make version 2 smaller (because my shape changed), however, I will also list the colors used in the video tutorial on the written pattern post for version 1: Rainbow Crochet Bikini Top – depending on which one you prefer, you can decide for yourself.
Let’s get to it!
Rainbow Crochet Bikini Top Tutorial

 Version 1 – Rainbow Crochet Bikini
This is the perfect crochet pattern for beginner crocheters to learn how to crochet a bikini top. The full written pattern will teach you all the stitches, and the video tutorial will help you learn how to work those stitches, with ease!
LIFETIME MEMBERS:

Hey, all you lifetime member stargazers! Login to your account to find the PDF in your downloads section.
If you are looking for a drama-free crochet group, check out my pattern support group, Stardust Gold Crochet & Friends. We have fun and share crochet patterns, stories, and courses; you can ask me about any pattern in my library for support.

It’s all About the Yarn…
I used Scheepjes Soft fun for Version 1, and subbed out a few with I Love This Cotton and one additional color (purple) for Version 2 of this pattern. Scheepjes is a 3-weight (DK) yarn and works great with a 3.5 or 3.75 mm hook.
They have a large variety of dazzling colors and the material is very delicate, hence the name. I purchased mine from Wool Warehouse, but check out the substitutes below…
Yarn Subs:
I Love This Cotton by Hobby Lobby – is an excellent substitute for the aforementioned. It is a 4 weight yarn but has the capability to work well with 3.5 mm / 3.74 mm / 4mm / 4.5 mm / or 5 mm hooks.
Skill Level:
Easy to Intermediate
Gauge
17 hdc x 5 rows = 4 x 4” (10 x 10 cm)
Gauge Instructions:
Ch 17 + 2, hdc in 3rd ch from hook and across (17 hdc), *ch 2, turn, hdc entire row, repeat from * until you reach 11 rows.
Materials
Hook Size:
- (V1) 3.5 mm (V2) 3.75 mm – you can swap out with a 4 mm, 4.5 mm, or 5 mm to increase the size of the cup – I recommend using a 4 weight yarn with a 5 mm hook for a larger cup size – keep in mind of yarn stretch.
- Scissors
- Darning Needle

Suggested Yarn:
Version 1 Colors:
Colors:
- C1 – 2617 – Red
- C2 – 2449 – Red/Orange
- C3 – 2427 – Orange
- C4 – 2610 – Yellow
- C5 – 2516 – Lime Green
- C6 – 2604 – Teal
- C7 – 2423 – Turquoise
- C8 – 2534 – Red Purple
- C9 – 2493 – Dark Purple
Border – C9


Version 2 Colors:
Scheepjes Soft Fun (I Love This Cotton subs are listed below)
Colors:
- C1 – 2617 – Red
- C2 – 2449 – Red/Orange
- C3 – I Love This Cotton – Glowing Orange
- C4 – 2610 – Yellow
- C5 – 2604 – Deep Green
- C6 – I Love This Cotton – Deep Teal
- C7 – 2515 – Purple
- C8 – 2493 – Dark Purple
Border – C6


Yarn Details:
60% Cotton / 40% Acrylic, 153 yds / 140 meters per skein (1.8 oz/50g)
Sizes
Sizes written as:
Version 1: Large to XL (cup)
Version 2: Small to Medium (cup)
The circumference is adjustable by crocheting a longer mesh on the side (see pattern below for “side mesh”).
There are a few ways to adjust sizing for this pattern. As written, V2 will fit a teen to a woman with a B to large C cup. As I mention in the video tutorial, the easiest way to increase sizing for this pattern is to increase hook size and yarn weight.
Another way to increase the size is to add another row of color to the cup. This will, however, change the number of stitches on your border, which may create an issue with the centering of the treble 5 stitch fan. If you are a more advanced crocheter, you will be able to modify it to your liking to center the treble 5 fan.
Yardage Needed:
You will need 1 skein of each color.

+ Abbreviations
| st(s) | stitch(es) |
| ch(s) | chain(s) |
| sc | single crochet |
| sc2tog | single crochet 2 together (a decrease stitch) |
| exsc | extended single crochet |
| hdc | half double crochet |
| dc | double crochet |
| dc3tog | double crochet 3 together (a decrease stitch) |
| tr | treble crochet |
| tr3tog | treble crochet 3 together (a decrease stitch) |
| sk | skip |
| st | stitch |
| yo | yarn over |
| * | *repeat instructions from * for as long as indicated |
Stitch Guide
sc – single crochet – insert hook in indicated stitch, yo, draw up a loop, yo draw through 2 loops.
exsc – extended single crochet – insert hook in indicated stitch, yo draw through one loop, yo, draw through both loops on hook.
sc2tog – single crochet 2 together (decreases by 1) – insert hook in indicated stitch, yo, draw up a loop, insert hook in next stitch, yo, draw up a loop, yo, draw through all loops on hook.
dc – double crochet – yo, insert hook in indicated stitch, *yo, draw through 2 loops – rep from * one more time.
dc3tog – double crochet 3 together (decreases by 2) – yo, insert hook in indicated st, yo, draw up a loop, yo, draw through 2 loops. *yo, insert hook in next st, yo, draw up a loop, yo, draw through 2 loops repeat from * two more times, then yo, draw through all four loops on hook.
hdc – half double crochet – yo, insert hook in indicated st, yo, draw up a loop, yo, draw through all three loops on hook.
tr – treble crochet – yo twice, insert hook in indicated stitch, yo, draw up a loop, *yo, draw through 2 loops, repeat from * three times.
tr3tog – treble crochet 3 together – *yo twice, insert hook in indicated stitch, yo, draw up a loop, (yo, draw through two loops) two times, repeat from * two more times, yo, draw through all 4 loops on hook.
Instructions
Crochet your tails into the work as you go, this pattern changes yarn color nearly every row. It’s a personal preference, of course, but it makes it easier than weaving them in at the end.
If you notice a mistake, please let me know! Despite rigorous testing, there may be something we missed! Leave a comment below to tell me you love it (or hate it!) lol
Pattern Notes
- Chains do not count as stitches (unless otherwise indicated).
- Work 1st stitch of each row in the base of the turning chain.
- Tension – keep the tension the same for both cups.
- Sizing is approximate.
- Remember to count your stitches.
- Each row increases by 4 hdc.
- A stitch is written as “stitch 2′ or “2 stitches” which means create separate stitches.
- Stitch placement will be noted in the pattern.
You May Enjoy These Free Crochet Patterns
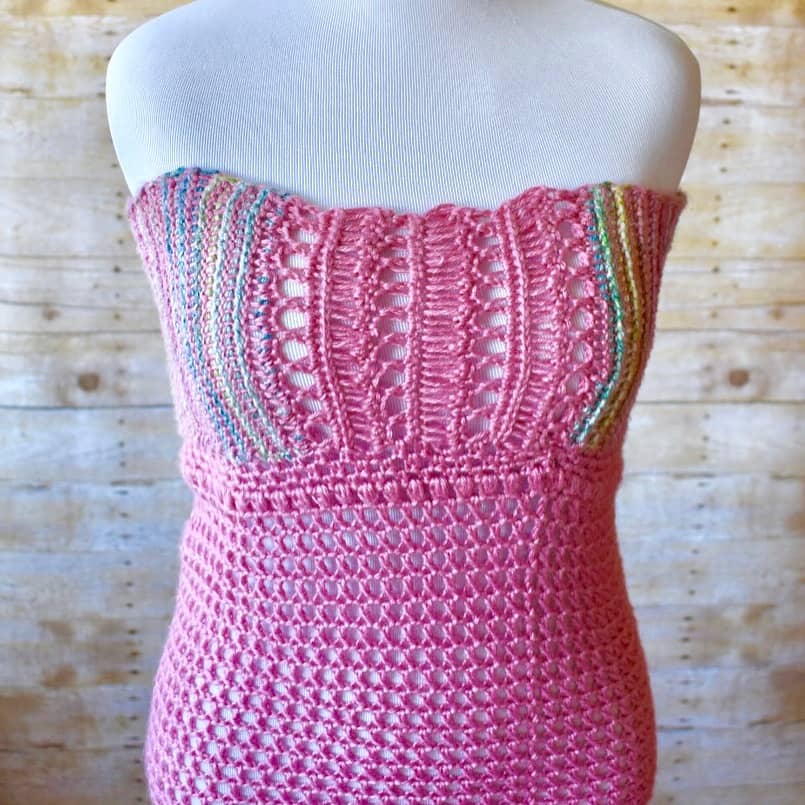
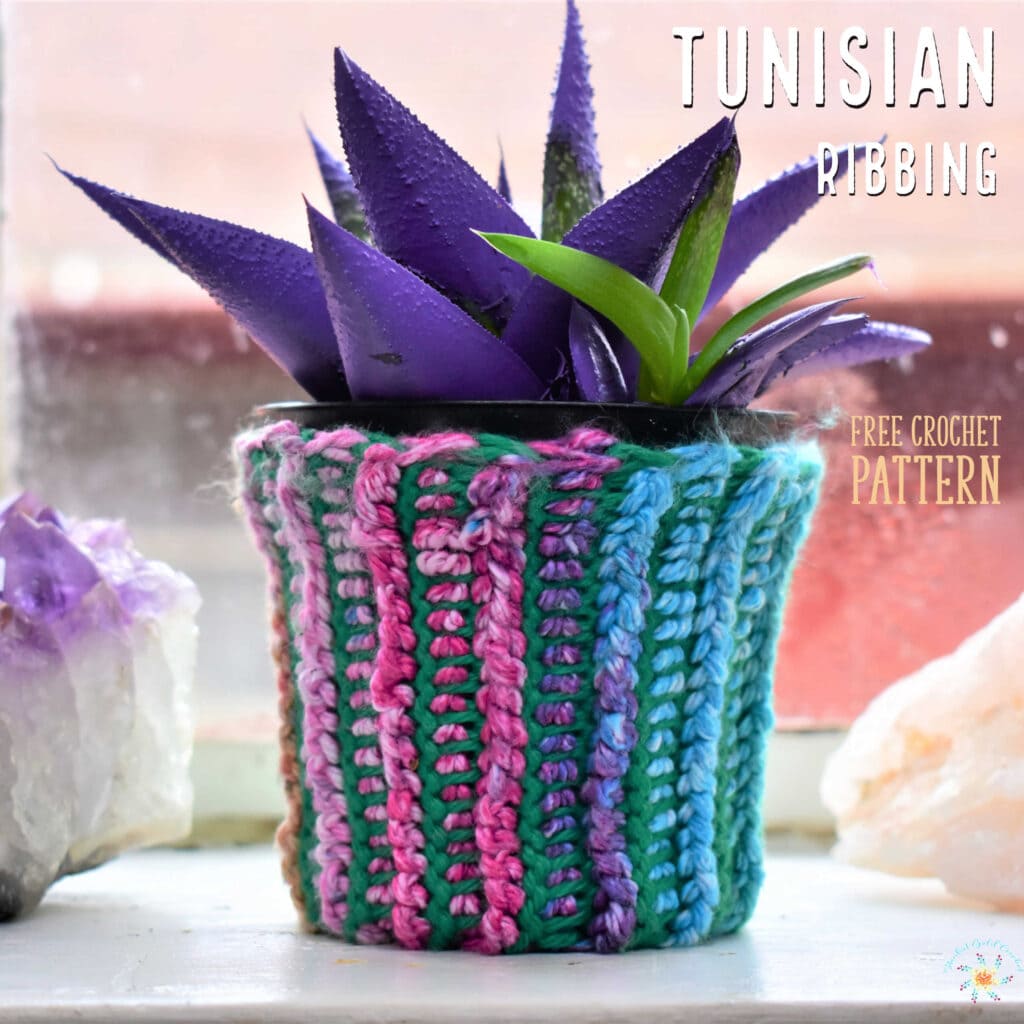
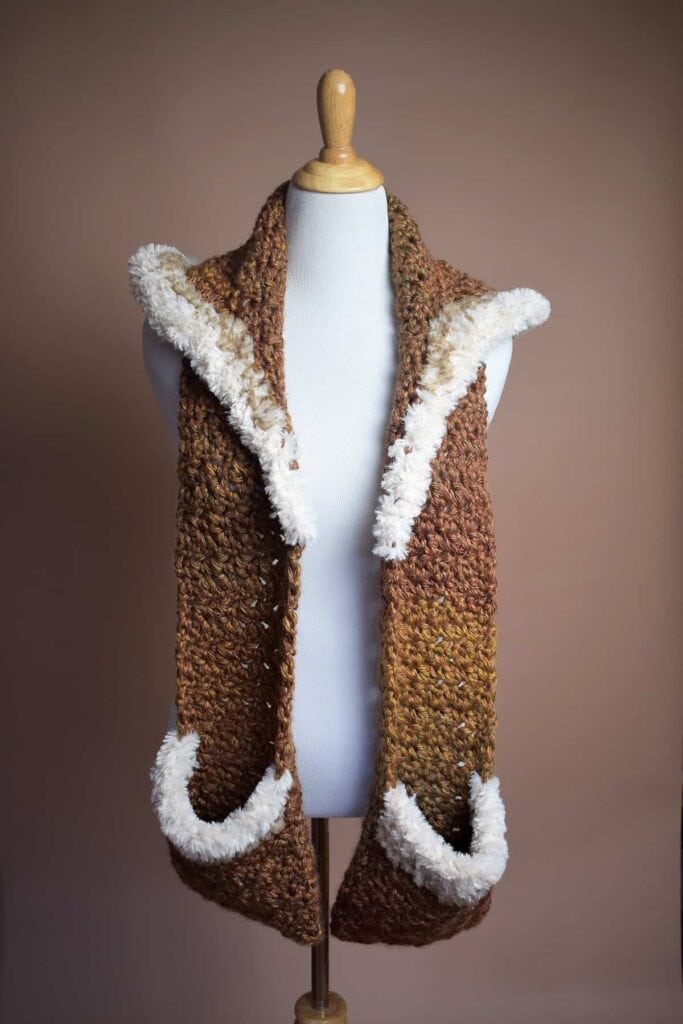
- Neptune Beach Dress Crochet Pattern 2. Cosmic Coozies Tunisian Crochet 3. Kunik Scoodie Hooded Scarf with Pockets
Pattern
Version 1: Rainbow Crochet Bikini
Purple Border using Scheepjes yarn and 3.5 MM hook with 9 Colors (make 2):

With C1 and 3.5 mm hook, chain 11 + 2.
Row 1: (C1) Hdc in 3rd ch from hook, hdc in next 11 chs, in last worked ch, hdc 1, ch 1, hdc 2, hdc (working around the other side) in next 10 chains – 24 hdc, 1 ch-1.
Row 2: (C1) Ch 2, turn, hdc in next 12 sts, (2 hdc, ch 1, 2 hdc) in ch-1 sp, hdc in next 12 sts, finish last st with C2 – 28 hdc, 1 ch-1.
Row 3: (C2) Ch 2, turn, hdc in next 14 sts, (2 hdc, ch 1, 2 hdc) in ch-1 sp, hdc in next 14 sts, finish last st with C3 – 32 hdc, 1 ch-1.
R4-R10 This pattern will repeat, changing color at the end of each row.
- Ch 2 at the beginning of each row.
- Finish last stitch with new color.
Row 4: (C3) 16 hdc (in ch-1 sp: 2 hdc, ch 1, 2 hdc) 16 hdc (36 hdc).
Row 5: (C4) 18 hdc (in ch-1 sp: 2 hdc, ch 1, 2 hdc) 18 hdc (40 hdc).
Row 6: (C5) 20 hdc (in ch-1 sp: 2 hdc, ch 1, 2 hdc) 20 hdc (44 hdc).
Row 7: (C6) 22 hdc (in ch-1 sp: 2 hdc, ch 1, 2 hdc) 22 hdc (48 hdc).
Row 8: (C7) 24 hdc (in ch sp: 2 hdc, ch 1, 2 hdc) 24 hdc (52 hdc).
Row 9: (C8) 26 hdc (in ch sp: 2 hdc, ch 1, 2 hdc) 26 hdc (56 hdc).
Row 10: (C8) 28 hdc (in ch-1 sp: 2 hdc, ch 1, 2 hdc) 28 hdc (60 hdc).
Do not cut C8.
Lace Border
Using C8 (or another color you choose for the border).
Row 1: Ch 1, turn, exsc 2 in each color along the bottom of the bikini (8 total for red, because there are four rows of red) – 40 exsc.

Row 2: sc2tog in each st across – 20 sc.
Row 3: Ch 3, turn, skip 1 sc, sc in next sc, ch 3, *skip 2 sc, ch 3, sc in next, repeat from * to end of row – 7 sc, 7 ch-3.
Row 4: Ch 5, turn, sc in 2nd ch of ch-3, *ch 3, dc 5 in next sc, repeat from * to end, ch 3, sc in 1st ch of ch-3 from beginning or row 3 – 30 dc, 2 sc, 8 ch-3.


Row 5: Ch 3, turn, sc in 2nd ch of ch-3, *ch 3, skip (1 ch & 2 dc), sc in next dc, ch 3, skip (1 dc & 1 ch), sc in next ch, repeat from * to end, ch 3, sc in ch-5 sp – 14 sc, 14 ch-3.
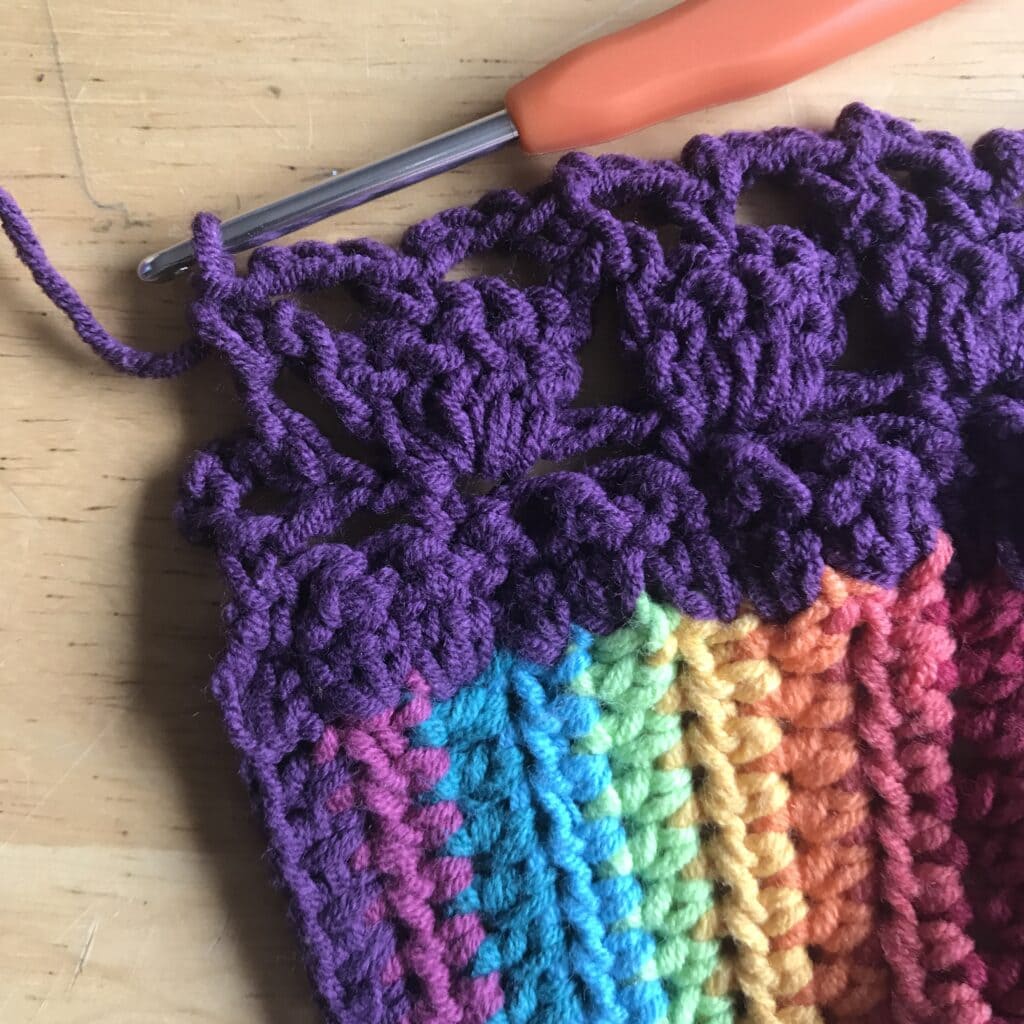
Row 6: Ch 3, turn, sc in ch-3 sp, ch 5, skip (sc, ch-3), dc 3 in next sc, ch 5, skip (ch-3, sc), sc in next ch-3 sp, ch 5, skip (sc, ch-3, sc, ch-3, sc), *(tr 1, ch 1) four times in next ch-3 sp, tr 1 in same ch-3 sp, ch 5, skip (sc, ch-3, sc, ch-3, sc) sc in next ch-3 sp, ch 5, skip (sc, ch-3), dc 3 in next sc, ch 3, skip next ch-3, sc in next sc, ch 3, sc into last sc on row – 5 sc, 6 dc, 5 tr, 4 ch-1, 3 ch-3, 5 ch-5.

Row 7: Ch 3, turn, skip (1st sc, ch-3), sc in next sc, ch 5, skip ch-3, 2 dc in dc3tog, ch 5, skip ch-5, tr3tog in next sc, ch 5, skip (ch-5, tr, ch-1, tr, ch-1), sc in next tr, ch 5, skip (ch-1, tr, ch-1, tr, ch-5), tr3tog in next sc, ch 5, skip ch-5, 2 dc in dc3tog, ch 5, skip ch-5, sc in last sc.

Do not cut yarn, do not turn.
Side Mesh
Note: Chain 5 counts as 1 dc & 1 ch-2. You’ll be working back toward the body of the bikini cup…
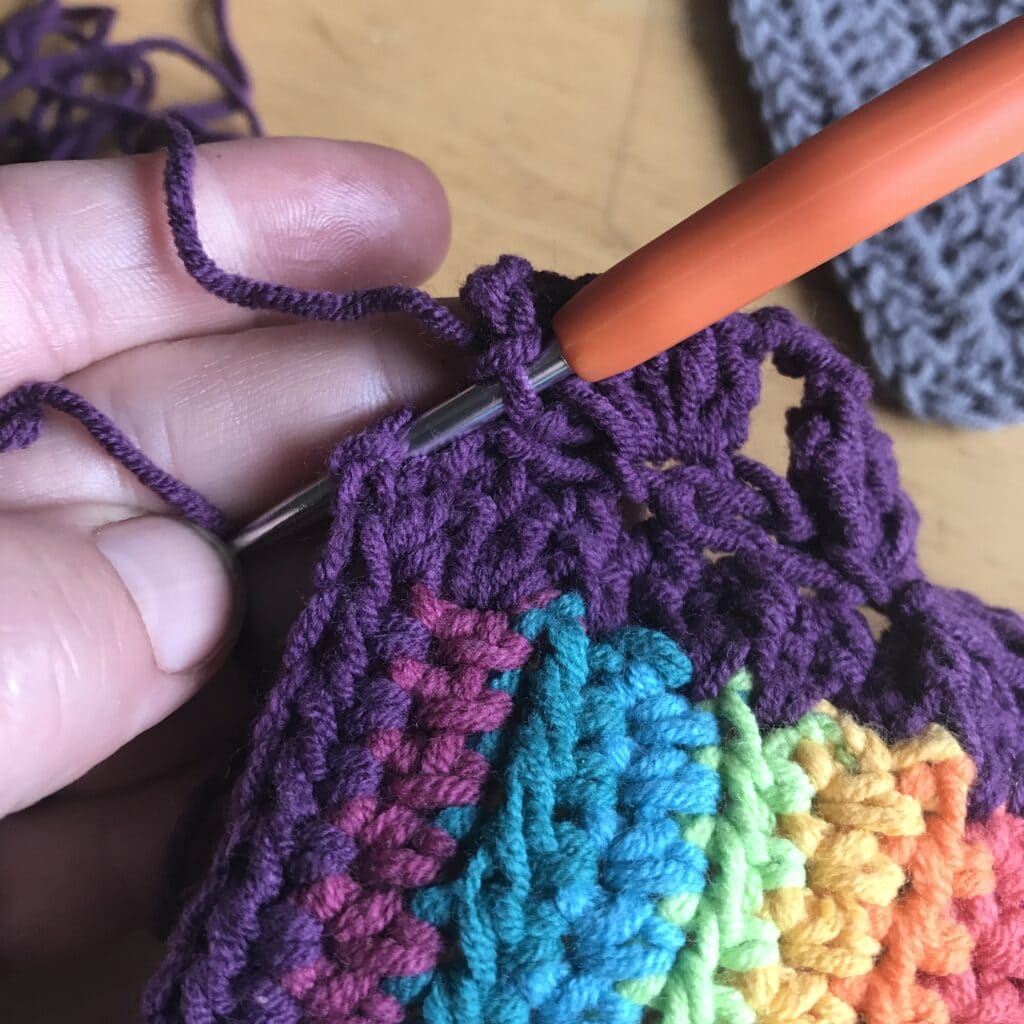
Row 1: Ch 5, dc first ch sp (see photo below), *ch 2, dc into next, repeat two more times – 5 dc, 4 ch-2.

Row 2: Ch 5, turn, *dc in next dc, ch 2, repeat two more times, dc in 3rd ch of ch-5 – 5 dc, 4 ch-2. It creates a mesh pattern, which is stretchy.
Row 3 – X: Repeat row 2. (create as many as you’d like to fit with circumference of your chest) – I completed 10 rows (the video tutorial for the crochet bikini will help you with this pattern too).
Do not cut yarn.
The finishing touches are the same for both versions – SKIP to Finishing Touches
Version 2: Rainbow Crochet Bikini
Teal Border using Scheepjes & I Love This Cotton and 3.75 MM hook with 8 Colors (make 2):
With C1 and 3.75 mm hook, chain 11 + 2.
Row 1: (C1) Hdc in 3rd ch from hook, hdc in next 11 chs, in last worked ch, hdc 1, ch 1, hdc 2, hdc (working around the other side) in next 10 chains – 24 hdc, 1 ch-1.
Row 2: (C1) Ch 2, turn, hdc in next 12 sts, (2 hdc, ch 1, 2 hdc) in ch-1 sp, hdc in next 12 sts, finish last st with C2 – 28 hdc, 1 ch-1.
Row 3: (C2) Ch 2, turn, hdc in next 14 sts, (2 hdc, ch 1, 2 hdc) in ch-1 sp, hdc in next 14 sts, finish last st with C3 – 32 hdc, 1 ch-1.
R4-R9 This pattern will repeat, changing color at the end of each row.
- Ch 2 at the beginning of each row.
- Finish last stitch with new color.
Row 4: (C3) 16 hdc (in ch-1 sp: 2 hdc, ch 1, 2 hdc) 16 hdc – 36 hdc.
Row 5: (C4) 18 hdc (in ch-1 sp: 2 hdc, ch 1, 2 hdc) 18 hdc – 40 hdc.
Row 6: (C5) 20 hdc (in ch-1 sp: 2 hdc, ch 1, 2 hdc) 20 hdc – 44 hdc.
Row 7: (C6) 22 hdc (in ch-1 sp: 2 hdc, ch 1, 2 hdc) 22 hdc – 48 hdc.
Row 8: (C7) 24 hdc (in ch sp: 2 hdc, ch 1, 2 hdc) 24 hdc – 52 hdc.
Row 9: (C8) 26 hdc (in ch sp: 2 hdc, ch 1, 2 hdc) 26 hdc – 56 hdc.
+ Lace Border
Using Teal or another color you choose for the border.
Row 1: Ch 1, turn, exsc 2 in each color along the bottom side of bikini (8 total for red, because there are four rows of red) – 36 exsc.
Row 2: sc2tog in each st across – 18 sc.
Row 3: Ch 3, turn, skip 2 sc, sc in next sc, ch 3, *skip 2 sc, ch 3, sc in next, repeat from * to end of row – 6 sc, 6 ch-3.
Row 4: Ch 5, turn, sc in 2nd ch of ch-3, *ch 3, dc 5 in next sc, repeat from * to end, ch 3, sc in 1st ch of ch-3 (at base) from beginning or row 3- 25 dc, 2 sc, 7 ch-3.
Row 5: Ch 3, turn, sc in 2nd ch of ch-3, *ch 3, skip (1 ch & 2 dc), sc in next dc, ch 3, skip (2 dc & 1 ch), sc in next ch, repeat from * to end, ch 3, sc in next ch-5 sp – 12 sc, 12 ch-3.
Row 6: Ch 5, turn, skip (ch-3, sc, ch-3), dc3tog in next sc, ch 5, skip (ch-3, sc), sc in next ch-3 sp, ch 5, skip (sc, ch-3, sc, ch-3), *(tr 1, ch 1) four times in next ch-3 sp, tr 1 in same ch-3 sp, ch 5, skip (sc, ch-3, sc, ch-3, sc) sc in next ch-3 sp, ch 5, dc3tog in next sc, ch 3, skip next ch-3, sc in next sc, ch 3, sc in last ch-sp – 5 sc, 6 dc, 5 tr, 4 ch-1, 3 ch-3, 5 ch-5.
Row 7: Ch 3, turn, skip (1st sc, ch-3), sc in next sc, ch 5, skip ch-3, 2 dc in dc3tog, ch 5, skip ch-3, tr3tog in next sc, ch 5, skip (ch-5, tr, ch-1, tr, ch-1), sc in next tr, ch 5, skip (ch-1, tr, ch-1, tr, ch-5), tr3tog in next sc, ch 5, skip ch-5, 2 dc in dc3tog, ch 5, sc in base of ch-5.
Do not cut yarn, do not turn.
Side Mesh
Note: Chain 5 counts as 1 dc & 1 ch-2. You’ll be working back toward the body of the bikini cup…
Row 1: Ch 5, dc first ch sp (see photo below), *ch 2, dc into next, repeat two more times – 5 dc, 4 ch-2.
Row 2: Ch 5, turn, *dc in next dc, ch 2, repeat two more times, dc in 3rd ch of ch-5 – 5 dc, 4 ch-2. It creates a mesh pattern, which is stretchy.
Row 3 – X: Repeat row 2. (create as many as you’d like to fit with the circumference of your chest) – I completed 10 rows (the video tutorial for the crochet bikini will help you with this pattern too).
Do not cut yarn.
Finishing Touches
Finishing Row 1: Ch 1, turn, sc across entire row (work into chain stitches, not around them), sc in the first 3 chs of ch-5 – 13 sc.
Finishing Row 2: Ch 1, turn, exsc in 1st sc (at base of chain 1), *ch 1, skip 1 sc, exsc in next sc, repeat from * to end – 7 exsc.
Creating the Cords
I absolutely love this method of creating a crochet cord! I found it on Instagram and it is much simpler than creating an I-cord for numerous reasons. The first reason is I do not have to remove my hook, which in the past, caused quite a bit of turmoil for me. I am a little clumsy and found myself utterly frustrated and kept dropping my stitches.
This method is new to me and it did take a little getting used to, but once I did, It goes faster than an I-cord and a little slower than crocheting a traditional chain.
I will write up the instructions here but viewing the how-to crochet a cord video tutorial below will help immensely…
You will use two strands, folded over in the center. The strands must measure around 5 times the length you want your finished cord to measure.
Another option is to use a method of creating a chain then slip stitching in each chain across (easier, but not as sturdy)!
Cord Measurements:
- Neck Straps / 23″
- Back Straps / 18″
- Front Straps / 15″
Step 1: Fold your long strand of yarn in half.
Step 2: Create a slip knot.
Step 3: Ch 1, pick up strand A, lay it over your hook front to back, creating a loop..
Step 4: Yo, with strand B, and pull through both loops on hook.
Step 5 to end: Repeat steps 3 & 4 until your cord is the length you’d like.
Whichever way you decide to create the cords, see the video below to help you weave them in and see the photo below.


Congratulations! You Are Finished!
RAINBOW CROCHET BIKINI VIDEO TUTORIAL
Pin it, Instagram it with #RainbowCrochetBikini or #StardustGoldCrochet
I hope you enjoyed creating this crochet bikini top pattern! Please share your finished works with me by using the hashtags mentioned above, I would love to see them.
Please leave any comments below, and thanks for visiting!
Facebook * Instagram * Ravelry * Etsy


*any FREE pdf download participants agree to my privacy policy.