


If you’ve ever embarked on the journey of creating crochet circles, you know that achieving a perfectly flat and symmetrical circle can sometimes feel like a bit of a puzzle. 🧶 In this post you will learn the formula on how to crochet a flat circle – perfectly – every time.
Fear not, because today, we’re diving into the art of crafting flawless circular wonders. 🌀✨
Whether you’re dreaming of crafting elegant coasters, vibrant mandalas, or the base for an adorable amigurumi friend, the secret to mastering the art lies in understanding the formula that shapes these circles with precision.
Say goodbye to those pesky ripples or bumpy edges, and say hello to circles that are as smooth as can be.
So, grab your favorite yarn, cozy up with your crochet hook, and let’s unlock the magic behind creating a perfectly flat crochet circle.
Ready to delve into the world of geometry and creativity? Let’s begin!
⭐️ Here are the steps to crochet a perfect flat circle:
This method uses the magic ring aka magic circle (check out this tutorial and learn the magic circle the easy way in 2 minutes! – video)
However, if you prefer a chain, just chain 3 and work your first stitch (and all round 1 stitches) into the first chain.
1. Choose your yarn and crochet hook: Select the appropriate yarn weight and a matching crochet hook. A lighter yarn with a smaller hook will create a tighter stitch, while a heavier yarn with a larger hook will result in a looser stitch.
2. Create a slip knot: Make a slip knot at the end of your yarn and place it on your crochet hook.
3. Start with a magic ring: Hold the tail end of the yarn with your thumb and wrap the working end around your fingers to form a ring. Insert your hook into the ring, yarn over, and pull through to create the first chain stitch. This will be your starting point for the circle.
Start Crocheting
4. Crochet into the magic ring: Work the required number of stitches into the magic ring. Usually, it’s recommended to start with 6 single crochet stitches for a basic circle.
5. Close the ring: Gently pull the tail end of the yarn to tighten the magic ring, closing the hole in the center of the circle.
6. Increase stitches: To make the circle larger, you’ll need to increase the number of stitches in each round. For example, in the first round, you started with 6 stitches. In the second round, you can double the number of stitches by working 2 single crochet stitches into each stitch from the previous round, resulting in 12 stitches.
7. Follow the increase pattern: For subsequent rounds, you’ll continue to increase by the same number (e.g., 6 stitches) evenly distributed throughout the round. For example, in the third round, you would work *1 single crochet in the first stitch, 2 single crochet in the next stitch* – repeat from * to * around.
Finishing Up Your Circle
8. Maintain a flat circle: As you continue to increase, make sure your circle remains flat by evenly distributing your increases and not creating any gaps or ruffles in the crochet.
9. Measure your circle: Keep measuring the diameter of your circle as you progress to ensure it’s the desired size.
10. Fasten off: Once your circle reaches the desired size, fasten off your yarn and weave in the loose ends to secure the center.

⭐️The Magic formula for Crocheting a Perfect Circle!⭐️
Magic ⭕️ or chain 3 and work your first sc into the first chain.
🗒️: Mark the first stitch of each round.
First Round: Sc 8 into the magic circle.
Second Round: Sc 2 in each stitch around.
Third Round: *Sc 2 in first stitch, sc 1 in next stitch, repeat from * around.
Fourth Round: *Sc 2 in first stitch, sc in next 2 stitches, repeats from * around.
Fifth Round: *Sc 2 in first stitch, sc in next 3 stitches, repeat from * around.
Sixth Round: *Sc 2 in first stitch, sc in next 4 stitches, repeat from * around.
Can you see the pattern?? 😍
Troubleshooting Your Perfect Crochet Circle
Despite best intentions, sometimes your yarn may cause your circle to ripple a little. Here is how to fix that.
- Crochet a round of single crochet (or whatever stitch you are using) every third round, then resume your increase pattern.
- Steam or wet blocking your project can help ease the ripples.
Additionally, to make sure you’re on the right track, each round should increase by the number of stitches you started off with in your first round.
In my practice circle, I started off 8. Some people choose to start off with 5 or 6, it depends on the pattern you’d like to make.
Remember to practice and be patient as achieving the perfect flat circle can take some trial and error. Happy crocheting!
If you’ve ever tried to do a circle ⭕️ in 🧶 crochet, it can be quite maddening 😠 when you’re first starting off.
Don’t worry, here is the magic formula for creating the perfect 🤩 flat circle in crochet.
You can use this as a starter to make a hat 🎩 or beanie, to make coasters, and more.
Once you learn the formula – you’re set! 😃 You can modify the stitch to create something truly unique.
I hope this makes your crochet design journey a little easier. I remember how frustrating it is to start designing and feeling like you don’t want to reinvent the wheel – I get it.
Well you don’t have to!
If you enjoyed this tutorial, please check out these helpful crochet tips & tricks tutorials.
- Yarn Basics 101
- What’s the difference between a hank, skein, ball of yarn.
- This is why Tunisian Crochet is so Awesome


How to Crochet a Flat Circle
Crocheting a cirlcle can be frustrating - if you don't know the formula. When you first start crocheting, it may seem like everyone knows what they are doing, except you. Right? Forget that. Here you will learn the formula for creating the perfect flat crochet circle every time.
Materials
- Yarn
Tools
- Crochet Hook
- Scissors
Instructions
This method uses the magic ring aka magic circle (check out this tutorial and learn the magic circle the easy way in 2 minutes! - video)
However, if you prefer a chain, just chain 3 and work your first stitch (and all round 1 stitches) into the first chain.
⭐️ Here are the steps to crochet a perfect flat circle:
1. Choose your yarn and crochet hook: Select the appropriate yarn weight and a matching crochet hook. A lighter yarn with a smaller hook will create a tighter stitch, while a heavier yarn with a larger hook will result in a looser stitch.
2. Create a slip knot: Make a slip knot at the end of your yarn and place it on your crochet hook.
3. Start with a magic ring: Hold the tail end of the yarn with your thumb and wrap the working end around your fingers to form a ring. Insert your hook into the ring, yarn over, and pull through to create the first chain stitch. This will be your starting point for the circle.
4. Crochet into the magic ring: Work the required number of stitches into the magic ring. Usually, it's recommended to start with 6 single crochet stitches for a basic circle.
5. Close the ring: Gently pull the tail end of the yarn to tighten the magic ring, closing the hole in the center of the circle.
6. Increase stitches: To make the circle larger, you'll need to increase the number of stitches in each round. For example, in the first round, you started with 6 stitches. In the second round, you can double the number of stitches by working 2 single crochet stitches into each stitch from the previous round, resulting in 12 stitches.
7. Follow the increase pattern: For subsequent rounds, you'll continue to increase by the same number (e.g., 6 stitches) evenly distributed throughout the round. For example, in the third round, you would work *1 single crochet in the first stitch, 2 single crochet in the next stitch* - repeat from * to * around.
8. Maintain a flat circle: As you continue to increase, make sure your circle remains flat by evenly distributing your increases and not creating any gaps or ruffles in the crochet.
9. Measure your circle: Keep measuring the diameter of your circle as you progress to ensure it's the desired size.
10. Fasten off: Once your circle reaches the desired size, fasten off your yarn and weave in the loose ends to secure the center.
⭐️The Magic Formula!⭐️
Magic ⭕️ or chain 3 and work your first sc into the first chain.
🗒️: Mark the first stitch of each round.
Round 1: Sc 8 into the magic circle.
Round 2: Sc 2 in each stitch around.
Round 3: *Sc 2 in first stitch, sc 1 in next stitch, repeat from * around.
Round 4: *Sc 2 in first stitch, sc in next 2 stitches, repeats from * around.
Round 5: *Sc 2 in first stitch, sc in next 3 stitches, repeat from * around.
Round 6: *Sc 2 in first stitch, sc in next 4 stitches, repeat from * around.
Can you see the pattern?? 😍
Troubleshooting:
Sometimes you'll find with different yarns that this method still creates a few ripples. To solve that problem, every 3rd or 4th row, you can crochet a row of single crochet (or whatever stitch you're using) and then resume your pattern increases.
I hope this helps you create the perfect circle every time. Print this out and add it to your crochet tutorial binder!
Recommended Products
As an Amazon Associate and member of other affiliate programs, I earn from qualifying purchases.
-
 4 Pcs Sewing Embroidery Scissors with 4 Pcs Artificial Leather Cover 3.6 Inch Stainless Steel Stork Scissors Vintage Embroidery Scissors for Needlework, Manual Sewing Handicraft (Retro Colors)
 -
3 Pack Tape Measure Measuring Tape for Body Fabric Sewing Tailor Cloth Knitting Craft Weight Loss Measurements Retractable 60-inch 1.5 Meter, Small Push Button Dual Sided Tape Measure Body Measuring
-
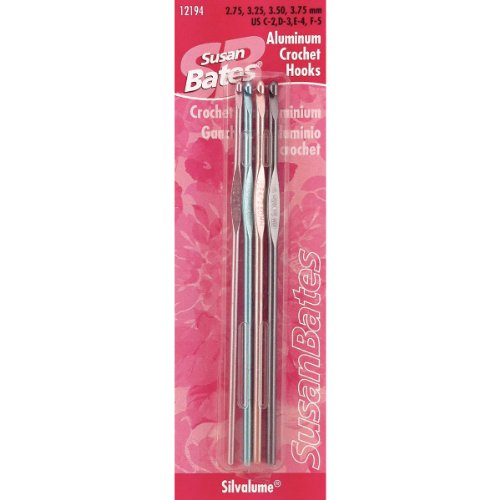
Susan Bates Silvalume Aluminum Crochet Hook, Set of 4


This shows how to do a circle which I’ve done for years using different yarns. But the start of each project always ends up a bit like a cone. I finger stretch, I start with a larger hook- nothing helps. The end of project ( if I’ve doing a ball for example), is fine.Any tips?
How many stitches are you using for your start? I guess it depends on the pattern, but if you’re using a magic circle, you shouldn’t get a cone look… Perhaps just soften it with a bit of water and lie it flat?