


Do you ever feel like your store-bought socks are more torture devices than cozy friends? Yeah, same. But guess what? Ditch those itchy prisons for your toes, because YOU can crochet the comfiest crochet socks EVER. In this post I will teach you How to Crochet Socks the EASY WAY!
No more boring stripes or wool sweaters for your feet (we’ve all been there). We’re talking about handmade socks that feel like marshmallows hugging your toes, socks that make your shoe size a superpower, socks that turn every step into a fluffy cloud party.
Ready to level up from “meh” feet to “marvelous” ones? Buckle up, friend, because it’s time to crochet some easy crochet socks masterpieces! A totally free crochet pattern!
Skill Building Hoppers!
If you landed here for the skill building blog hop, please use this code to get 50% OFF my Lifetime Bundle – TODAY ONLY! Use CODE: SKILLS
Stinky Sneakers Be Gone! Time to Make Your Own Marshmallow Mitts for Feet!
These socks really are like marshmallow mitts for your feet. I really don’t like crocheted socks, at all. They poke my sensitive feet and I don’t like it at all.
So for years I’ve been trying to come up with free pattern for crochet socks or booties that don’t give me the ick feeling. Also, one that are great beginner crochet socks.
This yarn is the one! This is the perfect tutorial to level up your crochet skills, and feel free to change up the yarn weight to customize them a little more.
Big Yarn, Big Fun (and Big Marshmallow Hugs!)
Hold on, you might be thinking, “Isn’t sock yarn supposed to be thin and scratchy?” Not today! We’re breaking the rules with chunky, cuddly, BULKY yarn that feels like wrapping your feet in a giant teddy bear hug.
Imagine sinking your toes into a cloud of cozy with every single step. Plus, bulky yarn means less squinting at tiny stitches and more “whoop-whoop, I finished a round!” high fives. And the best part?
There are a lot of free crochet sock patterns out there, but this one is made just for you. They are an easy pair of socks that you’ll pull out for winter’s to come.

Video Tutorial
This pattern comes with a video tutorial on how to assemble them, so you can see EXACTLY how to assemble them like a crochet pro (no more confusing instructions or yarn-tangled meltdowns!).
If this is your first pair of crochet socks, you’re in for a treat.
Let’s turn those tired toes into happy hoppers, one single crochet stitch at a time! (See how I snuck that in there?)
Written Pattern
I am still working out the math on the written pattern. It’s so hard with socks because all our feet are soooo different! But I’ll get it finished up on here on the blog within the week. In the meantime, keep reading!
Bonus – Customize Them!
Want to make everyone jealous of your amazing sock game? This pattern comes in different sizes, so you can whip up a pair for your besties, fam, even the dog (though fuzzy booties might be more their style!).
They have a slightly negative ease (it just means the socks hug your feet snugly), your creations will fit like a dream, no matter the shoe size.
And because you made them yourself, they’ll be way more special than anything you could find in a store.
Learn About Different Type of Sock Construction
A few years ago I wrote a post about how different socks are constructed, like top down, toe-up socks, or afterthought heel. Read more about that in this post: Anatomy of a Crochet Sock for crochet beginners.
There are so many ways to construct socks, and this style of construction in this post was created (so far as I know) by a fellow crocheter called Brunaticality.
When I saw this construction style, I thought, wow, this is great, I need to design a pattern using this construction! Let’s get down to it!
How to Crochet Socks
A little bit about the yarn…
(this section contains affiliate links, which means I earn a small commission from Michael’s at extra cost to you)
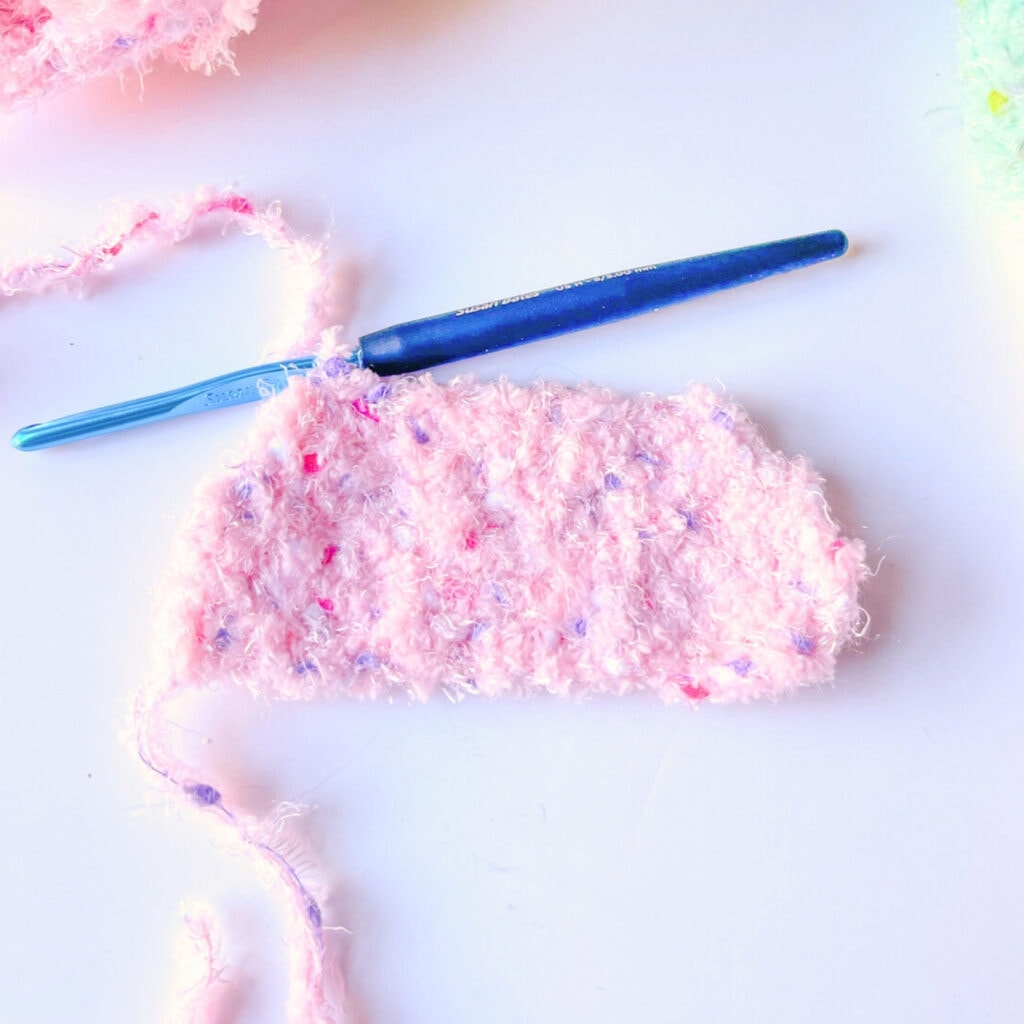
Cozy Boucle by Loops & Threads yarn in the color circus is a playful and soft textured yarn that is perfect for creating cozy winter garments and accessories.
These socks don’t use fingering weight yarn or sock weight yarn, so they are very different from traditionally knit socks, but I bet you can adjust the pattern to suit your needs using those weights too!
Although I enjoy working with this yarn, I would like to share some helpful suggestions for improving your experience with it.
Although Michael’s website says this yarn is a super bulky (6) yarn, I do not feel it stands up to the super bulky label. It looks and feels more like a worsted or more bulky.
Yarn Details: 100% polyester, 5.29 oz / 150 g, 166 yd / 150 m per skein.

Tips on Working with Cozy Boucle yarn:
- Feel for your stitches – you need to keep a close eye on your count using this yarn. The stitches hide.
- Use a stitch marker – using a stitch marker to mark the first and last stitch of each row will help you keep your stitch count proper.
- To ease the process of working with this somewhat challenging yarn, I suggest using a medium to loose tension and slightly pulling up the loop on your hook.
Yarn Subs
I searched around and found a great sub that’s very similar to Cozy Boucle yarn. It’s called Pipsqueak and can be found at Joann: Bernat Pipsqueak Yarn.
According to Joann’s website:
“Bernat Baby yarns are OEKO-TEX certified, and are tested for over 300 harmful substances and proven to be safe for your baby’s sensitive skin.”
That makes for a great sub. This yarn is listed as a bulky (5) weight yarn.
Yarn sub details:
100% Polyester, Ball Size: 100g / 3.5oz, 92m / 101yd per skein.
Notes
These socks are worked mostly using single crochet stitches, which makes it perfect for beginners and doesn’t use much yarn.
Skill Level
Easy to Intermediate (Intermediate because there is some shaping involved)
Gauge
It’s always a good idea to create a gauge swatch, especially if this is your first pair of socks. However, it’s not mandatory.
13 sc x 14 rows = 4” x 4” (10 cm x 10 cm)
Materials
Suggested Yarn & Yardage:
- Cozy Boucle by Loops & Threads yarn in Circus (MC) and Spearmint (CC) (100% polyester, machine washable)
- Yardage: 1 skein of each color.
- Hook Size: 5 mm Crochet Hook (US H Hook)
- Scissors
- Yarn Needle
- Stitch Markers
Sizes / Sizing & Finished Measurements
To accommodate my wide foot, I added extra stitches while crocheting. Adjusting in multiples of 2 maintains a neat appearance as the cuff is created with front and back post stitches, but this pattern is adjustable to your special foot size in such an easy way!
You can create the perfect pair of crochet socks made just for you!
Size Adjustments
As previously mentioned, measuring the recipient’s foot size will ensure a precise fit. Fortunately, this pattern is easy to adjust for different sizes.
How to Customize Your Sock to Fit Perfect
- Use these guides or grab a measuring tape and measure your own foot to get the perfect size.
- Because this pattern is created using only single crochets, that makes sizing a lot easier.
Sock & Foot Sizing Charts
Types of Sock Cuffs You Can Create
| Sock Height | Men / Unisex | Women | Kids |
| No show | 2″ | 1.75″ | — |
| No show | 3.5″ | 2.75″ | — |
| 1/4 (Quarter) Socks | 5.5″ | 5.5″ | 4″ |
| Shorty Socks | — | 5.75″ | — |
| Micro Crew Socks | 8.5″ | 7.5″ | 6″ |
| Crew Socks | 10.5″ | 8.5″ | 7.5″ |
| Boot Socks | 11″ | 10.5″ | — |
| Mid-Calf Socks | 12″ | 12″ | — |
| Over-the-Calf / Knee High Socks | 17″ | 16.25″ | 13″ |
Women’s Shoe Size Chart For Reference
| US | EU | UK | FOOT LENGTH (approximate) |
| 6 | 36-37 | 4 | 8.75 in / 22.5 cm |
| 6.5 | 37 | 4.5 | 9 in / 23 cm |
| 7 | 37-38 | 5 | 9.25 in / 23.5 cm |
| 7.5 | 38 | 5.5 | 9.375 in / 23.8 cm |
| 8 | 38-39 | 6 | 9.5 in / 24 cm |
| 8.5 | 39 | 6.5 | 9.75 in / 24.6 cm |
| 9 | 39-40 | 7 | 9.875 in / 25 cm |
| 9.5 | 40 | 7.5 | 10 in / 25.4 cm |
| 10 | 40-41 | 8 | 10.2 in / 25.9 cm |
| 10.5 | 41 | 8.5 | 10.35 in / 26.2 cm |
| 11 | 41-42 | 9 | 10.5 in / 26.7 cm |
Men’s Shoe Size Chart for Reference
| US | EU | UK | FOOT LENGTH (approximate) |
| 7 | 40 | 6 | 9.6 in / 24.4 cm |
| 7.5 | 40-41 | 6.5 | 9.75 in / 24.8 cm |
| 8 | 41 | 7 | 9.9 in / 25.2 cm |
| 8.5 | 41-42 | 7.5 | 10.125 in / 25.7 cm |
| 9 | 42 | 8 | 10.25 in ~26 cm |
| 9.5 | 42-43 | 8.5 | 10.4 in / 26.5 cm |
| 10 | 43 | 9 | 10.6 in / 26.8 cm |
| 10.5 | 43-44 | 9.5 | 10.75 in / 27.3 cm |
| 11 | 44 | 10 | 10.9 in / 27.8 cm |
| 11.5 | 44-45 | 10.5 | 11.125 in / 28.3 cm |
| 12 | 45 | 11 | 11.25 in / 28.6 cm |
| 13 | 46 | 12 | 11.6 in / 29.4 cm |
Abbreviations:
| Sc | Single Crochet |
| Sl st | Slip Stitch |
| Ch(s) | Chain (s) |
| FSC | Foundation Single Crochet |
| Sc2tog | Single Crochet 2 Together |
| FPdc | Front Post Double Crochet |
| BPdc | Back Post Double Crochet |
| Yo | Yarn over |
Stitch Guide:
Basic Crochet Stitches:
Sc – Single Crochet – insert hook in indicated stitch, yo, draw up a loop, yo draw through both loops on hook.
Special Stitches:
Sc2tog – Single Crochet 2 Together (decreases by 1) – Insert hook in indicated stitch, yo, draw up a loop. Insert hook in next stitch, yo, draw up a loop, yo, draw through all loops on hook.
FSC – foundation single crochet – Create a slip knot. Ch 2, insert hook in 1st chain. Yo, draw up a loop. Ch 1, yo, draw through both loops on hook. (2nd stitch) insert hook in bottom two loops of ch 1. Yo, draw up a loop, ch 1, yo, draw through both loops (2 fsc created).
FPdc – front post double crochet – Yo once, insert hook around indicated stitch (from front to back and out the front again). *yo and draw through two loops* – rep *…* until only one loop on hook remains on hook.
BPdc – back post double crochet – Yo, insert hook around the post of the next stitch (from back to front and out the back again). yo, draw up a loop, *yo, draw through two loops* – two times.
Pattern Notes – Please Read:
- Pattern is worked in rows and contains seams.
- Use the diagram for seaming instructions.
- See adjusting instructions to customize.
How to Crochet Socks The Easy Way!
Cozy Boucle Crochet Sprinkles Sock Pattern
I wrote this pattern customized for my foot, which is size 7 women’s, wide. See below for adjustment instructions to easily customize to fit your own foot or one of someone you love.
Body of Sock:
Main Color (MC): Circus, Contrasting Color (CC): Spearmint or whatever other color you choose.
Notes:
To give you an idea of measurements and adjusting, you’ll be starting the sock at the heel. It’s the construction that makes this sock pattern so great!
- Rows 1 – 11 make the heel.
- Rows 12 – 27 make the bottom of the sock (bottom of your foot).
- Rows 28 – 37 make the toe.
- Rows 38 – 54 make the top of the foot.
- Top cuff of the sock instructions are below.
- LEAVE LONG TAILS FOR SEWING.
- CH 1, TURN at the end of each row, unless otherwise indicated.
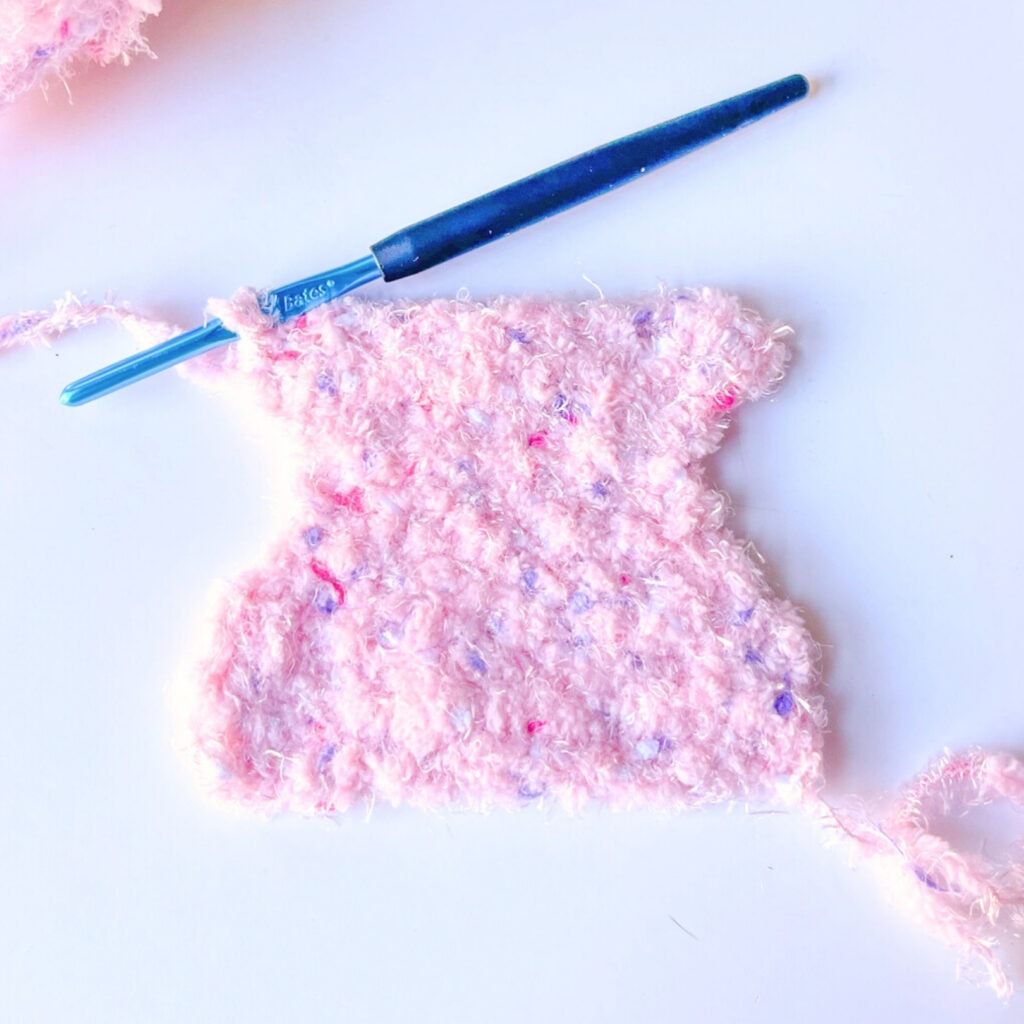
As you see from the diagram below, the arrows show the direction of the work and where to start.

PATTERN:
Heel Rows
To make a larger/smaller heel, start with a higher/lower stitch count starting chain in odd numbers.
The increases and decreases are made in the first and last stitch of each row. So only the center stitch count and final stitch count will change when you modify the pattern.
Row 1: With CC, FSC 15 (alternatively, create a chain of 16, work into the 2nd chain from the hook and back across using a single crochet) – 15 fsc.
Row 2: Sc in each stitch across (15 sc)
Row 3: Repeat Row 2.
Row 4: Sc2tog, sc 11, sc2tog (13 sc)
Row 5: Sc2tog, sc 9, sc2tog (11 sc)
Row 6: Sc2tog, sc 7, sc2tog (9 sc)
Row 7: Sc in each stitch across (9 sc)
Row 8: Repeat Row 7.
Row 9: Inc, sc 7, inc (11 sc)
Row 10: Inc, sc 9, inc (13 sc)
Row 11: Inc, sc 11, inc (finish out last stitch with MC) (15 sc)
Bottom of Sock
To make your song longer, simply increase the number of rows you create. Remember or write down the number of rows you use and repeat that number for the top of the sock too.
Row 12: Sc in each stitch across (15 sc)
Row 13 – 27: Repeat Row 11 (finish last stitch with CC at the end of Row 27).
Toe Rows
Similar to the HEEL, if you want to make a larger/smaller toe, start with a higher/lower stitch count starting chain in odd numbers.
The increases and decreases are made in the first and last stitch of each row. So only the center stitch count and final stitch count will change when you modify the pattern.
Row 28: Sc in each stitch across (15 sc)
Row 29: Repeat Row 27.
Row 30: Sc2tog, sc 11, sc2tog (13 sc)
Row 31: Sc2tog, sc 9, sc2tog (11 sc)
Row 32: Sc2tog, sc 7, sc2tog (9 sc)
Row 33: Sc in each stitch across (9 sc)
Row 34: Repeat 32.
Row 35: Inc, sc 7, inc (11 sc)
Row 36: Inc, sc 9, inc (13 sc)
Row 37: Inc, sc 11, inc (finish out last stitch with MC) (15 sc)
Top of Sock
If you customized the bottom of your sock, make sure you repeat that number of rows for the top of the sock too. Otherwise, continue on…
Row 38: Sc in each stitch across (15 sc)
Row 39 – 54: Repeat Row 37.
Tie off, weave in tails.

Top Cuff of Sock
I crocheted mine a little because it does tend to flare out a little, BUT doing that made it very difficult to pull the sock over my heel.
My solution for that is to add a little bit of elastic and weave it through – or even add a little clasp style button. Get creative!
After you finish crocheting this piece, use a whip stitch to attach it to the other piece (see diagrams).
The yarn is bulky and a whip stitch helps hide the seam. Place a stitch marker at sc 9 and sc 24 to mark where to begin sewing.
Neck Of Sock (Area below Cuff)
Here is where you can create a taller sock. After you complete Row 2 (below), the remaining rows are a repeat of Row 2. To make your sock taller, just crochet more rows.
Keep in mind that our calves get wider as we go up, so keep in mind you may need to add a few increase stitches to get the desired width circumference for taller socks.
Remember to keep your increases in multiples of two so the cuff pattern will easily translate to a wider / taller sock.
If you’re customizing the top and cuff, remember to double the number of starting stitches + 4 stitches from the final stitch count of your bottom piece. (i.e., I ended with 15 stitches, so the top piece of my neck/cuff is 34)
Row 1: FSC 34 – or – chain 35, and sc in 2nd chain from hook and across (34 sc)
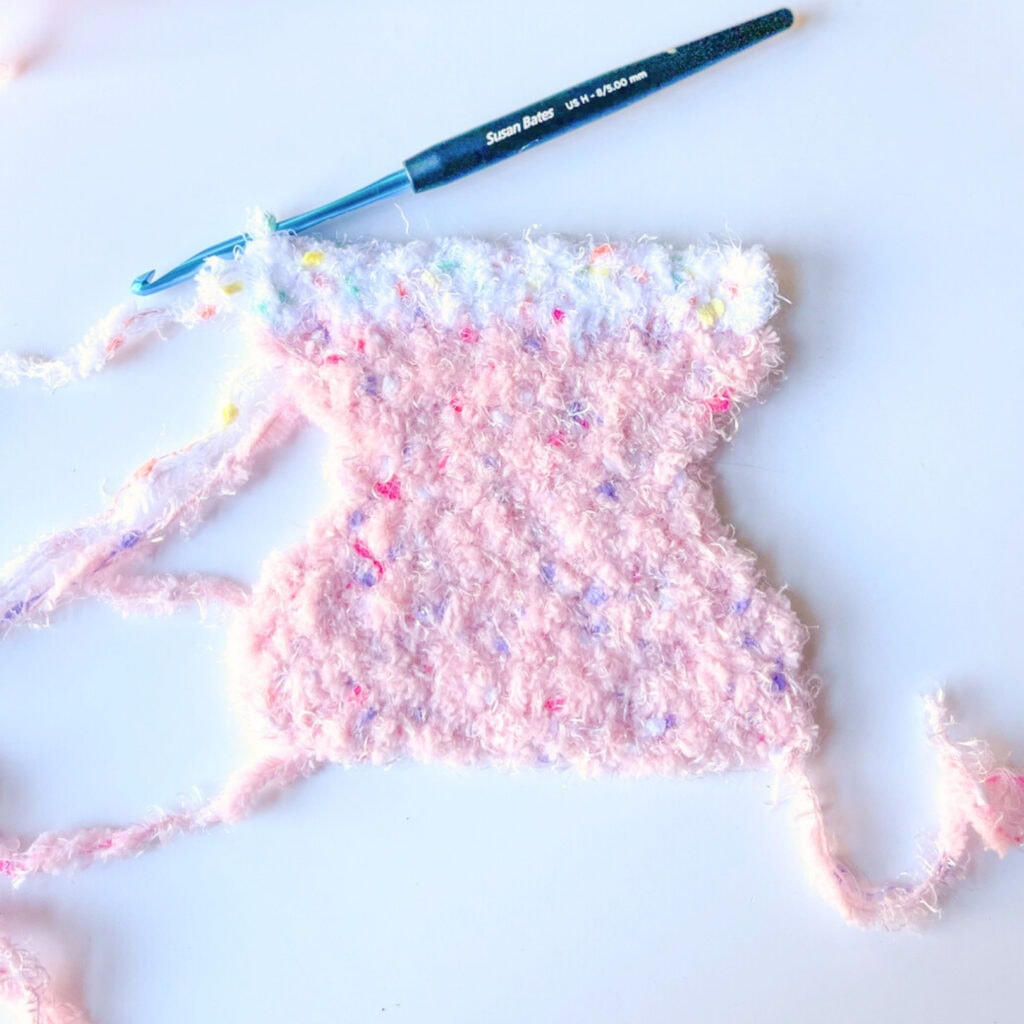
Row 2: Sc in each stitch across (34 sc)
Rows 3 – 7: Repeat Row 2 (finish last stitch of Row 7 with CC).
Creating the Cuff
This is a basic cuff using back post double crochet and front post double crochet stitches. You can use whatever you’d like and customize it, add buttons, use elastic, etc. Have fun with it! These are completely your own creation!
Row 8: Ch 2, turn, dc in each stitch across (34 dc)
Row 9: Ch 1, turn, sc in 1st dc, *FPdc around post of next dc**, BPdc around post of next dc, repeat from * across, ending repeat at ** (last stitch of the row is a FPdc) (1 sc, 33 dc)
Tie off, weave in tails.
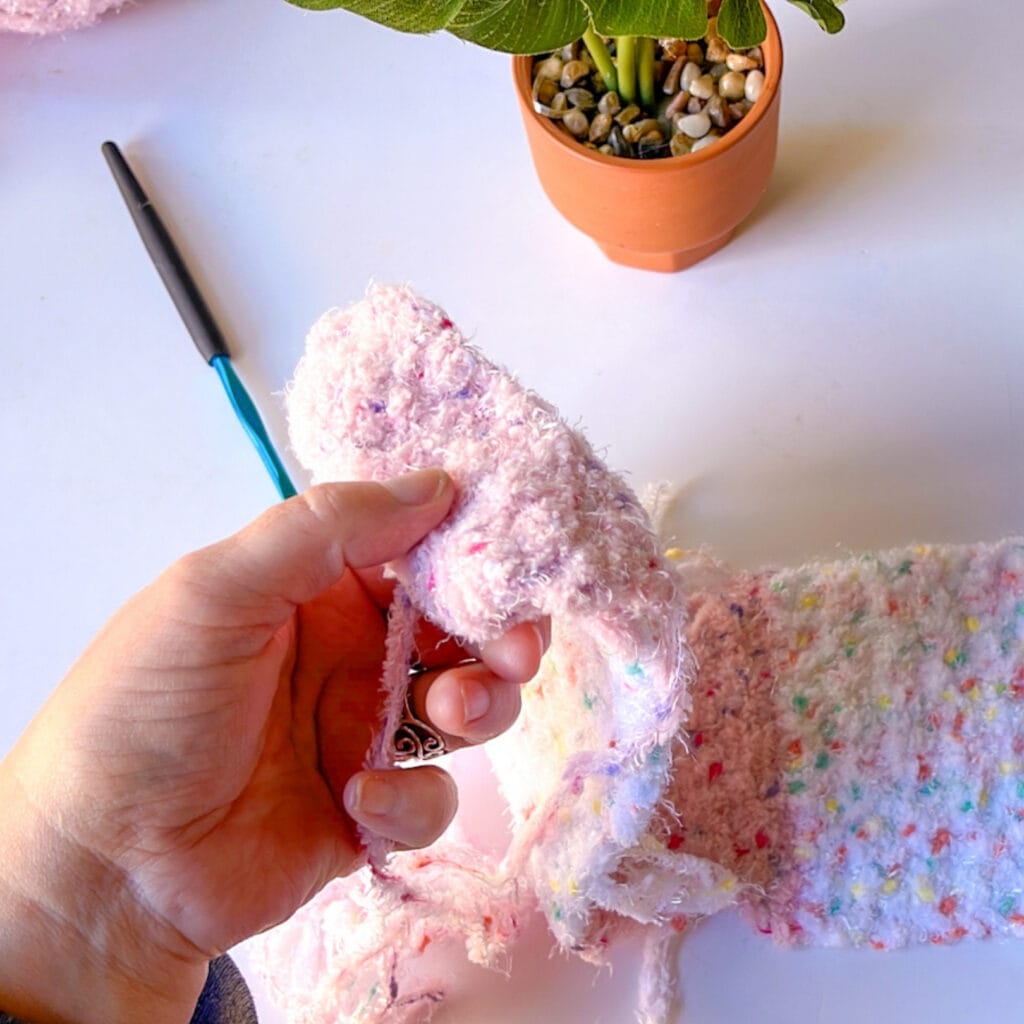
Assembly
Lay sock face up with heel closest to you. Center the cuff section of the sock and use a whip stitch or mattress stitch to attach it to the main body of the sock.
Follow the diagram below on how to fold and sew the remainder of the sock.

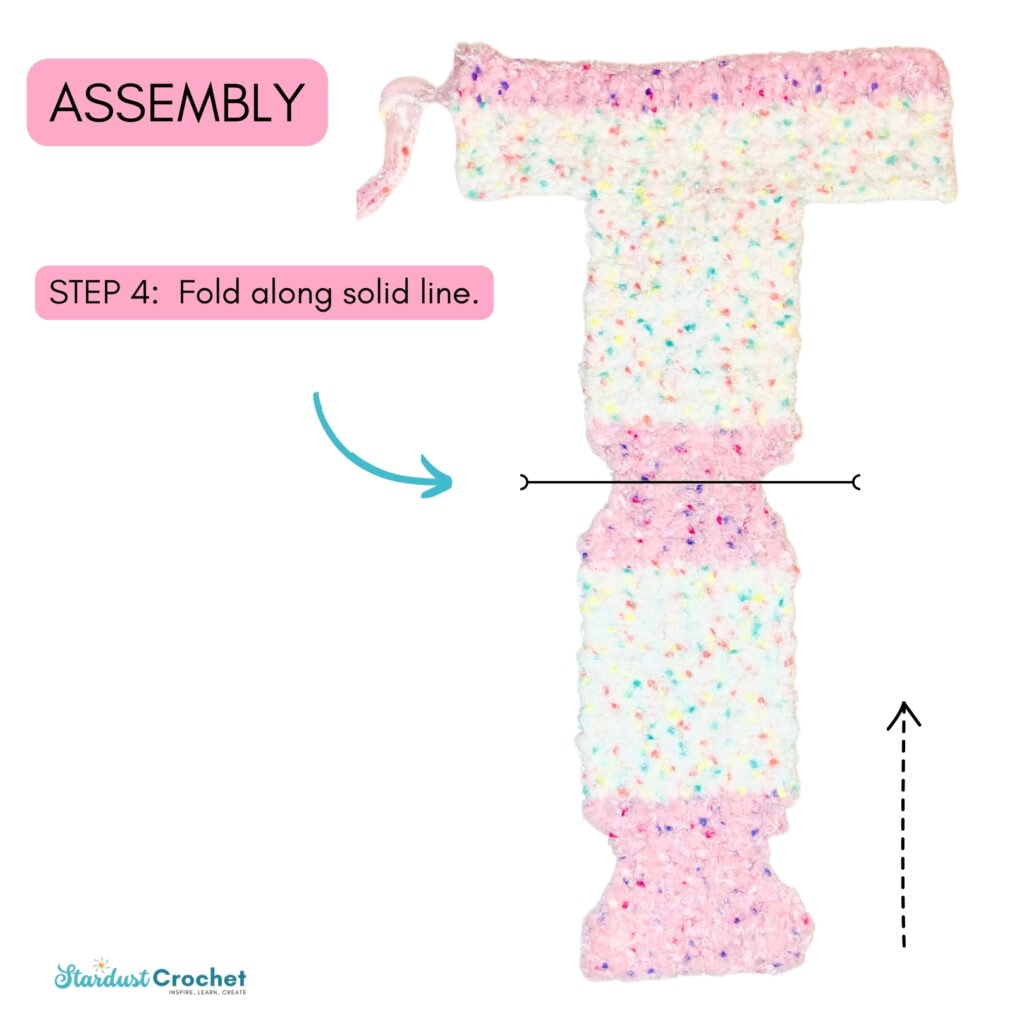

Easy Crochet Socks Picture Guide


Congratulations! You Are Finished!
I hope you enjoyed creating this pattern! Please share your finished works with me by using the hashtags mentioned above, I would love to see them.
If you share on social media, pretty please share! Pin it, Instagram it with #CozySprinklesCrochetSocks or #StardustGoldCrochet


I don’t see any notes on changing to a different sized foot. Just notes on making a taller sock…
Is there a download version please? I need it in large print. Thanks
Is there a printable. Version??