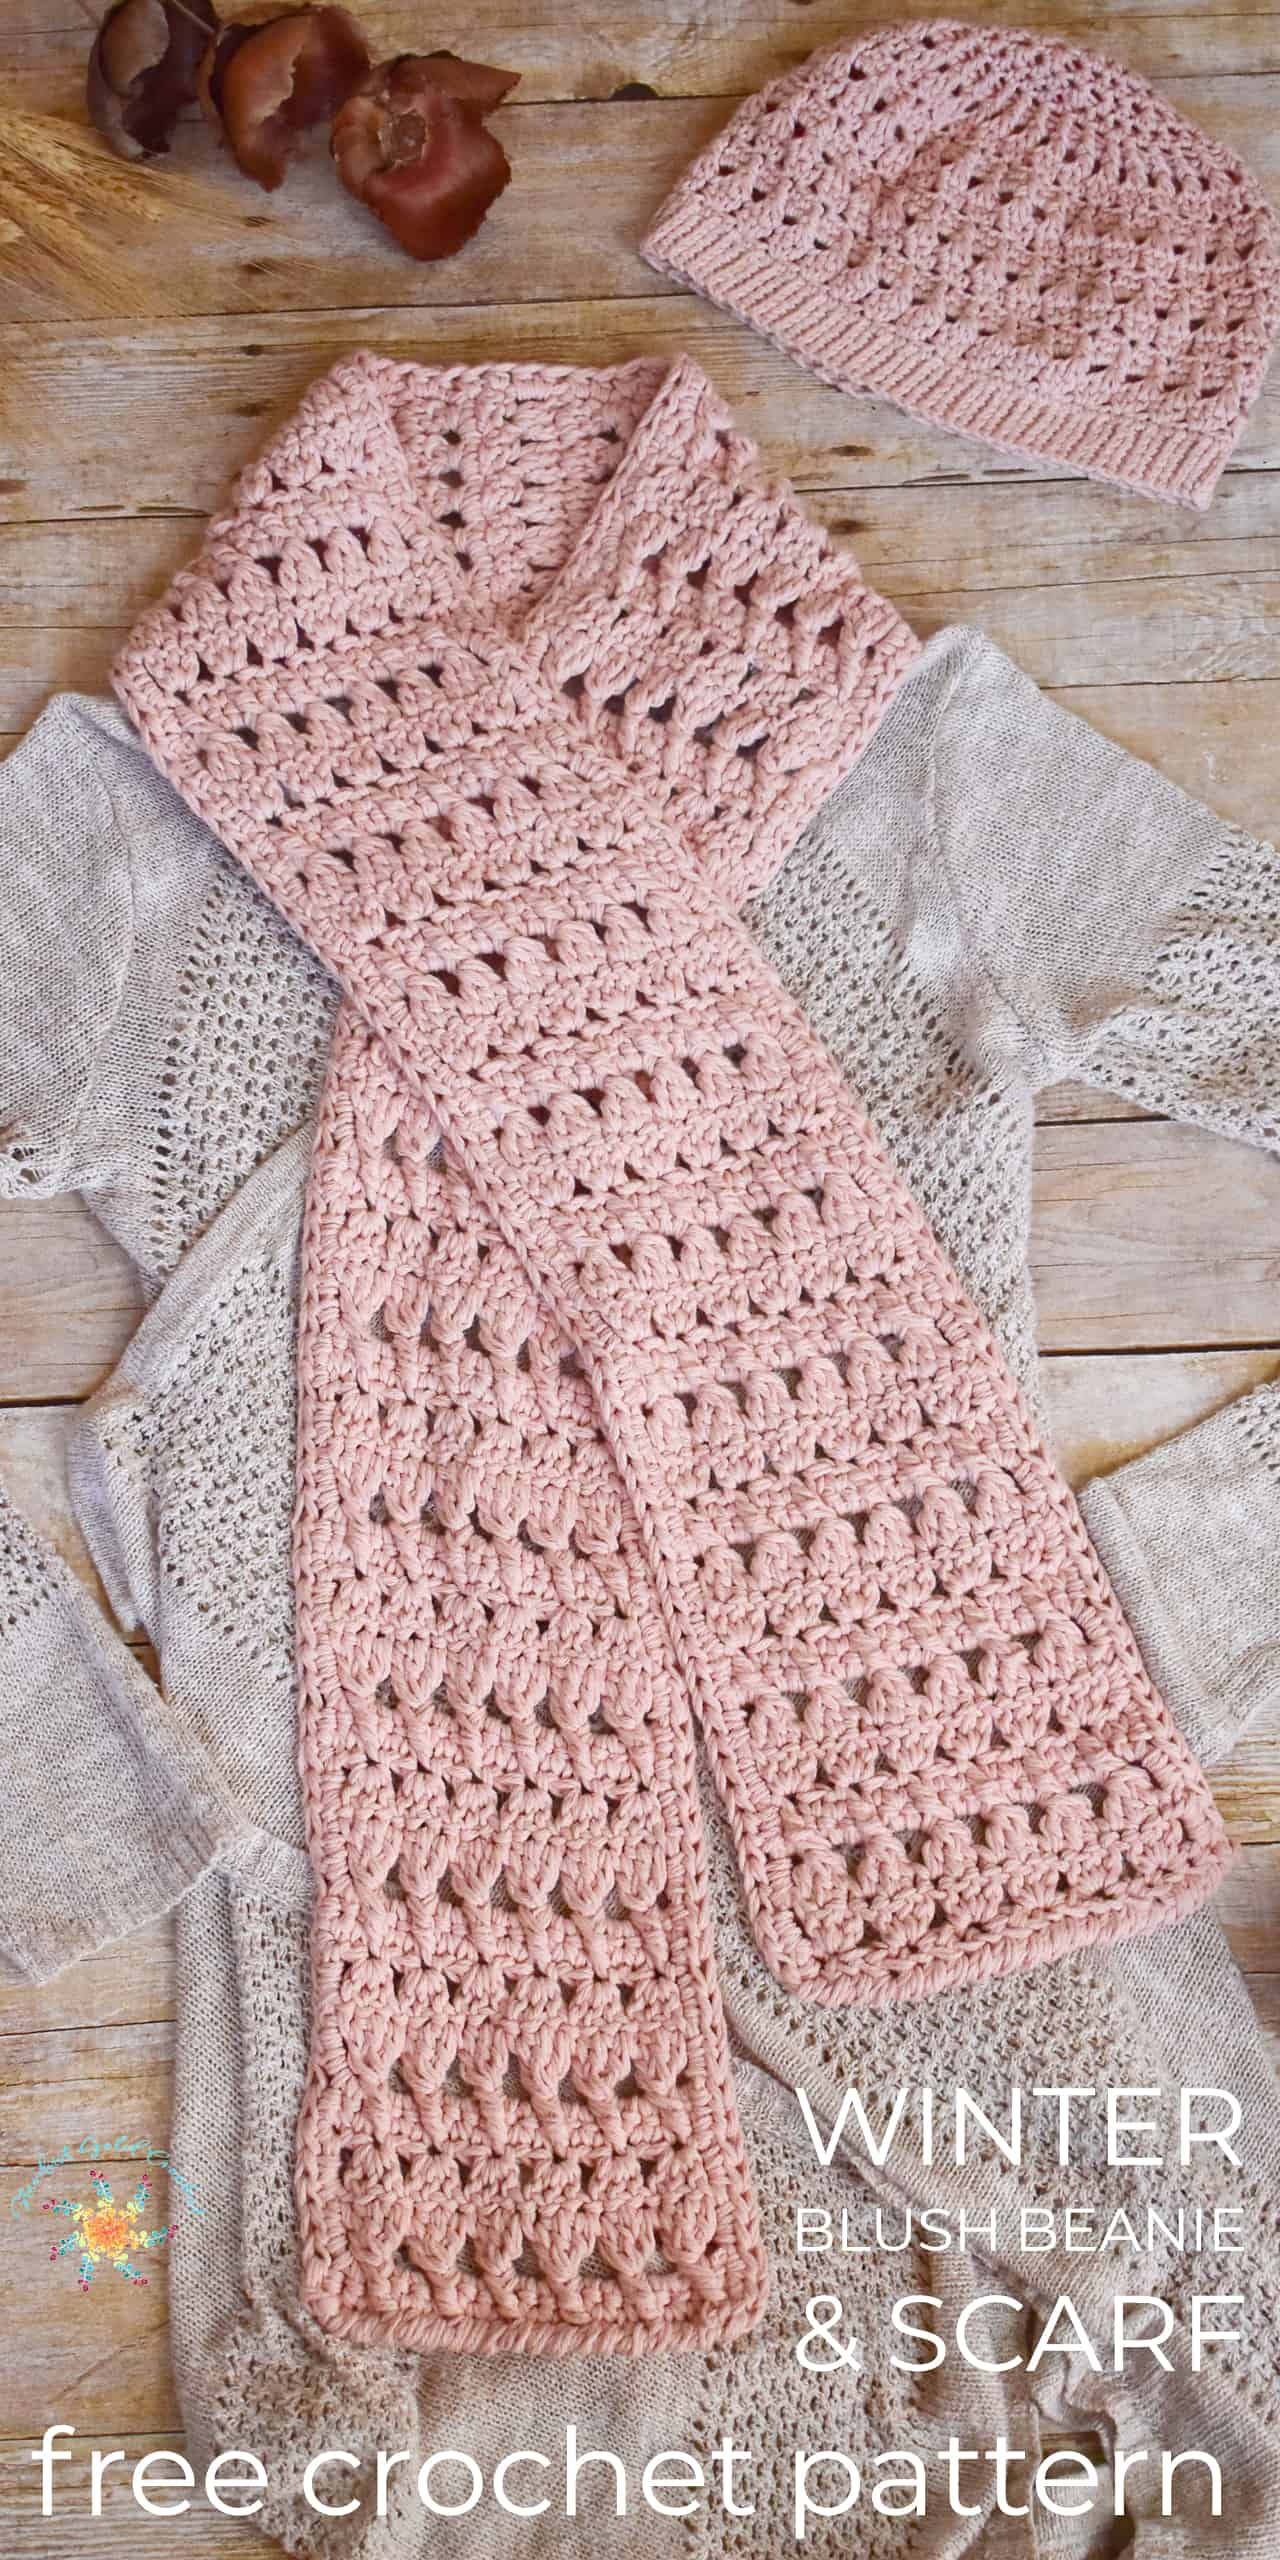
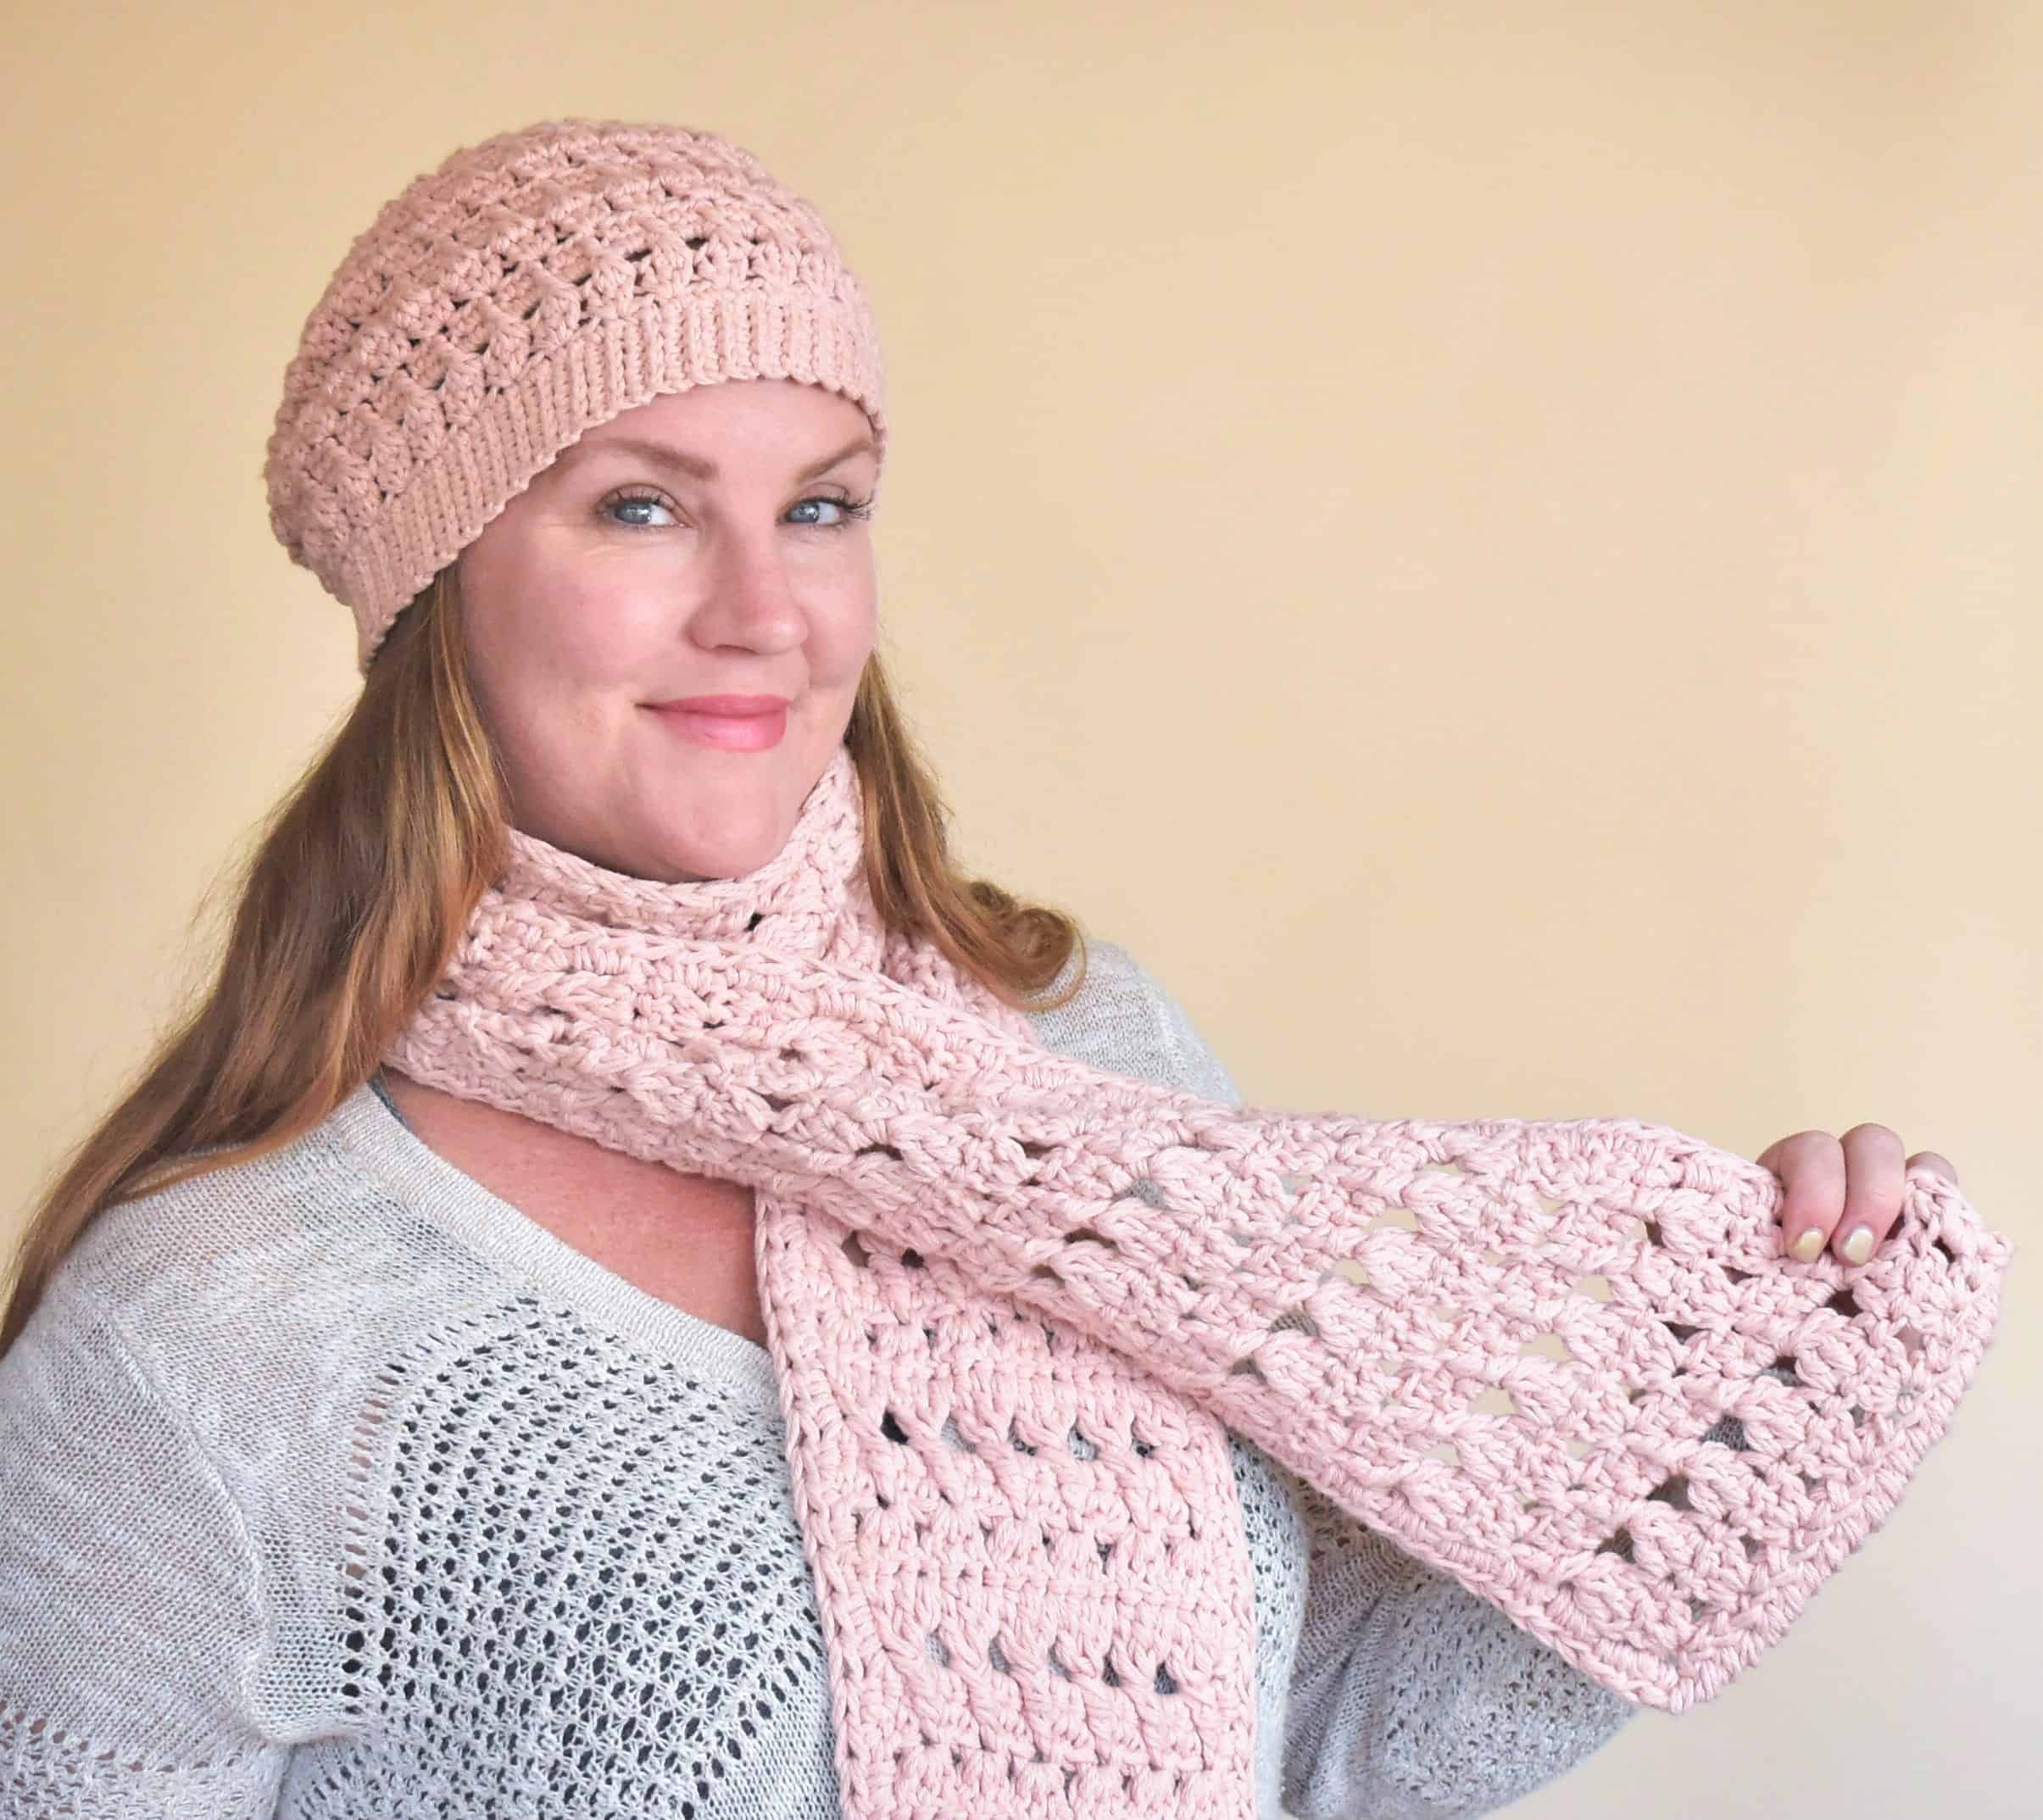
The winter blush crochet beanie and scarf pattern is here! This is one of my favorite crochet scarf patterns to date. The inspiration behind this pattern was to create a soft, whisper-y, and mostly comfortable, crochet winter hat pattern for free!
It’s soft, warm, and uses creative stitches that translate easy from scarf to beanie to create the perfect color coordinated set.
This pattern is part of the Autumn Harvest Blog Hop. If you missed the hop, don’t worry!
All 31 beautiful fall themed crochet patterns are FOREVER FREE, including this cute crochet winter hat pattern.
To get the free PDF –
Scroll down to the “Get the Pattern” graphic!
In This Post You Will Learn How to:
- How to crochet a hat
- Crochet a scarf
- Half Double Crochet Stitch
- Half Double Crochet 2 Together (a decrease)
- Foundation Single Crochet
- Half Double Crochet 3 Together (a crochet decrease)
- Reverse Single Crochet Stitch (crab stitch)
- Half Treble Crochet
- Double Crochet 2 Together (a decrease)
- Double Crochet 3 Together (a decrease)
- Front Post Half Treble Crochet Stitch
I know this may seem intimidating, but don’t worry, there are complete video tutorials on how to create the stitches used in the pattern.
I would love to see your finished patterns, if you have Instagram, Facebook, or a blog, please use hashtag #stardustgoldcrochet #WinterBlushBeanie. Thank you! Let’s get started! 😉
If you love this pattern, please feel free to share this crochet winter hat pattern (free pattern) with your friends!
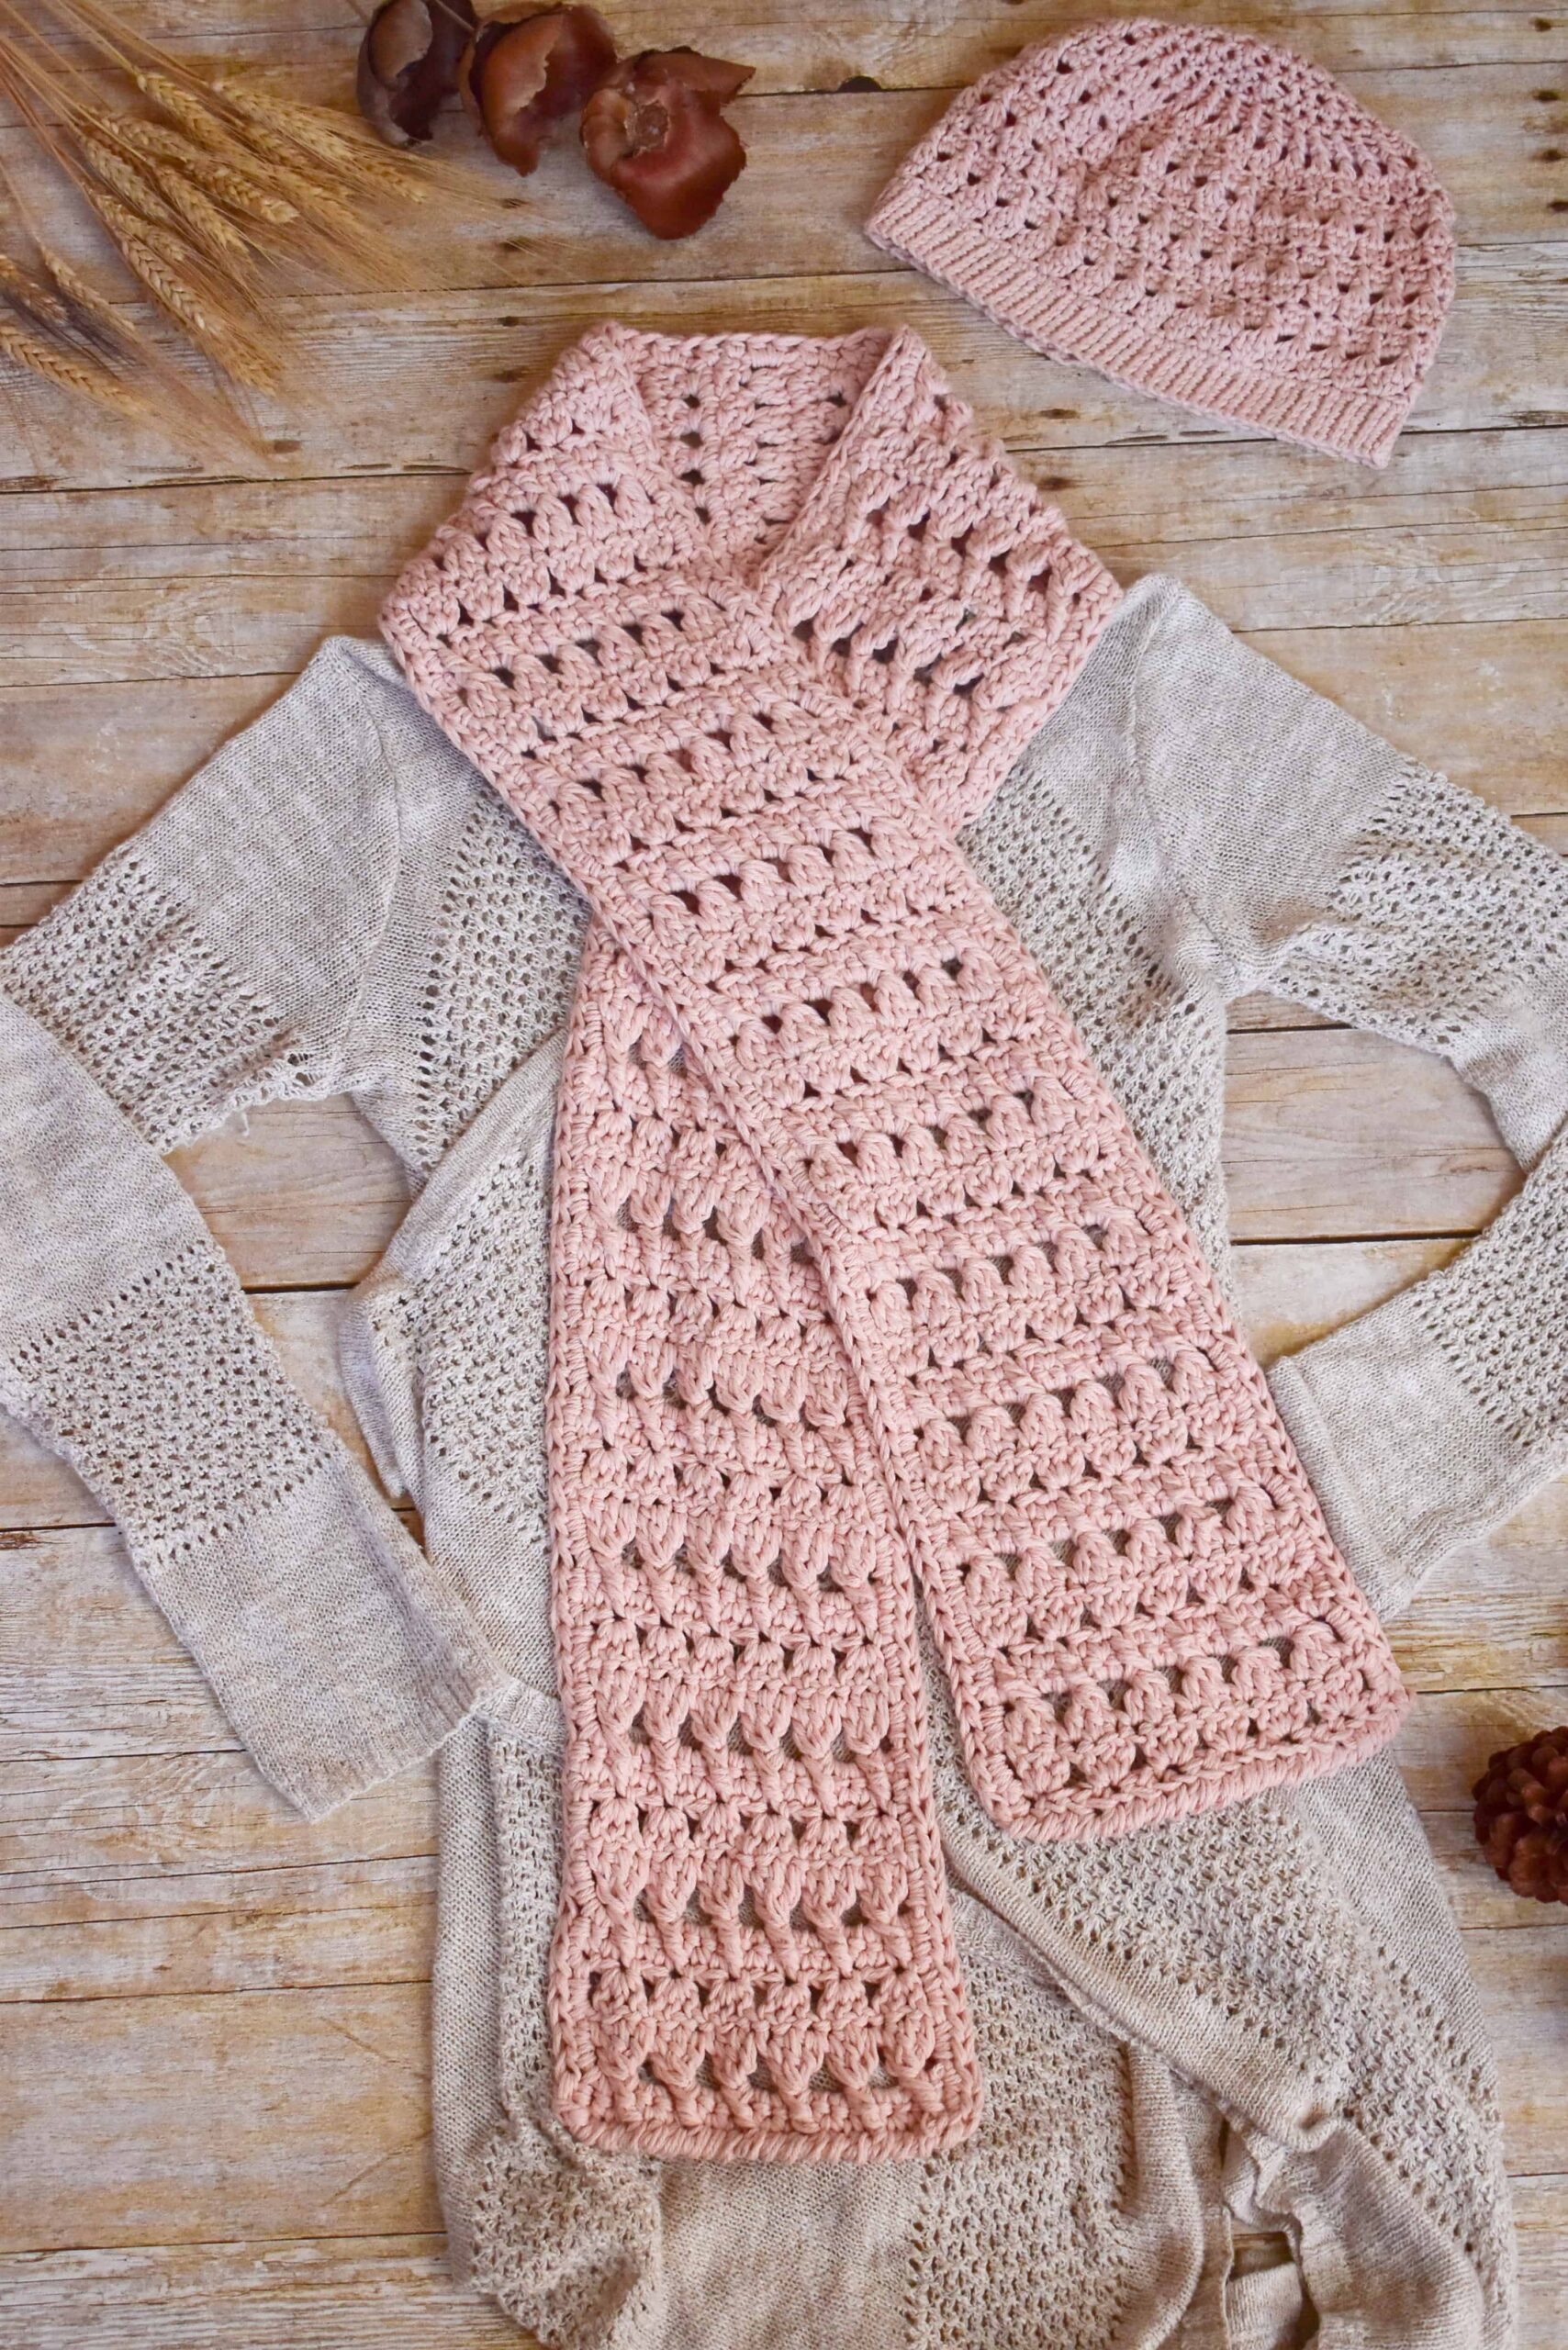
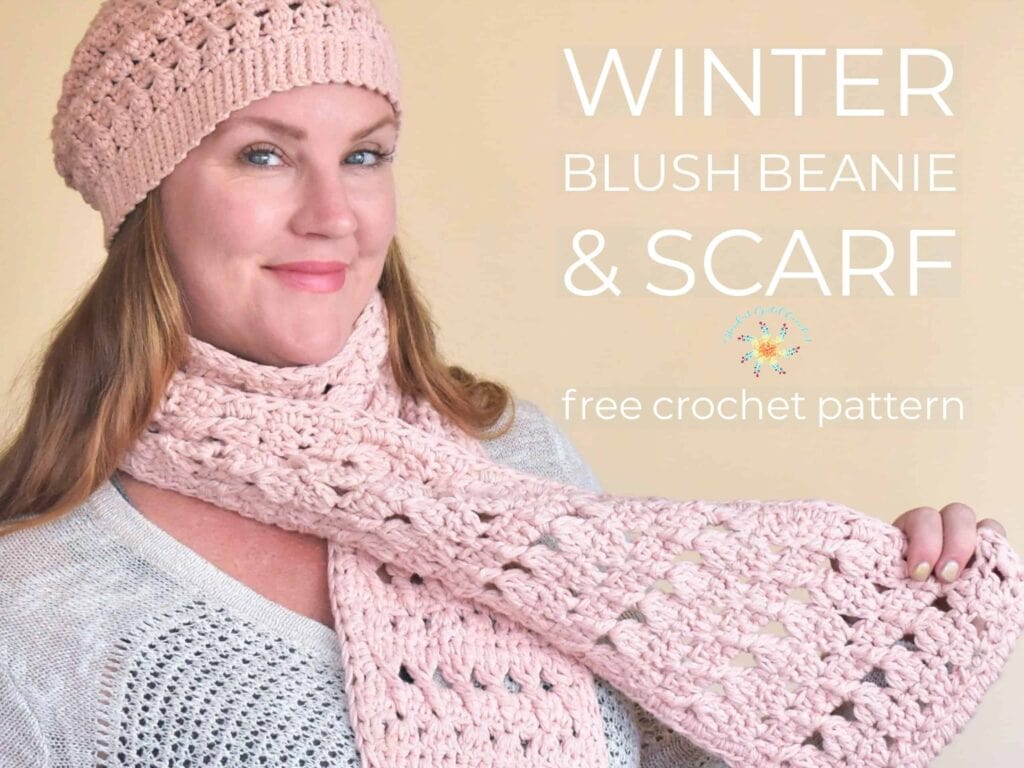
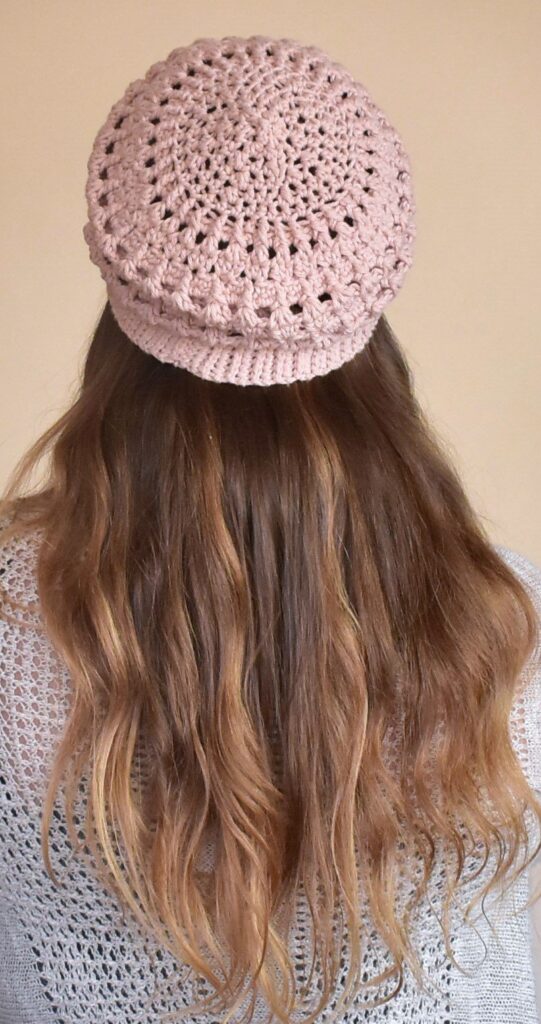
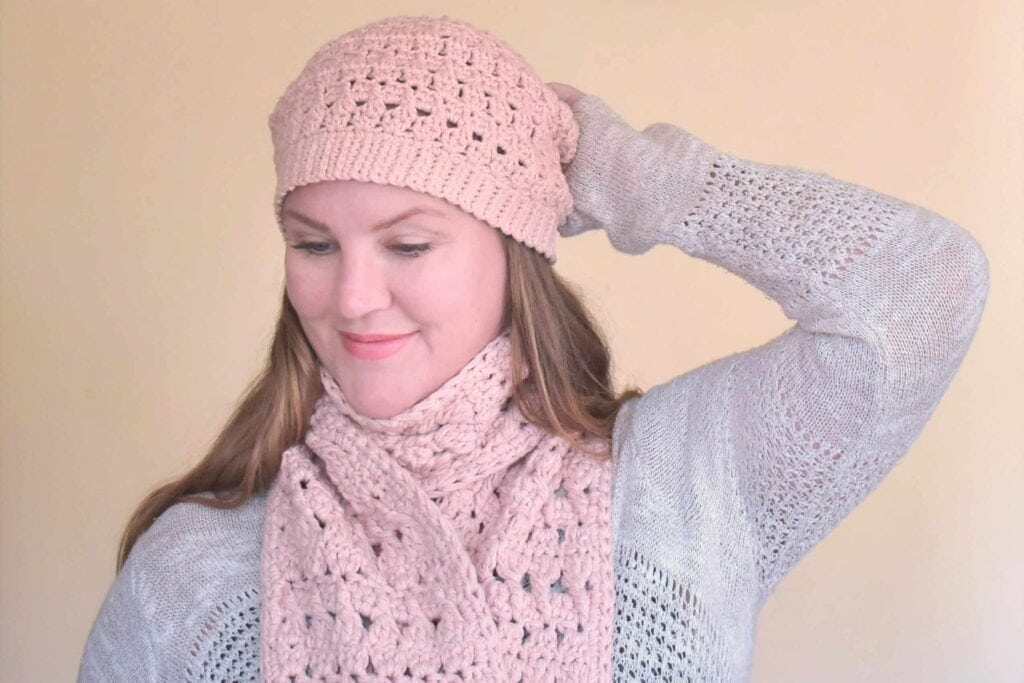
Crochet Winter Hat & Scarf Pattern
I hope you enjoy creating this crochet winter hat pattern with accompanying scarf.
I had so much fun creating this pattern and was delighted to see the sizing work out so well from toddler to adult!
The Winter Blush Crochet Hat & Scarf is written and tested in sizes: Toddler, Child, Adult: Small, Medium, Large.Skill Level:
Easy or ambitious beginner – stitch videos can help you work this pattern for sure!
Materials:
- Suggested Yarn: I Love This Cotton! Color used in Sample: Warm Blush
- Yarn Details: 100% Cotton. (4) weight, 3.5 oz (100 g), 180 yards (165 m) per skein.
- Yarn Substitution: Any 4 weight yarn with same WPI.
- Yarn Weight: Suggested yarn is worsted, but I love this cotton is considered a light aran, so if you use anything other than suggested yarn, I would recommend going with a 3 (light worsted).
- Gauge: 8.5 rows of simple ribbing for brim = 2″
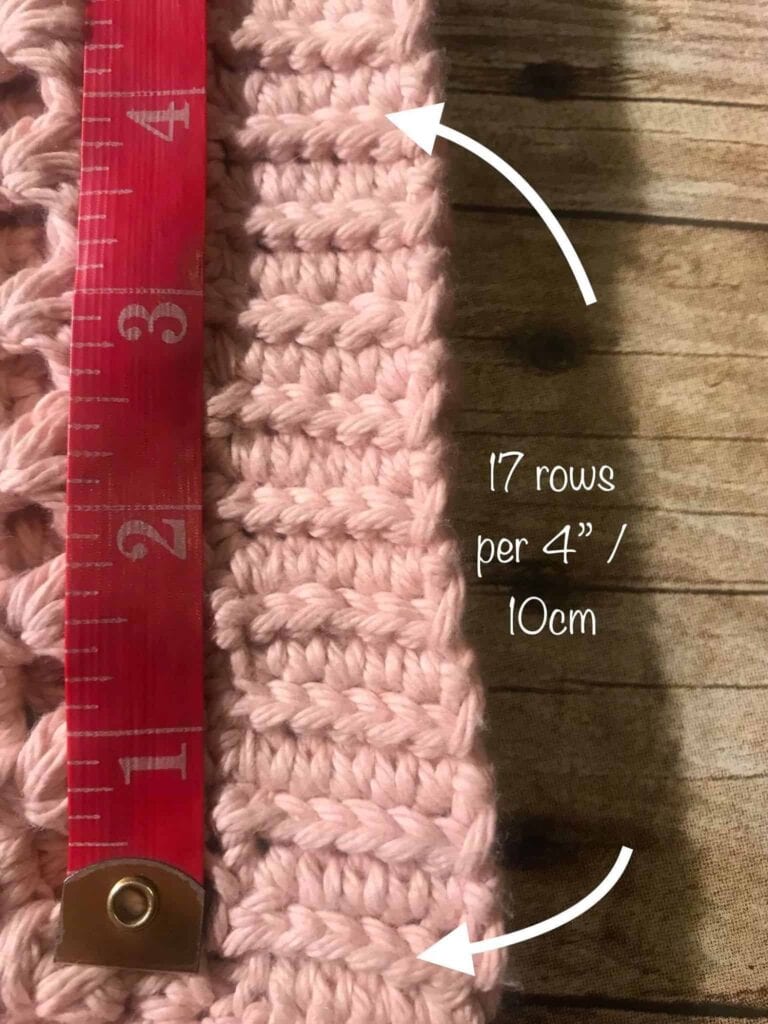
- Yardage Needed: a little under 780 yards for scarf, 180 (approx.) for hat – total of 5-6 skeins at 180 yards per skein.
- Hook Size (scarf): 6.5 mm (K) hook
- Hook Size (Beanie): 4 mm (G), 5.0 mm (H)
- Scissors
- Darning Needle
Finished Measurements (in/cm):
Size(s): Toddler, Child, Adult: Small, Medium, Large
| Will Fit Sizes | ||
| Beanie: | ||
| Toddler | 17- 18” (58.42) | |
| Child | 19-20” ( cm) | |
| Adult | ||
| Small | 20 – 21” ( cm) | |
| Medium | 22” ( cm) | |
| Large | 23” ( cm) | |
| Scarf (with border): | 6” wide x 71” tall |
How to Read This Pattern
Stitch counts are in parentheses at the end of each row. Remember to count your stitches 😉.
It is highly recommended you use the suggested yarn, some of my pattern testers used acrylic and found it to throw the gauge off for the beanie. The scarf is flexible, but if you would like a matching set, use recommended yarn or equivalent from the yarnsub site. Suggested yarn is considered a light aran.
Abbreviations:
| sc – single crochet | FPhtr – front post half treble crochet |
| fsc – foundation single crochet | beg – beginning |
| rvsc – reverse single crochet | rnd – round |
| dc – double crochet | st(s) – stitch(es) |
| dc2tog – double crochet 2 together | ch(s) – chain(s) |
| dc3tog – double crochet 3 together | *…* – repeat from * to * however many times indicated |
| hdc – half double crochet | lp(s) – loop(s) |
| hdc2tog – half double crochet 2 together | yo – yarn over |
| hdc3tog – half double crochet 3 together | ch sp – chain space |
| htr – half treble crochet | prev – previous |
Note: Stitches in Blue are are clickable, and will take you to my easy to follow video tutorials on how to create these stitches.
Stitch Guide
(click on bold colored heading for full video stitch tutorials)
Basic Stitches
sc – single crochet
insert hook in indicated st, yo, draw up a loop, yo draw through both loops on hook.
dc – double crochet
yo, insert hook in indicated st, yo, draw up a loop, *yo, draw through 2 loops* – repeat from * to * until you have one loop left.
hdc – half double crochet
yo, insert hook in indicated st, yo, draw up a loop, yo, draw through all three loops on hook.
fsc – foundation single crochet
create a slip knot. ch 2, insert hook in 1st chain. yo, draw up a loop. ch 1, yo, draw through both loops on hook. (2nd st) insert hook in bottom two loops of ch 1, yo draw up a loop. ch 1, yo, draw through both loops (2 fsc created).
rvsc – reverse single crochet (also known as crab stitch)
don’t turn. rvsc works left to right. pull out loop on hook just a tad. insert hook in indicated st. yo, draw up a loop (make it loose), yo, draw through both loops on hook.
htr – half treble crochet
yo twice, insert hook in indicated st. yo, draw up a loop, yo, draw through 2 loops, yo, draw through 3 loops.
Decrease Stitches
hdc2tog – half double crochet 2 together
yo, insert hook in indicated st. yo, draw up a loop. yo, insert hook in next st, yo, draw up a loop, yo, draw through all five loops on hook.
hdc3tog – half double crochet 3 together
yo, insert hook in indicated st. yo, draw up a loop, *yo, insert hook in next st, yo, draw up a loop* – repeat one more time, then yo, and draw through all loops on hook.
dc2tog – double crochet 2 together
yo, insert hook in indicated st, yo, draw up a loop. yo, draw through 2 loops. yo, insert hook in next st, yo, draw up a loop, yo, draw through 2 loops. yo, draw through all three loops on hook.
dc3tog – double crochet 3 together
yo, insert hook in indicated st, yo, draw up a loop, yo, draw through 2 loops. *yo, insert hook in next st, yo, draw up a loop, yo, draw through 2 loops* repeat from * to * one more time, yo, draw through all four loops on hook.
FPhtr – front post half treble crochet
yo twice, insert hook around indicated st(s). yo, draw up a loop, yo, draw through 2 loops, yo, draw through all 3 loops on hook.
winter Blush Easy Crochet Scarf & Hat Pattern:
Note: Pattern works in multiples of 3 + 1
Winter Blush Crochet Scarf Pattern
Using a 6.5 mm (K) hook, and 2 strands of yarn…
Note: 1st stitch of each round is made in same as chain, unless otherwise indicated.
Row 1: fsc 19
Row 2: ch 3, turn. sk 1, dc 3 in next st. *sk 2, dc 3 in next st* – repeat from * to * to end of row. sk 1 st, dc in last st. (19 sts – chain 3 does not count in stitch count for this row)
Row 3: ch 3, turn. sk 1st st. *dc3tog**, ch 2* – repeat from * to * to end of row ending at **. ch 1, 1 dc around ch 3 (not in the top of the stitch, but around it). (19 sts) (ch 3 at beg of row will count in your stitch count for this row)
Row 4: ch 1, turn. sc 2 in ch 1 sp. *sc 1 in top of dc3tog**, sc 2 in next ch 2 sp* – repeat from * to * to end of row, ending at **. sc around (not in) dc at end of prev row. (19 sts)
Row 5: ch 1, turn. *sc 1 in 1st and 2nd sts, FPhtr around dc3tog from prev row*, sk 1 st* (skipped st is behind FPhtr) – repeat from * to * end of row, ending at **. sk 1, sc 1 in last st. (19 sts)
Rows 6 – X: Repeat rows 2-5 until you have 25 diamonds (25 – 4 row repeats or 101 rows total)
You can make this scarf as long as you want by repeating rows 2 – 5 to desired length.
Don’t break yarn.
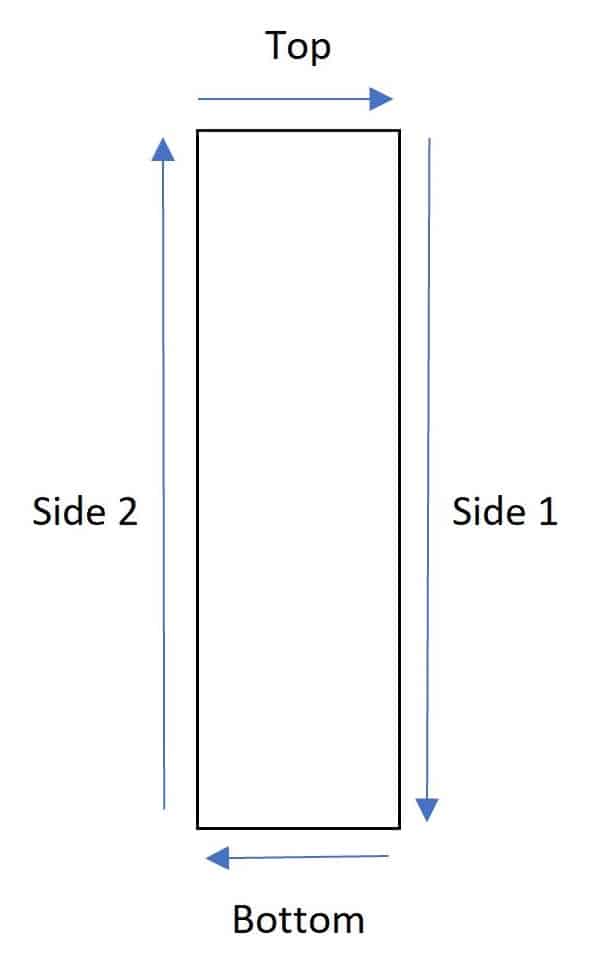
Scarf Border:
Top border: Continue working with existing yarn and hook & ch 1, we will work from left to right and create reverse single crochets. Insert hook in last completed st of row, yo, pull up a loop. yo, pull through both loops (1st reverse sc created). Continue working rvsc, left to right until you complete 19 (or the stitch count you decided on to start)
Side 1 of border: ch1, turn. (you’ll be working right to left) *hdc 1 in 1st two side of rows, hdc 2 in next end of row ch sp, hdc 2 in next end of row ch sp* – *repeat* from * to * ending at row two by completing 2 hdc in last ch sp.
Join in end of row 1 with slip stitch.
Bottom border: ch 1, turn. (you’ll be working left to right) 19 rvsc.
Side 2 of border: Turn. (you should be working down the other end of the scarf now) hdc 1 in the side of dc ch sp from row 1, then *hdc 2 in next ch sp, hdc 2 in next ch sp, 1 hdc in top of each next two rows* repeat from * to * to row 100.
Join with slip stitch in bar of rvsc. Cut, tie off, weave in tails.
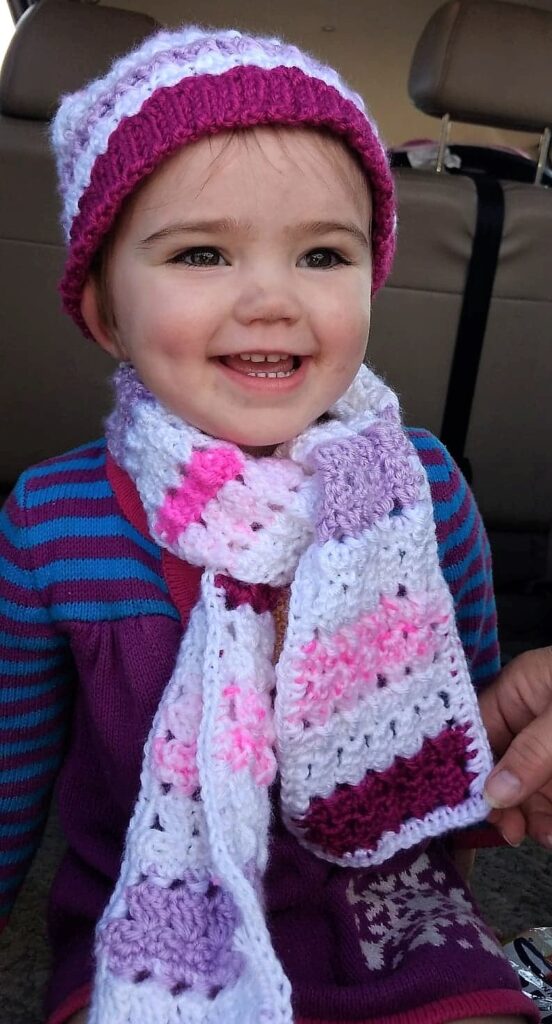
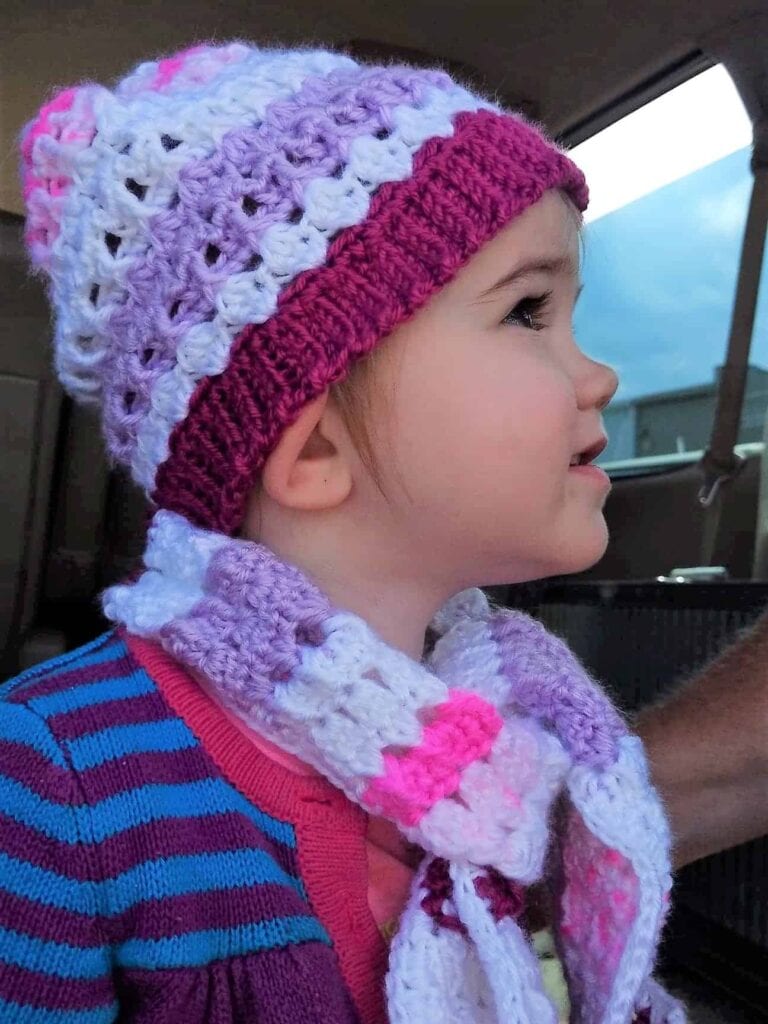
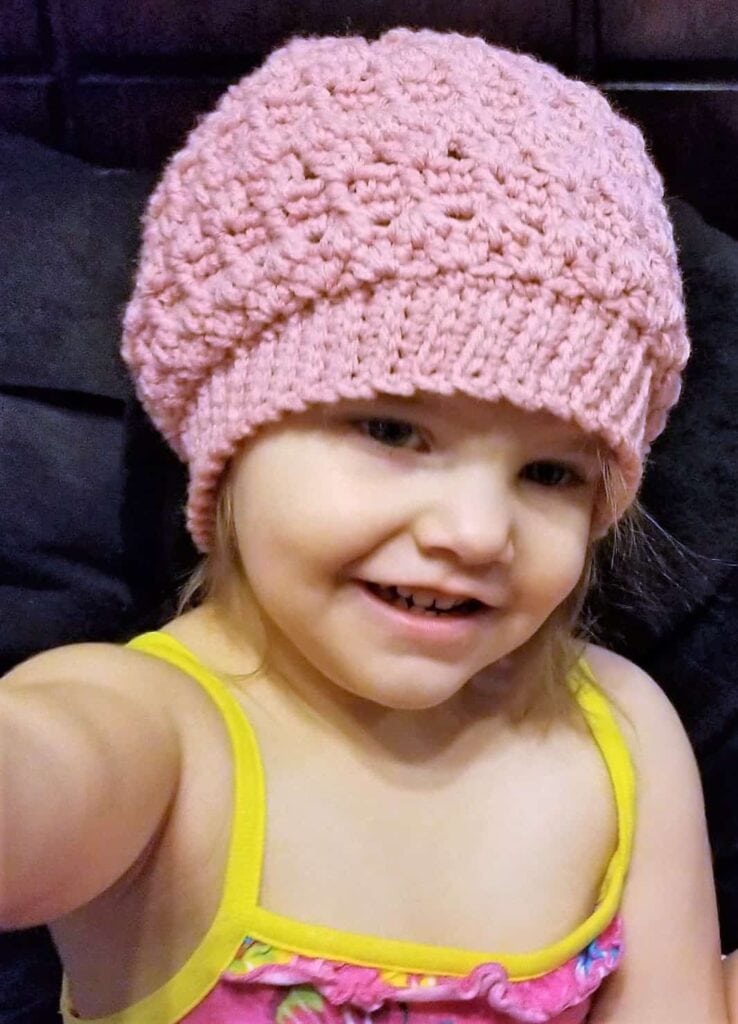
Here you see the set in toddler size. So adorable!
Easy Crochet Beanie Pattern
Using 4 mm (G) hook and one strand of yarn.
Sizing (using recommended yarn):
will fit sizes:
| Toddler – 17-18” | Child – 19-20” |
| Adult Small – 20-21” | Adult Medium – 22” |
| Adult Large – 23-25” |
If you are using the recommended yarn you can skip to the pattern.
The following notes are for those using acrylic or anything other than the recommended yarn.
- Sizing for listed stitch counts will only be consistent if you maintain the proper gauge, and use the recommended yarn.
- If you use anything other than the suggested yarn, you will need to match gauge of brim as shown in order to obtain the proper sizing. The cotton I used has a good stretch to it.
- I created medium size (as pictured) which fits average 22” head circumference (my head measures 22.5”).
- I worked 96 rows for the band, and it measured around 18” prior to joining, which means it stretched about 4” and fits very gentle. The fit of the brim is meant to be slightly loose, not super snug.
- I learned from my testers that acrylic yarn doesn’t seem to stretch like the recommended yarn (or similar cotton), and the band seemed tight to them – so gauge and yarn choice is very important in this pattern for proper fit.
- Making adjustments is easy, and I’ll walk you through it here.
Adjusting for Using Acrylic Yarn:
This is how to adjust for using acrylic yarn or any other yarn that is not the recommended yarn, or different than average head circumference:
Adjusting the Brim Ribbing:
The entire pattern works in multiples of 3.
Simply work the number of rows you need to reach your desired circumference by working in multiples of 3.
Here are a range of multiples of 3:
81, 84, 87, 90, 93, 96, 99, 102, 105, 108, 111, and I highlighted what I used for this pattern the first being toddler, then child, small, medium, large.
Remember to account for stretch, so if you are making a toddler hat, and the toddlers head measures 18” – create a band that around 16.5-17”. A good way to test the stretch is take a ruler and lay it down.
Place one end of the band at 0 and stretch it out. What is the difference between how wide it is just laying flat and how wide it is when stretched? Also keep in mind, some yarns will stretch with wear – especially cotton.
Adjusting the Top of Beanie:
Because the pattern works in multiples of 3 – there will be no changes in the pattern from rounds 1 to 14.
Rounds 15 – 18:
work these rounds as close to the pattern as possible – you should only need to make minor adjustments
For the decrease rounds 19 – 22:
Rnd 19: Decrease by 8 sts, using hdc. If you are making a child/toddler, use sc.
Rnds 20 – 22: Decrease by 6 – 7 sts each round using hdc for adult , or sc for child/toddler – until you have a small enough opening to easily sew together.
crochet winter hat pattern free:
Stitch counts listed in pattern as follows: (toddler, child, small, medium, large).
Brim Ribbing:
Simple ribbing pattern; work the slip stitch rows very loose, especially if you are using an acrylic yarn (which I don’t recommend)
Ch 7
Row 1: sc in 2nd ch from hook and across. (6)
Row 2: (no ch 1) turn, (very loose) sl st in each sc. (6)
Row 3: ch 1, turn. sc in each sl st. (6).
(this can be a little tricky, but as long as you keep your stitches loose, you will be okay)
Rows 4 – x: repeat rows 2 & 3 until you reach (81, 87, 93, 96, 99)
Joining:
Bring sides together with “wrong” side facing out (the right side is the side with the V ribbing). sl st through both sides in one loop (6 sl st).
Don’t break yarn.
Top of Beanie:
Note: 1st stitch of each round is made in same place as ch st, unless otherwise indicated.
Using 4 mm (G) hook
ch 1, turn, and flip band so “V” rib pattern is facing you (this will be your right side(RS))
Round 1: sc 1 in top of each row of brim until you reach beg of rnd. Join with sl st in top of 1st sc from beg of rnd. (81, 87, 93, 96, 99)
Using 5 mm (H) hook
Round 2: ch 2, hdc 2 in same st (creates a hdc3 V) *sk 2 sts, hdc 3 in next st* – repeat from * to * until you reach beg of rnd, sk last 2 sts. Join in top ch of ch 2 from beg of rnd. (81, 87, 93, 96, 99)
Round 3: ch 2, hdc2tog (ch 2 & hdc 2tog creates a hdc3tog cluster), ch 2, *hdc3tog, ch2* – repeat from * to * until beg of rnd. Join in top ch of ch 2 from beg of rnd. (do not count chain stitch in count for this row) (81, 87, 93, 96, 99)
Round 4: ch 1, *sc 1 in top of cluster, sc 2 in ch 2 sp* – repeat from * to * to beg of rnd. Join in top of sc from beg of rnd. (81, 87, 93, 96, 99)
Round 5: ch 1, FPhtr around the cluster from rnd 3 (enclosing the ch 2 with the hdc2tog directly below the ch 1). *sk st behind FPhtr, sc in each of next 2 sts, FPhtr around cluster from rnd 3* – repeat from * to * to beg of rnd. (Two stitches left) sc in each of last 2 sts. Join in top of FPhtr from beg of rnd. (81, 87, 93, 96, 99)
Round 6: ch 2 (counts as hdc), hdc 2 in top of FPhtr from prev round. hdc 3 in top of each FPhtr until you reach beg of rnd. Join in top of ch 2 from beg of rnd. (81, 87, 93, 96, 99)
Round 7: ch 1, hdc3tog in 1st hdc from prev rnd. ch 2, *hdc3tog, ch 2* – repeat from * to * until you reach beg of rnd. Join in top of hdc3tog from beg of rnd. (81, 87, 93, 96, 99)
Round 8: ch 1, *sc in hdc3tog, sc 2 in ch 2 sp* – repeat from * to * until you reach beg of rnd. Join in top of sc from beg of rnd. (81, 87, 93, 96, 99)
Round 9: ch 1, FPhtr around hdc3tog & chain from two rnds down, sk st (skipped st is same st where ch 1 is), *sc in each of next 2 sts, FPThtr around next hdc3tog from two rnds down, sk st* – repeat from * to * until you reach beg of rnd. (two stitches left) sc in each of last 2 sts. Join in top of FPhtr from beg of rnd. (81, 87, 93, 96, 99)
Note: for toddler & child beanies, you can omit rounds 10, 11, 12 & 13 if you want a less slouchy hat. The toddlers in the photos include these rows.
Round 10, 11, 12 & 13: Repeat rounds 6, 7, 8 & 9 (81, 87, 93, 96, 99)
Round 14: repeat round 6.
Round 15: ch 1, hdc2tog (see photos below). *ch 1, sk 1, hdc2tog* – repeat from * to * until you reach beg of rnd (depending on the size you are working, you may need to ch 1 after the last hdc2tog to maintain st count. Count your stitches to see if you need to or not, especially if you are customizing). Join in top of hdc2tog from beg of rnd. (54, 58, 62, 64, 66)
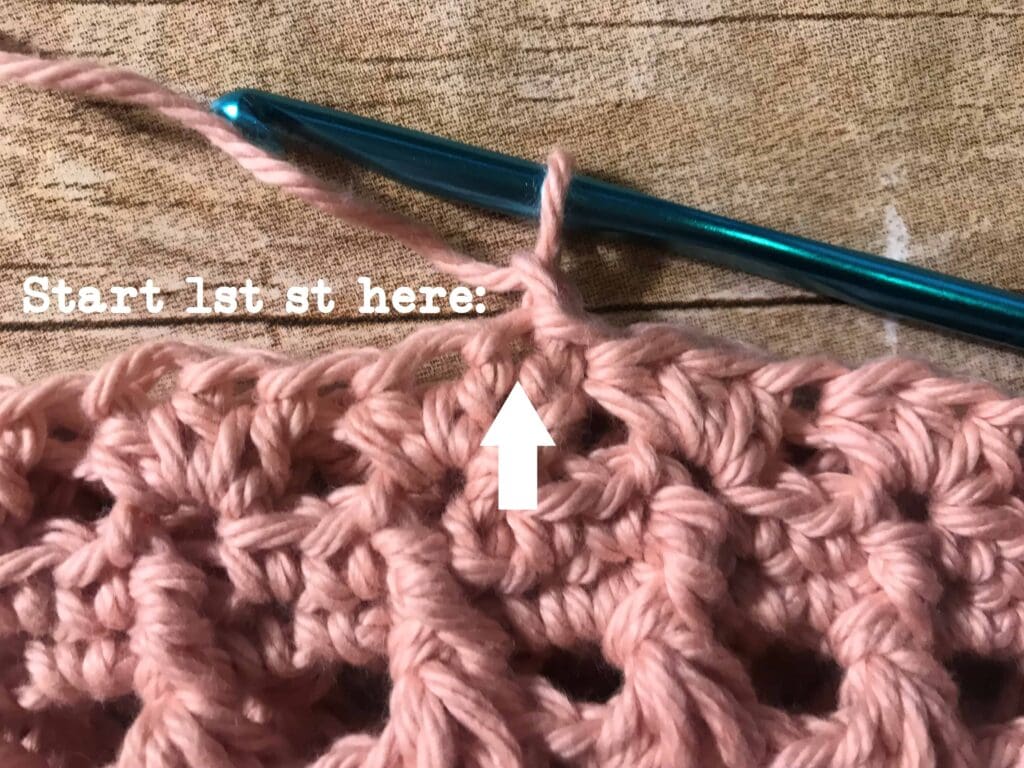
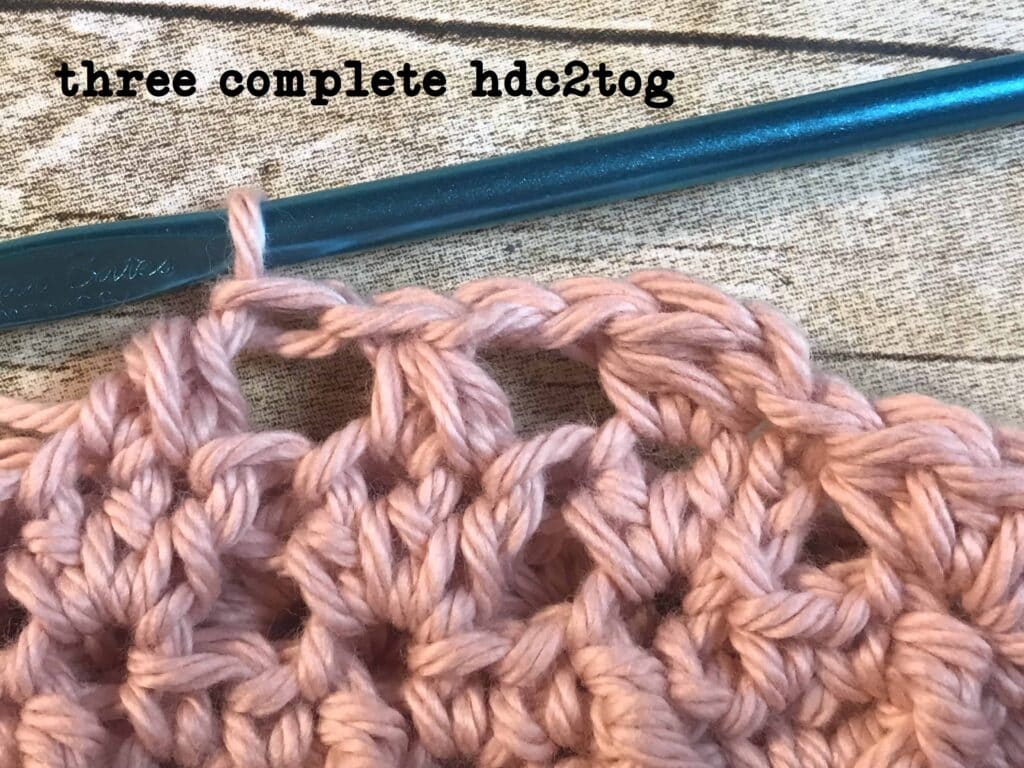
Round 16: ch 1, sc 1 in each of next 2 sts, *sc 1 in ch sp, sc 1 in top of hdc2tog from prev rnd* – repeat from * to * until you reach beg of rnd. Join in top of sc from beg of rnd. (54, 58, 62, 64, 66)
Round 17: ch 1, FPhtr around hdc2tog & ch 1 from 2 rnds down. *FPhtr around each hdc2tog from 2 rnds down* – repeat from * to * until you reach beg of rnd. Join in top of FPhtr from beg of rnd. (27, 29, 31, 32, 33)
Round 18: ch 1, hdc in each st around and join in top of 1st hdc from beg of rnd. (27, 29, 31, 32, 33)
The following are decrease rounds that will close up the top of the beanie
Note: 1st stitch of each round is made in same place as ch st, unless otherwise indicated.
Round 19:
[toddler] ch 1, *hdc 1 in each of next 2 sts, hdc2tog* repeat from * to * 6 times total. hdc 1, hdc2tog. Join in top of 1st hdc from beg of rnd. (20)
[child] ch 1, *hdc 1 in each of next 2 sts, hdc2tog* – repeat from * to 7 times total. hdc in last st. Join in top of 1st hdc from beg of rnd. (22)
[small] ch 1, *hdc 1 in each of next 2 sts, hdc2tog* repeat from * to * 7 times total. hdc 1, hdc2tog over last 2 sts. Join in top of 1st hdc from beg of rnd. (23)
[medium] ch 1, *hdc 1 in each of next 2 sts, hdc2tog * – repeat from * to * until you reach beg of round. Join in top of 1st hdc from beg of rnd. (24)
[large] ch 1, *hdc 1 in each of next 2 sts, hdc2tog* – repeat from * to 8 times total. hdc in last st. Join in top of 1st hdc from beg of rnd. (25)
Round 20:
[toddler] ch 1, *hdc 1 in each of next 2 sts, hdc2tog* – repeat from * to * 5 times total. Join in top of 1st hdc from beg of rnd. (15)
[child] ch 1, *hdc 1 in each of next 2 sts, hdc2tog* – repeat from * to * 5 times total (two sts left), hdc in last 2 sts. Join in top of 1st hdc from beg of rnd. (17)
[small] ch 1, *hdc 1 in each of next 2 sts, hdc2tog* – repeat from * to * 5 times total (3 sts left), hdc 1, hdc2tog over last two sts. Join in top of 1st hdc from beg of rnd. (17)
[medium] ch 1, *hdc 1 in each of next 2 sts, hdc2tog* – repeat from * to * 6 times total. Join in top of 1st hdc from beg of rnd. (18)
[large] ch 1, *hdc 1 in each of next 2 sts, hdc2tog* – repeat from * to * 6 times total, hdc in last st. Join in top of hdc from beg of rnd. (19)
Round 21:
[toddler] ch 1, *hdc2tog, hdc 1* – repeat from * to * 5 times total. Join in top of hdc2tog from beg of rnd. (10)
[child] ch 1, *hdc2tog, hdc 1* – repeat from * to * 5 times total. hdc2tog over last 2 sts. Join in top of hdc2tog from beg of rnd. (11)
[small] ch 1, *hdc2tog, hdc 1* – repeat from * to * 4 times total (4 sts left) hdc2tog two times over next 4sts. Join in top of hdc2tog from beg of rnd. (10)
[medium] ch 1, *hdc2tog, hdc 1* – repeat from * to * 6 times total. Join in top of hdc2tog from beg of rnd. (12)
[large] ch 1, *hdc2tog, hdc 1* – repeat from * to * 5 times total. hdc2tog 2 times. Join in top of hdc2tog from beg of rnd. (12)
Round 22:
[toddler] ch 1, *sc2tog* – repeat from * to * 5 times. Join in top of sc2tog from beg of rnd. (5)
[child] ch1, sc2tog 4 times, hdc3tog. Join in top of sc2tog from beg of rnd. (5)
[small] ch 1, *sc2tog* – repeat from * to * 5 times. Join in top of sc2tog from beg of rnd. (5)
[medium] ch 1, *sc2 tog* – repeat from * to * 6 times. Join in top of sc2tog from beg of rnd. (6)
[Large] ch 1, *sc2tog* – repeat from * to * 6 times. Join in top of sc2tog from beg of rnd. (6)
cut a long tail and weave in, closing the tiny hole at the top together.
Congratulations! You’re Finished!
Autumn Harvest Blog Hoppers!
Thanks so much for all of the love you’ve shown us this month. Visiting our sites helps us keep offering free crochet patterns – priceless! Click the image below to get the free pattern! or click here.

Thanks for stopping by! I hope you enjoyed creating this crochet winter hat pattern with scarf.

More Free Crochet Patterns…
If you love making crochet headbands, I have quite a few other cute and fast crochet beanie patterns here >>>




I can not download the Winter Blush beanie and scarf pattern. It keeps saying something went wrong. Help
Click on Autumn Harvest Blog Hop Get The Pattern rectangle box. Then on next page add your email. Then click free download today. Then actually go to your email then click on Stardust Gold Crochet. Then click on download. That is how you get the pattern.
Everytime i put my email in to get the free blush pattern set (blog hop today) it says something has gone wrong and won’t let me get it. Anyone else having this issue?
Yes.
Click on Autumn Harvest Blog Hop Get The Pattern rectangle box. Then on next page add your email. Then click free download today. Then actually go to your email then click on Stardust Gold Crochet. Then click on download. That is how you get the pattern.
Just spent half an hour trying and failing to send my email to get the pattern and no luck either, I hope we are not being scammed
Click on Autumn Harvest Blog Hop Get The Pattern rectangle box. Then on next page add your email. Then click free download today. Then actually go to your email then click on Stardust Gold Crochet. Then click on download. That is how you get the pattern.
Click on Autumn Harvest Blog Hop Get The Pattern rectangle box. Then on next page add your email. Then click free download today. Then actually go to your email then click on Stardust Gold Crochet. Then click on download. That is how you get the pattern.