


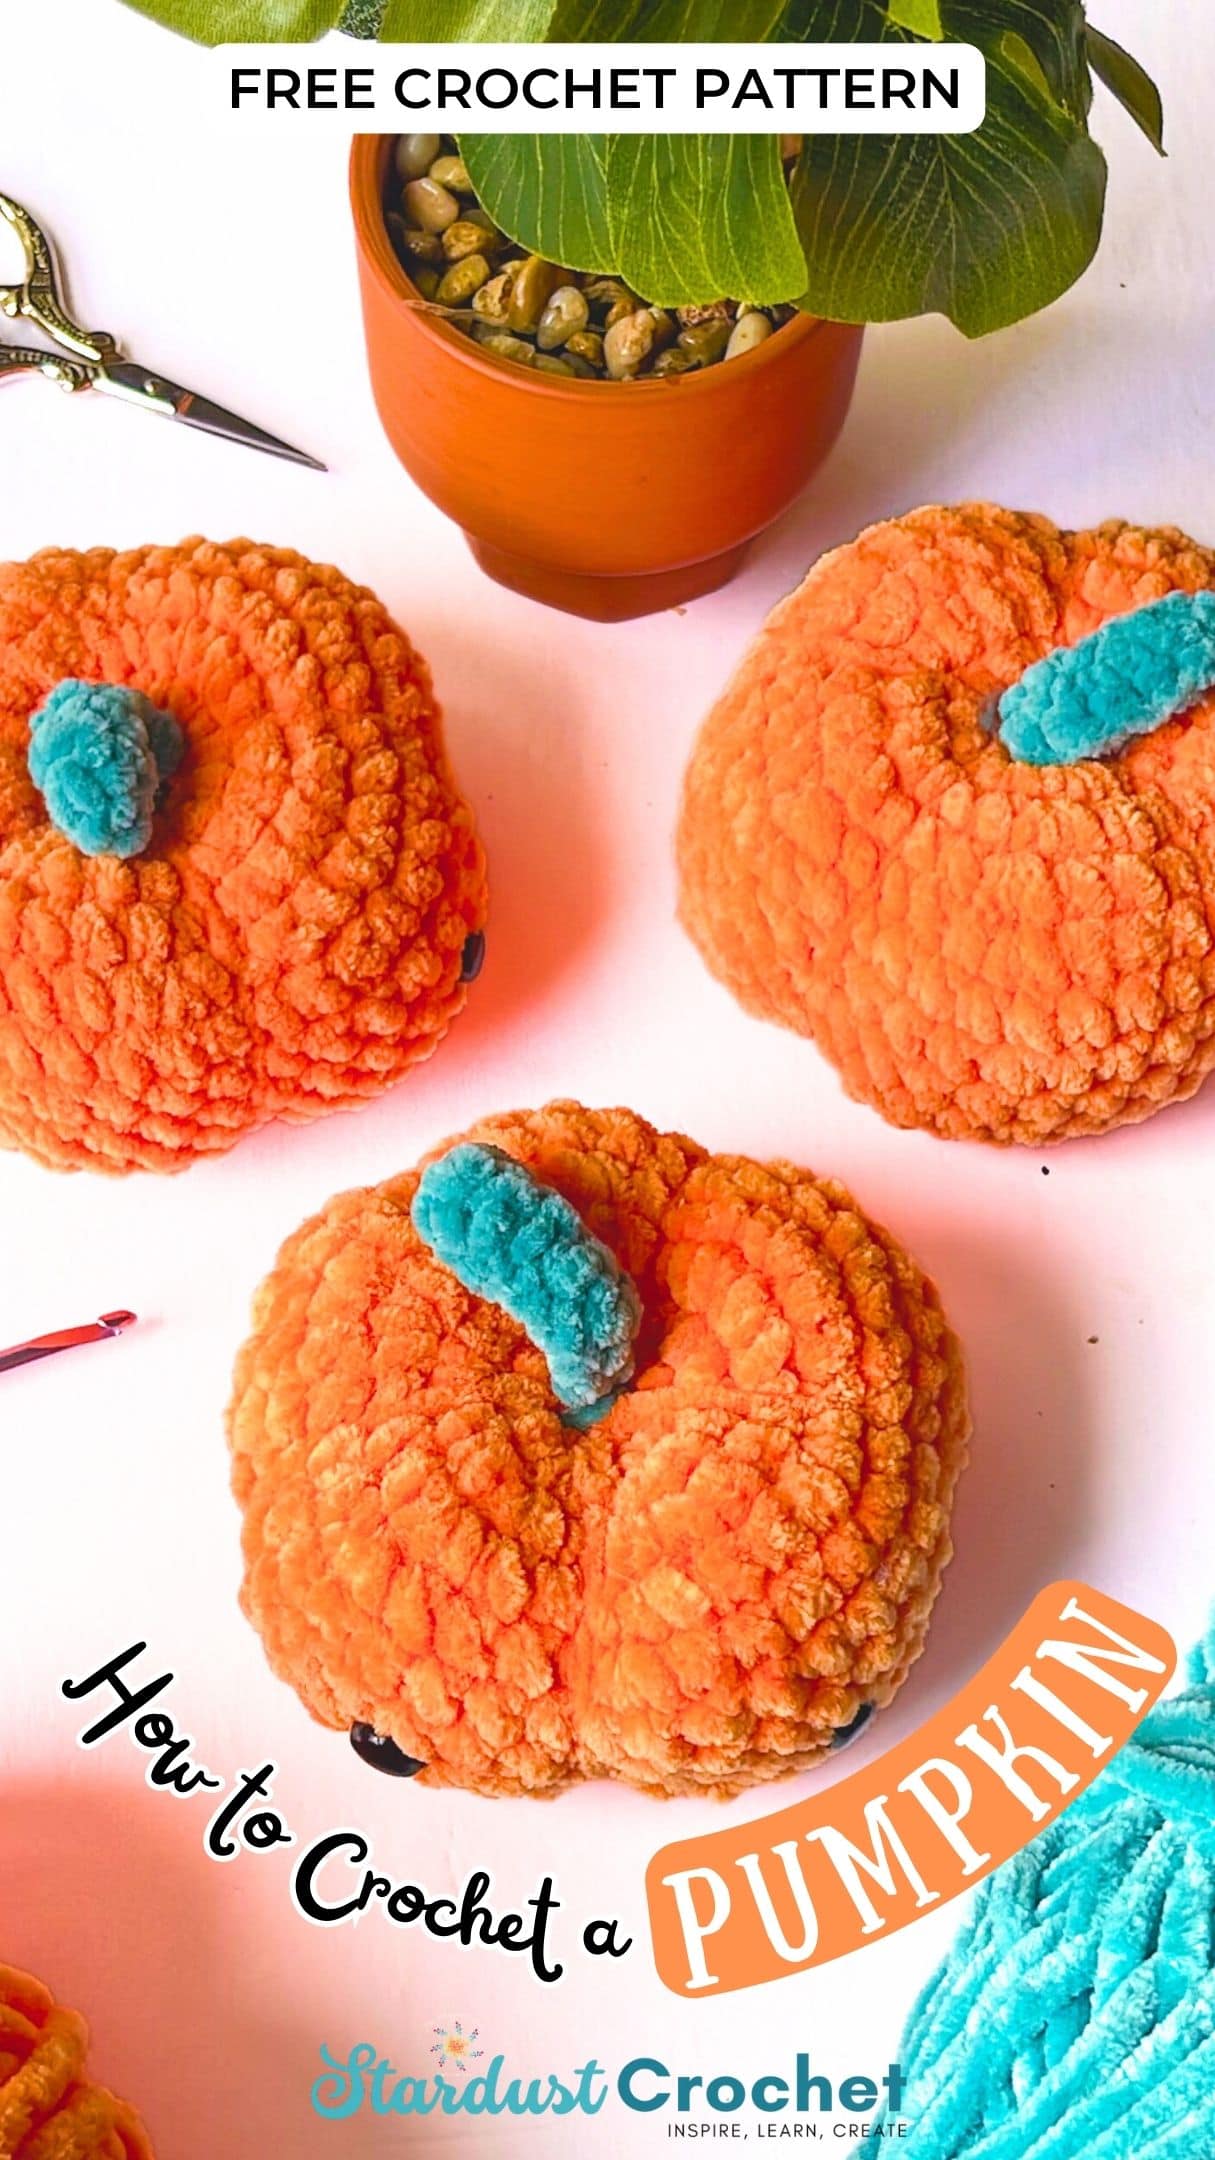
Hello crocheters! It’s fall,🍁 🍂 and that means it’s time to start making all the pumpkin-themed 🎃 things! This cute crochet pumpkin pattern for beginners is the perfect way to get in the spirit of the season.
It’s also a great project for new crocheters, as it uses basic stitches like a single crochet.
When it comes to crocheting a charming amigurumi pumpkin, a touch of creativity and the right guidance can yield delightful results.
In this guide, we will delve into the process of crafting a beginner-friendly amigurumi pumpkin.
We’ll explore the selection of yarn, crochet hook sizes, and the potential for beginners to embark on this fun and rewarding project.
Remember to bookmark this page and add it to your free crochet pumpkin pattern library!
Table of contents
- What size crochet hook for pumpkins?
- Looking for Crochet Pattern support?
- Visual Learner? There’s a Video for that!
- Let’s Get Started Making a Beginner Amigurumi Pumpkin!
- Skill Level:
- Yarn Weight:
- All About the Yarn…
- Yarn Subs:
- PATTERN:
- Materials & Notions
- Sizes / Finished Measurements:
- Stitch guide:
- Notes:
- Color Pallette
- HOW TO CROCHET AN AMIGURUMI PUMPKIN:
- Rounds:
- Adding the Eyes
- Finishing
- Stem:
- Crochet Pumpkin Pattern tutorial Pictures
- Blog Hoppers!
- More Amigurumi Crochet Patterns You Might Like
Here are some of the fun way to use this Crochet Pumpkin for Beginners:
It’s wonderful to make crochet pumpkins, there are lots of free pumpkin crochet patterns out there, but this one is a simple, easy crochet pumpkin pattern you can use for all kinds of crochet projects.
- Table settings
- Keychains
- Gifts for kids
- Cute little pumpkins for your Etsy shop!
- Large pillows
- Halloween garland
- Possibilities are endless!
- Mini pumpkin key chains
How to crochet a simple pumpkin (Basics)
To crochet a simple pumpkin, you need a few ingredients, like your favorite yarn, a crochet hook, darning needle, and some scissors.
If you want to get fancy, you can embellish your pumpkin with cinnamon sticks, raffia yarn, or amigurumi safety eyes.
Use your imagination!
Creating a simple amigurumi pumpkin doesn’t require complex patterns. Instead, you can follow these basic steps to get started:
- Magic Circle: Begin by forming a “magic circle.” This technique allows for a seamless and tight start to your pumpkin. (see tutorial below for magic circle)
- Single Crochet (sc) and Slip Stitch (sl st): Master the “single crochet” (sc) and “slip stitch” (sl st) techniques. These stitches will help you shape your pumpkin, creating the characteristic ridges and texture.
- Increase and Decrease Stitches: To achieve the round shape of a pumpkin, practice increasing and decreasing stitches. You can use terms like “2nd ch” and “repeat row” to control the number of stitches and create the desired curves.
- Amigurumi Stuffing: As you crochet, remember to stuff your pumpkin with soft amigurumi stuffing. Ensure it’s well-packed but not overly tight. Pay attention to the “bottom of the pumpkin” to achieve the right shape.
- Pumpkin Stem: Finish your amigurumi pumpkin by crafting its stem. The “pumpkin stem” adds a final touch of authenticity to your creation.
What kind of yarn do you use to crochet a pumpkin?
Choosing the appropriate yarn is essential for your amigurumi pumpkin. Even though I am using a plushie yarn for this pattern – you can use any yarn you want and any hook size to create a different look to match your special home decor.
Opt for a worsted weight yarn or super bulky yarn category, which is perfect for creating plump and huggable pumpkins.
When you think about the “yarn weight,” consider how it affects the final size and texture of your pumpkin.
You can use any type of yarn to crochet a pumpkin, but I recommend using a super bulky weight yarn for this pattern. This will give your pumpkin a nice, full shape.
However, you can create a crochet pumpkin in *any* yarn or hook size! That’s the beautiful part of crocheting, you can create it how you want!
What size crochet hook for pumpkins?
The size of your crochet hook plays a significant role in shaping the size of the pumpkin. For worsted or bulky weight yarn, a crochet hook around 4.5 mm, or even larger, is suitable.
The “mm crochet hook” size directly impacts the size of your stitches and, consequently, the overall size of your pumpkin.
I recommend using a size 7 (4.5 mm) crochet hook for this pumpkin pattern.
Using a smaller crochet hook with Parfait Chunky yarn creates a tight gauge so your stuffing doesn’t come out
Try out different hooks with different yarns to see what you like best. I’ve used everything from sport weight to super bulky yarn and from 3.5 mm hook to 9 mm hook!
The great thing about playing around with hook sizes and yarn sizes is you can create small pumpkins or HUGE pumpkins depending on the sizes.

Can a beginner crochet amigurumi?
Absolutely! Beginners can crochet amigurumi! Even if you’re a new crocheter, you can confidently embark on an amigurumi project. Amigurumi is simply a Japanese word for crocheted stuffed animals.
Start with the “basic crochet stitches” to build your foundation. With patience and practice, you’ll develop the skills and confidence to create charming amigurumi pumpkins.
It’s a great way to practice your crochet skills and create something cute and cuddly. Try this easy crochet amigurumi ghost for another fun Halloween / Fall fun pattern.
I would say amigurumi is a PERFECT place to start if you are just learning to crochet. Why? Because it uses *one* stitch – the single crochet stitch, and two variations of the single crochet.
- Increase – Single crochet increase (sc INC)
- Decrease – Single crochet decrease (sc2tog)
The single crochet increase is simply making 2 single crochets into the same stitch.
A single crochet decrease is just joining two stitches together by working half of a single crochet into one stitch and another half single crochet into the next stitch.
Then completing the single crochet through both. (see the stitch guide for complete instructions.)
Tips & Tricks to Create the Perfect Pumpkin
- To make your pumpkin even more pumpkin-y, add a cinnamon stick stem! Simply tie a piece of yarn around the cinnamon stick and then sew it to the top of the pumpkin.
- If you want to make multiple pumpkins, try making them in different sizes. This will create a fun and festive display.
You can also use different colors of yarn to make your pumpkins. I love using orange yarn for traditional pumpkins, but I also think other fall colors like red, yellow, and green look great.
Get creative and try using deep blues or even rainbow pumpkins!
I hope you enjoy this easy free pattern!
Looking for Crochet Pattern support?
Head over to Stardust Gold Crochet & Friends.
Visual Learner? There’s a Video for that!
For visual learners there is a full video tutorial on YouTube here: No Sew Ami Pumpkin Tutorial
Let’s Get Started Making a Beginner Amigurumi Pumpkin!
In this pattern I use a super bulky, Parfait yarn, with a smaller crochet hook.
Skill Level:
Beginner / Easy
Yarn Weight:
6 (super bulky)
All About the Yarn…
Parfait Chunky Yarn is my yarn of choice for this pattern. This yarn is so soft and great for amigurumi projects and stuffies. It also doesn’t shed much, which makes it great for washing.
Yarn Subs:
Easily – there are tons of super cute yarns that are similar to Premier Parfait Chunky – check them out here.
PATTERN:
How to Crochet a Pumpkin YouTube for the video pattern tutorial.
Materials & Notions
Suggested Yarn: Premier Parfait Chunky or equivalent 100% Polyester, 131 yds (119 m), 3.5 oz (100 g) in Tangerine & Lagoon
Yardage Needed: 48 – 50 approximately
- Hook Size: 4.5 mm hook (USA 7)
- Scissors
- Darning Needle
- Flexible Measuring Tape
- 10 mm Safety Eyes (or any of your choice)
Sizes / Finished Measurements:
Dimensions: 2.5″ (6.35 cm) tall x 3.5″ (10.6 cm) wide.
Abbreviations
- Ch (s) – Chain (s)
- St (s) – Stitch(s)
- Sc – Single crochet
- Sl st – slip stitch
- Sc – Single crochet
- Sc2tog – Single crochet 2 together
- Yo – Yarn over
- * – Repeat from * as many times indicated.
Stitch guide:
Sc – Single Crochet – Insert hook in indicated stitch, yo, draw up a loop, yo, draw through two loops.
Sc2tog – Single Crochet Two Together – Insert hook in indicated stitch, yo, draw up a loop (2 loops on hook), insert hook in next stitch, yo, draw up a loop (3 loops on hook), yo, draw through all 3 loops on hook – 1 sc created.
How to create a crochet Magic Circle
Notes:
- Mark the beginning of each round with a stitch marker.
- Pattern works in continuous rounds – unless otherwise noted.
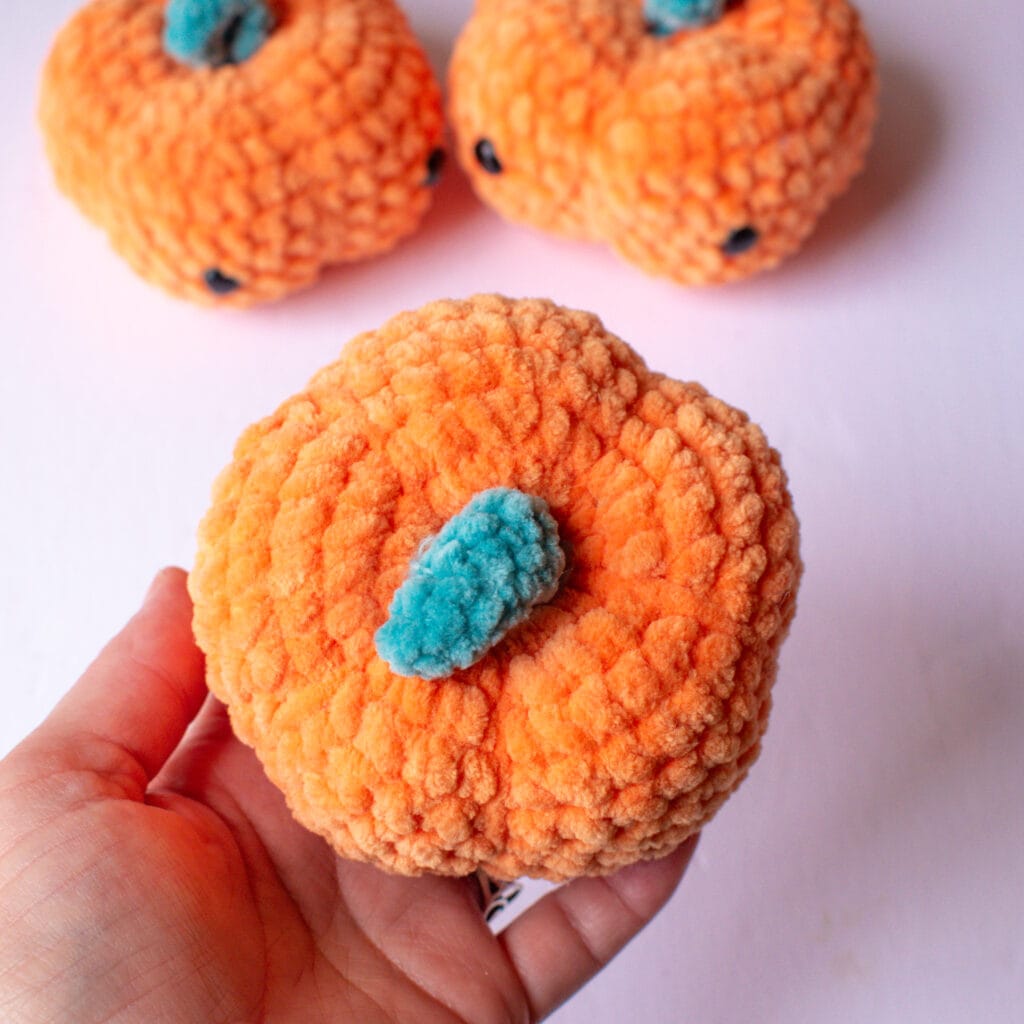
Color Pallette
Tangerine (orange) & Lagoon (green) because… pumpkins 😀
HOW TO CROCHET AN AMIGURUMI PUMPKIN:
Start off with a Magic Ring – or – chain 2 and work into the first chain.
Rounds:
1: Sc 6 into the ring. (6 sc)
2: Sc 2 in each stitch around. (12 sc)
3: [Sc 2 in next st, sc in next stitch] repeat around. (18 sc)
4: [Sc 2 in next st, sc in next 2 sts] repeat around. (24 sc)
5: [Sc 2 in next st, sc in next 3 sts] repeat around. (30 sc)
6: [Sc 2 in next st, sc in next 4 sts] repeat around. (36 sc)
7 – 11: Sc in each st around (36 sc)
12: [Sc2tog, sc in next 4 sts] repeat around. ( 30 sc)
13: [Sc2tog, sc in next 3 sts] repeat around. (24sc)
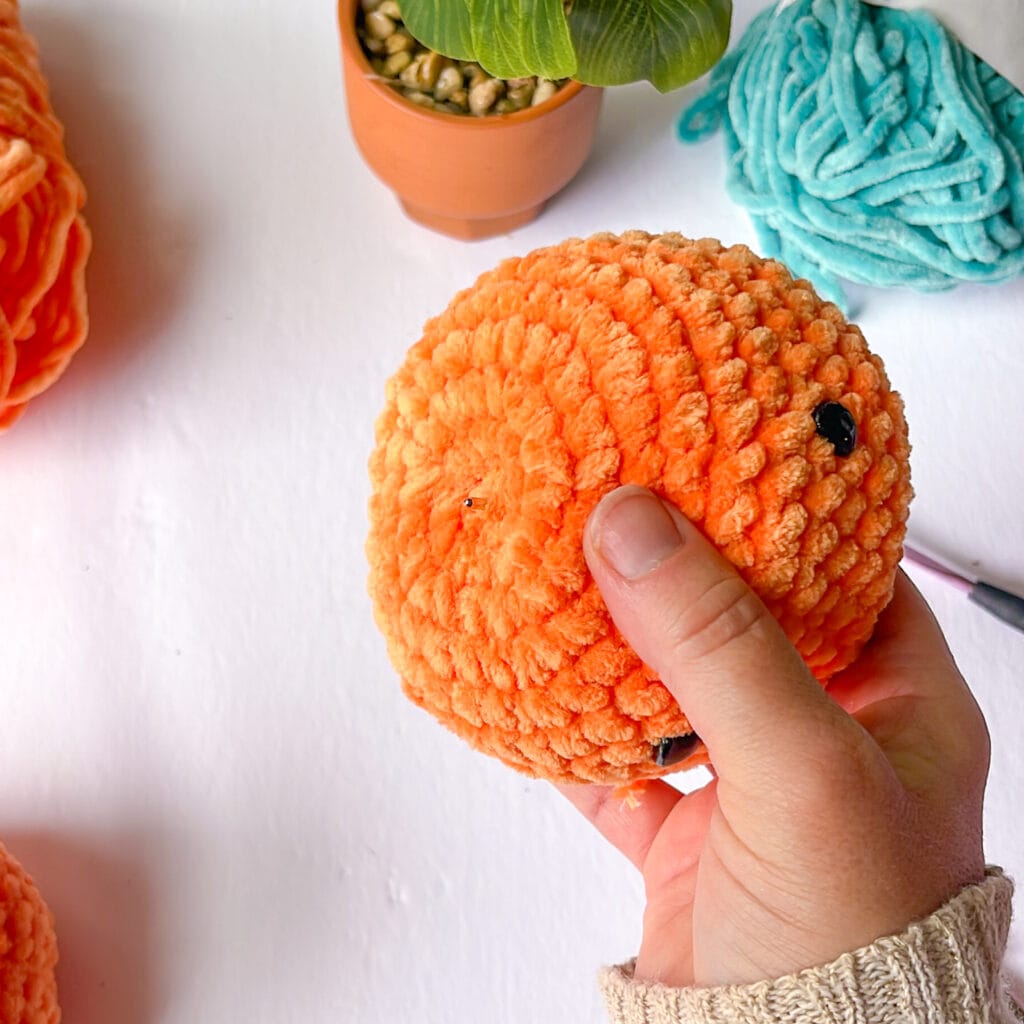
Add some stuffing and add eyes
14: [Sc2tog. Sc in next 2 sts] repeat around. (18 sc)
15: [Sc2tog, sc in next st] repeat around. (16 sc)
16: [Sc2tog] repeat around. (10 sc)
Adding the Eyes
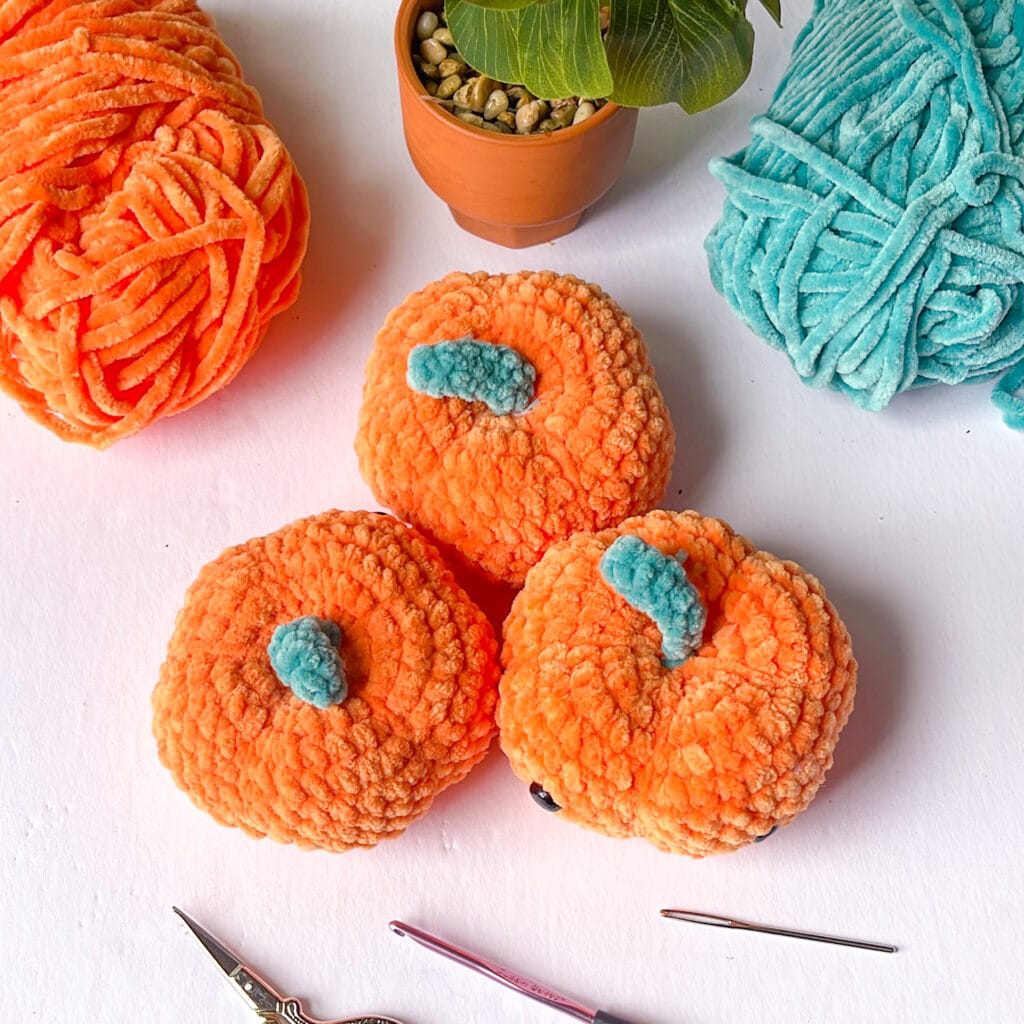
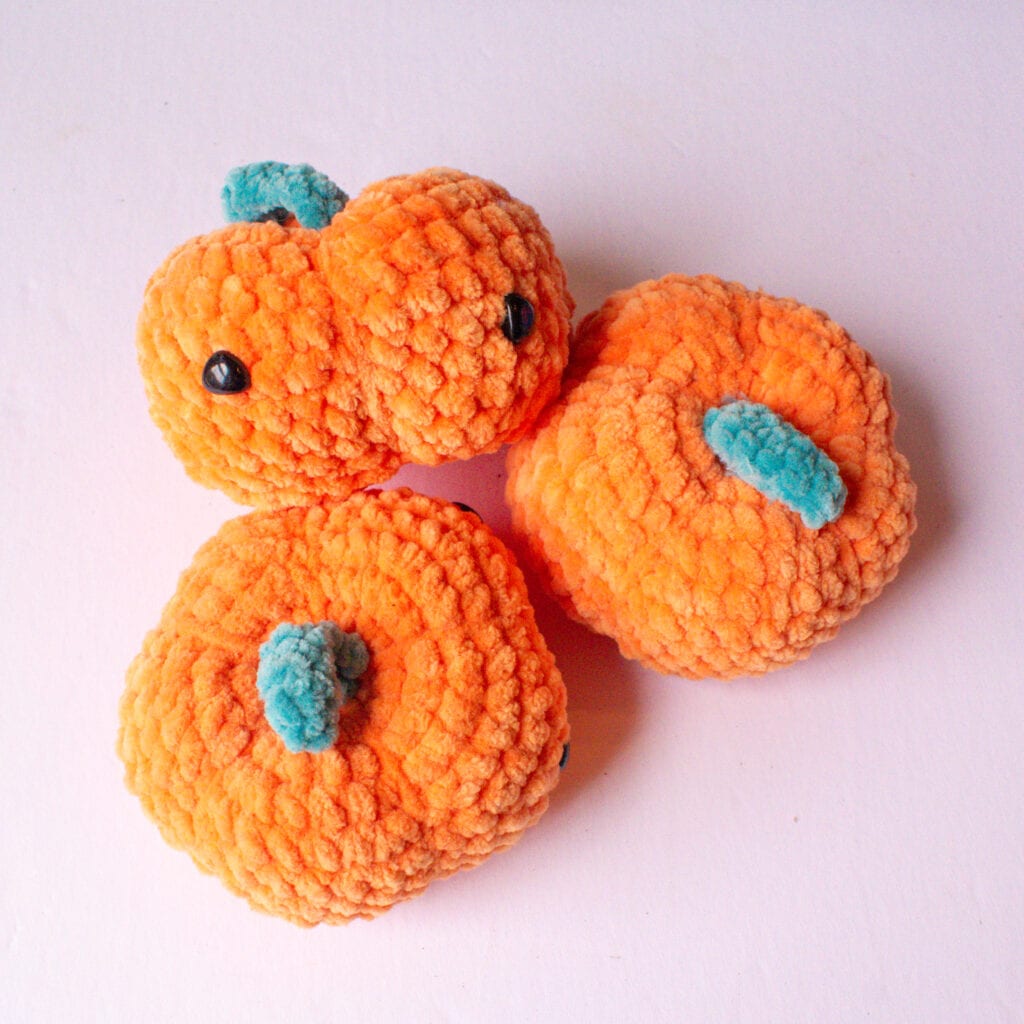
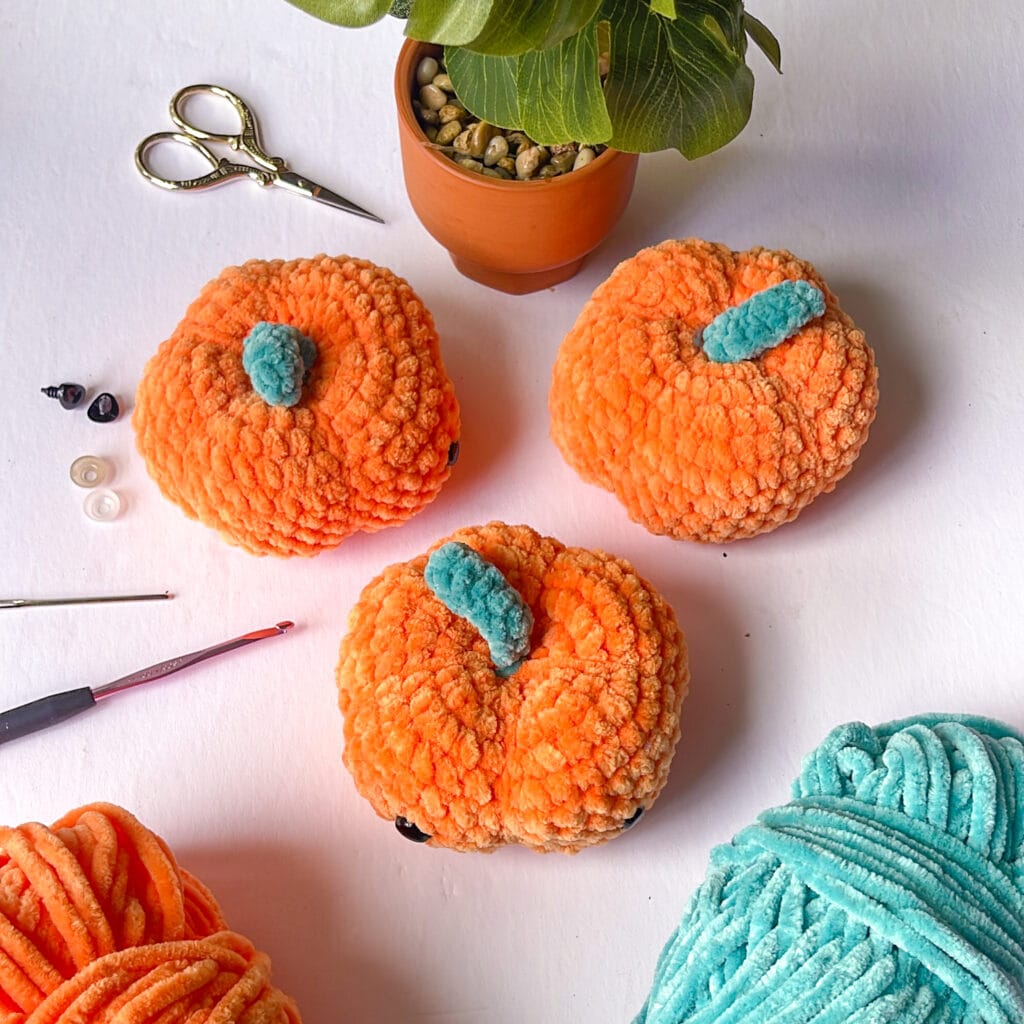
I placed my eyes around 6 rows up from the bottom and 6 stitches apart from each other. (see images below)
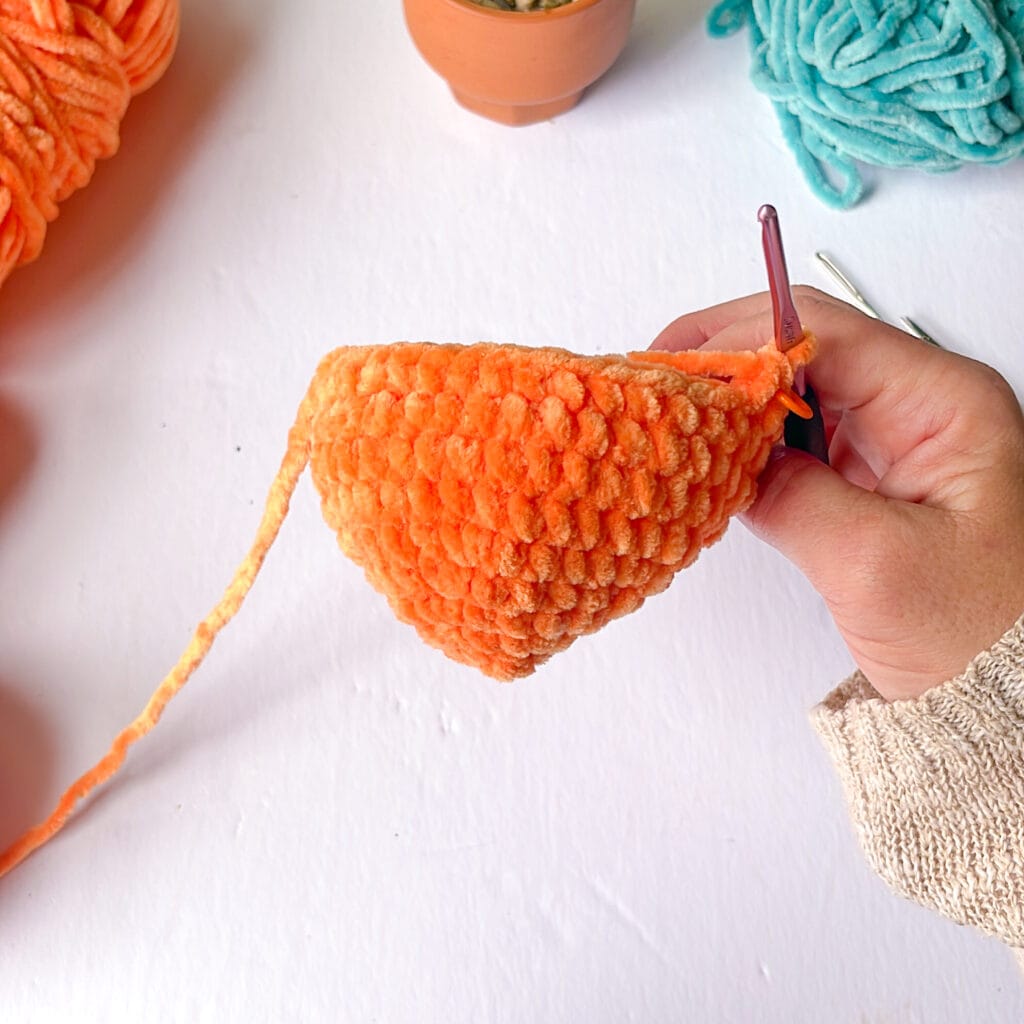
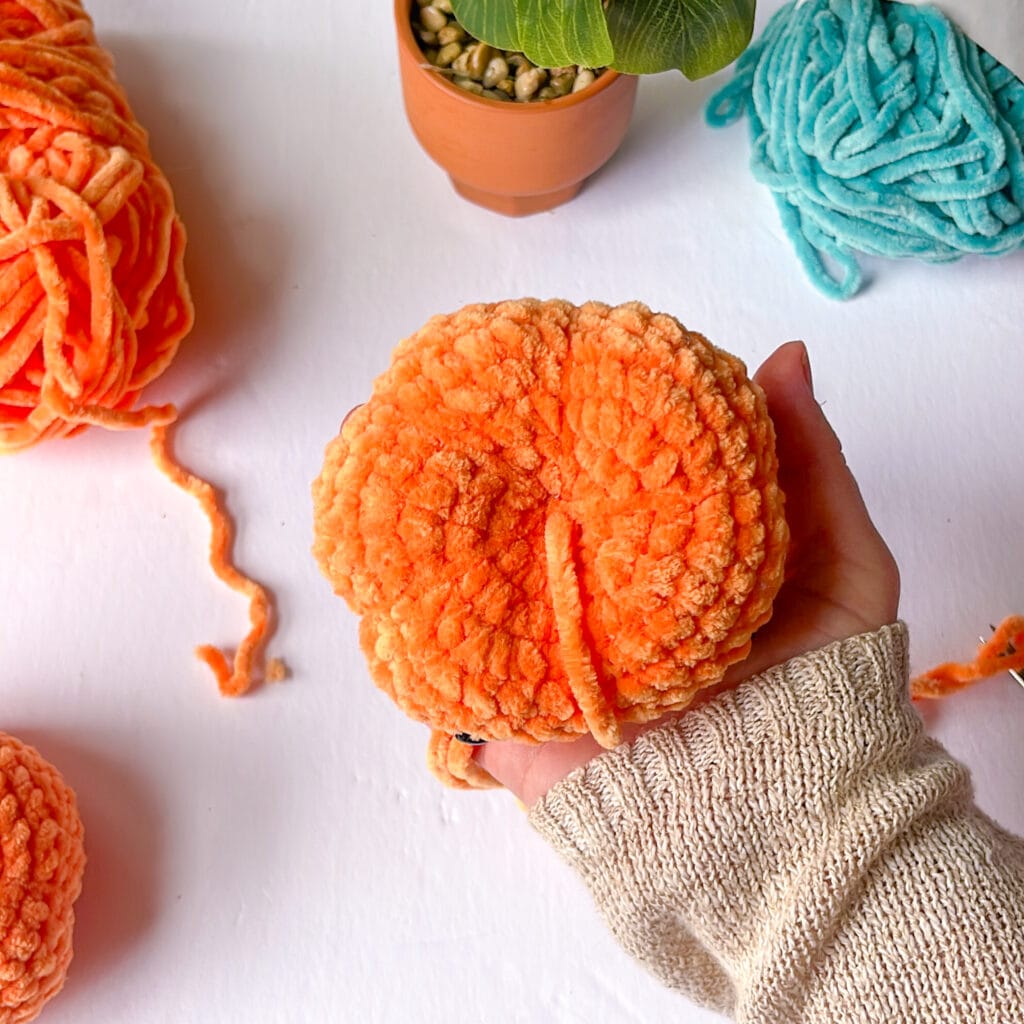
Finishing
Here are the written instructions on how to create the ridges on the pumpkin and create the stem. If you need visual help, please check out the video or check out the pictures below.
- Cut leaving an 18” tail.
- Thread your darning needle.
- Weave in and out along the edge, then draw it into the center.
- Sew the hole closed, then.
- Insert the needle through the bottom and up to the top.
- Insert needle back into the bottom and pull it up through the top, pulling it tight to create a ridge.
- Repeat steps 5 & 6 to create 5 ridges around your pumpkin.
Stem:
Chain 8 – Sc in 2nd chain from hook and across. Tie off, make a knot with the two ends. Then thread both into a large eye needle and attach to the pumpkin top. 🎃 Weave in all remaining tails.
Congrats! You are finished!
Crochet Pumpkin Pattern tutorial Pictures
Here are progress pics to give you a good visual of what each step looks like.


Thanks for stopping by!
I hope you enjoy crocheting this cute and easy pumpkin pattern for beginners! Don’t you love a free crochet pattern? Don’t forget to share your finished pumpkins on social media using the hashtag #crochetpumpkinpattern.
Blog Hoppers!
Download the free pattern Amigurumi Pumpkin PDF Pattern here or click the button below. Thanks for being a part of the Autumn Harvest Blog Hop friends!

More Amigurumi Crochet Patterns You Might Like
- Easy Amigurumi Ghost Pattern
- Honey Bee Amigurumi Crochet Pattern
- Amigurumi Buck Deer Snuggler by Kat Rombold Tarr


Indeed, I also discovered the code as follows: BOHO today at 9:34 AM (CT).However, the Free pumpkin pattern just wasn’t available, just yet.Thank you for your best intervention, plus this offer being provided ASAP!
No download available again 😕. Too many ads to follow the pattern here 😕
I filled out the form to get the free pattern for this on the right day, the 19th, but never got the email with the pattern. I checked my spam too.