


Last Updated: April 4, 2023
If you like to design crochet garments of any kind, crochet ribbing is a necessary skill to add to your crochet repertoire. In this pose you will learn how to crochet ribbing 6 easy ways.
Crochet ribbing consists of a combination of simple stitches, usually worked in the back loops only or using front or back post stitches to create ridges.
All of these work beautifully, but I have a favorite…because not only does it looked knitted, it has a great stretch, like ribbing is intended to do.
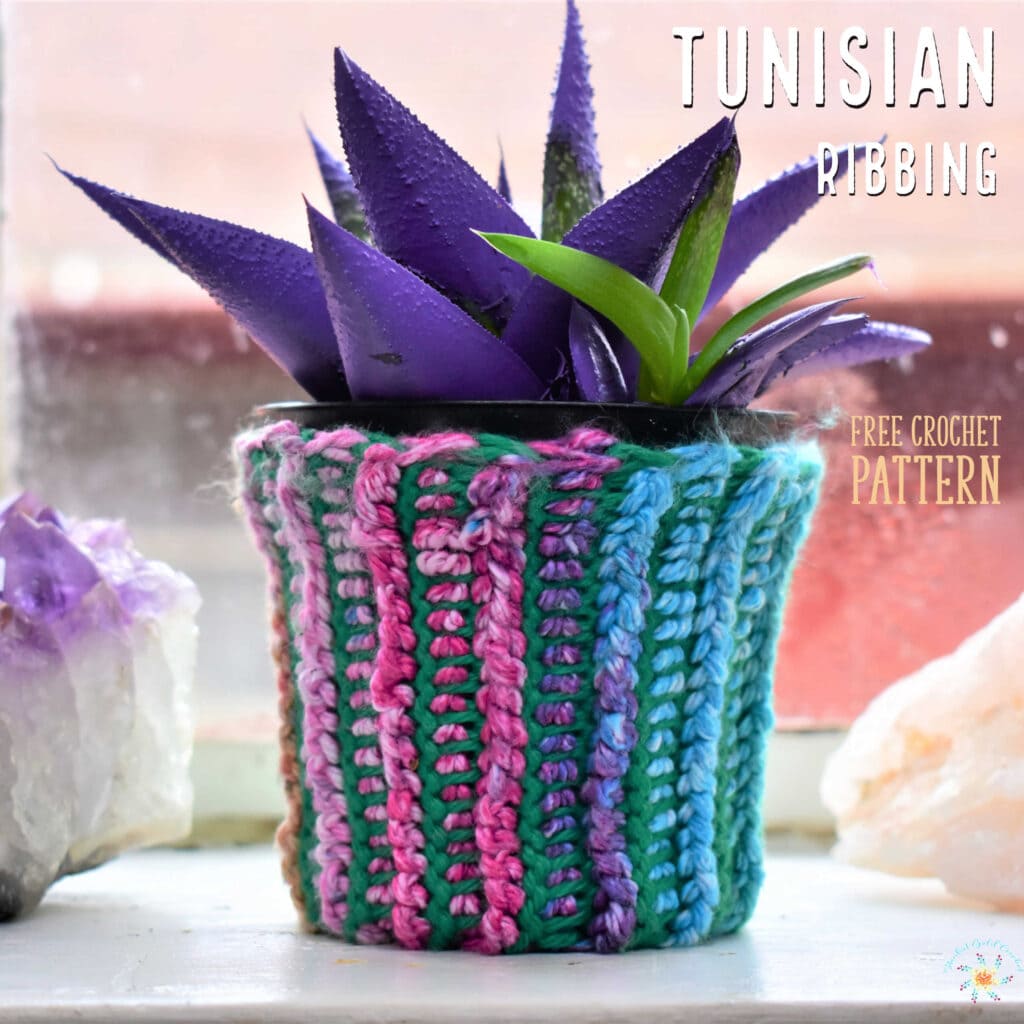
Crochet ribbing doesn’t always come in traditional crochet style – check out my Tunisian crochet ribbing pattern and see if you like that one too!
Tunisian crochet is a technique that reminds me of knitting, but it’s done with one hook and creates a thick fabric. Despite the pattern being a koozie…you can use this Tunisian crochet ribbing for garments too!
In this post you will learn 6 Easy Ways to Crochet Ribbing…
I’ve compiled 6 different techniques – I hope you learn something new and can use them on all your beautiful projects!
- Stretchy Slip Stitch Crochet Ribbing
- Single Crochet Ribbing
- Double Crochet Ribbing
- Combo Half Double Crochet & Single Crochet Crochet Ribbing
- Single Crochet & Slip Stitch Crochet Ribbing
- Front Post Half Double Crochet & Single Crochet Combo – Crochet Ribbing Combo
These patterns can be worked using a top-down hat or beanie pattern or a bottom-up beanie pattern too!
Table of contents
- In this post you will learn 6 Easy Ways to Crochet Ribbing…
- How Many Different Types of Crochet Ribbing Are There?
- What Are the Best Tips and Tricks for Crochet Ribbing?
- PEOPLE OFTEN ASK…
- How do you crochet a stretchy ribbing?
- How to attach crochet ribbing?
- How to crochet ribbing on a hat?
- What is the best crochet stitch for ribbing?
- Crochet Pattern Support
- 6 Simple Crochet Ribbing Patterns | How to Crochet Ribbing
- Single Crochet Ribbing
- Half Double Crochet Ribbing
- Half Double Crochet & Single Crochet Crochet Ribbing Combo
- Single Crochet & Slip Stitch Crochet Ribbing
- Front Post Half Double Crochet & Single Crochet Ribbing Combo
- Adding Flair To Your Crochet Ribbing
- Fixing a Mistakes Using Crochet Ribbing
- Using Crochet Ribbing for Home Decor
- You May Enjoy These Free Crochet Patterns
How Many Different Types of Crochet Ribbing Are There?
There are several different types, each with its own unique look and texture. Some of the most popular types of crochet ribbing include slip stitch, single crochet, and half double crochet combos.
What Are the Best Tips and Tricks for Crochet Ribbing?
If you’re new to crochet ribbing, here are a few tips and tricks to help you get started:
Keep your slip stitches loose
The best way to be successful at creating a nice stretchy and easy to work with ribbing is to keep those slip stitches loose.
Pull up your hook so it is horizontal to make sure you keep the same tension throughout.
If you slip (no pun intended lol), then you will end up with tight slip stitches that are hard to work through.
Look for a yarn that has a good stitch definition and is easy to work with and has good stretch and stitch definition.
Mark your first stitch of each row
Marking your stitch will help you locate your last stitch of the row. This is especially important while working half double crochet and slip stitch ribbings.
PEOPLE OFTEN ASK…
How do you crochet a stretchy ribbing?
Stretchy Ribbing Pattern
To crochet a stretchy ribbing, you can use the slip stitch method working into the back loop only.
Here is a quick stretchy ribbing pattern to follow:
Chain your desired number for your brim + 1.
(crochet these very loose!)
TIP: Mark the first stitch of each row to help you keep track of where you last stitch of the row is!
Row 1: Slip stitch in back loop only (BLO) in 2nd chain from hook and across.
Row 2: Chain 1, skip the chain 1, slip stitch (BLO) into each slip stitch across.
Repeat row 2 to get your desired length.
That’s it!
How to attach crochet ribbing?
If you are working the ribbing separate and attaching it to a garment:
Using a darning needle and yarn, use a mattress stitch to attach by lining it up with your garments edge, and working the mattress stitch. Remember to weave in those tails!
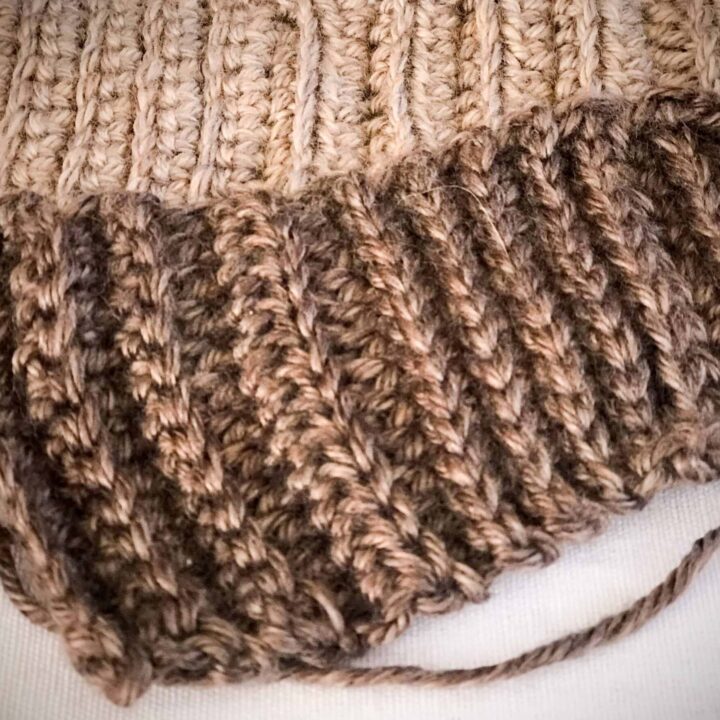
How to crochet ribbing on a hat?
To crochet ribbing on a hat, you can start by following one of the patterns below. Once the ribbing is long enough, fold it in half and sew the two ends together to form a circle. Then, continue working in rounds to create the body of the hat.
What is the best crochet stitch for ribbing?
The best stitch for ribbing is the slip stitch. Second runner up is the single crochet stitch. Third is the half double crochet stitch.
Why? Because the slip stitch creates the best stretch and the ultimate goal of perfect ribbing is to get a tight fit.
I have tried so many styles and these are definitely my best choices.
Crochet Pattern Support
If you ever need pattern support, head over to Stardust Gold Crochet & Friends and find all the support you need! I check in daily…
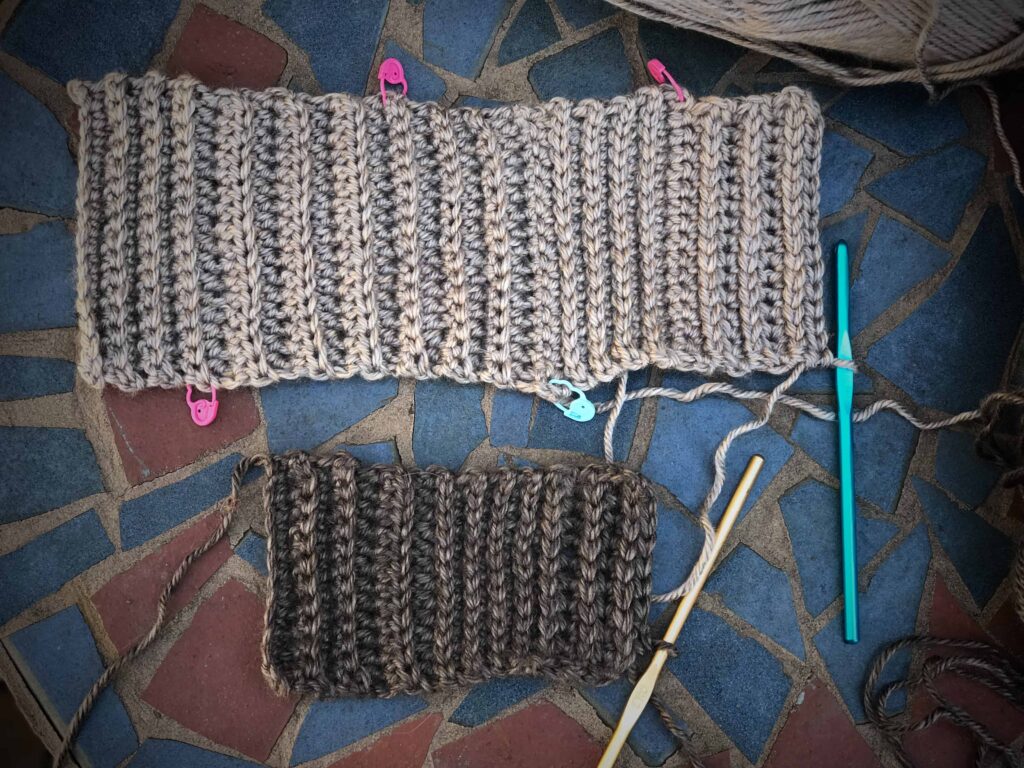
Let’s get to it! Grab your crochet hooks and some scrap yarn. Practice makes perfect and I believe you will find a favorite of your own.
6 Simple Crochet Ribbing Patterns | How to Crochet Ribbing
Abbreviations
ch – chain
sc – single crochet
hdc – half double crochet
sl st – slip stitch
blo – back loop only
FPhdc – front post half double crochet
3rd loop – third loop
These instructions are for working flat back and forth rows. Ribbing height can vary from hats to sweaters, so it is up to you how many chains you make to start. When you finish, you will join the ends together and stitch them up.
Note: When creating the ribbing, the first st of each row is made in same as turning chain unless otherwise indicated.
X = the number of rows or stitches in your project.
Single Crochet Ribbing
Pattern #1
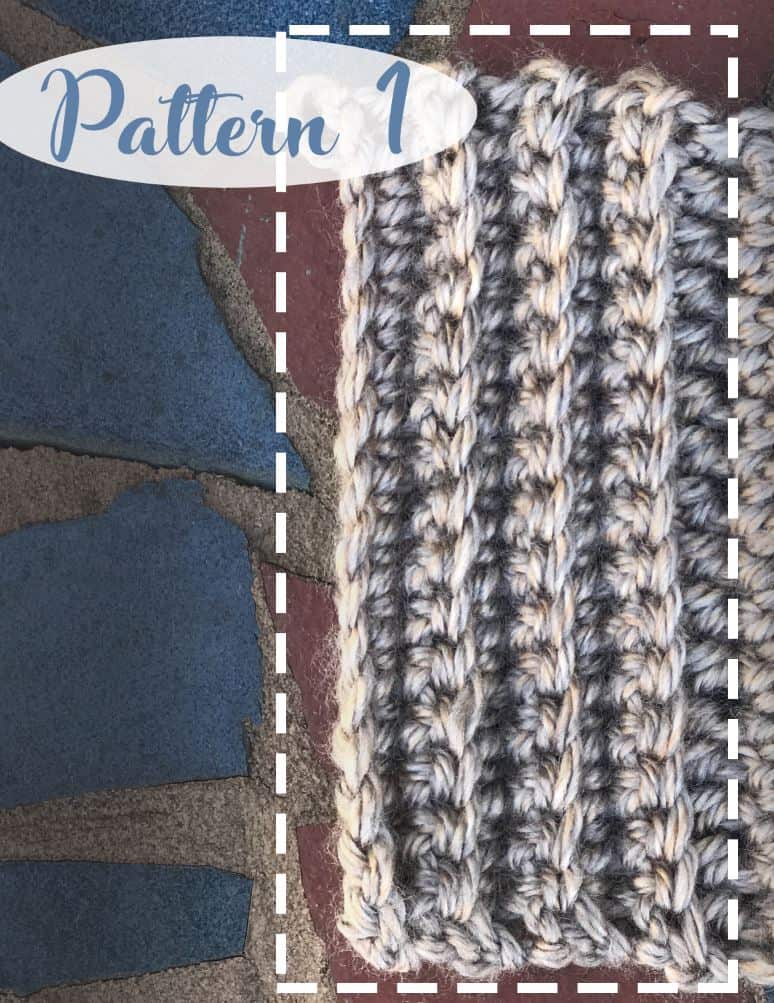
Create your foundation chain using chains or foundation single crochet row using this tutorial.
Row 1: Sc in 2nd ch from hook and in each stitch across, ch 1, turn.
Row 2 – Sc (BLO) in each stitch across, ch 1, turn.
Rows 3 – X: Repeat Row 2 until your ribbing is the length you’d like.
Half Double Crochet Ribbing
Pattern #2
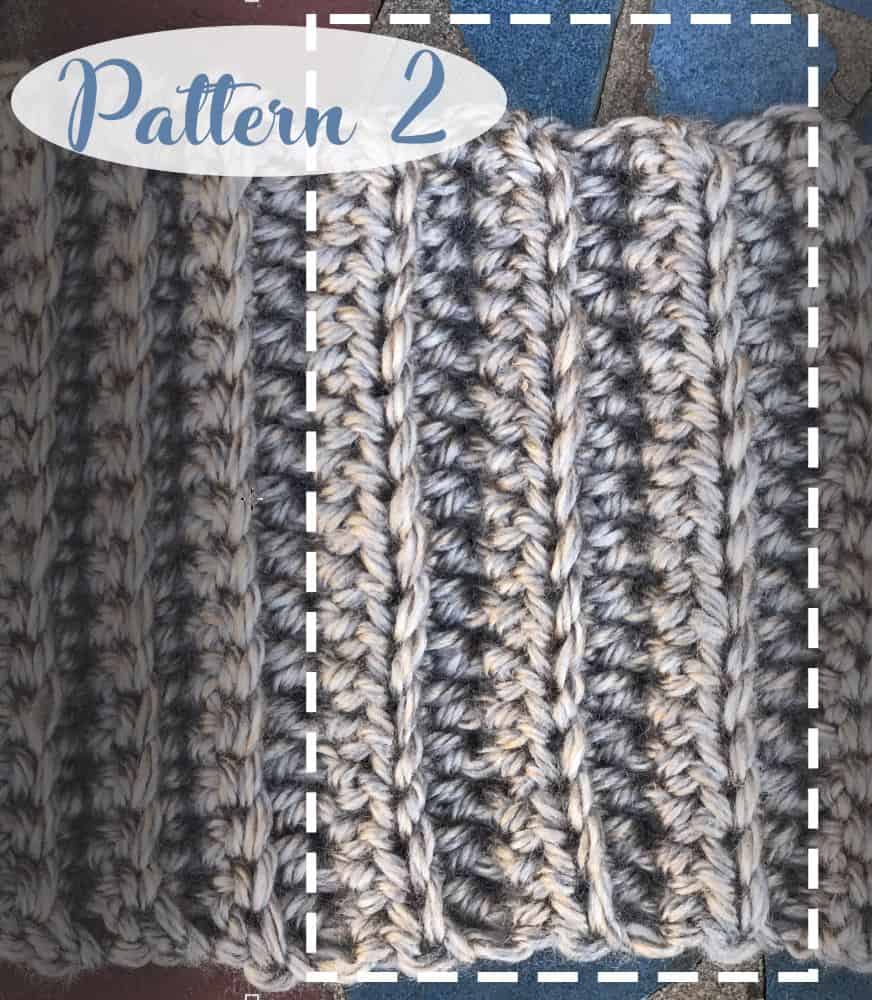
Note: When working the half double crochet – the last stitch of the row likes to hide ~ so remember to count your stitches. If you are short by one stitch – find that hiding last stitch and pull up the loop 🙂 Also, half doubles have a “3rd loop” – here is a pictorial on how to find the third loop of a half double crochet.
Create your foundation chain using chains or foundation half double crochet (fhdc). I created a tutorial to teach you how to crochet a foundation half double crochet, also known as a chain-less half double crochet.
Row 1: Hdc in each chain across row (if you started with a foundation hdc row, you’ll work these into the 3rd loops), ch 1, turn.
Row 2: Hdc (3rd loop) entire row, ch 1, turn.
Rows 3 – X: Repeat Row 2 until your ribbing is the length you’d like.
Half Double Crochet & Single Crochet Crochet Ribbing Combo
Pattern #3
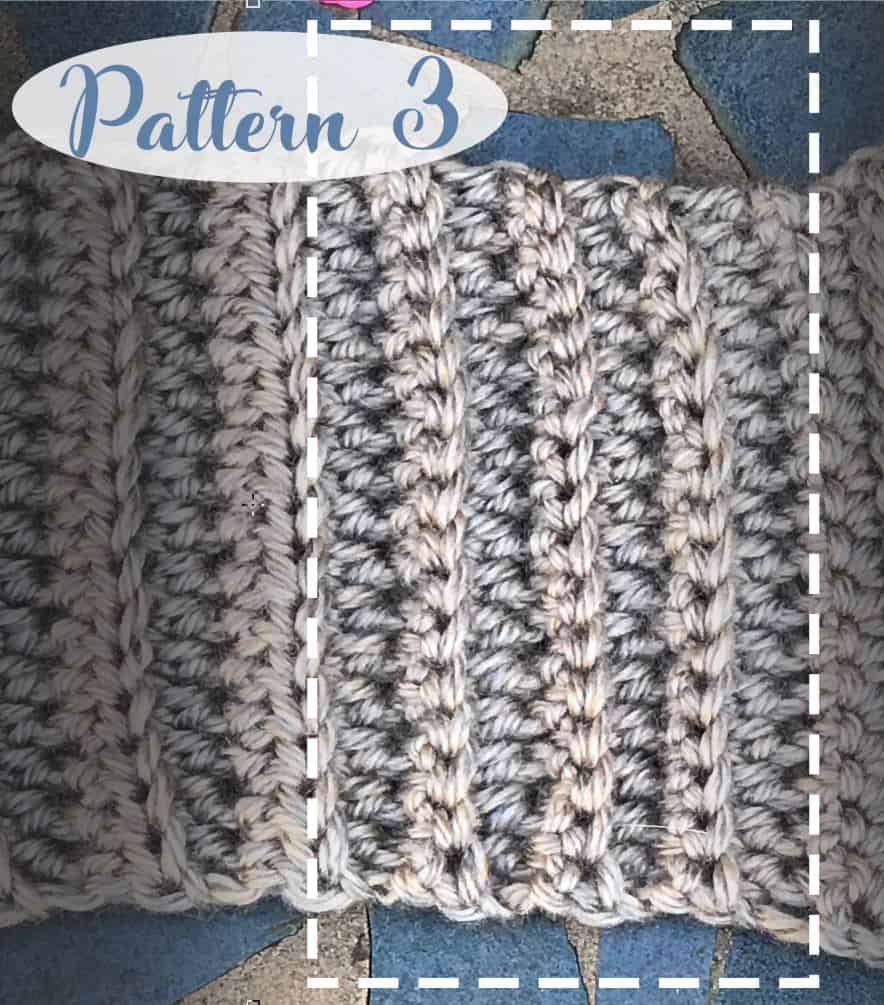
Create your foundation chain using chains or foundation single crochet (fsc). To learn how to create a foundation single crochet, check out this tutorial.
First Row: Sc in each stitch or chain across (if you started with a foundation single crochet row, you’ll work these into the back loops only), ch 1, turn.
Second Row: Hdc (BLO) in each stitch across, ch 1, turn.
Third Row: Sc (3rd loop) in each stitch across, ch 1, turn.
Rows 4 – X: Repeat Rows 2& 3 until your ribbing is the length you’d like.
Single Crochet & Slip Stitch Crochet Ribbing
Pattern #4
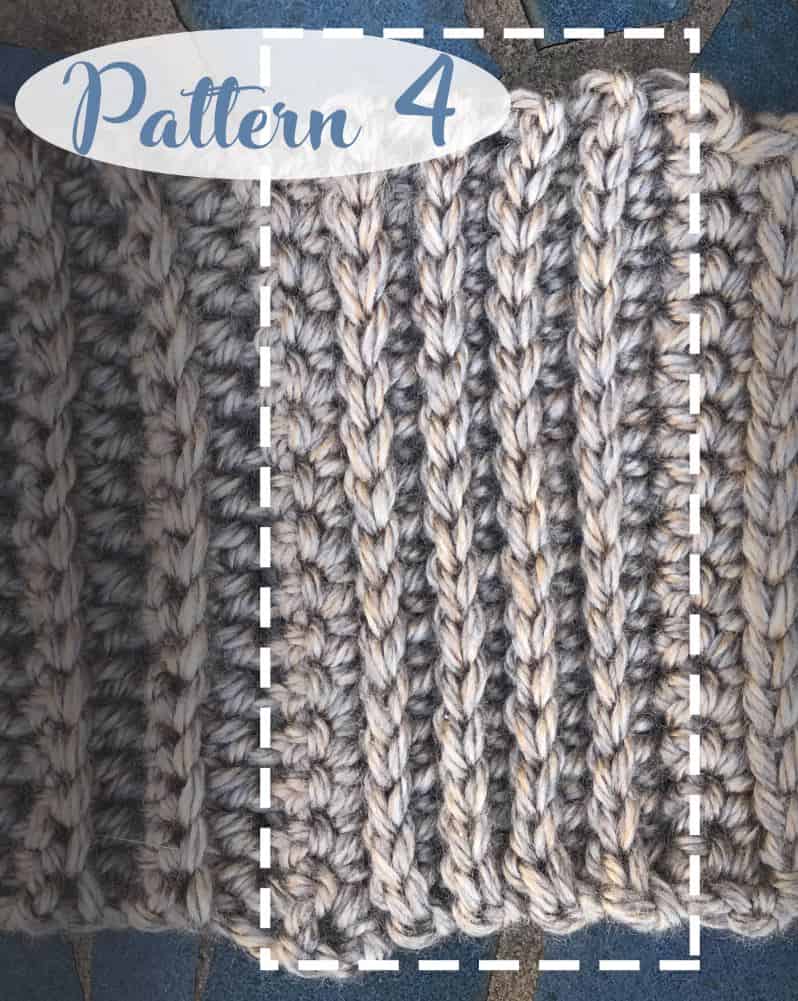
Note: Make the slip stitch very loose, as this ribbing tends to bunch up. Also, remember to count these stitches – or place a stitch marker on the first stitch. The last stitch of the slip stitch row will seriously hide from you!

P.S. – This is my favorite one 
Create your foundation chain using chains or foundation single crochet (fsc). If you are not familiar with how to crochet a foundation chain – I created a tutorial on it. Click here to learn how to create a foundation single crochet, this is also known as a chain-less foundation chain.
If you start with a foundation single crochet row, skip Row 1 and move on to Row 2.
First Row: Sc in each chain across row ch 1, turn.
Second Row: Sl st (BLO) entire row, ch 1, turn (make these loose! they tend to bunch up and it will make it easier to create R3).
Third Row: Sc (BLO) entire row, ch 1, turn.
Rows 4 – X: Repeat Rows 2 & 3 until your ribbing is the length you’d like.

Have you signed up for my Stargazers Mailing List ?
Front Post Half Double Crochet & Single Crochet Ribbing Combo
Pattern #5
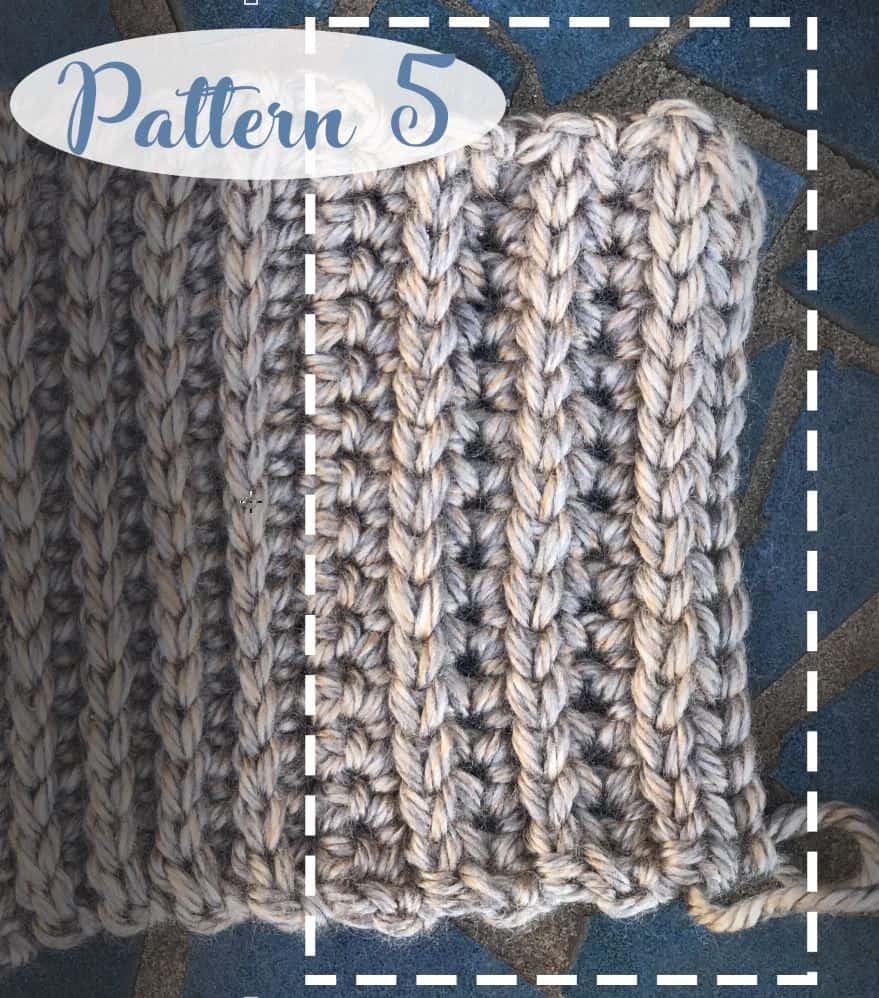
Create your foundation chain using chains or foundation single crochet (fsc). I am full of tutorials today! I also created a tutorial on how to create a foundation single crochet chainless foundation chain.
Again, if you started with a foundation single crochet row, skip Row 1 and move onto Row 2.
First Row: Sc in each stitch or chain across row, ch 1, turn.
Second Row: FPhdc around each sc from Row 1, ch 1, turn.
Third Row: Sc (in both loops) entire row, ch 1, turn.
Rows 4 – X:
Repeat Rows 2 & 3 until your ribbing is the length you’d like.
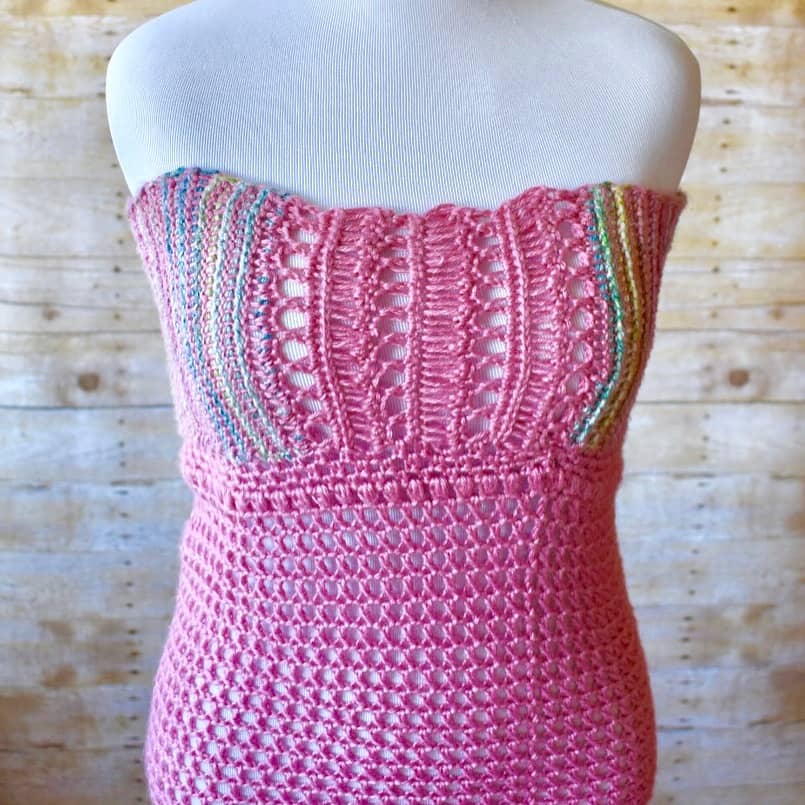
Adding Flair To Your Crochet Ribbing
Using Variegated Yarn
Variegated yarn, which features multiple colors in a single skein, can be a fun and creative way to add visual interest to crochet ribbing. Although, your stitches may hide a little, try it and see what it looks like!
Fixing a Mistakes Using Crochet Ribbing
Crochet Ribbing for Garment Alterations
Crochet ribbing can be a useful technique for altering the fit of a garment. For example, if a sweater is too short in the sleeves or body, you can add some ribb to extend the length.
Subsequently, you can also use it to tighten or loosen the fit of a garment by working fewer or more stitches in each row. When using crochet ribbing for garment alterations, it’s important to match the weight and fiber content of the existing garment as closely as possible to ensure a seamless and professional-looking result.
Using Crochet Ribbing for Home Decor
Crochet ribbing can also be a fun and versatile technique for home decor projects. Use it to create:
- Stretchy and snug-fitting covers for throw pillows
- Add texture to blankets and afghans.
- Trims for curtains, tablecloths, and other household linens.
Crochet ribbing can be worked in a variety of yarns and colors to match any decor style, and it’s a great way to add a handmade touch to your home.
If you are looking for more fun tutorials, check out these:
- Learn to Read a Crochet Graph
- How to Crochet Foundation Stitches
- Planned Pooling in Crochet Made Easy
Thanks for stopping by!
Do you have a crochet ribbing pattern that is your favorite? I would love to hear about it! Leave a comment below and let me know!


How to Crochet Ribbing: 5 Different Styles
In this post, you'll learn five unique and versatile ways to crochet ribbing. Whether you're a beginner or an experienced crocheter, these techniques will help you add a professional touch to your projects. With step-by-step instructions and helpful tips, you'll be able to master the art of crochet ribbing in no time!
Materials
- Crochet Hook
- Scissors
Tools
- Just bring your hook, yarn and hands!
Instructions
Single Crochet Ribbing
Create your foundation chain using chains or foundation single crochet row using this tutorial.
Row 1: Sc in 2nd ch from hook and in each stitch across, ch 1, turn.
Row 2: Sc (BLO) in each stitch across, ch 1, turn.
Rows 3 – X: Repeat Row 2 until your ribbing is the length you’d like.
Half Double Crochet Ribbing
Note: When working the half double crochet – the last stitch of the row likes to hide ~ so remember to count your stitches.
If you are short by one stitch – find that hiding last stitch and pull up the loop 🙂 Also, half doubles have a “3rd loop” – here is a pictorial on how to find the third loop of a half double crochet.
Create your foundation chain using chains or foundation half double crochet (fhdc). I created a tutorial to teach you how to crochet a foundation half double crochet, also known as a chain-less half double crochet.
Row 1: Hdc in each chain across row (if you started with a foundation hdc row, you’ll work these into the 3rd loops), ch 1, turn.
Row 2: Hdc (3rd loop) entire row, ch 1, turn.
Rows 3 – X: Repeat Row 2 until your ribbing is the length you’d like.
Half Double Crochet & Single Crochet Crochet Ribbing Combo
Create your foundation chain using chains or foundation single crochet (fsc). To learn how to create a foundation single crochet, check out this tutorial.
First Row: Sc in each stitch or chain across (if you started with a foundation single crochet row, you’ll work these into the back loops only), ch 1, turn.
Second Row: Hdc (BLO) in each stitch across, ch 1, turn.
Third Row: Sc (3rd loop) in each stitch across, ch 1, turn.
Rows 4 – X: Repeat Rows 2& 3 until your ribbing is the length you’d like.
Single Crochet & Slip Stitch Crochet Ribbing
Note: Make the slip stitch very loose, as this ribbing tends to bunch up. Also, remember to count these stitches – or place a stitch marker on the first stitch. The last stitch of the slip stitch row will seriously hide from you!
Create your foundation chain using chains or foundation single crochet (fsc). If you are not familiar with how to crochet a foundation chain – I created a tutorial on it. Click here to learn how to create a foundation single crochet, this is also known as a chain-less foundation chain.
If you start with a foundation single crochet row, skip Row 1 and move on to Row 2.
First Row: Sc in each chain across row ch 1, turn.
Second Row: Sl st (BLO) entire row, ch 1, turn (make these loose! they tend to bunch up and it will make it easier to create R3).
Third Row: Sc (BLO) entire row, ch 1, turn.
Rows 4 – X: Repeat Rows 2 & 3 until your ribbing is the length you’d like.
Front Post Half Double Crochet & Single Crochet Ribbing Combo
Create your foundation chain using chains or foundation single crochet (fsc). I am full of tutorials today! I also created a tutorial on how to create a foundation single crochet chainless foundation chain.
Again, if you started with a foundation single crochet row, skip Row 1 and move onto Row 2.
First Row: Sc in each stitch or chain across row, ch 1, turn.
Second Row: FPhdc around each sc from Row 1, ch 1, turn.
Third Row: Sc (in both loops) entire row, ch 1, turn.
Rows 4 – X: Repeat Rows 2 & 3 until your ribbing is the length you’d like.
You May Enjoy These Free Crochet Patterns

I am fixing an old friends cardigan and the cuff is a crochet finish, almost like blanket stitch but bigger. I am have trouble finding tuition on this finish. Can you please help. I can send a photo.
Yes, If you can send a photo to me so I can see, that would be great! Use my contact page or send on my Facebook page messenger.
I always wanted to crochet but never had time – you’re inspiring me to delve deeper!