


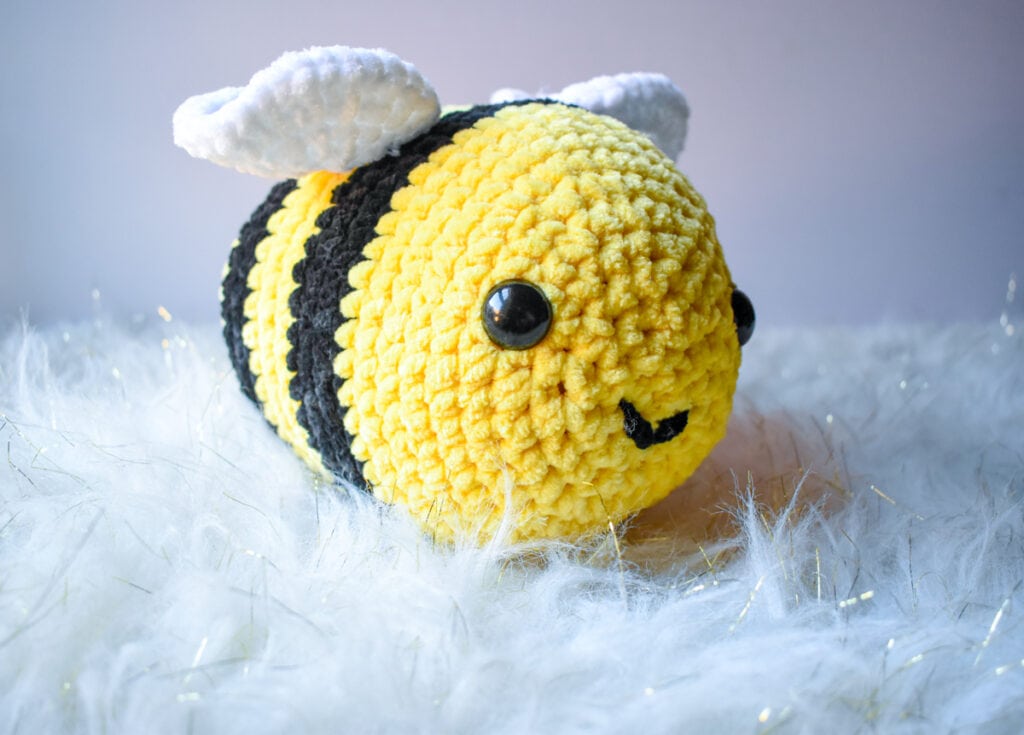
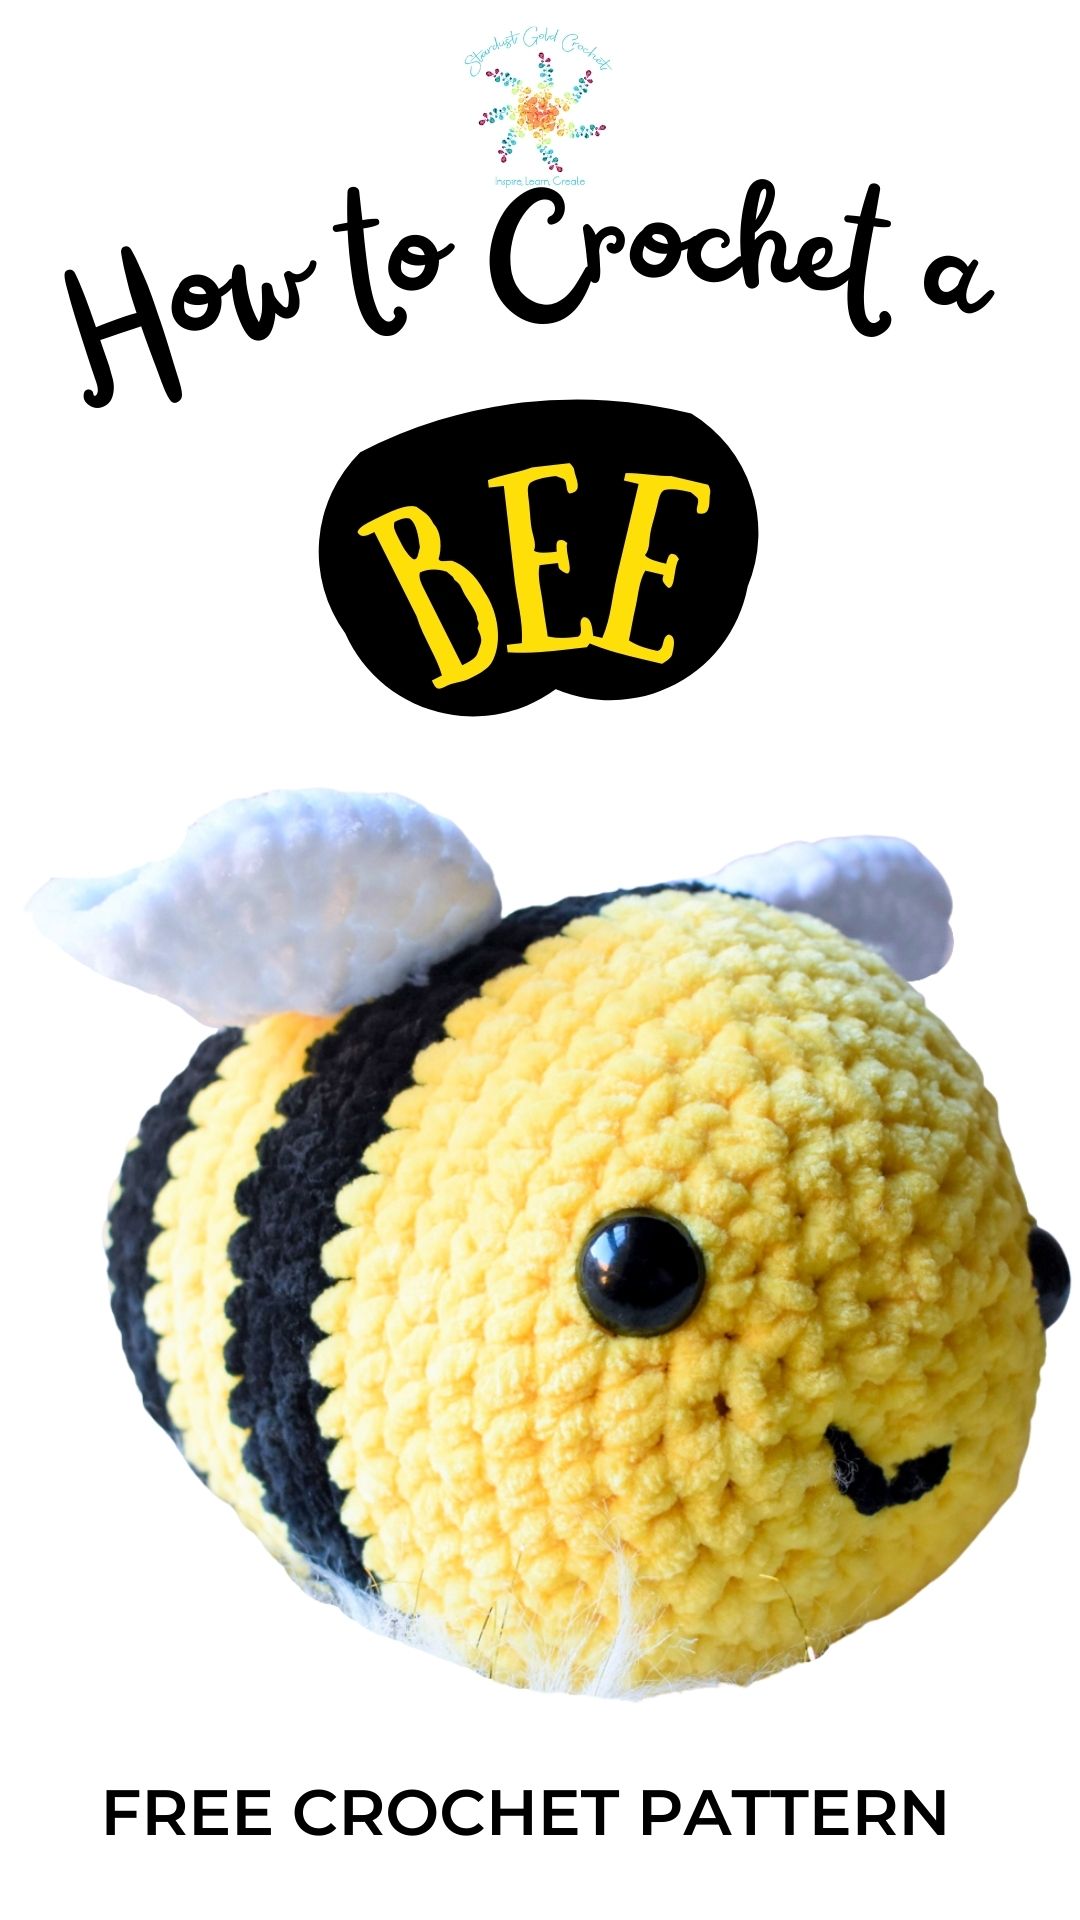
In this post, I will teach you to make a crochet bee pattern of your very own. Crochet bees are all the buzz these days! Whether you’re looking for a quick project or a special gift, a crochet bee pattern is a great option for any skill level.
This crochet bee pattern tutorial is easy to follow and can be worked up in an afternoon. It’s the perfect free crochet pattern for all crochet skill levels, so bookmark it and add it to your list of quick projects.
Step by Step Guide to Crocheting a Bee
In this step-by-step guide, I’ll show you how to make your own crochet bee pattern. You can use your pattern to share with other crocheters, make it your own, and create something new and fun.
This is a step-by-step guide on how to make a crochet bumble bee. There is also a free bee pattern for crocheters who just want a quick and fun project. But first, let’s talk about why crochet bees are so popular right now.
Why Crochet Bees Are So Popular
Amigurumi bee patterns are all the rage, made popular but none other than TikTok! First, they’re easy and fun to make, they’re soft (which means you can find the chunky yarn you need fully stocked), and they’re incredibly versatile and so much fun.
Second, they make a great project for when you need a quick crochet fix. They also don’t require a lot of materials – just some black, yellow, and white yarn, and any size crochet hook.
Get the Full Written Pattern for FREE
I’ve created a post for full written Free Honey Bee Crochet Pattern. You can find that free pattern here: Free Crochet Honey Bee Printable PDF – OR – Support my crochet content and grab the Crochet Honey Bee PDF pattern here.
Helpful Crochet Techniques to Know:
Don’t be intimidated by increasing and decreasing. It’s so easy and I’ve created a tutorial to help you out! The color changes are also easy to learn with a little help of the crochet bee video tutorial, you’ll be crocheting this cute little bee in no time at all. You’ll also love creating your own crochet bee pattern with your own flare!
(click the colored links to take you to the tutorials)
- Single Crochet
- Slip Stitch
- Invisible Decrease (inv dec) – worked in front loop only
- Increase (single crochet)
- Decrease (single crochet)
- Color Changing
- Magic Circle
The Basics to Create Your Own Cute Crochet Bee
To make this bee, you will need black yarn, yellow yarn, white yarn, pink yarn (optional) & 4.5 mm (USA 7) crochet hook (or any size hook you choose), a stitch marker, a tapestry needle, and toy stuffing.
This bee is worked in the round. The body is worked in a continuous spiral, marking the beginning of each round (to keep count.), then you work rounds with no increases.
After that you start decreasing, add eyes, stuff it, and close it up. Then you create the wings, sew them on with a tapestry needle, then create a cute little smile! Let’s go into more detail and some good tips.
Tips for Making the Perfect Crochet Honey Bee:
- Practice the single crochet stitch before you start (This will help you get the hang of the pattern and produce a neater bee.)
- Using a worsted weight yarn, a smaller hooks create a tighter stitch, larger hooks create a looser stitch.
- If you want your bees to be different sizes, use a thinner yarn for a smaller bee or a thicker yarn for a larger bee.
- Play around with different hook sizes to see how big your bee will be.
- Use a soft, smooth yarn so your bee will be soft and cuddly.
- Make sure to stuff your bee firmly so it will be able to sit up on its own.
- Crochet with a tighter tension so your bee will hold its shape.
What You’ll Need to Make Your Own Crochet Bee (Materials):
.
You can use different yarn weights and hook sizes to create any size crochet honey bee! Change it up a little to create your own unique crochet bee pattern.
- 1 skein of any weight yarn in yellow, black & white (use any color and have fun!)
- Size 4.5 mm crochet hook (USA 7)
- Embroidery floss or a 3 weight yarn to create the smile (I used the same yarn to make my smile.)
- Scissors
- Tapestry needle
- 8-16 mm safety eyes (depending on the size you make, play around with different sizes to find the one you like best)
- Toy stuffing
- Stitch marker
Step-By-Step Guide to Making a Crochet Bee
This is a simple free crochet bee pattern that you can use to customize and create your very own pattern. Grab your hooks and yarn and lets start making!
Step One: Make the Body
- You will start by making a magic ring. If you’re not familiar with the magic ring, don’t worry. I have a magic circle video tutorial that shows you how to do it.
- Start off with your 4.5 mm hook (or the one you choose) and your favorite yarn.
- Next, create a magic circle or crochet 2 chains and work your first 6 single crochet in to that chain. That’s it, you’ve finished your first round.
- Continue to crochet around (remember to mark your 1st stitch of Round 2) until you match the size you want to make your bee (follow this Basic Amigurumi Increase Pattern below as you increase your rounds)
- The more rounds you crochet, the larger your bee will be.
- Once you’re finished with increasing, you will crochet the main part of the bee’s body, which will have the same number of stitches in each round.
- I crocheted 3 (non-increase rounds), 3 black, 3 yellow, 3 black, 3 yellow, then I began to crochet my decrease rows.
- After you complete the length of your bee body, start your decrease rounds (follow this Basic Amigurumi Decrease Pattern to finish your decrease rounds)
Step Two: Attach the eyes
Before you finish out your body, you want to add stuffing and attach your eyes. In my crochet bee pattern (<<< get the full written pattern here) below, I added the eyes between rows 27 – 28, then finished out the last rows, added more stuffing, and closed it up).

Step Three: Make the Wings
The wings are created in the same manner as the start of the body. First, create a magic circle, and crochet 8 half double crochets (or single crochets) into the circle. Continue crocheting 2 half doubles or single crochets in each stitch around until your wing is the size you’d like (follow the basic bee wing pattern below)

Step Four: Attach the Wings
Using a tapestry needle, sew the wings on the yellow stripe. You can leave a few inches between the wings, or bunch them close together.

Step Five: Stitch on the Mouth
Creating a cute smile uses a bit of embroidery. Here is a step by step on how to embroider a cute amigurumi smile.
If you want to spice it up a little, you can use small cut pieces of pink felt to add some blush underneath the eyes, or crochet a small circle (magic circle, sc 6 into circle, next sc 2 in each of round 1 sts, leave a long tail to sew on to the bee)


Your Crochet Bee is complete!
Basic Amigurumi Increase Pattern
This is a basic amigurumi pattern for any cute toy you’ld like to make.
Round 1: 6 sc in magic ring = 6 sts
The next rounds (2 – 8) are increase rounds.
Round 2: 2 sc in each st around = 12 sts
Round 3:(sc in next st, 2 sc in next st)*6 times = 18 sts
Stop here to make a tiny bee – then crochet 2 rows with no increases, adding the black stripes, then decreasing at the end.
Round 4: (sc in next 2 sts, 2 sc in next st)*6 times = 24 sts
Round 5: (sc in next 3 sts, 2 sc in next st)*6 times = 30 sts
Round 6: (sc in next 4 sts, 2 sc in next st)*6 times = 36 sts
Round 7: (sc in next 5 sts, 2 sc in next st)*6 times = 42 sts
Round 8: (sc in next 6 sts, 2 sc in next st)*6 times = 48 sts
Basic Amigurumi Decrease Pattern
This is a basic decrease pattern for amigurumi dolls. I modified this basic decrease pattern to shape my Honey Bee Crochet Pattern the way I wanted, you can see how I changed it by checking out the pattern.
Round 1: (sc in next 6 sts, sc dec) *6 times = 42 sts
Round 2: (sc in next 5 sts, sc dec) *6 times = 36 sts
Round 3: (sc in next 4 sts, sc dec) *6 times = 30 sts
Round 4: (sc in next 3 sts, sc dec) *6 times = 24 sts
Add your eyes & stuffing when you get to this point.
Round 5: (sc in next 2 sts, sc dec) *6 times = 18 sts
Round 6: (sc in next, sc dec) *6 times = 12 sts
Round 7: (sc dec) *6 times = 6 sts
Cut yarn, using tapestry needle, sew through top loops of each stitch weaving in and out. Pull tight to close hole and weave in all tails.
Basic Wing Pattern
You can modify this to suite your needs. This simple pattern will create a circular wing.
Magic circle.
Round 1: hdc 8 into ring – 8 sts
Round 2: hdc 2 in each st around – 16 sts
Round 3: hdc 2 in each st around – 32 sts
Fasten off, use the long tail to sew wings to the bee body.
I hope you had fun and learned how to make a fun crochet bee pattern!
Thanks for supporting my tutorials!
Thanks for being here.
More Quick Crochet Patterns & Tutorials You May Enjoy
Crochet Pattern Support
I hope you enjoy this easy pattern. Pattern support? Head over to Stardust Gold Crochet & Friends.
- If you are looking for a drama-free crochet group, check out my pattern support group, Stardust Gold Crochet & Friends
- We have fun and share crochet patterns, stories, and courses; you can ask me about any pattern in my library for support.


How to Crochet a Bee (Step by Step)
Materials
- 1 skein of any weight yarn in yellow, black & white (use any color and have fun!)
- 4-weight yarn, embroidery floss or a 3 weight yarn to create the smile (I used the same yarn to make my smile.)
- 8-16 mm safety eyes (depending on the size you make, play around with different sizes to find the one you like best)
- Toy stuffing
Tools
- Size 4.5 mm crochet hook (USA 7)
- Scissors
- Tapestry needle
- Stitch marker
Instructions
How to Crochet a Bee
Step One: Make the Body -
- First, start by making a magic ring (aka magic circle). If you’re not familiar with the magic ring, don’t worry. I have a magic ring video tutorial that shows you how to do it. Start off with your 4.5 mm hook (on the one you choose) and your favorite yarn.
- Next, create a magic circle or crochet 2 chains and work your first 6 single crochet in to the first chain. That's it, you've finished your first round!
- Continue to crochet in rounds, stitching following the Basic Amigurumi Increase Pattern until you match the size you want to make your bee.
- The more increase rounds you crochet, the larger your bee will be.
- Once you're finished with increasing, you will crochet the main body, which will have the same number of stitches in each round.
- I crocheted 3 (non-increase rounds), 3 black, 3 yellow, 3 black, 3 yellow, then I began to decrease. All of these rows will have the same stitch count - no increasing.
- After you complete the length of your bee body, start your decrease rounds.
- Follow the Basic Amigurumi Decrease Pattern and move on to step two.
Step Two: Attach the eyes -
- Before you finish out your body, you want to add stuffing and attach your eyes. In my pattern crochet honey bee pattern (<< get the full written pattern here), I added the eyes between rows 28 - 29, then finished out the last rows, added more stuffing, and closed it up).
Step Three: Crochet the Bee Wings -
- The wings are created in the same manner as the start of the body. First, create a magic circle, and crochet 8 single crochet or half double crochets into the circle. Continue crocheting 2 stitches in each stitch around until your wing is the size you'd like (follow the basic bee wing pattern to help)
Step Four: Attach the Wings
- Using a tapestry needle, sew the wings on the yellow stripe between the black stripes (using a whip stitch). You can leave a few inches between the wings, or bunch them close together. See this crochet bee pattern video tutorial for more details.
Step Five: Stitch on the Mouth
- Creating a cute smile uses a bit of embroidery. Refer to the Amigurumi Bee Crochet Tutorial for creation the mouth or refer to the picture tutorial in the Honey Bee Crochet Pattern.
If you want to spice it up a little, you can use small cut pieces of pink felt to add some blush underneath the eyes, or crochet a small circle (magic circle, sc 6 into circle, next sc 2 in each of round 1 sts, leave a long tail to sew on to the bee)
Your Crochet Bee is complete!
Notes
Reminder: Place a stitch marker in the first stitch of each round starting in round 2.
Recommended Products
Affiliate links help grow my business by providing a small commission at no additional cost to you, thank you!
-
 4 Pcs Sewing Embroidery Scissors with 4 Pcs Artificial Leather Cover 3.6 Inch Stainless Steel Stork Scissors Vintage Embroidery Scissors for Needlework, Manual Sewing Handicraft (Retro Colors)
 -
Susan Bates Silvalume Soft Handle Aluminum Crochet Hook 5.5"-size 7/4.5mm
-
400g/14.1oz Polyester Fiber Fill, High Resilience Fill Fiber, Stuffing for Stuffed Animals Pillows Quilts Paddings Pouf Stuff Toys DIY Crafts (White)
-
Honey Bee Locking Stitch Markers with Case for Knitting and Crocheting


Thank you. Very easy to follow