


Learn to crochet Fair Isle with this cute Fall Cinnamon Pumpkin pattern. It’s easier than you think! All you need to know is how to do a single crochet & read a chart (don’t worry, I’ll teach you!) This cute free pumpkin crochet pattern is sure to become your new favorite crochet pattern.
This cute crochet pattern is the perfect blend of Fall colors and a knit-like stitch that will make people wonder if you learned to knit! The best part is its a free pattern!
Additionally, this adorable tweed cinnamon pumpkin adds a charming rustic touch to your autumn decor.
If you are looking for a unique free crochet pumpkin pattern – I got you covered there too! I’ll be releasing this adorable pattern next week – so keep an eye out for it.
Welcome Blog Hoppers! – AUTUMN HARVEST BLOG HOP
The Fair Isle Pumpkin is today’s free PDF download in the Enchanted Autumn Blog Hop – Please scroll down to find the INSTANT DOWNLOAD! Thanks for being here – soooo happy to have you!
Table of contents
The Ad-Free Written PDF is Available
The ad-free PDF includes everything here, but you have the option to print out the charts, and easy access to all the tutorial links and video tutorials.
Fair Isle Fall Crochet PumpkinVideo Tutorial
The video will premier on Saturday at 2:00 PM on my YouTube channel – come chat with me!
Creating Different Sizes for your Little Pumpkins
These adorable pumpkins can be adjusted and here’s how. The easiest way to create different pumpkin sizes, follow these tips.
Create Larger Pumpkins
If you’re looking to make a larger pumpkin – here’s how.
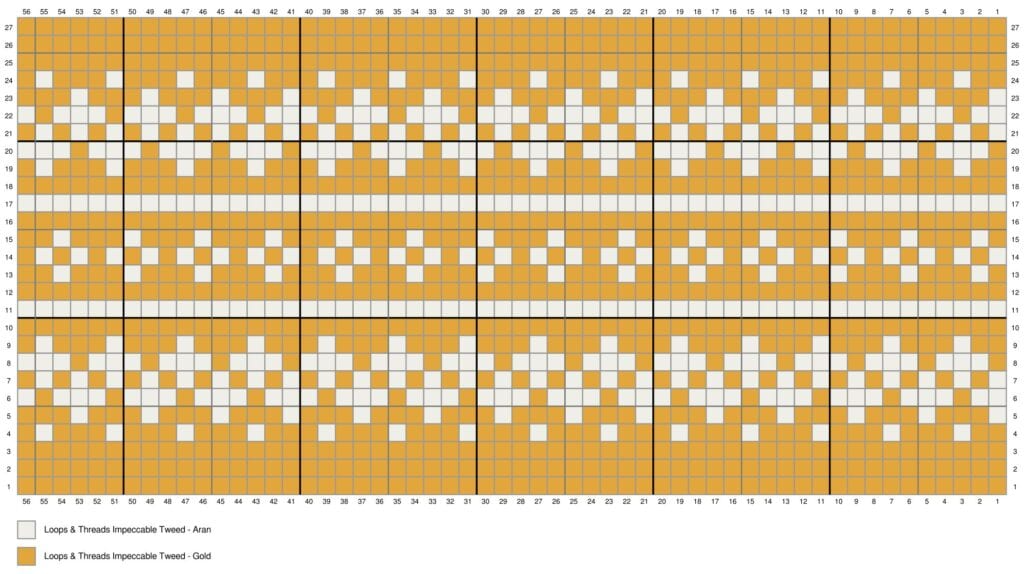
- The graph below is an 8 row repeat – you can increase the number of repeats.
- Keep in mind the height of the pumpkin and perhaps start off crocheting a few more starting rows, and a few more rows at the top edge.
- Use a bulky yarn and a 10 mm hook. Super bulky yarns will make a GIANT pumpkin! Lots of fun and may even be easier to crochet fair isle, but I haven’t tried.
Make Small Pumpkins
To create smaller pumpkins –
- Use the repeat pattern fewer times (This may make the shape of you pumpkin a little wonky, so I don’t recommend making it much smaller.)
- Try using a thinner yarn – a 3 (DK light worsted) or 2 (sport) weight would work great!
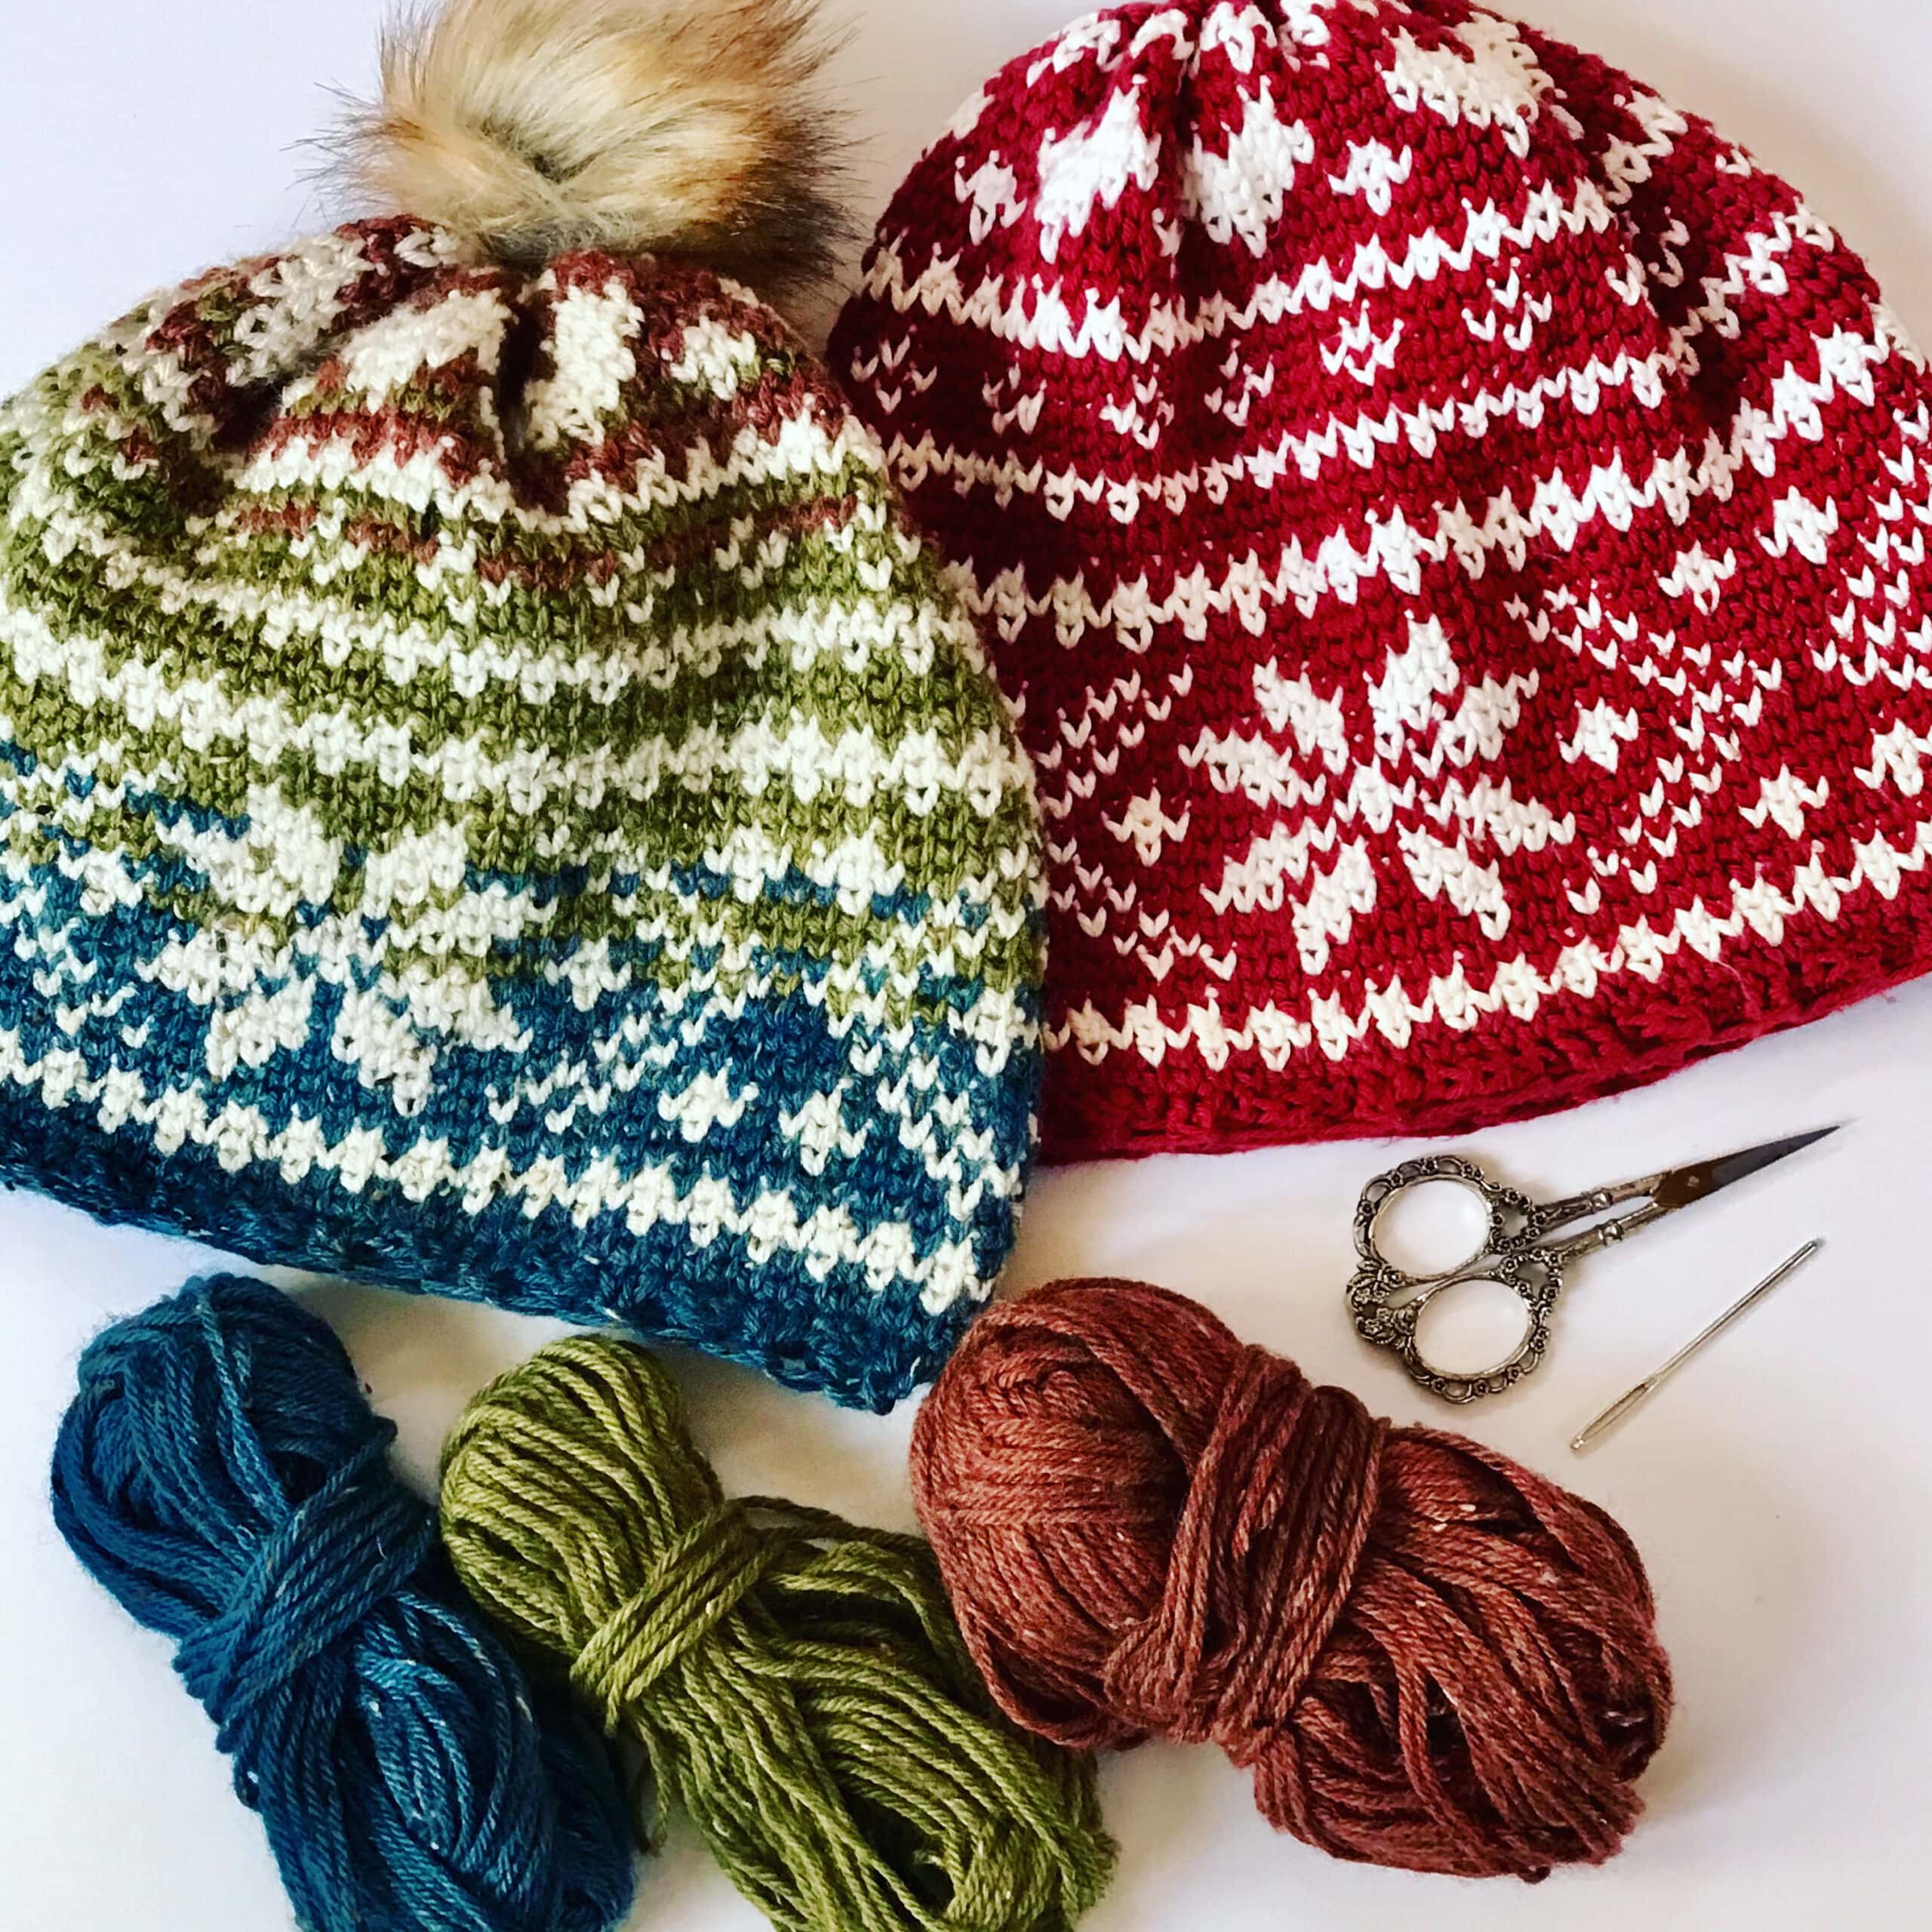
Choosing the Right Colors
So you have a favorite yarn you think will look great for this pattern? Make sure you choose a yarn that provides good contrast.
Contrast is important for fair isle style crochet because it makes the pattern pop!
If you choose an ombre yarn or self striping yarn, make sure the contrasting color you use is not a part of the self striping or ombre yarn.
Why? Because it will fade into the main color and you’ll lose the contrast.
What is Fair Isle Crochet?
Fair Isle is a type of knitting that originated on the Island of Fair Isle, north of Scotland in the UK.
Crocheters have adapted this technique using various ways, including tapestry crochet and Fair Isle style using the waistcoat stitch.
In essence, Fair Isle crochet is like painting with yarn. It involves changing colors to create intricate and beautiful patterns within your work.
It’s not as daunting as it sounds, especially when you’re making something as cute as these crocheted pumpkins!
There are tons of free pumpkin crochet patterns out there to choose from, but this one is special. Why? Because you’ll be learning a new crochet technique you’ll come to love.
Fair Isle uses basic crochet stitches and is a lot easier to create than you think…What kind of projects can I make using the waistcoat stitch?
- Beanies
- Scarves
- Blankets
- Sweaters and more!
What’s wonderful about learning to read a crochet chart is you can apply it to so many different projects.
You can create just about anything using the waistcoat stitch and get that knit look, without actually knitting!
Learn more about Fair Isle and how to crochet a Fair Isle Beanie in the CAL I hosted in 2019.
There are tons of tutorials and a complete walk through and pattern to make the Fair Isle Slouchy beanie. It’s a free pattern too.
Tips & Tricks on Crocheting a Fair Isle Pumpkin
Now, I know Fair Isle can sound a bit intimidating, but I promise you, it’s not rocket science.
For this project, we’ll be using the waistcoat stitch, which is a variation of the single crochet.
The key here is placing your single crochet in the center of the V of the stitch below instead of the usual top loops.
It’s what gives the Fair Isle effect, and it’s easier than it looks.
If you’re new to Fair Isle or reading crochet graphs, don’t worry. I’ve got you covered!
I’ve put together a full video tutorial to walk you through every step of this free crochet pumpkin pattern.
So, whether you’re a beginner or an experienced crocheter, you can tackle this project with confidence.
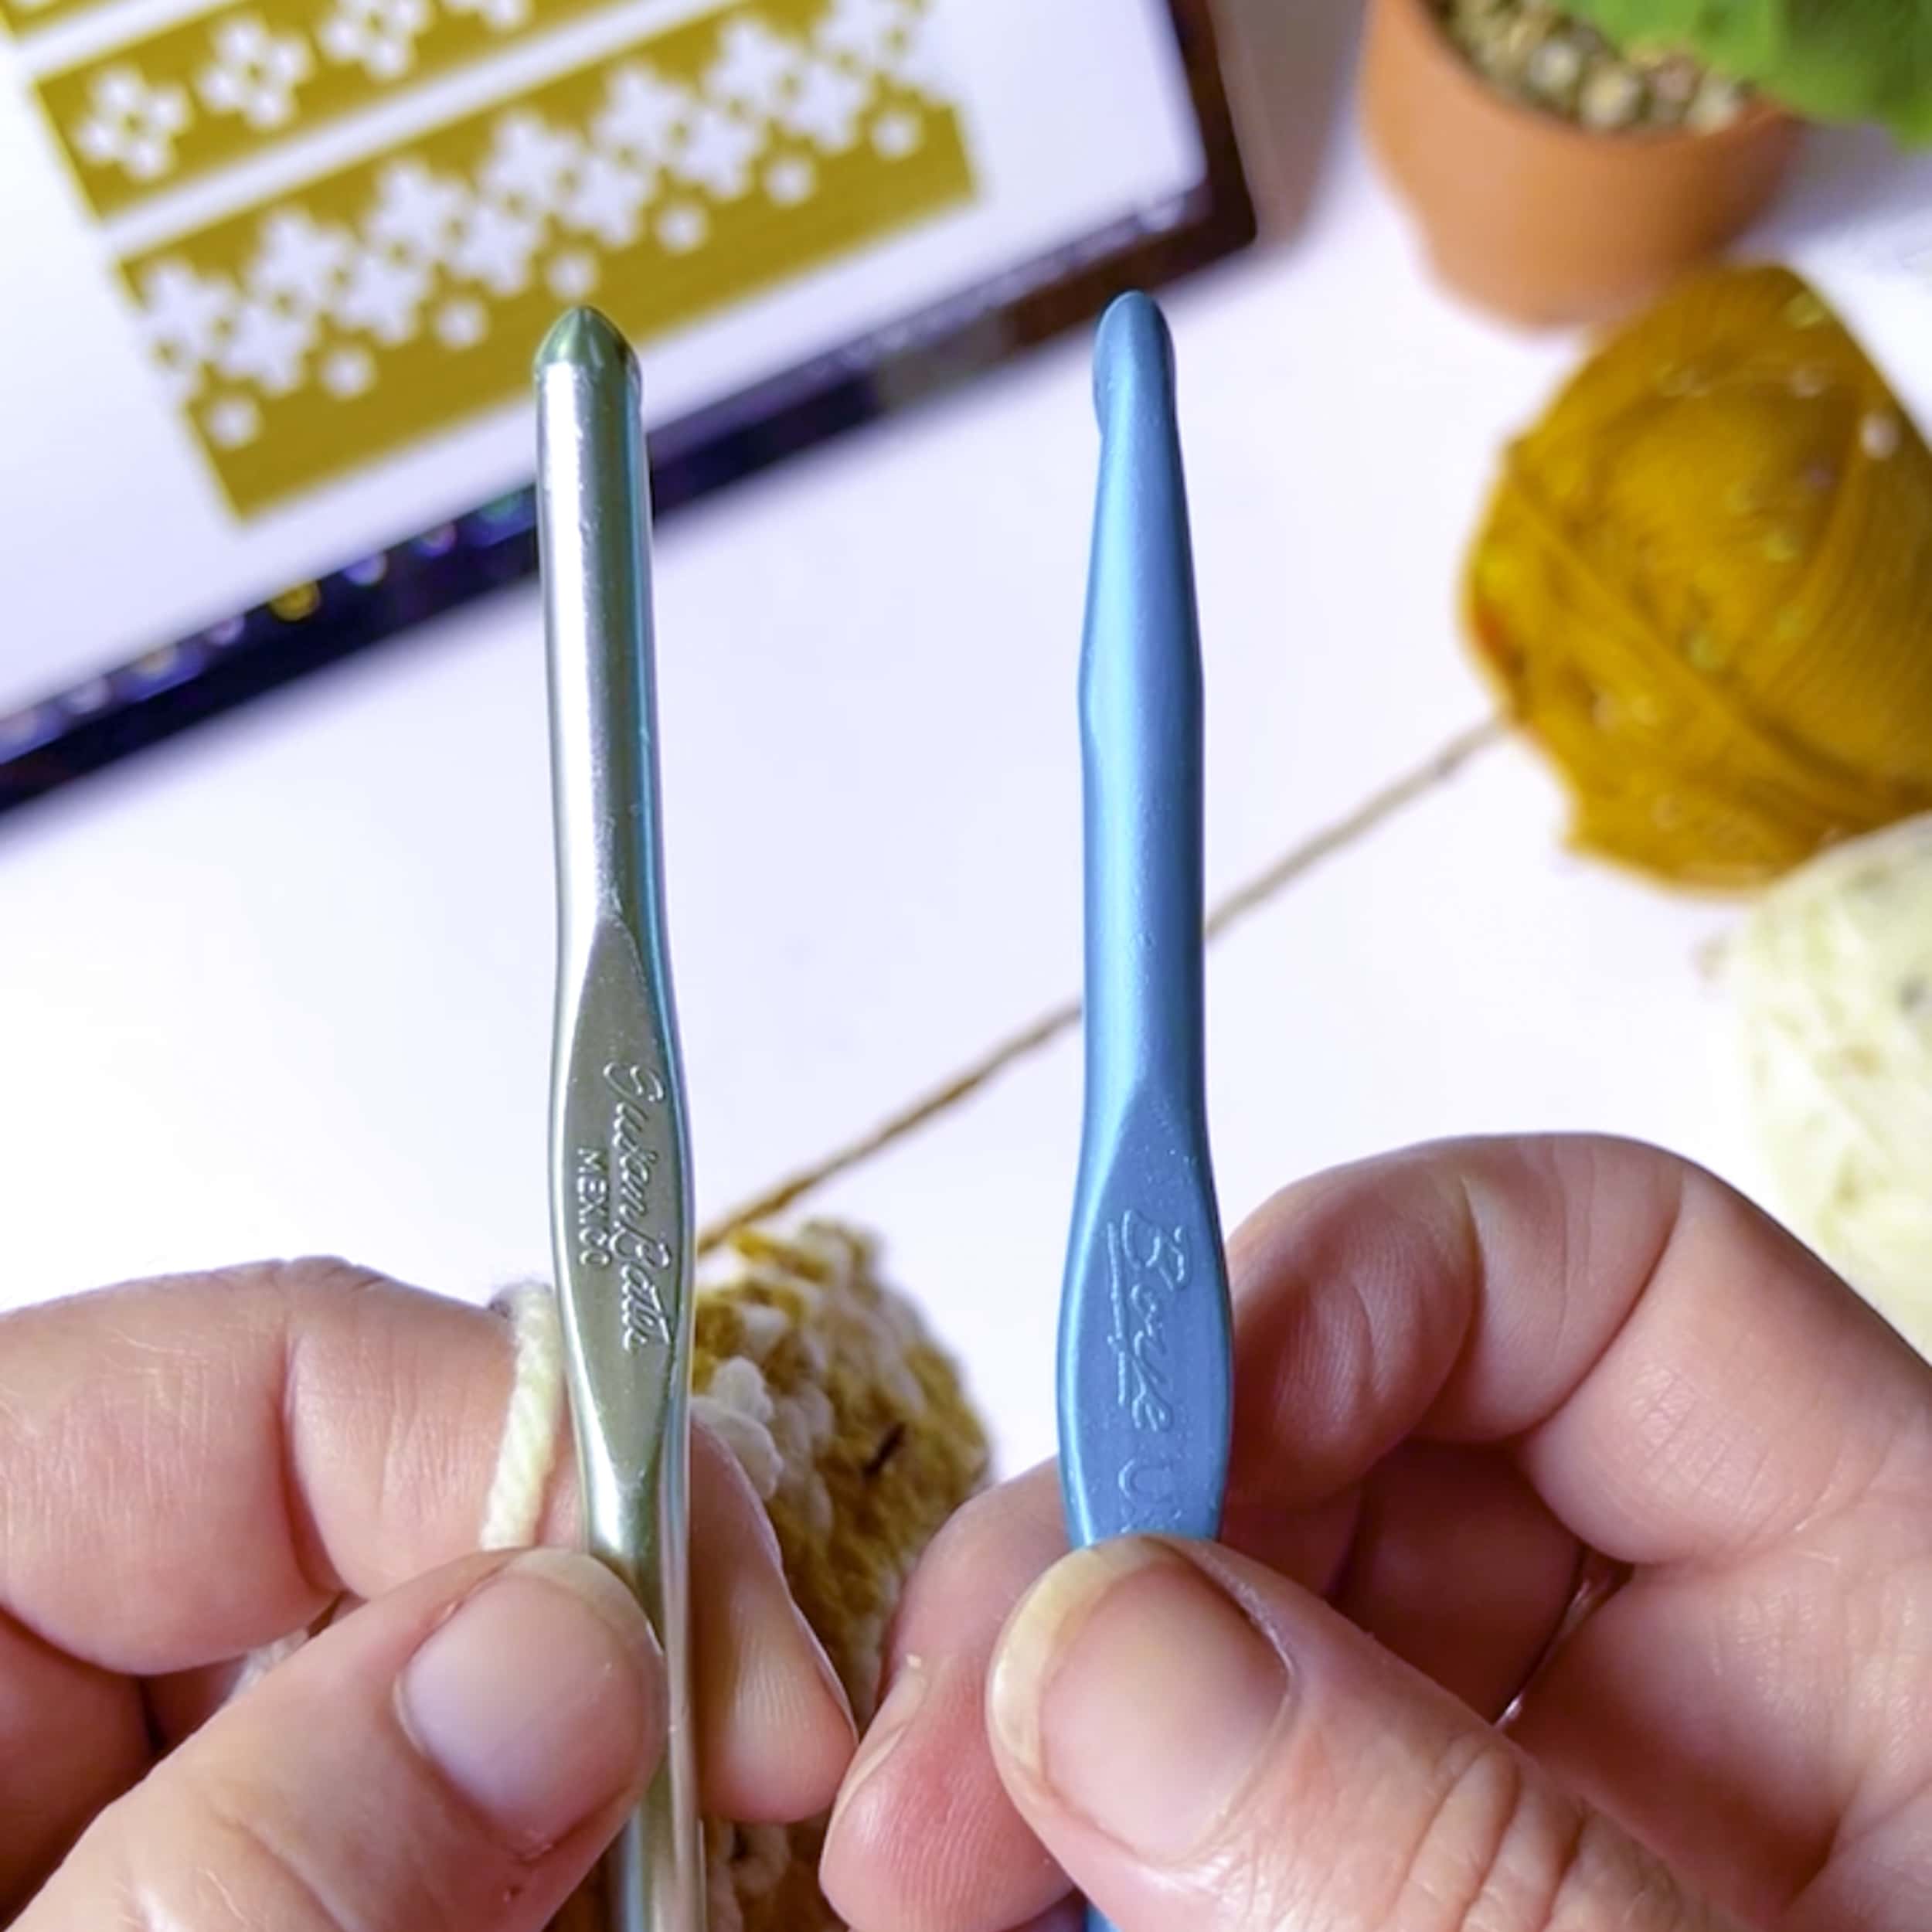
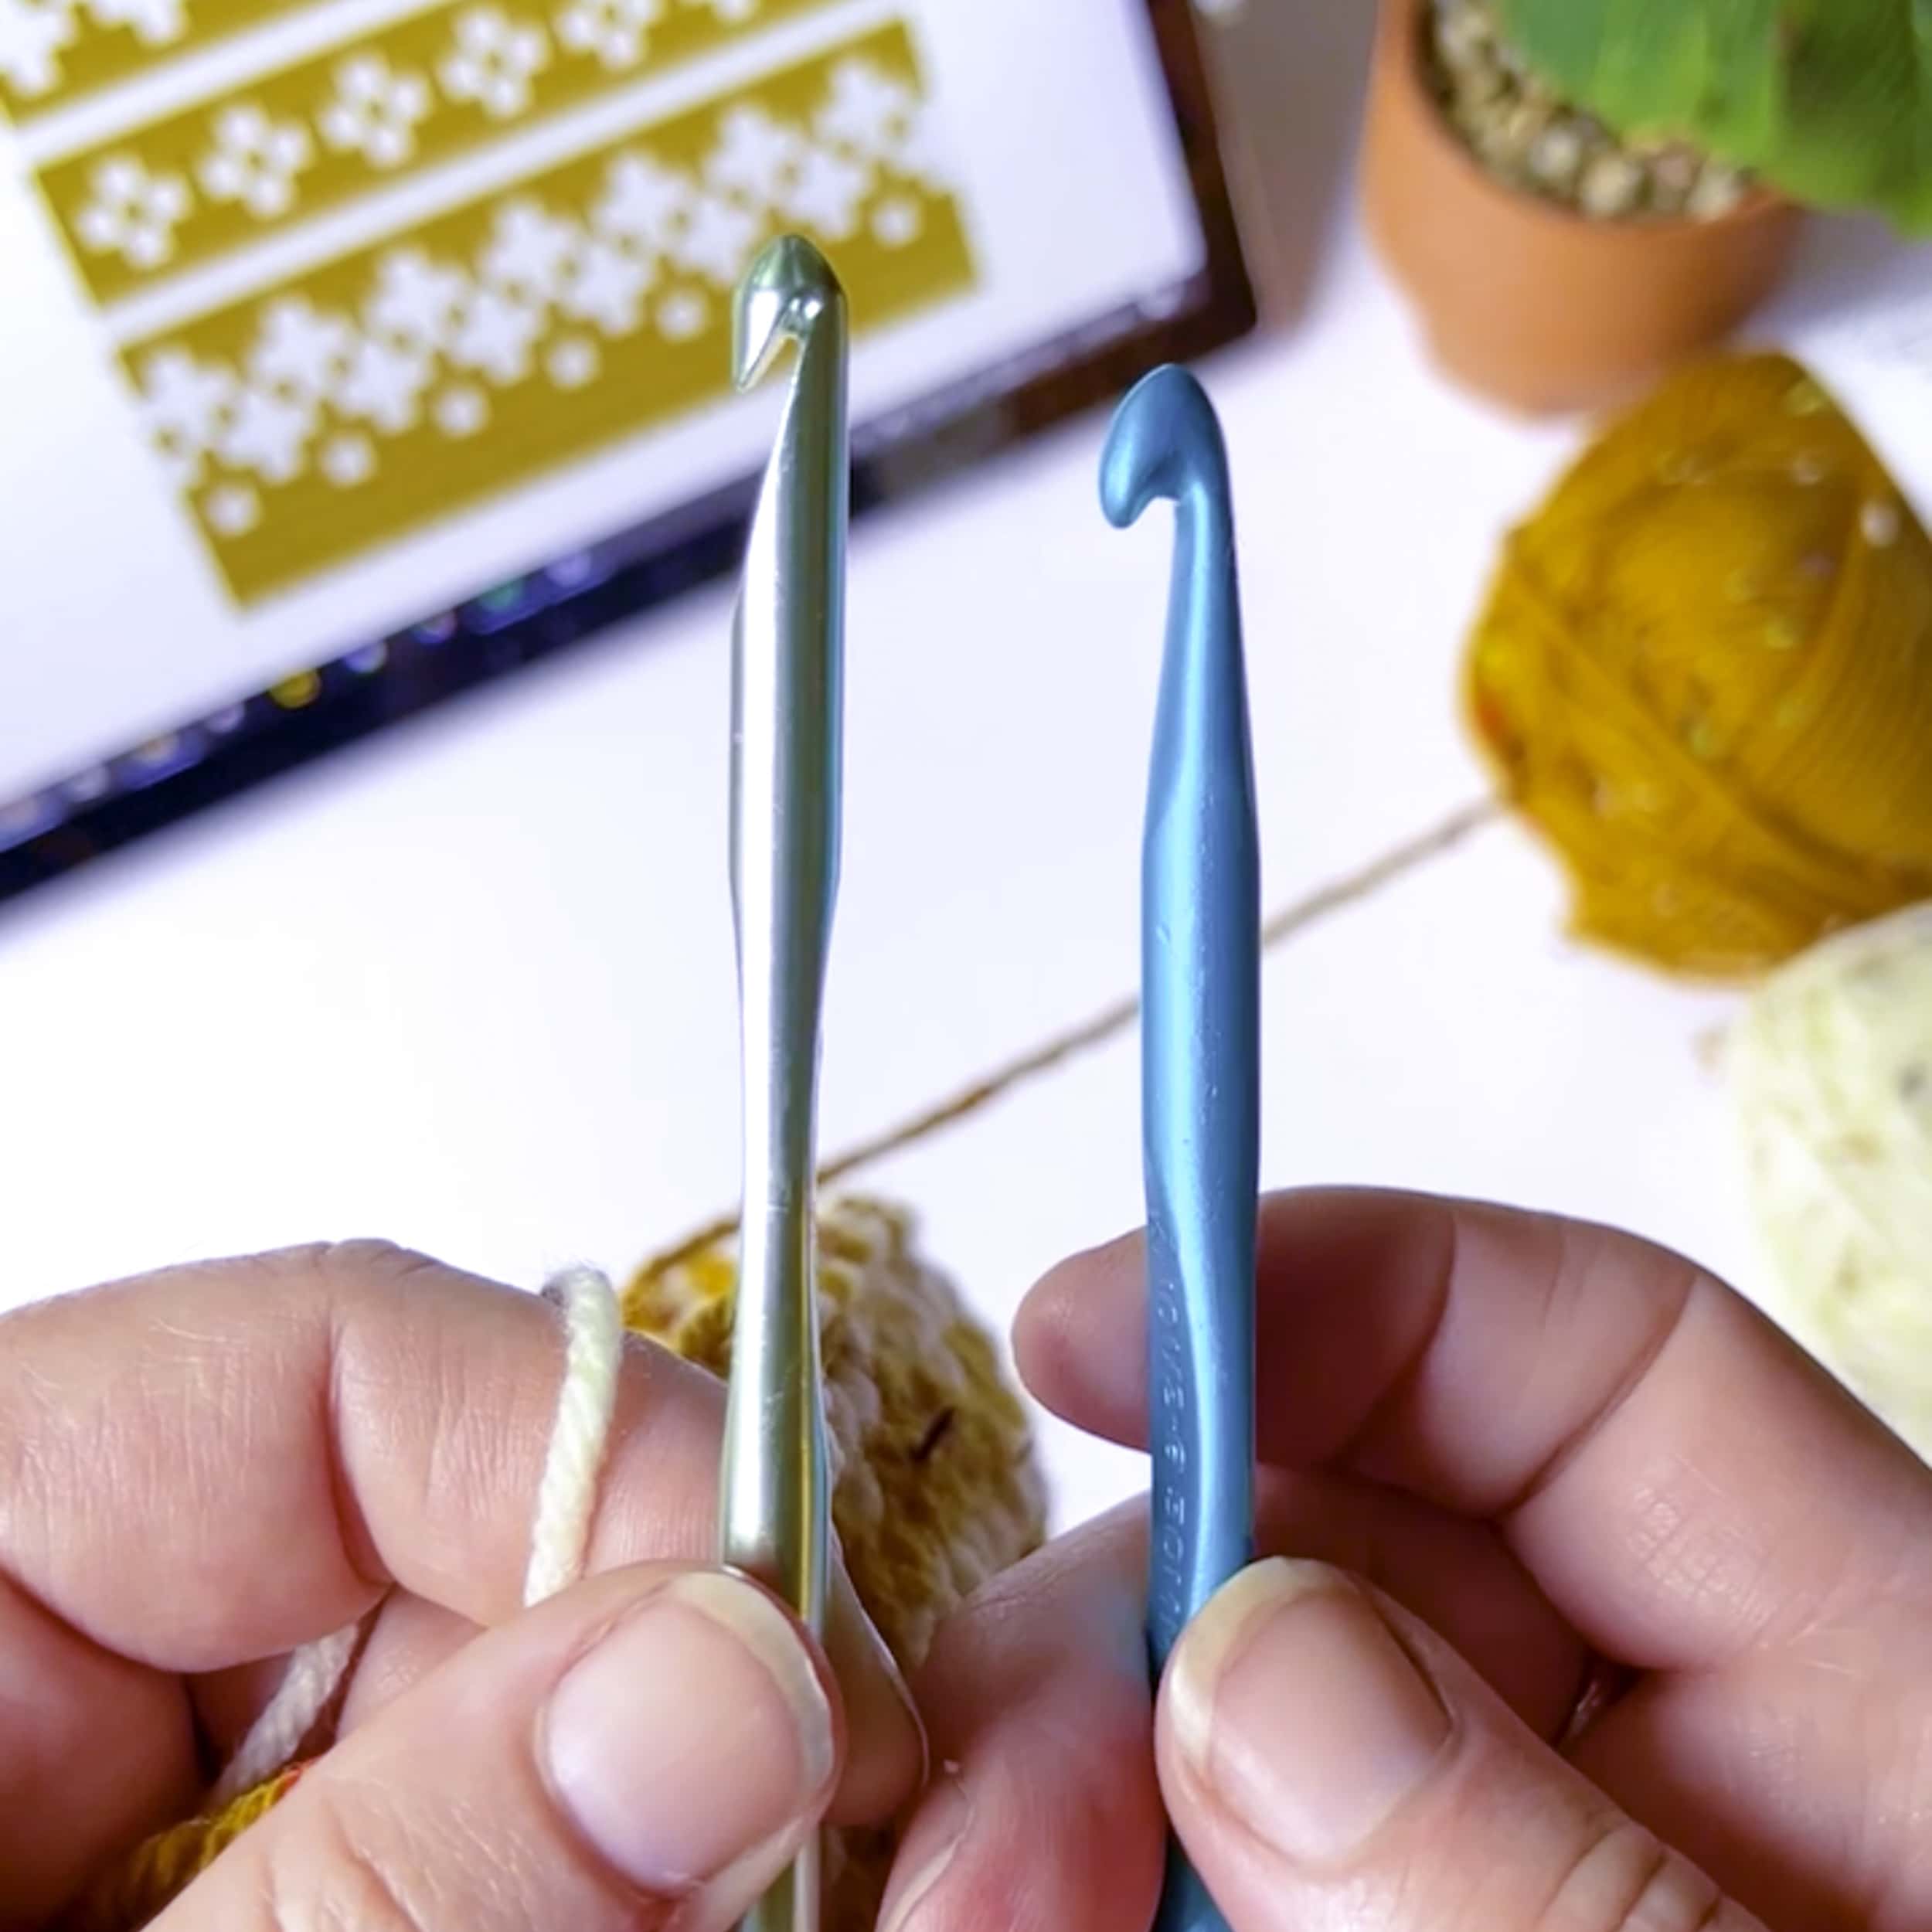
Choosing the Right Hook
This style of crochet can be challenging for beginners. The blue hook (on the right) below is called a tapered hook.
These work best for fair isle crochet because they have a sharper edge.
On the flip side – I’m a Bates hook (in-line) style girl (the green hook on the left). Why?
Because I struggle with tension and the Bates hook is the same width throughout, so it helps maintaining even tension easier.
Changing Colors Properly
The easiest way to change color in fair isle is to finish closing out your single crochet with your new color. That’s it. Simple!
Floating the Yarn
You will not be carrying the yarn inside your stitches. It floats behind the stitches, which creates the classic style.
You are welcome to carry your yarn inside if you prefer.
Remember when you are floating, try not to float it more than 4 or 5 stitches because then you’ll have long pieces that can snag on something.

Creating Your Cute Crochet Pumpkin pattern
To get started, you’ll need worsted weight yarn in your choice of colors (think beautiful autumnal shades like orange and brown), a 6.5 mm crochet hook, a tapestry needle for weaving in ends, and a stitch marker to keep track of your rounds.
You can make pumpkins in different sizes—mini or larger, depending on your preference.
This pattern doesn’t work using a magic ring like other pumpkin patterns. We will work in continuous rounds using the waistcoat stitch.
To create those classic Fair Isle patterns, change colors according to the graph. It might take a bit of practice to get the tension just right, but soon enough, you’ll be breezing through it.
How to Add Flair!
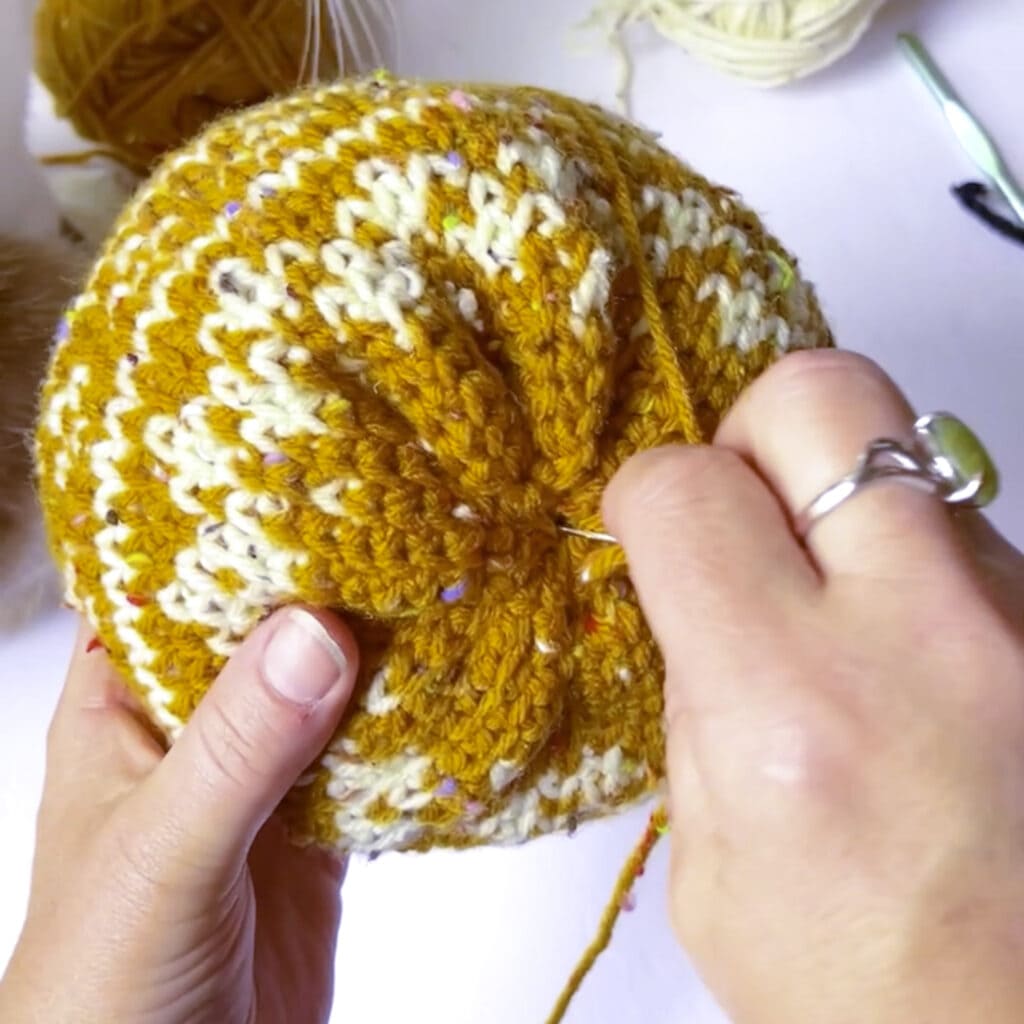
Once you’ve finished, leaving a long yarn tail. Then, cinch the top closed to create the cute pumpkin shape.
You can even add a crocheted stem or use a pipe cleaner to make it look more authentic.
These crocheted Fair Isle pumpkins are perfect for your fall home decor, place settings on your dining room table, or even as place cards.
They’re an ideal project for ambitious beginner crocheters looking to level up their skills while creating something beautiful for personal use or as a thoughtful gift.
Remember, you can make them in various sizes and color combinations to match your style.
Getting Started…
So, dive into the world of Fair Isle crochet pumpkins, and before you know it, you’ll be crocheting up these adorable pumpkins like a pro!
Don’t forget to scroll down for the free crochet pattern and check out the video tutorial if you need extra help learning the waistcoat stitch. Enjoy the process, my friend!
Get notified of new pattern releases by becoming a Stargazer (my newsletter) Sign up here!.
I hope you enjoy this easy pattern. Pattern support? Head over to Stardust Gold Crochet & Friends.
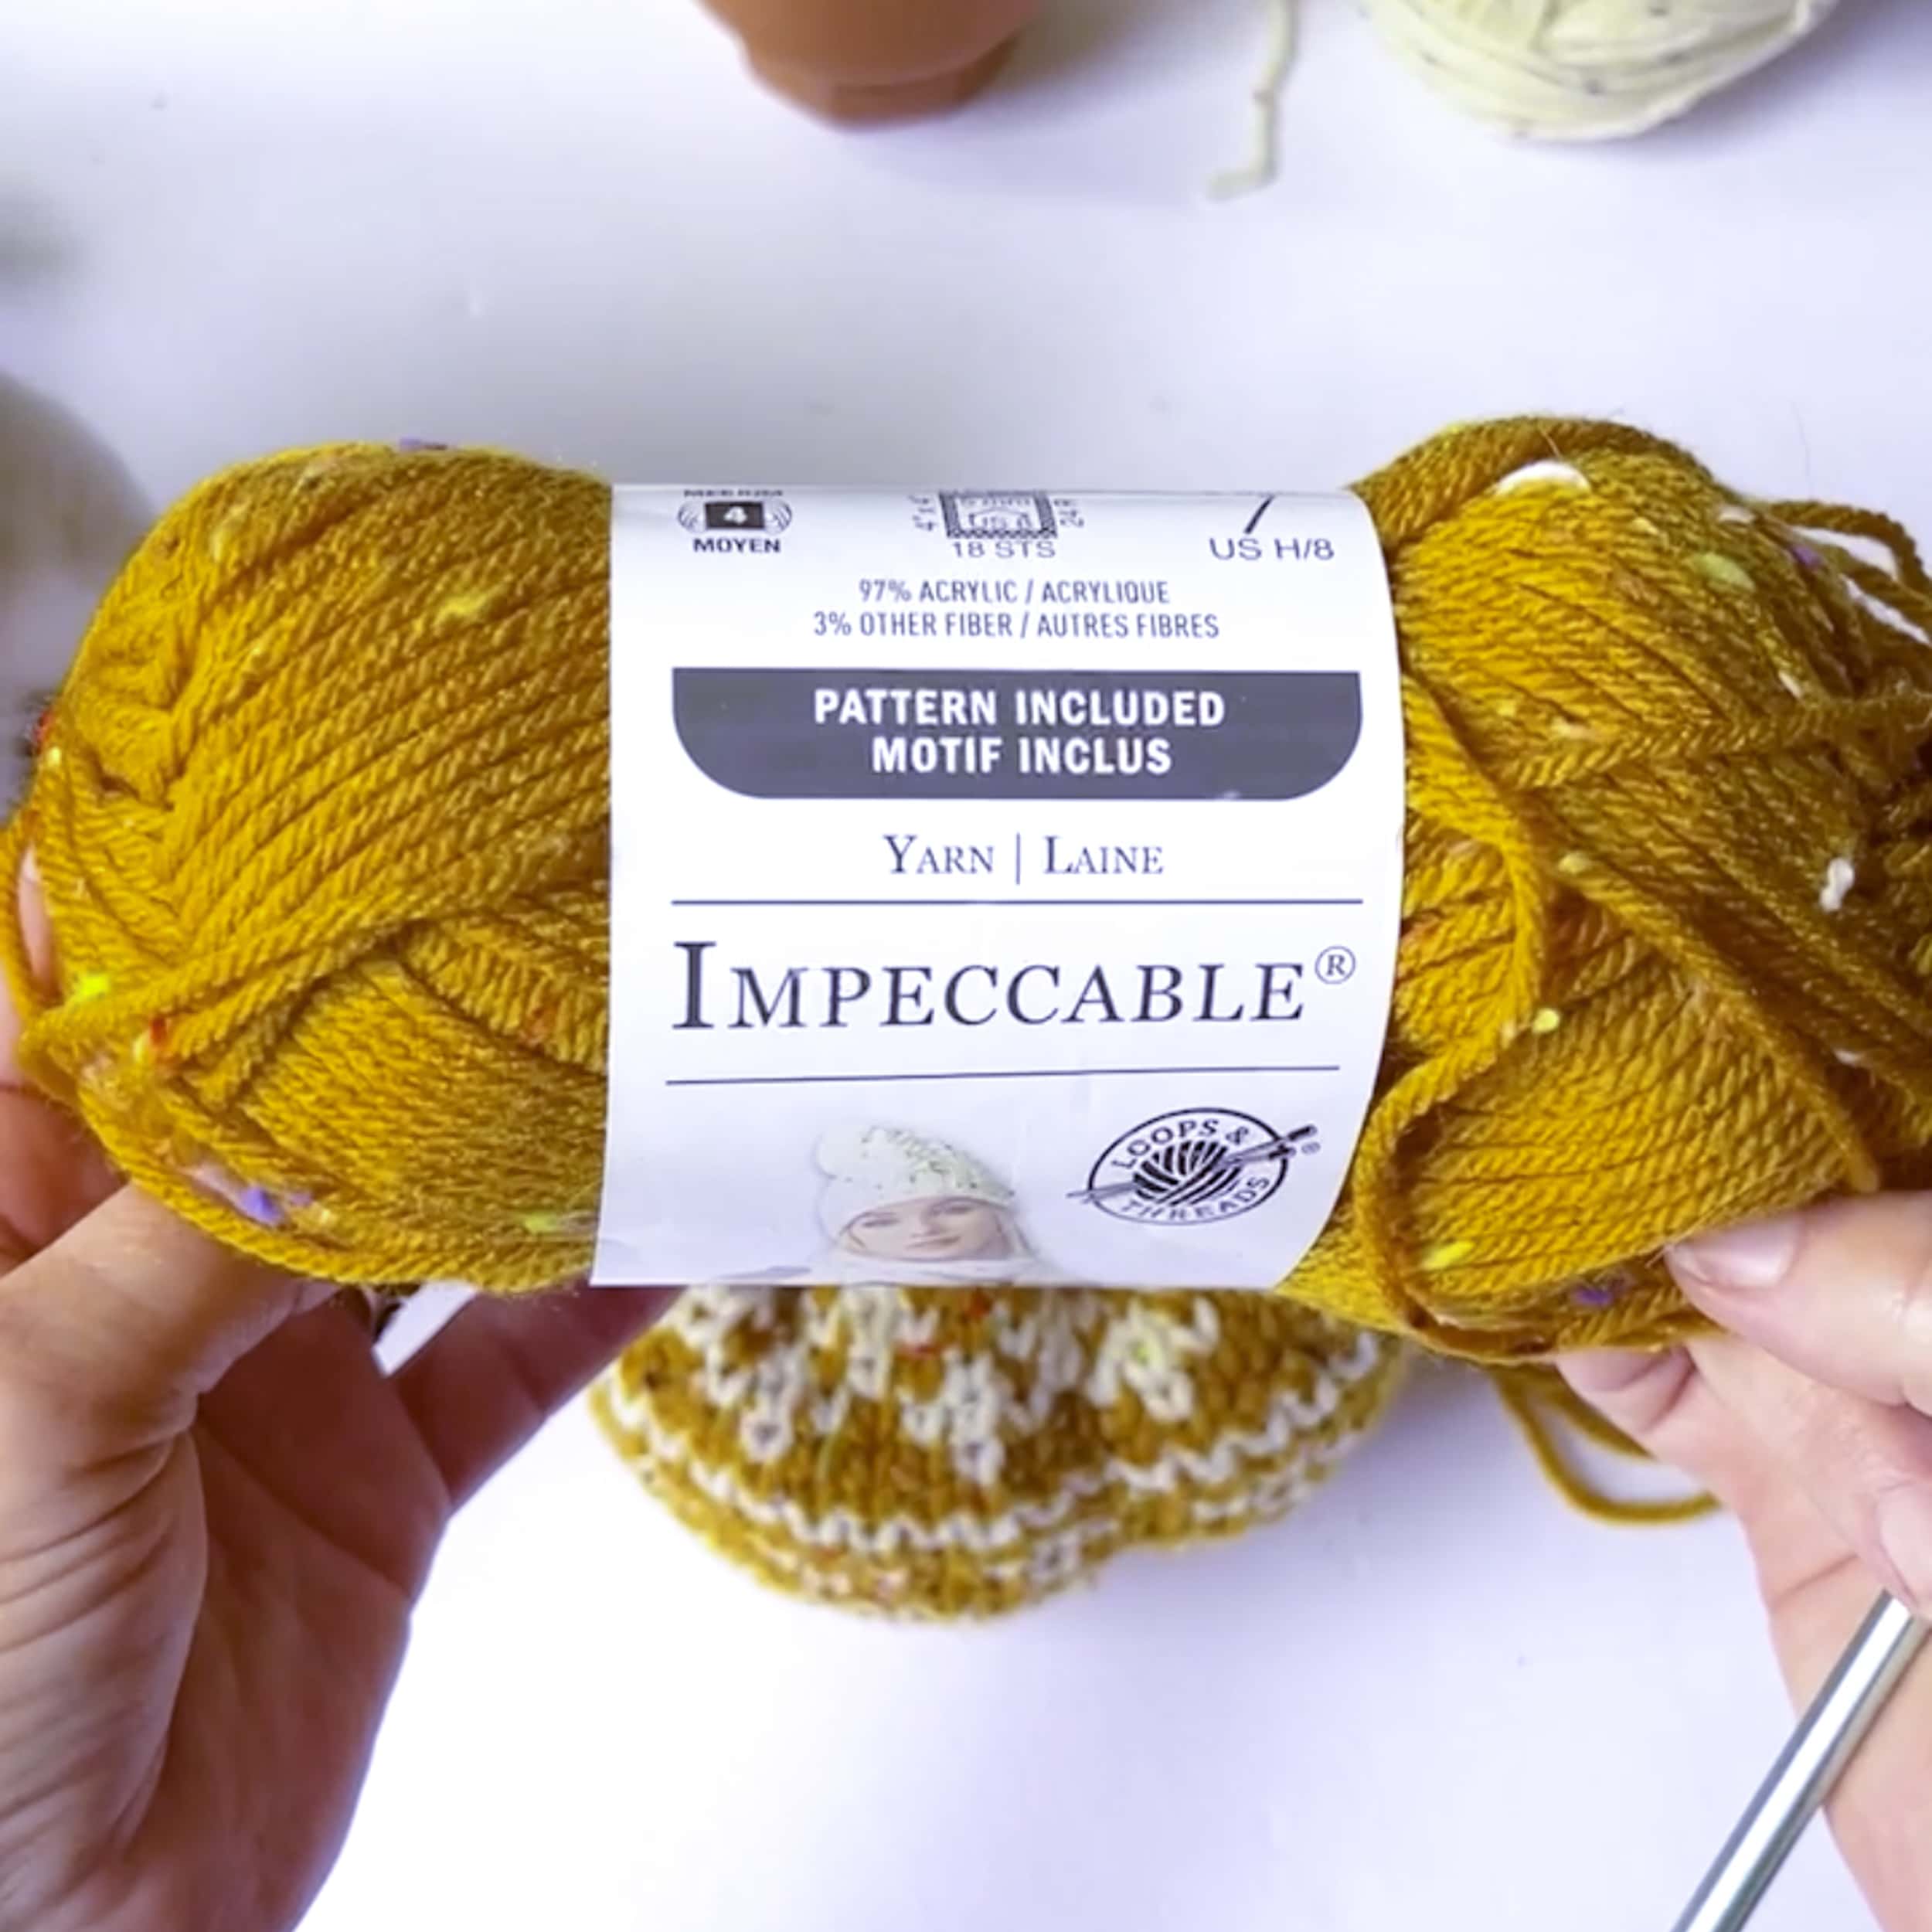
You can use ANY weight yarn to make these cute pumpkins, including a bulky yarn. I chose to use a 4-weight yarn because I like the Tweed.
Orange yarn is a perfect choice with a nice contrasting yarn is best.
All About the Yarn…
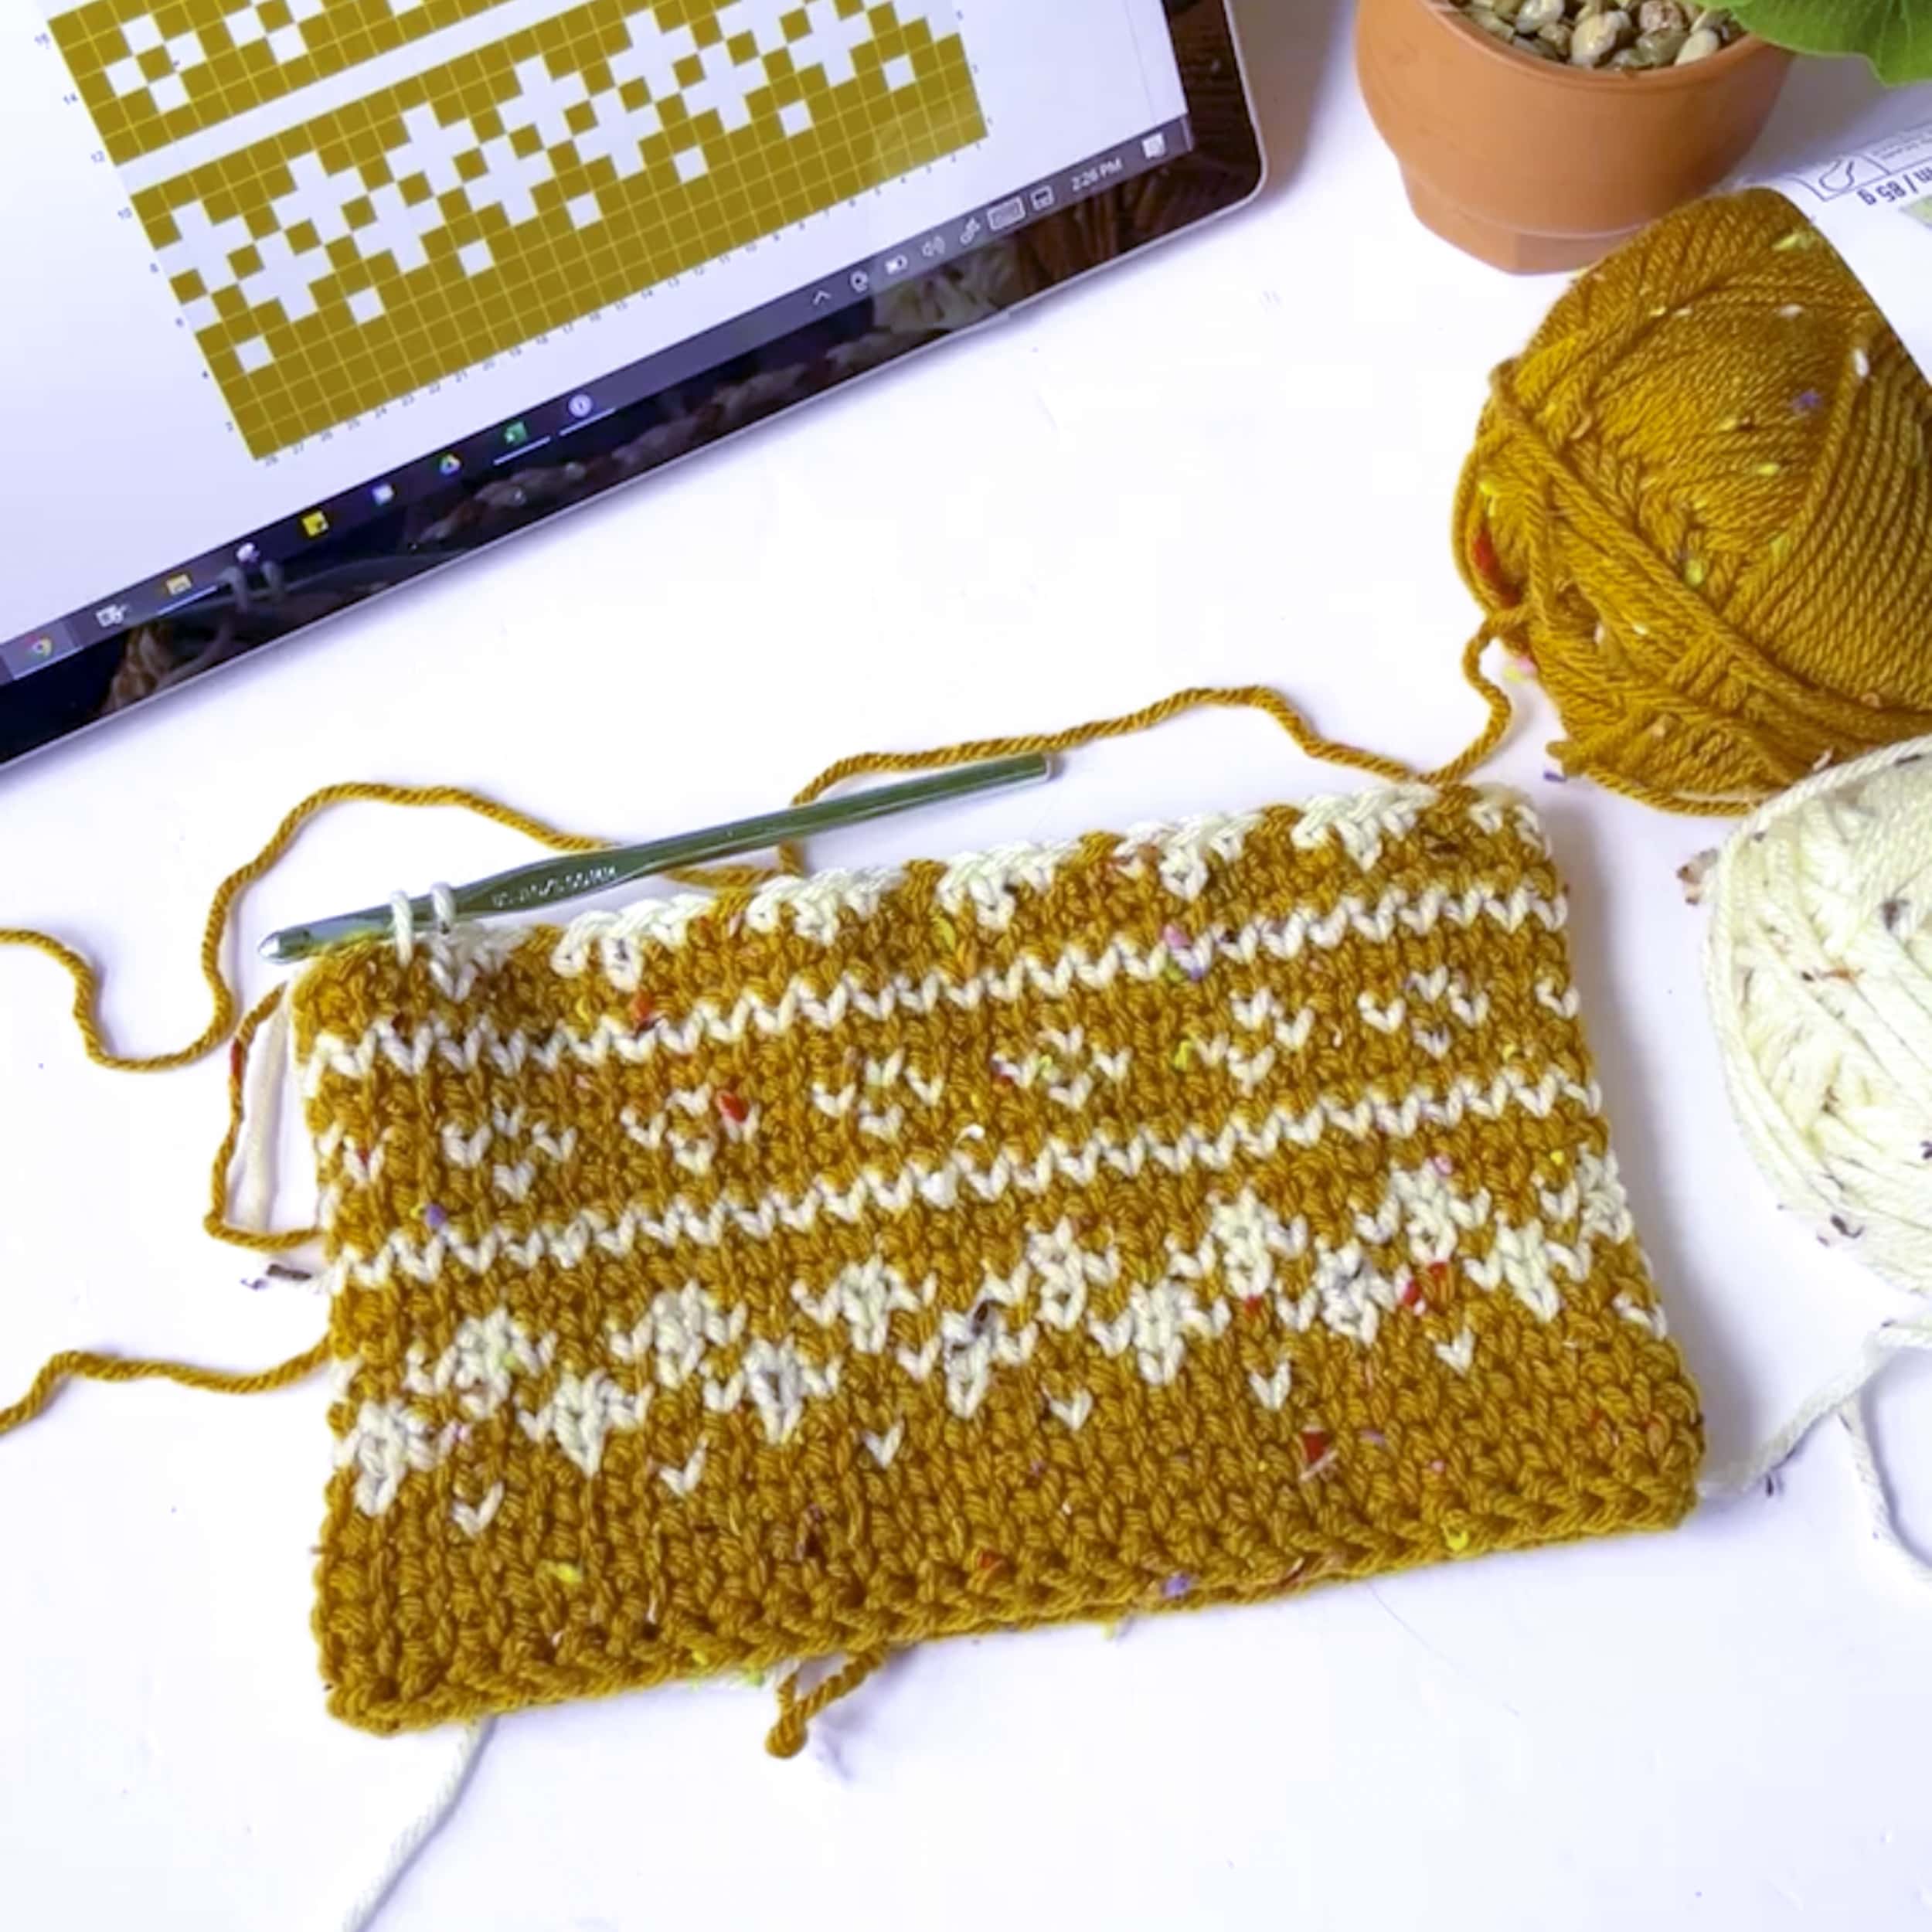
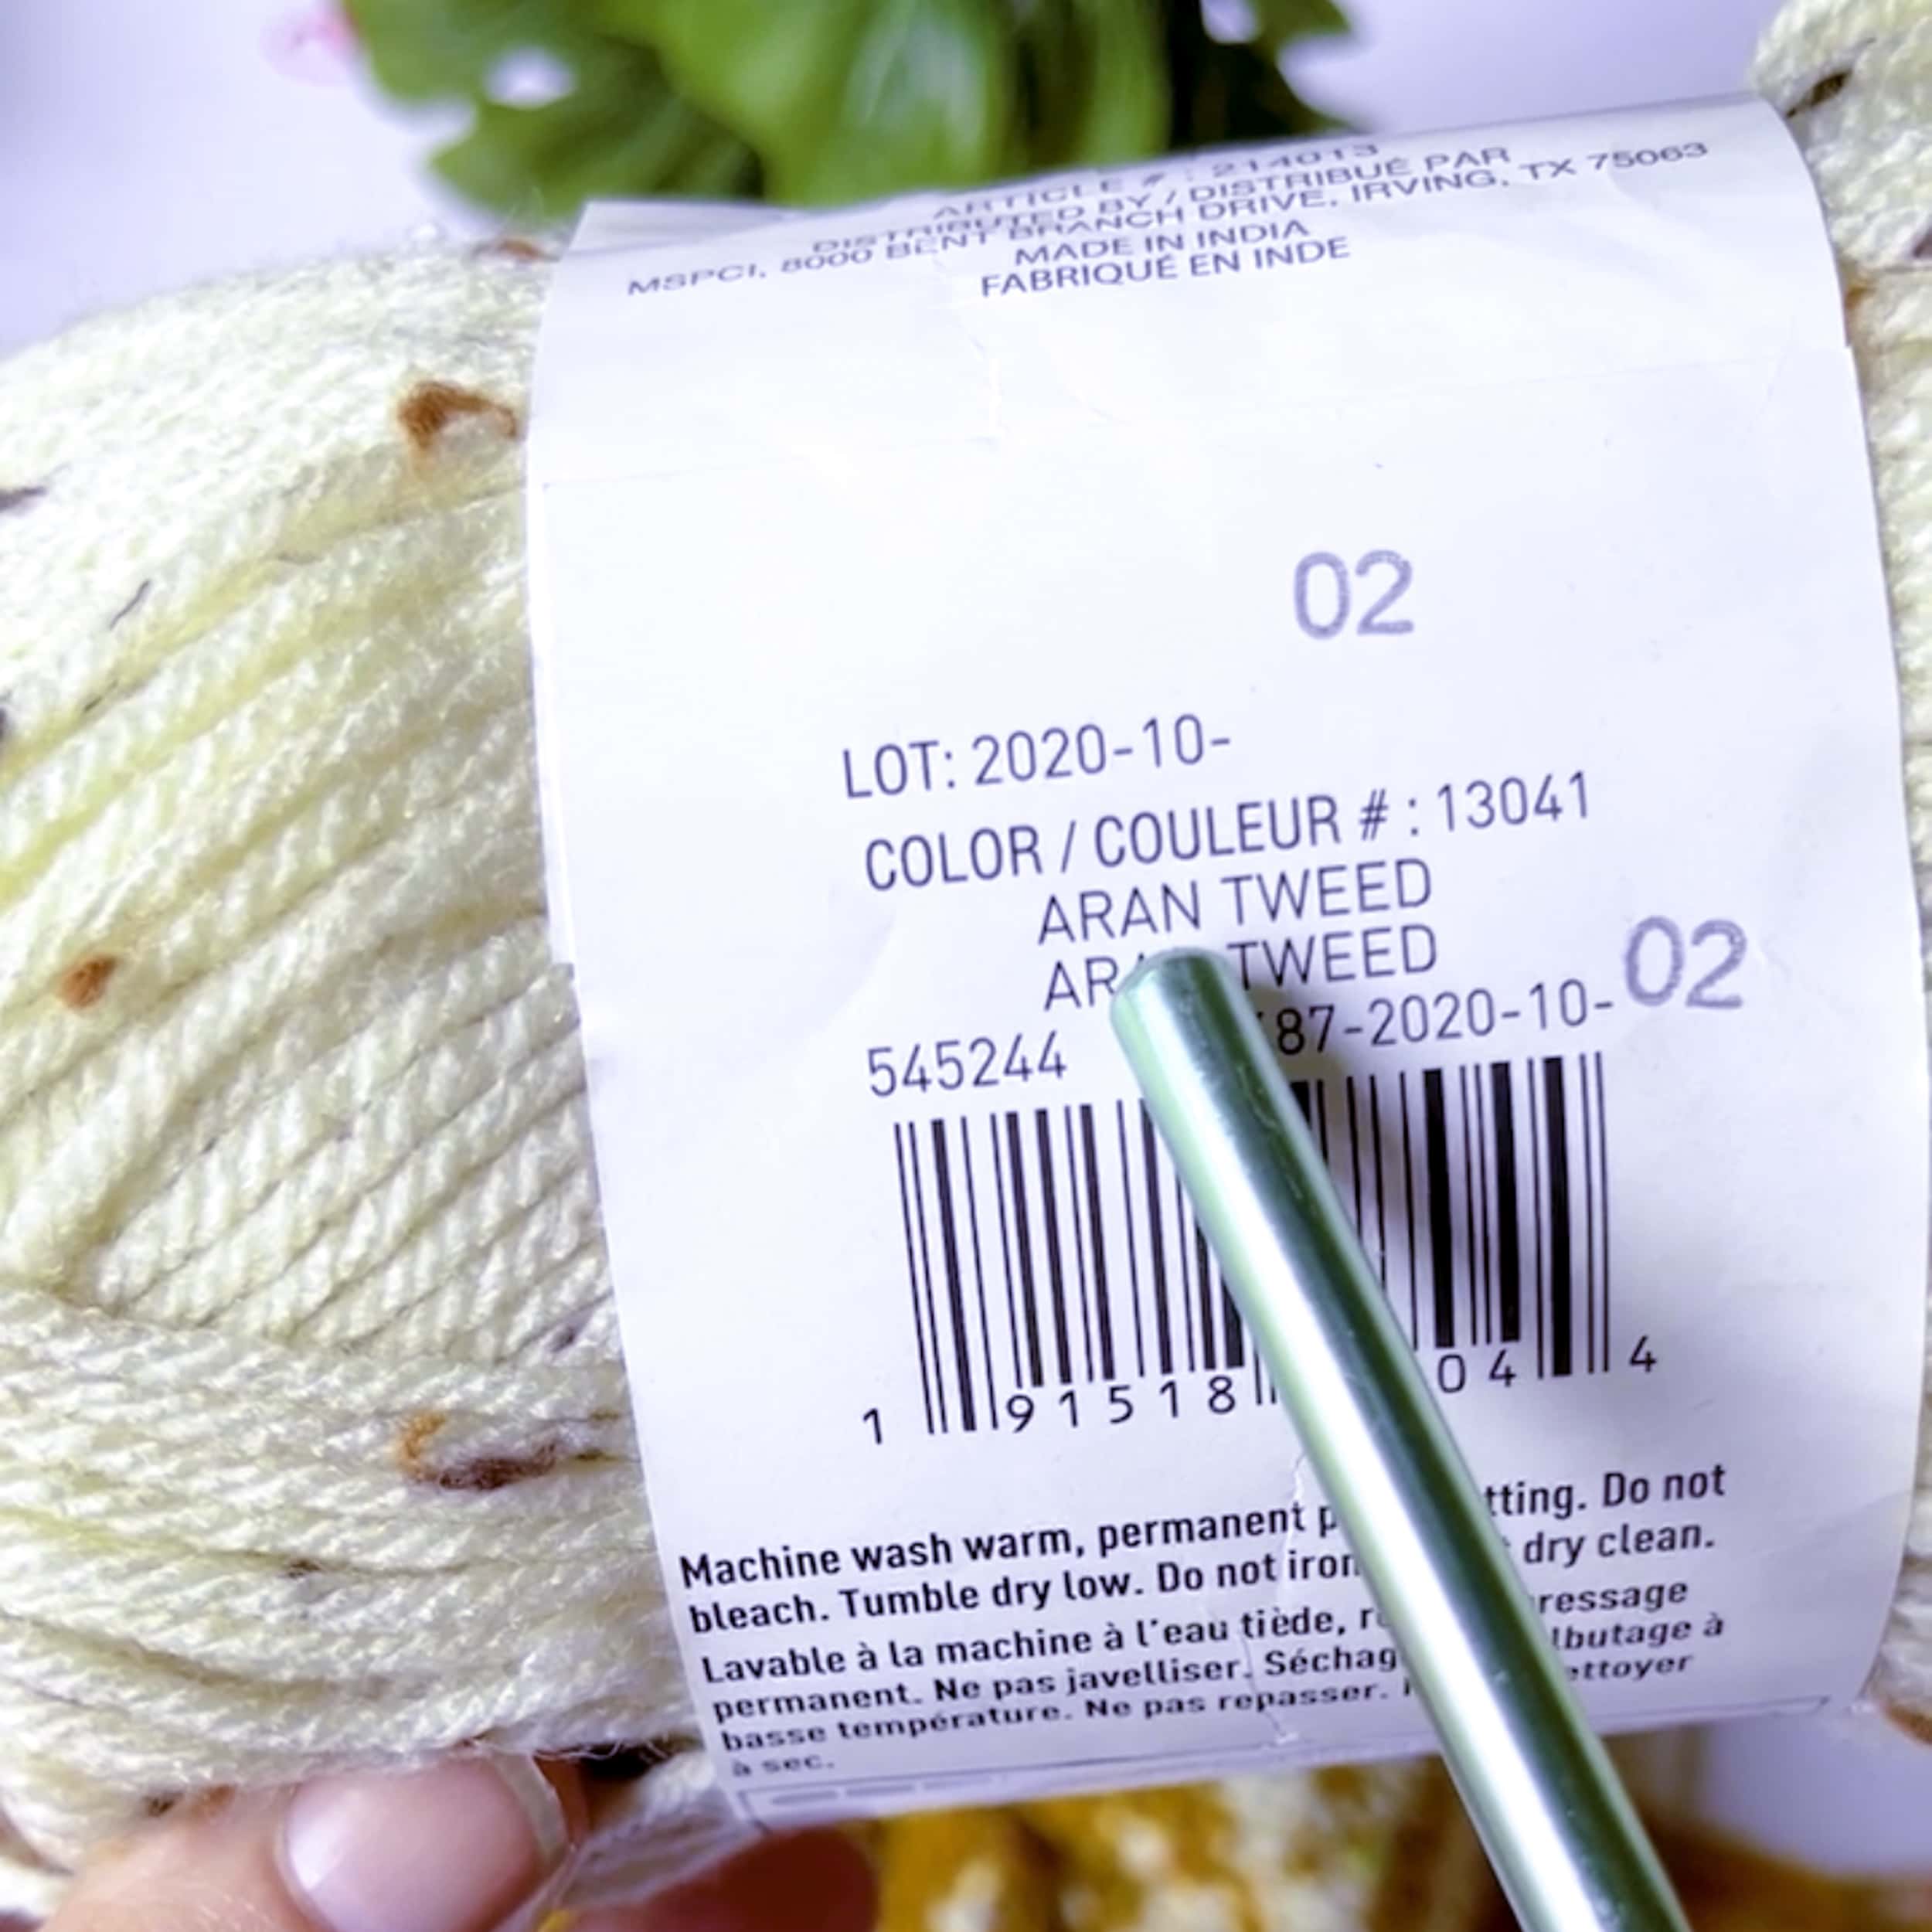
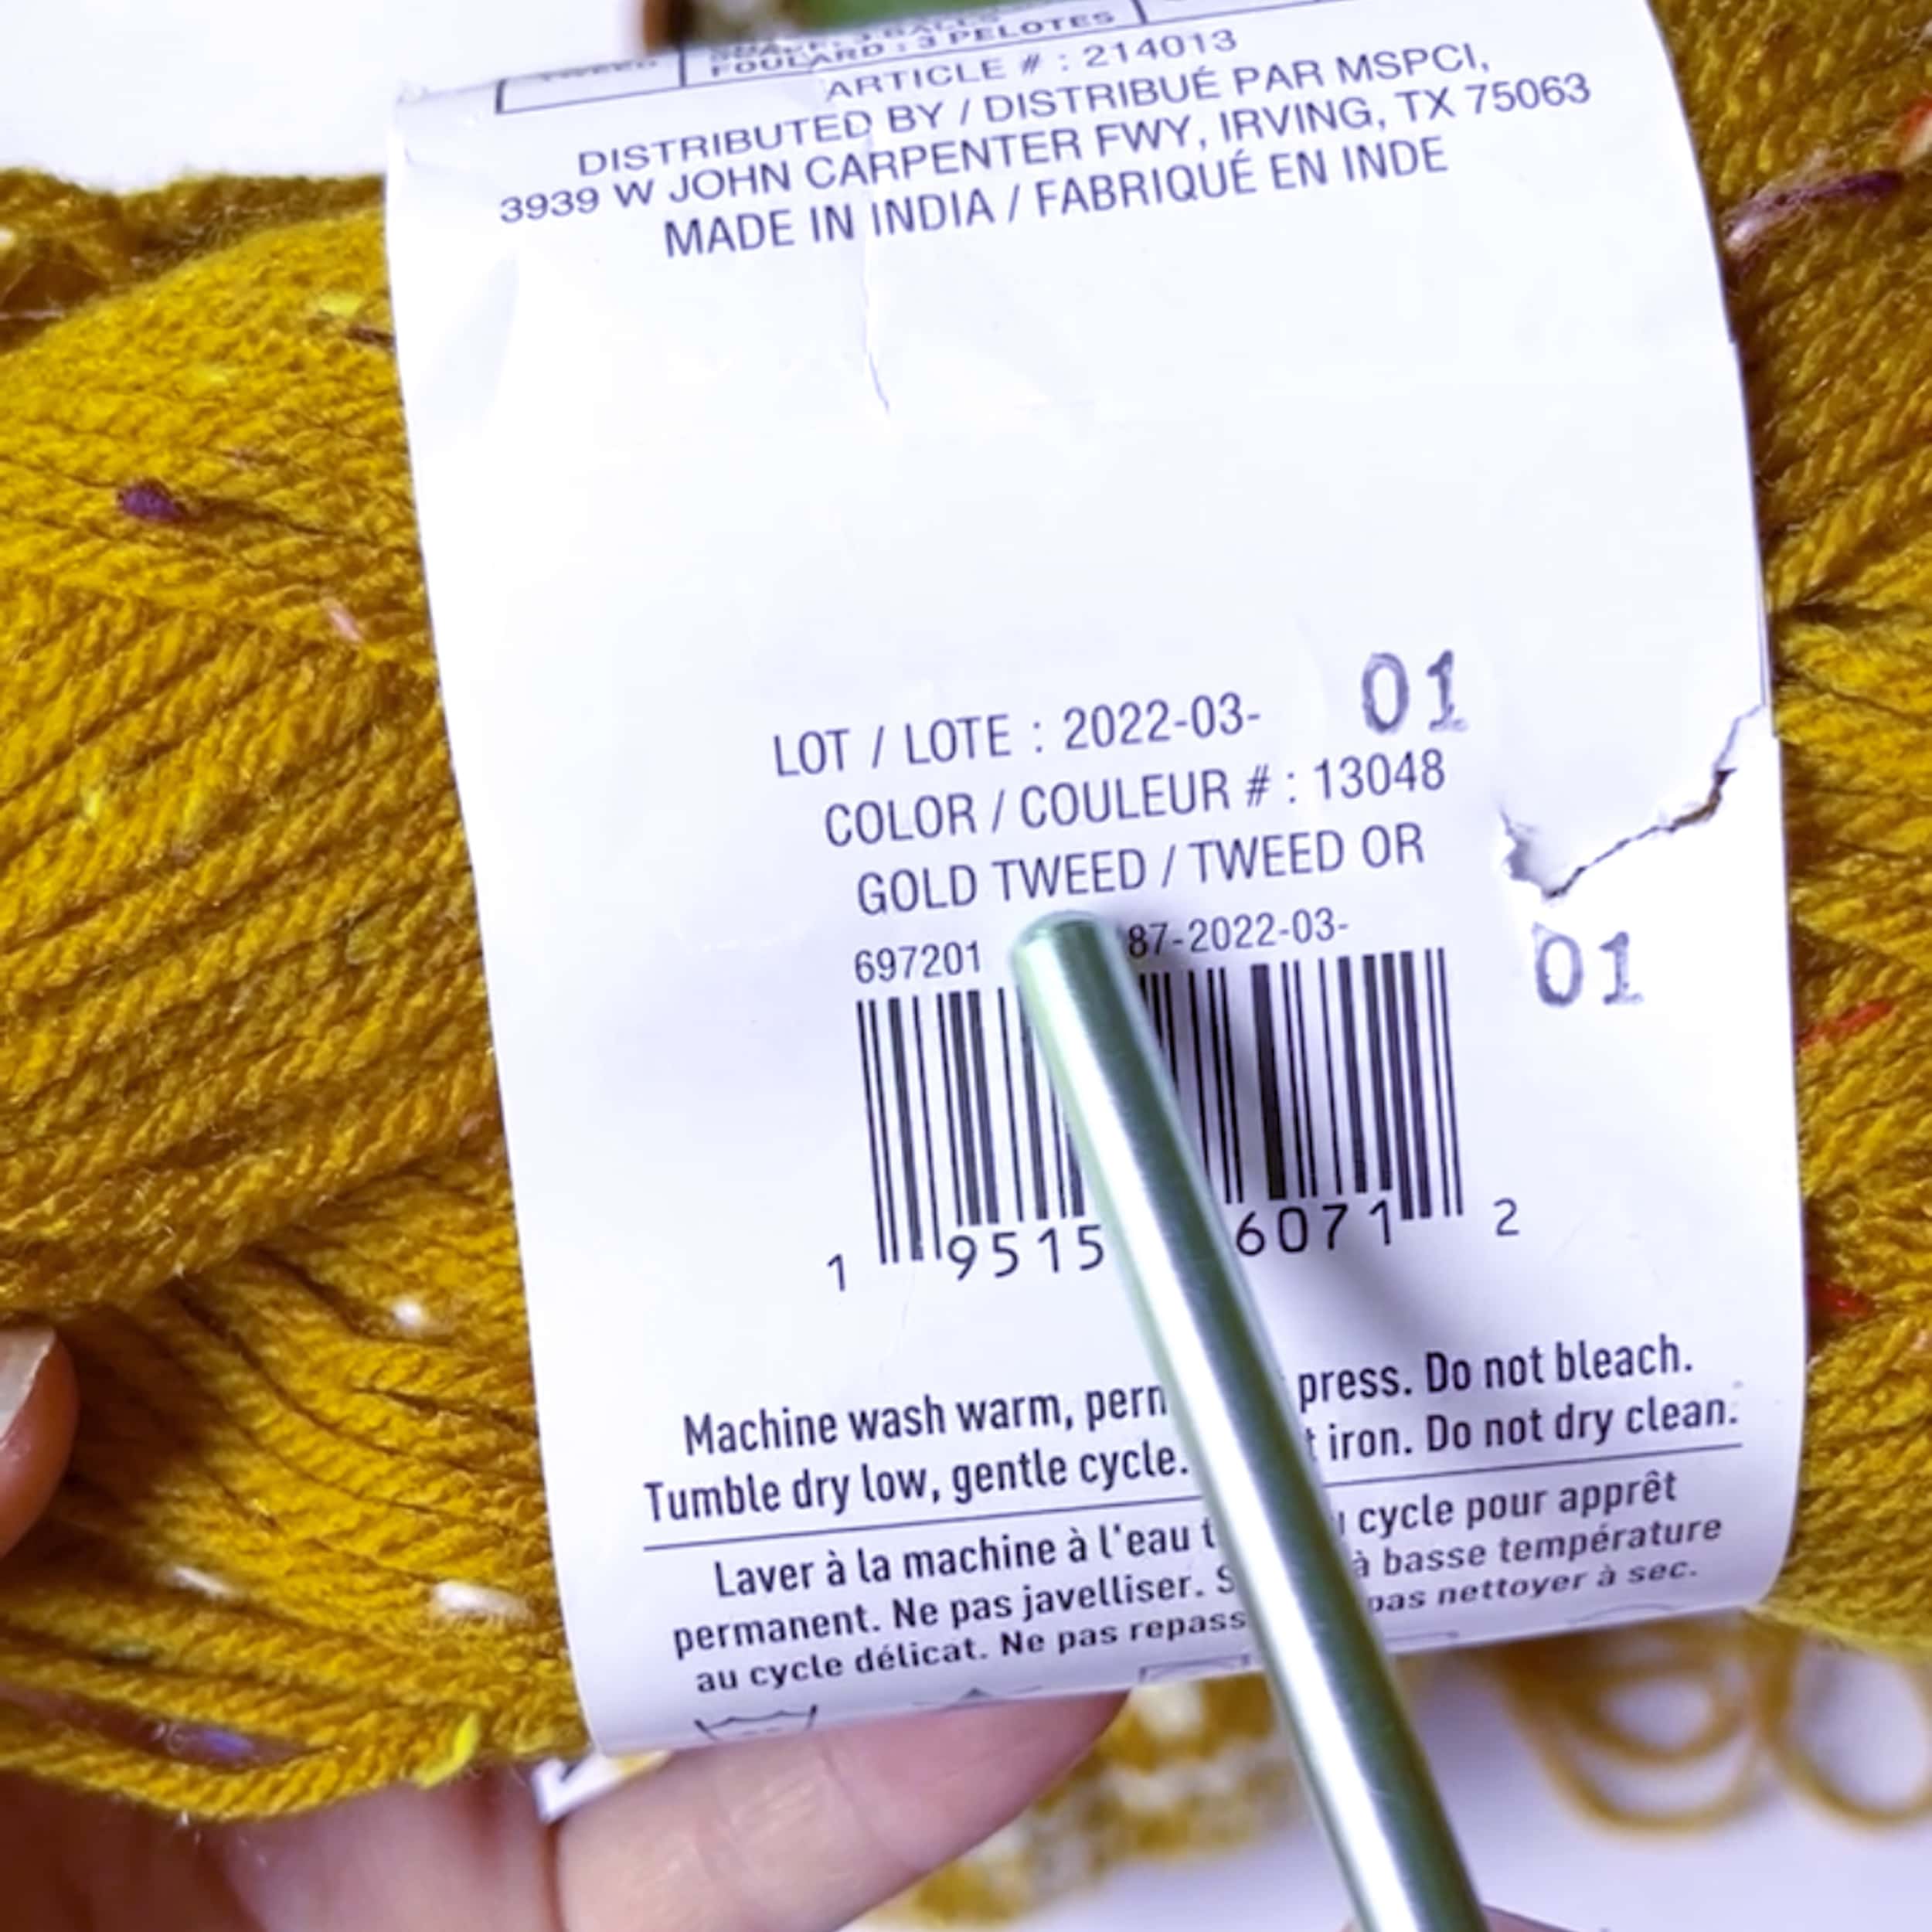
I went with Loops & Threads Impeccable Yarn in Tweed yarn for my cute little pumpkin because I really liked the beautiful fall colors and the speckles of yarn throughout.

Yarn Substitutions:
Any yarn will do for these and that’s why they are so great! You can use a chunky, a plush, or Knit Picks Tweed too!
PATTERN:
This pattern is created using a single crochet stitch only – it’s the placement of the stitch that creates the knit look.
A Boye hook works best for the waistcoat stitch, but Bates hooks can work too.
Tips For Crocheting Fair Isle Style:
- Crochet very loose.
- If yarn calls for a 5.5 mm hook, go up to a 6.5 or higher.
- Place your hook between the V of the single crochet from the previous round.
- Use your hook to grab onto the right vertical bar of the V to open up the stitch.
- Insert hook at a 45 degree angle to make it easier.
- Float the yarn, do not carry inside the stitches.
Materials & Notions
Suggested Yarn: Loops & Threads Impeccable Yarn – Tweed or equivalent 97% Acrylic, 3% other fibers, 190 yds (174 m), 3 oz (85 g) in the following colors: Gold Tweed, Aran Tweed, Camo Tweed
Yardage Needed:
Gold – 130 yards, Aran – 97 yards
- Hook Size: 6.5 mm (USA K) Crochet hook or any hook you’d like to create the size you want.
- Scissors
- Yarn Needle
- Flexible Measuring Tape
- Raffia Yarn (Optional)
- Cinnamon Sticks (Optional)
Gauge:
Worked in the waistcoat stitch in the round.
12 sts x 16 rows = 4” x 4” (10 cm x 10 cm)
Sizes / Finished Measurements:
Pattern is worked in the round, joined. If it were lying flat the measurements would be…
Dimensions: 18″ (45 cm) wide by 6.75″ (17 cm) tall.
Abbreviations
- Ch (s) – Chain (s)
- St (s) – Stitch(s)
- Sl st – Slip Stitch
- Yo – Yarn over
- Wc – Waistcoat stitch
- Hdc – Half double crochet
Total Stitches In Each Color:
(Aran Tweed) x 476, (Gold Tweed) x 1036
Stitch guide:
Wc – Waistcoat Stitch (in this pattern the single crochet is used to create the waistcoat stitch – the stitch placement of the single crochet creates the waistcoat stitch)
Insert hook between the V’s of the previous Round, yo, pull up a loop, yo, pull through both loops.
Hdc – Half Double Crochet
Yo, insert hook in indicated stitch, yo, draw up a loop, yo, draw through all three loops on hook.
Fair Isle Crochet Tutorial Links:
- How to Read a Crochet Graph
- Create Your Own Fair Isle Crochet Graph Pattern
- How to Crochet the Waistcoat Stitch
- More Crochet YouTube Tutorials by Stardust Gold Crochet.
Notes (Please Read):
- This pattern uses the waistcoat stitch only.
- Changing colors – finish the last part of the stitch with your new color.
- Float the yarn – do not carry it inside.
- Pattern is worked in the round.
- Joins are made in the chain-1 from the previous round.
- Ch 1 after each join.
- Starting round and Round 28 are not pictured on the graph.
Share your work with me on social media using the hashtag: #StardustGoldCrochet
FAIR ISLE CROCHET PUMPKIN PATTERN:
What is exclusive content? If you are new here, don’t worry, this is something new for us, as publishers too.
The internet is changing the way we can continue to bring our free crochet patterns to you and still receive ad-revenue.
In order to keep providing free patterns, you can sign up to Grow.
There is no charge to you and it conveniently stores all your favorite bookmarks in one place. Log in once, and you’re in for life!
Stitch Fiddle Exclusive Graph Access
As a bonus, you get access to the Stitch Fiddle Progress Tracker and work on the go!
Getting access to this gives you an advantage because you can work the graph on the go. On your tablet, or smart phone.
Fair Isle Crochet Pumpkin Pattern
NOTE: Repeat between [ … ] as many times indicated. You’ll begin to notice the pattern as you crochet.
I used a foundation single crochet round to start, but you’re welcome to use a chain to start. Below are starting instructions for both options.
Foundation single crochet start: (Counts as Round 1) Fsc 56 – join in first fsc, ch 1, first stitch of Round 1 is created in the same stitch as join.
Chain start (Counts as Round 1) – Ch 57, single crochet in 2nd chain from hook and in each stitch across chain. Join in first single crochet, ch 1, first stitch of Round 1 is created in the same stitch as join.
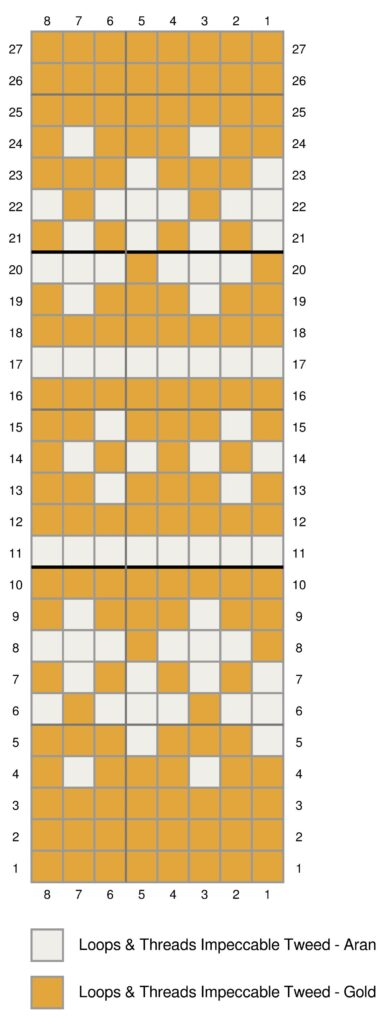
Rounds:
2: (Gold) x 56
3: (Gold) x 56
4: [(Gold) x 2, (Aran) x 1, (Gold) x 1] x 14
5: [(Aran) x 1, (Gold) x 3] x 14
6: [(Aran) x 2, (Gold) x 1, (Aran) x 1] x 14
7: [(Aran) x 1, (Gold) x 1] x 28
8: [(Gold) x 1, (Aran) x 3] x 14
9: [(Gold) x 2, (Aran) x 1, (Gold) x 1] x 14
10: (Gold) x 56
11: (Aran) x 56
12: (Gold) x 56
13: [(Gold) x 1, (Aran) x 1, (Gold) x 2] x 14
14: [(Aran) x 1, (Gold) x 1] x 28
15: [(Gold) x 1, (Aran) x 1, (Gold) x 2] x 14
16: (Gold) x 56
17: (Aran) x 56
18: (Gold) x 56
19: [(Gold) x 2, (Aran) x 1, (Gold) x 1] x 14
20: [(Gold) x 1, (Aran) x 3] x 14
21: [(Aran) x 1, (Gold) x 1] x 28
22: [(Aran) x 2, (Gold) x 1, (Aran) x 1] x 14
23: [(Aran) x 1, (Gold) x 3] x 14
24: [(Gold) x 2, (Aran) x 1, (Gold) x 1] x 14
25: (Gold) x 56
26: (Gold) x 56
27: (Gold) x 56
28: (Gold) x 56
Finishing
After completing round 28, leave an extra long tail – at least 2 feet because you will use it to create the grooves of the pumpkin.
Steps for closing and stuffing the pumpkin
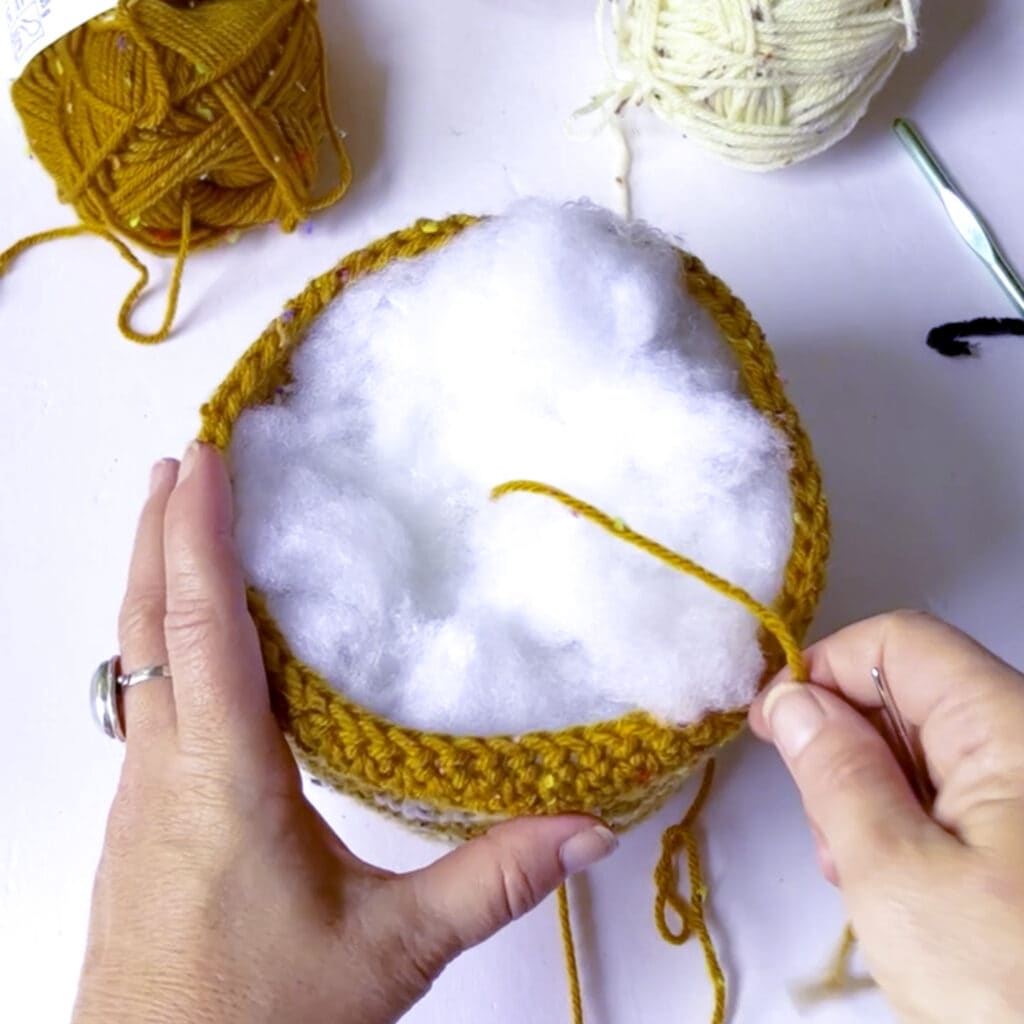
- Thread yarn onto a darning needle.
- Weave through (in and out) just underneath the top two loops of each stitch.
- Gently pull the top closed (gently so the yarn doesn’t break).
- There will be holes and you may not get it all the way closed, so use your needle to close the gaps.
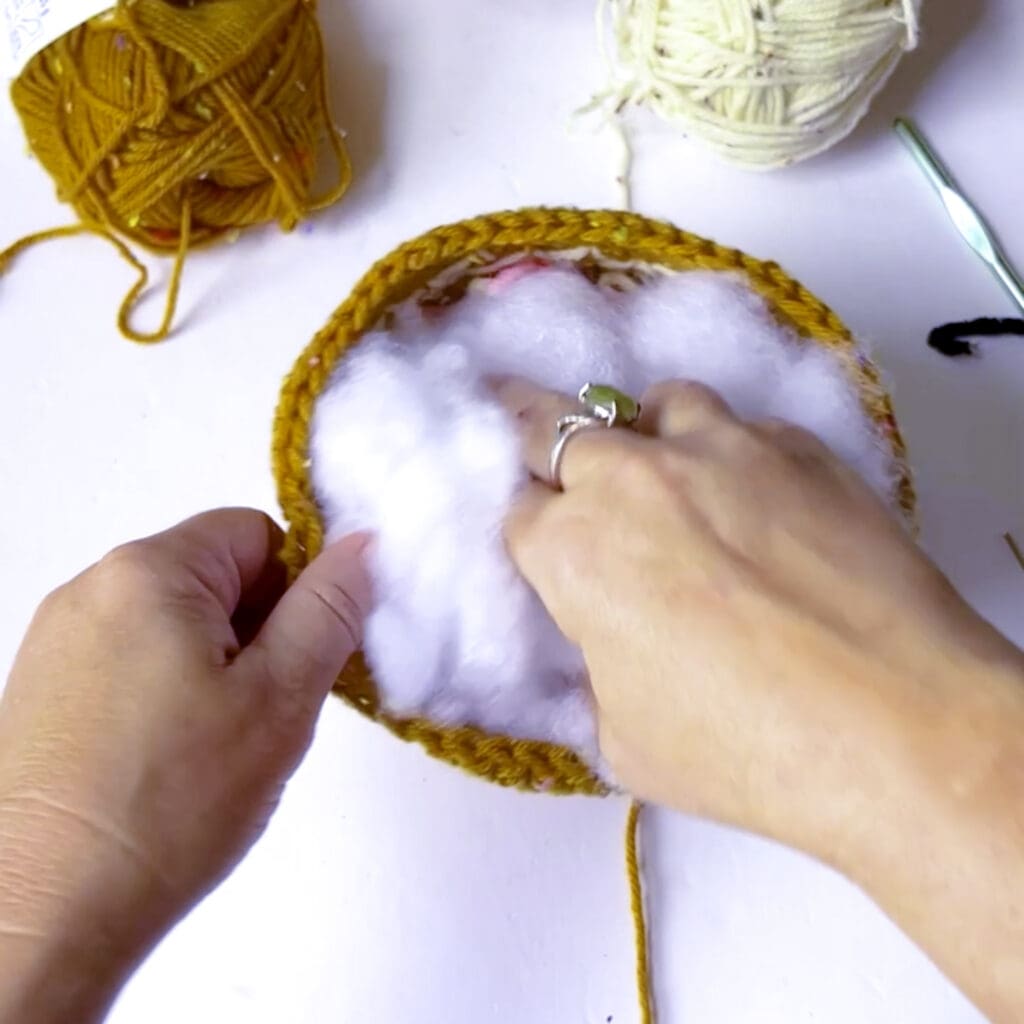
- Turn over, add stuffing, enough to get the perfect pumpkin shape.
- Thread your needle through the center of the pumpkin and up through the stuffing.
- Repeat steps 2 – 4 for the other side.
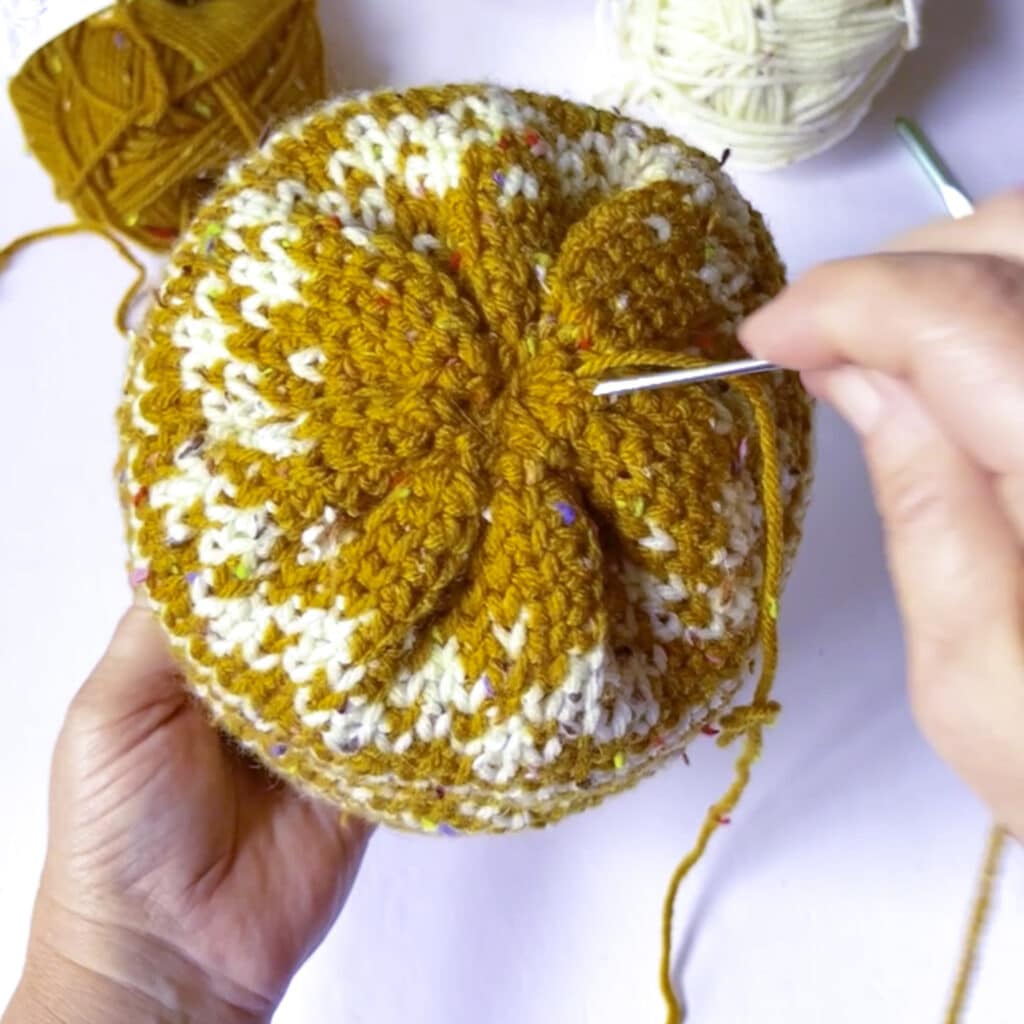
- Identify the top of the pumpkin by looking at the V’s. You want them to V’s no upside V’s.
- Don’t cut yarn, use yarn to make grooves around it (seen in last photo)
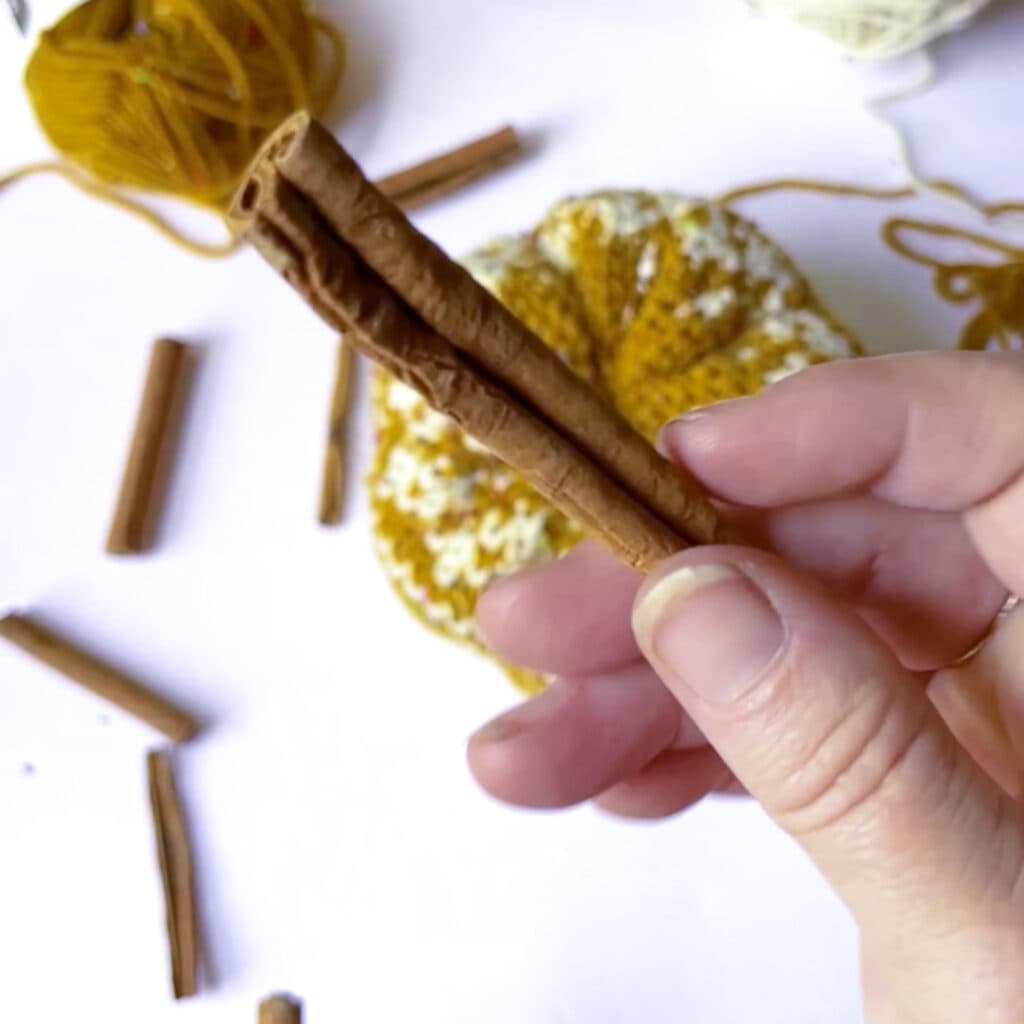
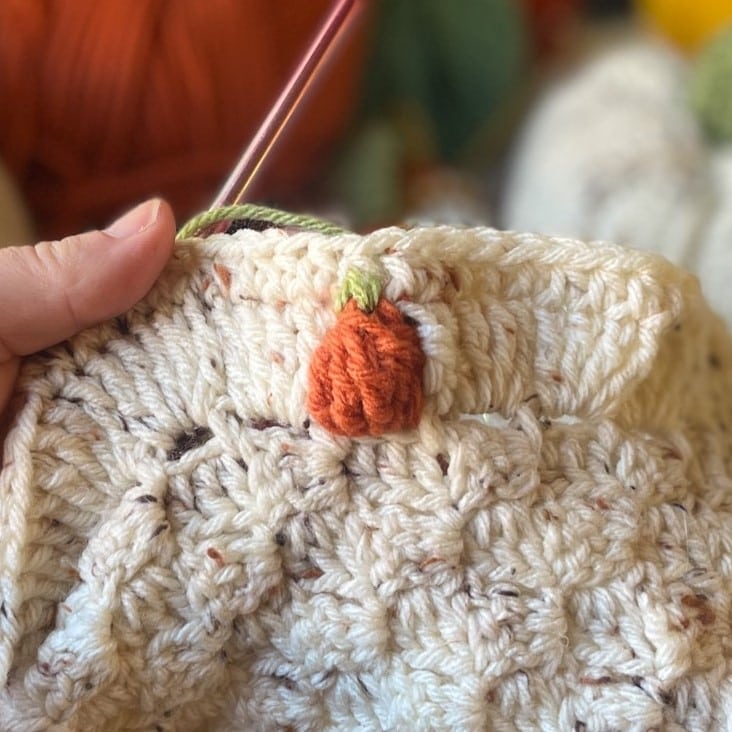
Creating the Pumpkin Stem
I created a very simple stem using half double crochet. Then I used some raffia yarn to tie around the cinnamon stick after I inserted it into the top of the pumpkin.

Stem Pattern
Using Camo yarn, Ch 10, hdc in 3rd chain from hook and in each chain across, cut and leave a long tail to sew to pumpkin. Sew to the top of the pumpkin and weave in all tails.
Insert the cinnamon stick into the top opening of the pumpkin and tie the raffia yarn around it in a bow.
Full Graph
If you have a hard time downloading the full size graph, use the smaller graph below. They are best saved on a phone by tapping and holding it, then save to your device. On a computer, I serve webp and it saves as a page instead. So you can take a screenshot to save it as a jpeg.
Want to make a different size?
We all love different sizes to add a little flare! This is the short 8 row repeat so you can create this cute pumpkin in different sizes.
Pictorial


Congrats! You are finished!
I hope you enjoyed making this! Please share with your crochet friends and thank you so much for stopping by. Leave any questions or comments below or head over to my pattern support group and join the conversation.
Today’s Featured Pattern – Download
Hey friends! Thanks for being here – to get the free PDF download today – please click the button below & follow instructions on the page. Please share your finished pumpkins with me! #stardustgoldcrochet
More Fun Fall Crochet Patterns You May Enjoy


Crochet Pattern Support
I hope you enjoy this easy pattern. Pattern support? Head over to Stardust Gold Crochet & Friends.
- If you are looking for a drama-free crochet group, check out my pattern support group, Stardust Gold Crochet & Friends
- We have fun and share crochet patterns, stories, and courses; you can ask me about any pattern in my library for support.


Hi, I am overjoyed, for the first time I habe managed to get the pattern downloaded immediately Whatever you did, it has been a complete success. Thank you for sorting out the issue. Hopefully, there will be no more problems for you. .much appreciated.
Thanks so much! I love your thoughtful and kind remarks always Mrs Franks!
Love the look of the Fair Isle Pumpkin. Signed in, clicked the download button. No success. The code FAIRISLE does not work. Tried all variations each time it says invalid.
Unfortunately discount code said invalid. I really love the pumpkin and will get the pattern from your blog. Thank you ❤️🧶
I entered the password and it told me “invalid discount”. What am I doing wrong?Connie
Cannot find the coupon code to use for patter for Fair Isle Pumpkin pattern….☹️
really complicated 🙁 coupon code says “invalid code”
Couldn’t find where to put the password to get it free.
Thanks for sharing the lovely pumpkin with fairisle.Great small project to try with crochet.only you mixed up the password;)Gr. Arina