
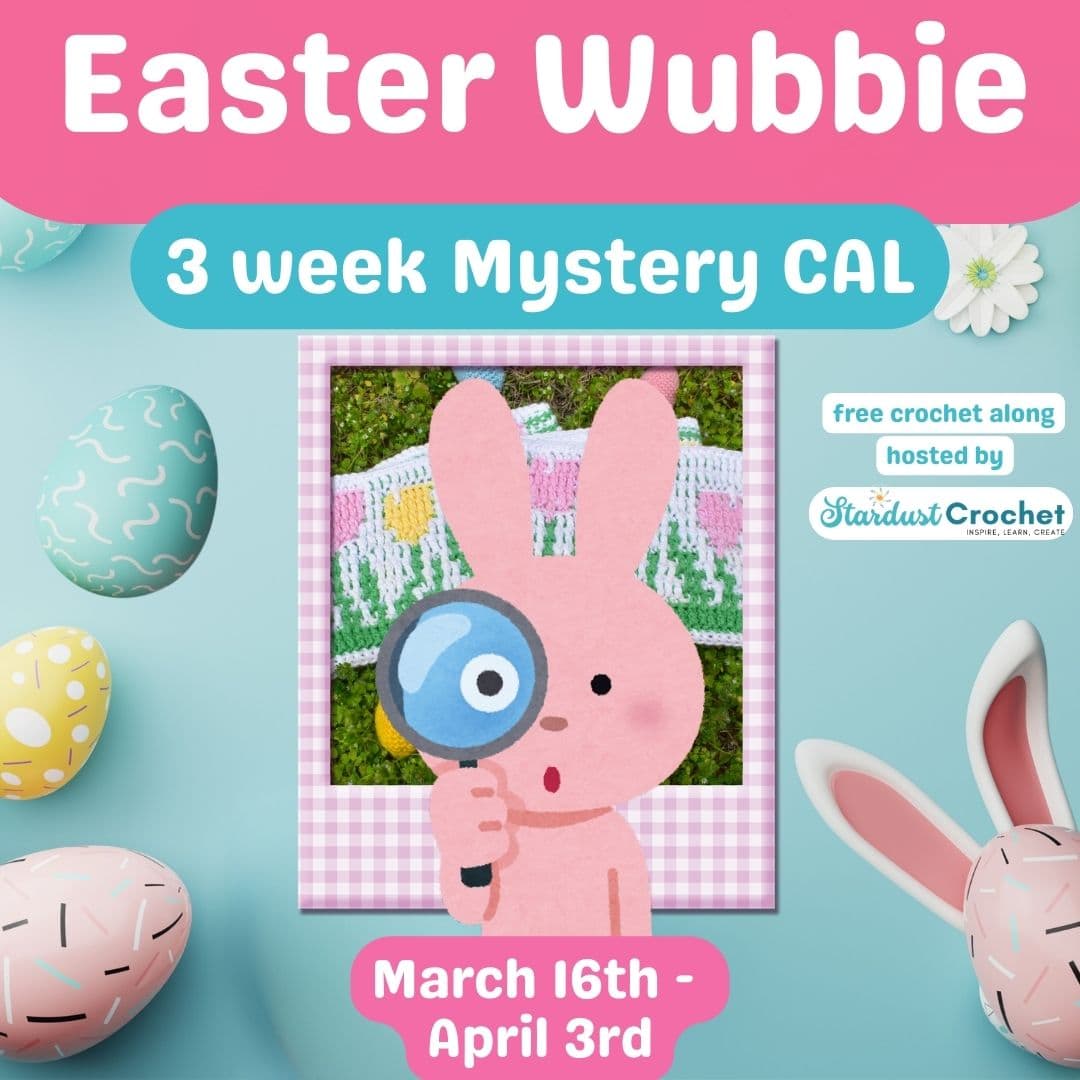
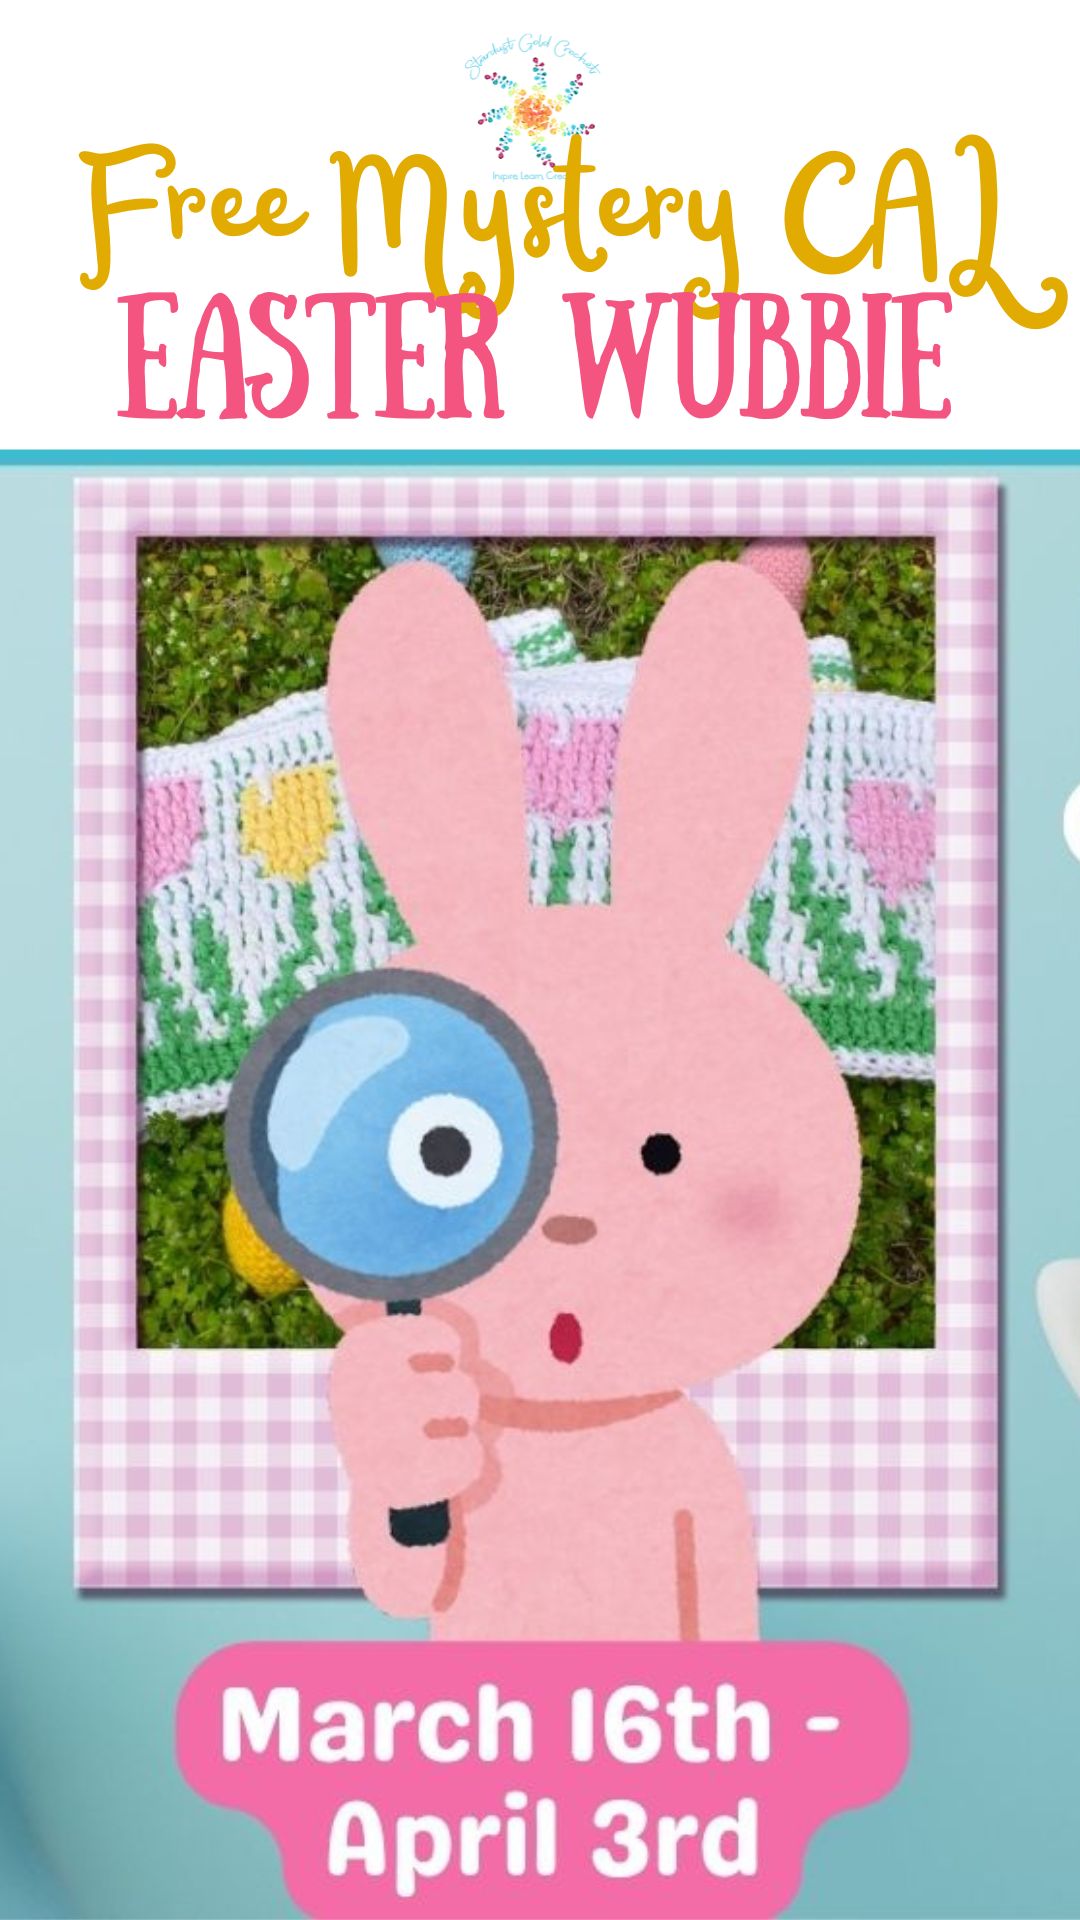
Welcome to the Easter Wubbie Blanket CAL! 🏡✨ This free crochet along will help you create a keepsake for the littles using the a unique crochet technique called overlay mosaic crochet. The Easter Wubbie Mosaic Crochet Blanket is perfect to get started with mosaic crochet.
Get ready for a fun project filled with charming designs, beautiful colors, and the satisfaction of making something special for your home.
Even if you are a beginner to mosaic crochet this blanket will get you up to speed quick.
You’ll learn how to use simple stitches and color changes to make a blanket you’ll treasure. Let’s begin! 😊
How the CAL Works
A new blanket strip will be release each week on Monday at 8 AM CST. Check back here for the new releases – and scroll down to get the details on yarn/yardage/tutorials/how to start your blanket too! Table of Contents Below.
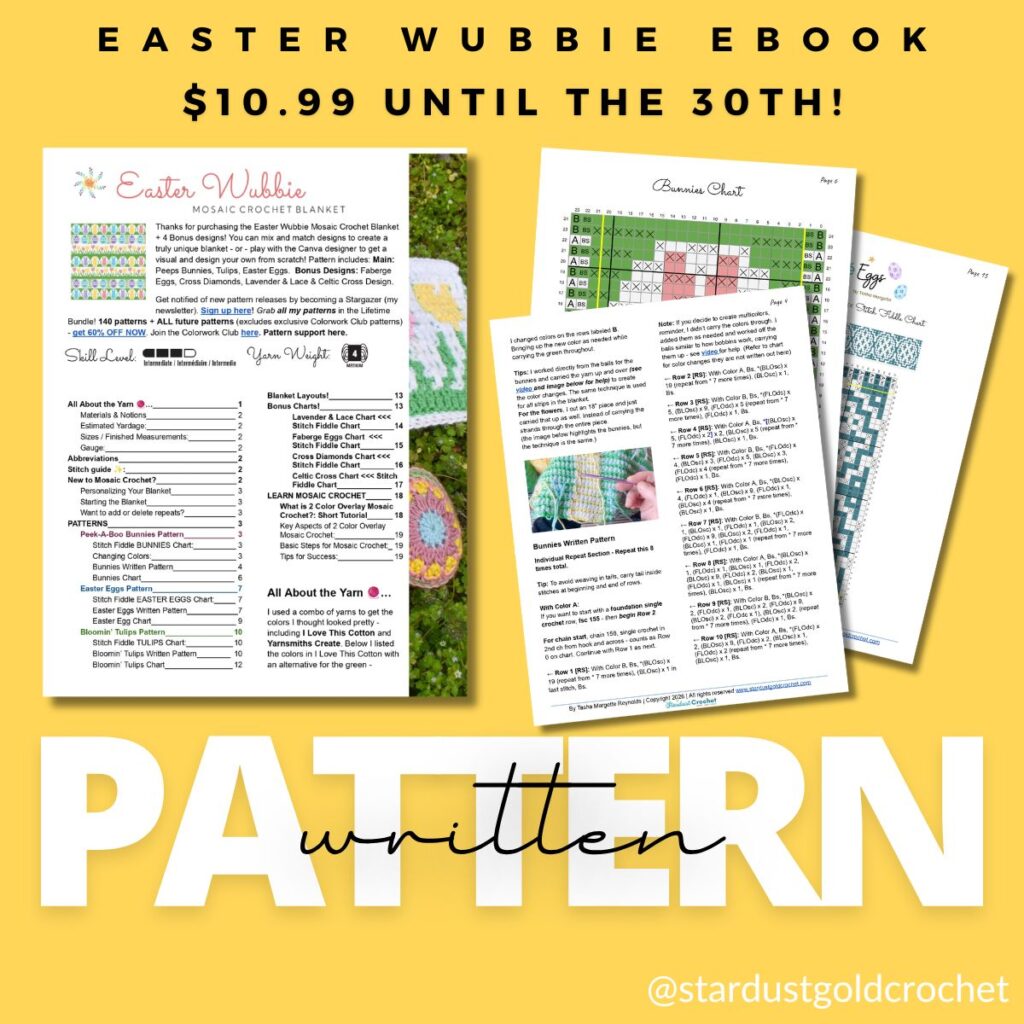
Get the Easter Wubbie Mosaic Crochet Blanket EBook and Work at Your Own Pace – Available for pre-sale -Friday, March 13th – March 15th 11:59 PM CST.
Get the Easter Wubbie Mosaic Blanket eBook! (COMING THIS FRIDAY) – Sign up here to get notified of the release!
Included in the eBook is everything you need to learn mosaic crochet, complete with tutorials and helpful resources.
🐣 Join the fun and get 7 adorable Easter themed mosaic crochet patterns to mix and match!
The Easter Wubbie Mosaic Blanket eBook includes:
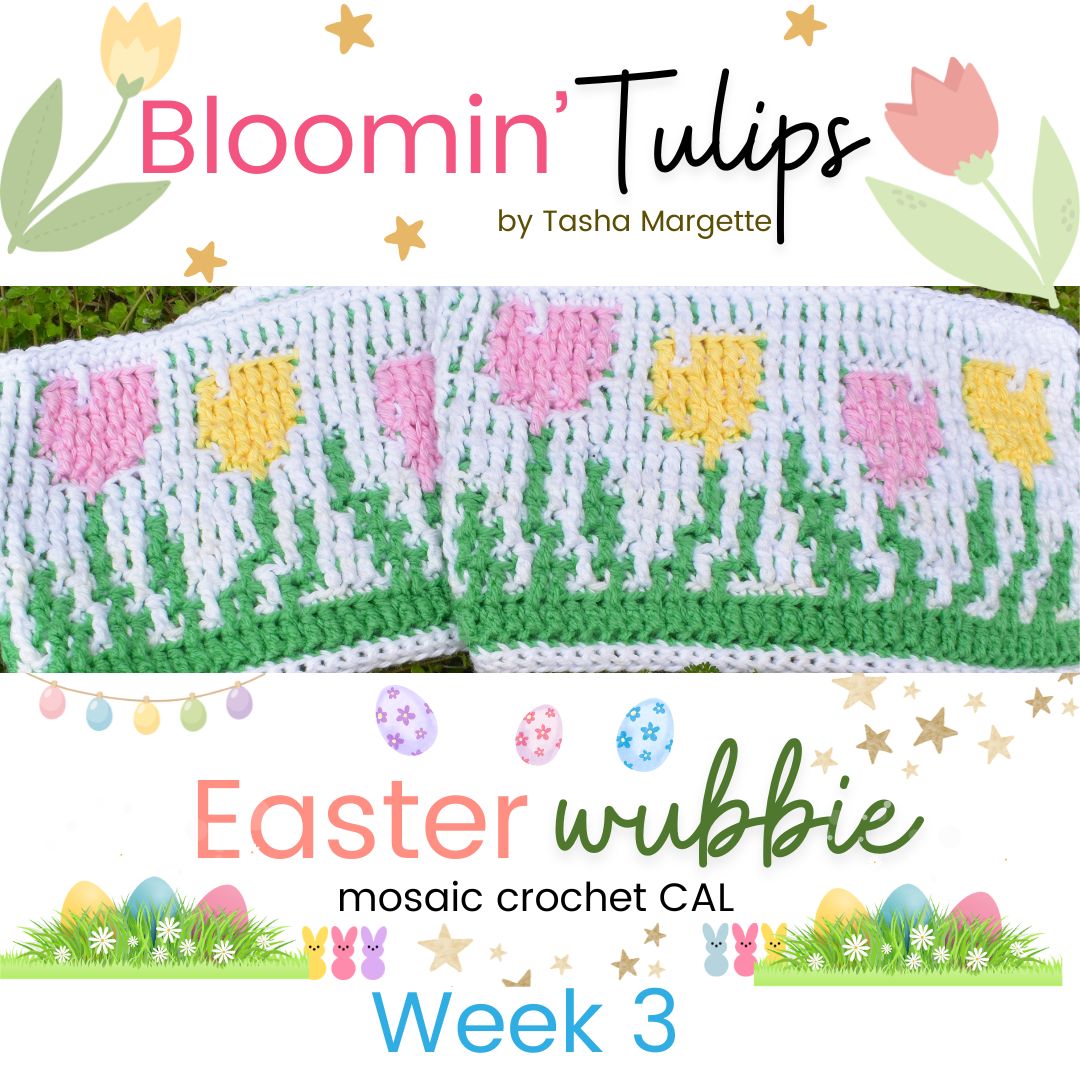
- 🐰 3 Full written patterns for Peek-A-Boo Bunnies, Easter Eggs, & Bloomin’ Tulips Wubbie sized blanket
- 📋Full Table of Contents with jump links for easy navigation.
- 🎁 4 Bonus Easter themed mosaic crochet designs
- 🗺️ Choose your own adventure!
- 📖 Full written mosaic crochet tutorial.
- 🎬 4 Video Tutorial Links to teach you different mosaic crochet techniques.
- 🌱 Basic Mosaic Crochet Tutorial (Absolute Beginner).
- 🎨 2-Color Overlay Mosaic Crochet.
- 🌈 Multi Colors Per Row (Changing Colors Mid-Row).
- 🔄 Reversible Mosaic Crochet Tutorial 🤝 Links to join the community and share your progress!
- 🧶 Join us in making this blanket together!
- Get $3.00 OFF from March 13th – March 16th – On the 16th is goes up to $15.99!
GET THE EBOOK HERE.
-OR- click the image below.

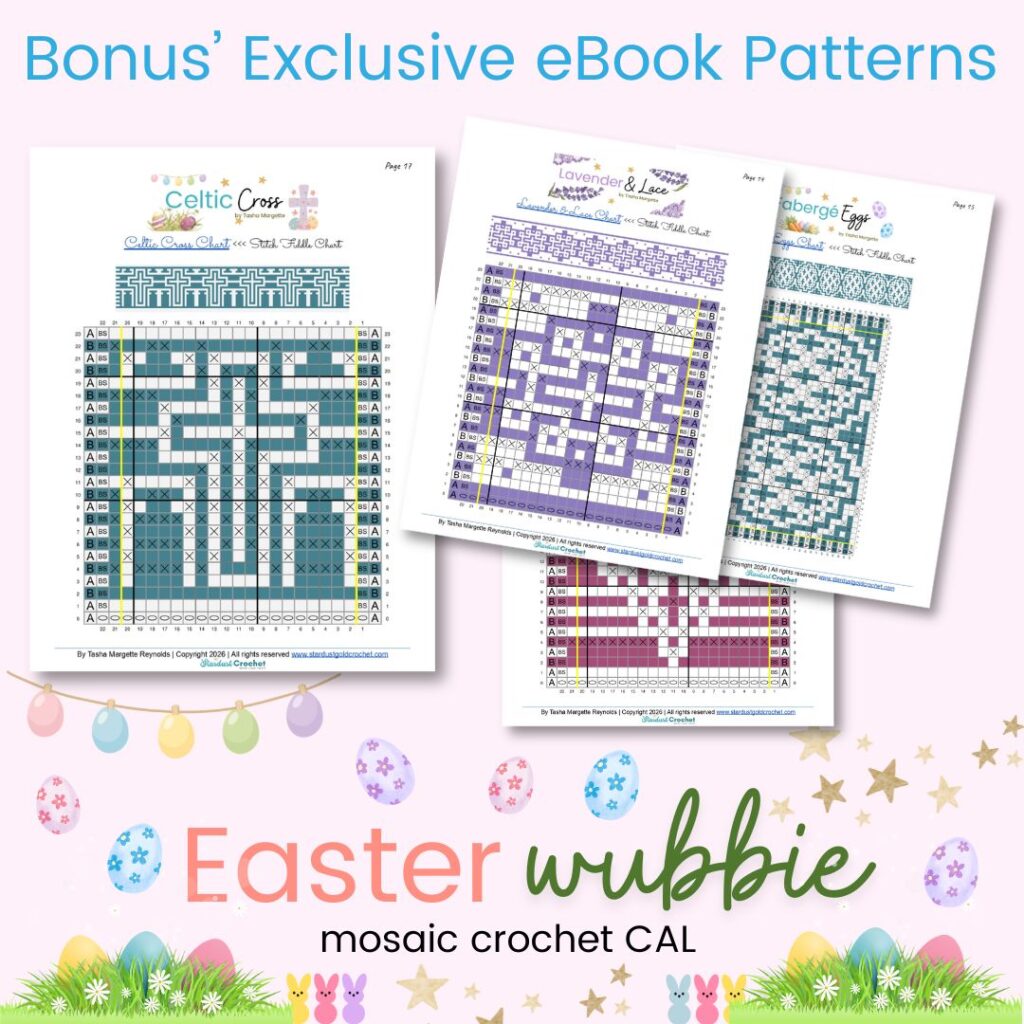
Table of contents
- How the CAL Works
- Get the Easter Wubbie Mosaic Crochet Blanket EBook and Work at Your Own Pace – Available for pre-sale -Friday, March 13th – March 15th 11:59 PM CST.
- GET THE EBOOK HERE.
- Grab The Yarn
- How to Do Overlay Mosaic Crochet
- Changing Colors Mid-row
- Learn to Change Colors
- Learn Mosaic Crochet Video Tutorial
- Overlay Mosaic Crochet Visual Guide
- Working the Written Pattern
- Joining The Strips – Work As You Go Method
- Creating the Border
- Easter Wubbie Mystery Mosaic Crochet Blanket Patterns – Free Crochet Along
- Thanks Friends!
Grab The Yarn
All About the Yarn 🧶…
I used a combo of yarns to get the colors I thought looked pretty – including I Love This Cotton and Yarnsmiths Create. Below I listed the colors in I Love This Cotton with an alternative for the green – because I used Yarnsmiths for green in my samples.
Materials & Notions
Suggested Yarn: I used 4-weight yarn (I Love This Cotton). Here’s the full rundown:
I Love This Cotton by Hobby Lobby – Fiber: 100% Cotton Weight: #4 Medium Skein: 3.5 oz (100g) / 180 yards (165m) Care: Machine wash warm, tumble dry normal, low iron, do not bleach. You can find it at Hobby Lobby Origin: Made with US-grown fibers.
Alternate Yarn – Premier has cotton in amazing colors too if you don’t have access to a Hobby Lobby.
- Hook Size: 5 mm (US H)
- Scissors
- Darning Needle
Estimated Yardage:
To make the Wubbie Size these are recommendations
- 4-5 Skeins – White (Color A)
- 3 Skein – Bright Green or Premier (Color B MC)
- 1 Skein – Pink
- 1 Skein – Aqua
- 1 Skein – Buttercup or Curry
- 1 Skein – Amethyst
Sizes / Finished Measurements:
Approximately 45″ wide x 42″ tall (about 114 cm x 107 cm) – without border.
Gauge:
Approximately 14 sts × 17 rows (in overlay mosaic) = 4″ x 4” (10 x 10 cm) with H/8 (5.0 mm) hook.
How to Do Overlay Mosaic Crochet
What is Overlay Mosaic Crochet?
Overlay mosaic crochet is a specific type of mosaic crochet where you work with two contrasting colors, but only one color per row. The magic happens by using a combination of single crochet (BLOsc) and front loop only dc (FLOdc) stitches to create the design.
The FLOdc stitches are worked two rows below your current row, allowing the contrasting color from previous rows to peek through, creating the mosaic effect.
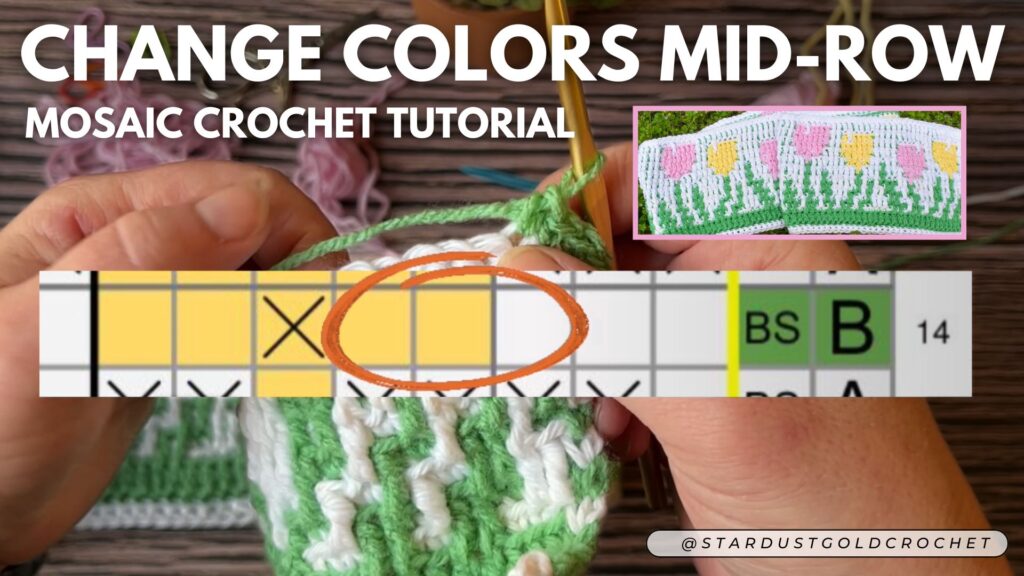
Changing Colors Mid-row
Someone brought this up today and I’d thought I would touch on it. So, in this example, the tester uses various colors instead of just two colors – which is a little more complicated and takes a little more forethought.
Learn to change colors mid-row here in this How to Change Colors Mid-Row on Mosaic Crochet Tutorial.
Learn to Change Colors
Creating a multi colored mosaic can be achieved in various ways. Here they are:
- Since in mosaic we have 2 main colors (contrasting color and main color), you’ll want to follow the A and B on the chart but replace your contrasting color with the color of your choice. (you can see from the mushroom image below that she uses green and tan in the same row.)
- How to achieve it. Either carry both colors inside the stitches and pull it up as you need it by changing our the last part of your stitch with your new color as in traditional color changes.
- Or you use your main contrasting color and add your new color as needed (like the stem of the mushroom below), which looks like she added the color as needed without carrying it in the stitches. I say that because you can see that the green of the square motif and the bottom part of the stem overlap and are on the rows. So She either had to carry two yarns or add the stem yarn as she needed it.
- This will cause more tails to weave in, unless you carry them through.
I hope this helps and if you have any questions, please let me know.
Learn Mosaic Crochet Video Tutorial
Learn how to do mosaic crochet in video form >>> Mosaic Crochet Video Tutorial

Key Aspects Of Overlay Mosaic Crochet:
- One color per row: You cut the yarn after each row, then add the color to the beginning of the next row.
- No turning: You work each row from the right side (or “front”) of the fabric.
- Direction of Work: Right to left (can be worked left to right as well for the lefties out there!)
- Stitch combination: The interplay of BLOsc and FLOdc stitches creates the pattern.
- Charts: Overlay mosaic crochet patterns typically rely on charts to guide the placement of stitches and color changes, however, written patterns are also helpful.
Basic Mosaic Crochet Steps:
- Foundation chain: Start with a foundation chain (or chain + 1 for turning) in your main color. The number of chains will depend on the pattern.
- Border stitches: Most patterns begin and end each row with a border stitch (usually a single crochet placed diagonally into the V of the single crochet below to secure it).
- Follow the chart or written pattern: Use the chart to determine whether to work a BLOsc or a FLOdc in each stitch. Empty squares are BLOsc (regardless of what color the square is) and X’s are FLOdc regardless of what color the square is.
Tips for Success:
- Fixing mistakes: The beautiful thing about overlay mosaic crochet is it is easy to fix mistakes even from a few rows down. Simply untie the knot on the left side, rip back the first row, then do the same for the rows below until you reach the stitch you missed or made a mistake on. Fix it and finish crocheting the rows above.
- Read your chart carefully: Pay close attention to the symbols on the chart to ensure you’re working the correct stitches in the right places. Sometimes this can be confusing at first because the color of the square may not match – but trust the process.
Block your finished piece: Blocking will help even out your stitches and showcase the mosaic design.
Overlay Mosaic Crochet Visual Guide

Abbreviations
- FLOdc = front loop only double crochet
- BLOsc = back loop only single crochet
- ch(s) – chain(s)
- Bs – border stitch
- st (s) – stitch(es)
- yo – yarn over
- fsc – foundation single crochet
- RS – right side
[…] – Repeat inside brackets as many times as indicated.
Stitch guide ✨:
Bs – Border Stitch: It’s a single crochet stitch, placed between the V of the single crochet below. Insert your hook into the designated stitch or space. Yo and pull up a loop. Yarn over again and draw the yarn through both loops on the hook. (it’s a single crochet)
BLOsc = Back Loop Only Single Crochet: Insert your hook into the back loop only of the designated stitch. Wrap the yarn over your hook and pull up a loop. Yarn over again and draw the yarn through both loops on the hook.
FLOdc = Front Loop Only Double Crochet (aka drop down double crochet): Yo, insert your hook into the front loop only 2 rows down. Yo and pull up a loop. Yarn over and draw through two loops on the hook.
FUN TIP: Lately, I’ve been doing a front POST drop down double crochet because I think it looks a lot better.
New to Mosaic Crochet?
- If you are new to mosaic crochet head to the table of contents to find the tutorials (at end of the eBook – full of links and tutorials to learn how to do mosaic crochet).
Personalizing Your Blanket
The great thing about these patterns is you can create a blanket as large as you’d like and as small as 41 stitches wide! Mix and match motifs. Create something truly unique!
Starting the Blanket
The blanket is 155 stitches wide – when the pattern is released on Monday – I’ll update everyone in the Crochet Along With Us group and you can ask questions there too!
Want to add or delete repeats?
Repeat the area between the yellow lines. When you get the number of repeats you’d like, complete the last stitch + the border stitch to finish it off.
To customize the size, use the graph below:
- Repeat only the stitches between the yellow lines for the body of your project.
- To adjust the width, multiply the number of stitches between the yellow lines by the number of repeats you want, then add 3 stitches to your foundation chain.
- After completing your repeats, work the final two stitches shown at the end of the graph to finish the edge.
Notes:
- Worked flat from R – L (L-R if left handed)
- No turning, all worked on RS.
- For 2 Color Patterns: Color changes each row – cut yarn after each row.
Multi-Color Changes Mid-row: If you like the multi-color, you can achieve that by changing colors mid-row (refer to the CHART for when to change).Similar to any color change midrow, you use bobbins or balls and bring up the color as needed, carrying it up and over and enclosing it. (I created a video for this) – check out the video links above.
Working the Written Pattern
Joining The Strips – Work As You Go Method
You can be as creative as you’d like between the strips by using bobble stitches, X stitches, V stitches, or any combo to add some flare to your Easter Wubbie blanket. It’s completely up to you!
The most common way is to create a row of double crochet between the strips (keeping it simple) or just continue the strips one after the other.
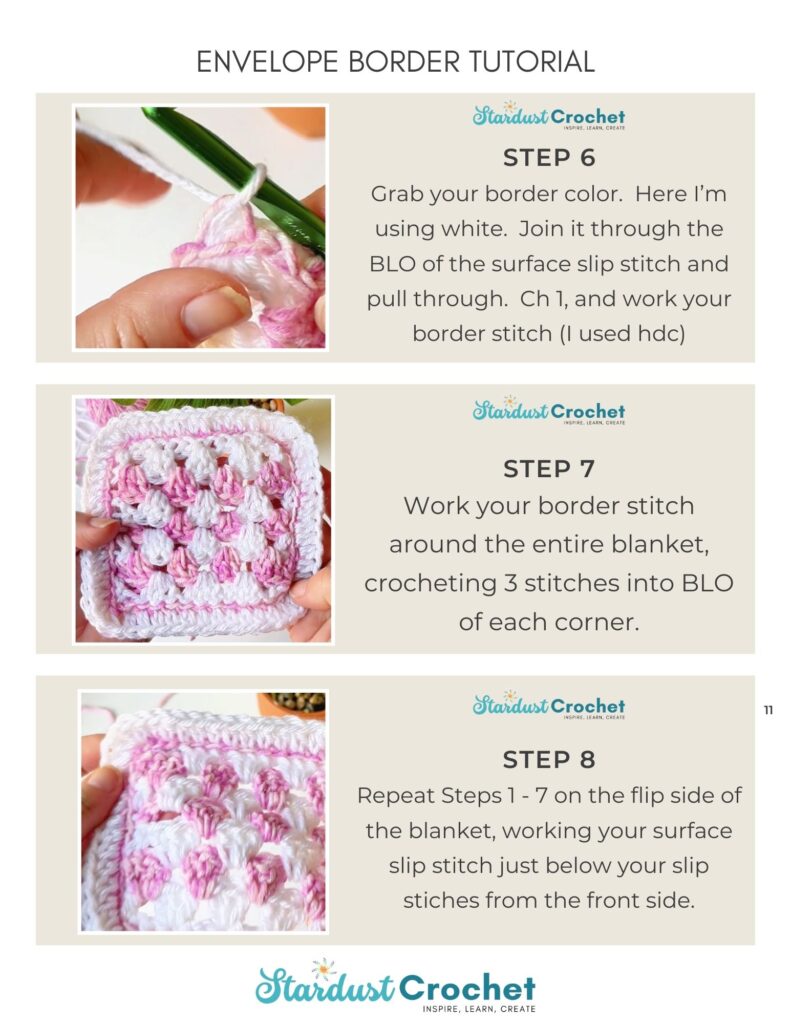
Creating the Border
There are several ways to create borders for mosaic crochet patterns. We will go into more detail about border towards the end of the crochet along.
Because we are changing colors each row, it tends to leave a lot of tails. Here are 3 common ways to avoid weaving in all the tails:
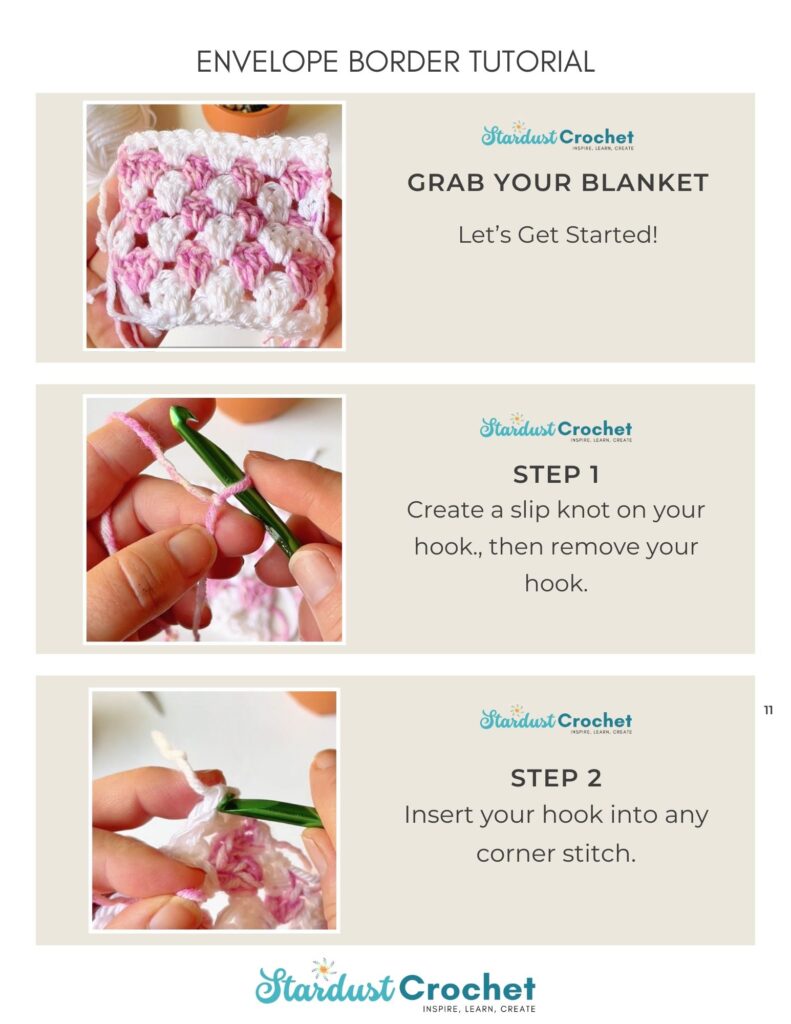
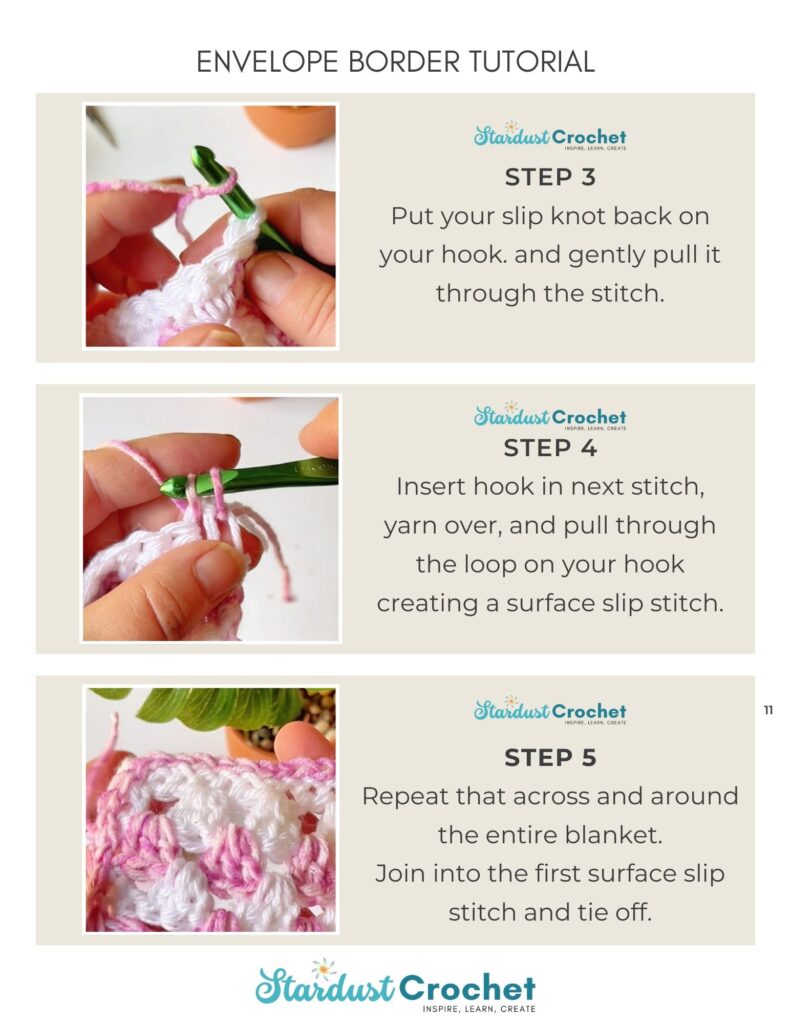
- Envelope Border
- An envelope border encloses the tails by creating a surface slip stitch around the edge and then working a double crochet stitch into each back loop of the surface stitch. Then repeating that other side. Then join both flaps with a sc or hdc.
- Creating a Beginning, Before & After Border
- You can create a simple border by single crocheting 5 or 6 rows of single crochet (as seen below). Then begin your chart pattern 5-6 stitches in from the side. Leave 5-6 stitches at the end too. When you finish the last section, crochet 5 or 6 rows above the last row of the chart. This method allows you to hide the tails as you work.
- Tying the tails into tassels
- This is a simple method of tying the tails together to create secure tassels (as seen below)
Easter Wubbie Mystery Mosaic Crochet Blanket Patterns – Free Crochet Along
Here you will find links to ALL 3 sections of the blanket. Each are FREE on the blog – If you want to purchase the ebook, you can do that too – and get all 7 patterns!
Easter Wubbie Mystery Mosaic Crochet Blanket
Welcome to the Easter Wubbie Mystery Mosaic Crochet Blanket CAL! Here you will find all the FREE patterns int he CAL - Check back every Monday starting March 16th with the final pattern being released on March 30th. Border pattern will be released that day too!
Peek-a-Boo Bunnies Mosaic Crochet Pattern
Week 1 is here and so is this adorable Peek-a-Boo Bunny Mosaic Peeps inspired pattern. It's a free pattern on the blog, head over, grab your hooks and let's start crocheting!
Easter Eggs Mosaic Crochet Pattern
Week 3 is here and these beautiful Bloomin' Tulips Mosaic crochet pattern. It's a free pattern on the blog, head over, grab your hooks and let's start crocheting! Thanks for joining the CAL! There is a layout of the full blanket design in this post too!
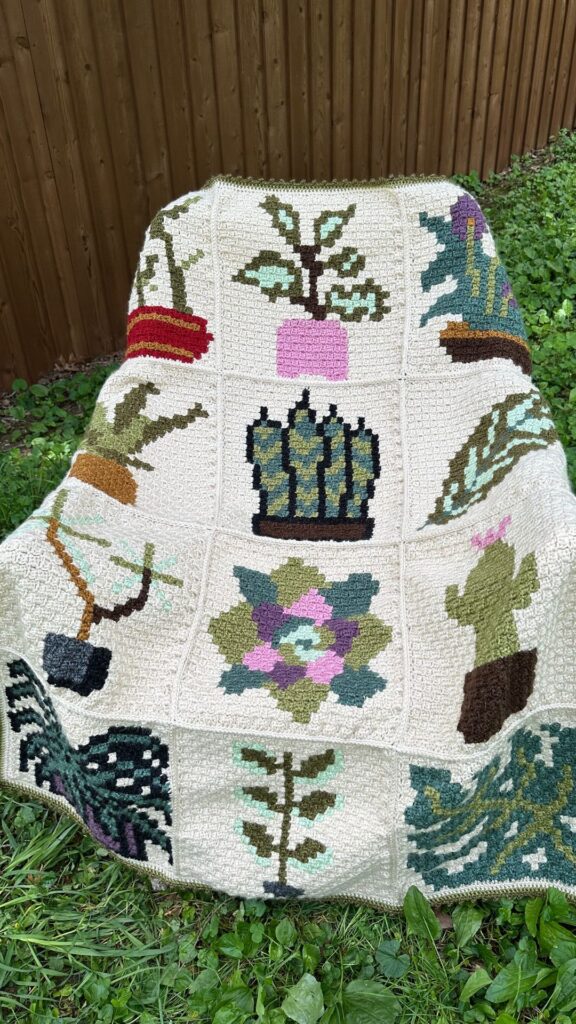
Collaboration Designer Crochet Blankets You May Like


Crochet Pattern Support
I hope you enjoy this easy pattern. Pattern support? Head over to Stardust Gold Crochet & Friends.
- If you are looking for a drama-free crochet group, check out my pattern support group, Stardust Gold Crochet & Friends
- We have fun and share crochet patterns, stories, and courses; you can ask me about any pattern in my library for support.
Thanks Friends!
Thanks so much for being here and I hope you enjoy the crochet along!


Hello, just wondering what a “wubbie” is?Thank you,Patricia