


It’s so exciting to finish and pattern and share it with you! In this comprehensive guide, I will walk you through the steps on how to crochet potholders using this fun and simple gingham plaid technique.
Crocheting gingham plaid potholders adds a touch of classic charm to your kitchen decor while providing essential heat protection. .
From selecting the right yarn and colors to mastering the stitch pattern, you’ll be able to create beautiful and practical potholders that are sure to impress.
We will walk through the basics of what you need to get inspiration first and understand what we will cover in this post and you’ll learn how to crochet your own potholders.
Table of contents
If you need pattern support, please feel free to head over to my Facebook group Stardust Gold Crochet & Friends.
Want the written pattern?
If you prefer a written pattern PDF, I have you covered. The Ad-FREE PDF is available in the Infinite Yarniverse, Ravelry & Etsy.
Gingham Plaid Video Tutorial
If you are a visual learner, there is a full video tutorial for you – jump to the video.
Let’s get started!
Gathering Your Materials:
Discover the essential tools and materials you’ll need to create your potholder, including heat-resistant yarn options, crochet hooks, and color choices that will bring your plaid pattern to life.
Choose Your Stitch Pattern:
- Explore different crochet stitch patterns suitable for gingham plaid designs.
- While the corner-to-corner (C2C) stitch is a popular choice, I will also explore alternatives such as tapestry crochet or doubling up yarns crochet to achieve your desired look.
Master the Color Changes:
- Learn the technique of switching colors to create the iconic gingham plaid effect.
- Understand color placement, weaving in ends, and maintaining an even tension throughout your project for clean and professional results.
Follow the Chart or Written Instructions:
- Whether you prefer following visual charts or step-by-step written instructions, I will guide you through both methods.
- Choose the approach that suits your style and comfort level to confidently create your gingham plaid potholders – although their is a full written pattern using the single crochet stitch.
Customize Your Design:
- Explore different color combinations, sizes, and variations them unique.
- Add decorative edging or experiment with additional stitch patterns to put your personal touch on the final product.
Finishing Touches:
Complete your project by properly securing loose ends, blocking your project for a polished look, and ensuring the durability of your handmade creations.
Crocheting potholders allows you to combine functionality with timeless style in your kitchen.
With the help of this step-by-step guide, you’ll be equipped with the knowledge and inspiration to create beautiful and practical potholders that will be cherished for years to come.
How to Crochet Plaid
Let’s take a deep dive into what plaid is and the different types of plaid there there are out there, also the different ways you can crochet plaid.
Crocheting plaid is not as hard as it seems.
There are several different ways you can achieve a plaid look to add flair to a crochet scarf, blanket, beanie, table runners, placemats, or just about anything!
Buffalo Plaid VS Gingham Plaid
Did you know the only difference that distinguishes crochet buffalo plaid from crochet gingham plaid is the colors!
- Buffalo plaid is created using red & black yarn with a hue of red that is a mix between red and black, i.e. maroon colored yarn.
- Gingham plaid is created using white yarn with complimentary hues of ANY two colors, i.e. dark pink & light pink (as seen in pics above).
So as you see, there isn’t much of a difference except the base color for buffalo plaid is black and the base color for gingham plaid is white or any other light color (like light yellow, light pink, light orange, etc.)
Different Ways To Crochet Plaid Patterns
- Tapestry crochet to create blocks of color – tapestry crochet uses single crochet, which makes it great for beginners.
- C2C creates blocks easily to create crochet plaid.
- Using two different colors and doubling up the yarn – like using white & blue, dropping one color and picking up the rest.
I will be discussing method three in another post – because I have a beautiful gingham plaid placemat pattern coming out in the next few weeks too!
How Crochet Plaid is Created
Crochet plaid is created by using two contrasting shades of the same color and pairing it with either black or white.
As seen below, we are using black, with grey & white – OR – a dark pink, light pink, and white.

Buffalo plaid uses black, paired with a light cherry red and a darker red.

There are also different fun forms of plaid to discover in crochet and all of them are so much fun. In this post we’ll focus on the basics and creating a beautiful gingham plaid project.
Let’s get into what you need to know about creating a perfect crochet potholder.
Important Things to Consider When Crocheting Potholders
When you start creating crochet designs made for the kitchen, you want to consider a few things and make sure you don’t deviate or t can cause injury.
Here are a few things to consider…
Heat Resistant:
- Potholders need to provide effective heat protection.
- Single crochet helps create close stitches create a barrier that offers insulation and reduces the risk of burns.
Stability:
- They should be stable and maintain their shape even when handling hot items.
- The single crochet & thermal stitches produce a sturdy and firm fabric, ensuring that your potholders retain their shape and structure over time.
Durability:
- Potholders are subjected to frequent use and washing, so durability is crucial.
- Choosing the right stitch and yarn play a big role is durability.
What is the best yarn for crochet potholders?
When selecting the yarn, it’s important to consider both heat resistance and durability. Here are some factors to keep in mind when choosing the best yarn for crochet potholders:
- Use appropriate heat-resistant yarns.
- Consider creating two pieces and stuffing them with insulating materials for added protection.
- Safety always comes first.
Heat Resistance:
- Natural fibers such as cotton, linen, and hemp are known for their heat resistance and are often favored for potholders.
- These fibers can withstand high temperatures without melting or releasing harmful fumes.
Absorbency:
- Crochet hot pads may come into contact with moisture or liquids while in use, so choosing a yarn that absorbs moisture well is beneficial.
- Cotton is highly absorbent and can help protect your hands from hot liquids or steam.
Durability:
- Potholders undergo frequent use, washing, and rubbing against hot surfaces, so durability is essential.
- Opt for yarns that are sturdy and can withstand wear and tear.
- Look for yarns with a tight twist or consider using multiple strands for added strength.
Easy Care:
- Potholders can become soiled with food stains and spills, so choosing a yarn that is easy to care for and machine washable is convenient.
- Check the yarn label for washing instructions and ensure that it can withstand repeated washing without losing its quality.
Thickness:
- Potholders require a certain level of thickness to provide effective heat insulation.
- Choose a yarn that is suitable for the project’s gauge and provides enough thickness to protect your hands from heat.
Recommended yarn options for crochet potholders include:
- 100% cotton yarn: It is a popular choice due to its heat resistance, absorbency, and durability. Look for options such as Lily Sugar ‘n Cream, Peaches & Creme, or Bernat Handicrafter Cotton.
- Linen or hemp yarn: These natural fibers have similar heat-resistant and absorbent qualities to cotton and can be used for potholders.
- Blends: You can also consider yarns that combine natural fibers with synthetic fibers such as acrylic or nylon for added durability and easy care.
Remember to avoid using yarns that contain acrylic or other synthetic fibers alone, as they can melt or release toxic fumes when exposed to high heat.
Ultimately, the choice of yarn for crochet potholders depends on your personal preferences, availability, and the specific qualities you prioritize.
Consider the heat resistance, durability, absorbency, and care instructions when selecting the best yarn for your project.
Here are some great yarns that are 100% Cotton or Cotton / Linen blends


Is acrylic yarn safe for potholders?
No, acrylic yarn is not recommended for potholders that will come into direct contact with heat.
Acrylic yarn is a synthetic fiber that has a lower melting point compared to natural fibers like cotton, linen, or hemp.
When exposed to high temperatures, acrylic yarn can melt or release toxic fumes, posing a safety hazard.
Your safety is paramount, so it’s important to select yarn that can withstand high temperatures without melting or releasing harmful fumes.
What is the best stitch for crochet potholders?
This one is under debate! But it seems like there are 3 really great stitches for crochet potholders.
- Single Crochet – the single crochet creates a thick fabric that doesn’t let the heat slip through.
- Thermal Stitch – this stitch is a single crochet with a twist
- C2C Stitch – corner to corner crochet also provides a nice tight stitch.
Let’s go a little more into detail about these:
Single Crochet Stitch:
The single crochet stitch is commonly used for potholders due to its tight and dense fabric, which offers several advantages for this specific application. Here’s why the single crochet stitch is well-suited for potholders.
- Single crochet creates a thick fabric
- It’s versatile
- Beginner stitch making it easy!
Remember that the thickness, stability, and heat resistance of the single crochet stitch make it particularly suitable for potholders.
Thermal Stitch
df
The thermal stitch is a great option for creating a gingham plaid effect in crochet because of its texture and versatility. Here are a few reasons why the thermal stitch works well:

- Raised Texture: The thermal stitch creates a raised and textured fabric, which adds depth and dimension to your crochet project. This textured surface mimics the appearance of woven fabric, making it ideal for imitating the look of gingham plaid.
- Reversible Design: The thermal stitch produces a fabric that looks attractive on both sides. This is beneficial for potholders since they often get flipped and used on both sides. With the thermal stitch, your gingham plaid pattern will be visible from both the front and back of the potholder.
- Two-Color Effect: The thermal stitch allows you to easily incorporate two colors, which is essential for achieving the contrasting blocks of color.
- Stability and Thickness: The thermal stitch creates a dense and sturdy fabric that is well-suited for potholders.
- Added Insulation: The texture of the stitch also adds an extra layer of insulation, making it even more effective at protecting your hands from hot surfaces.
Remember, the choice of stitch pattern is ultimately a matter of personal preference. If you enjoy the texture and look of the thermal stitch, it can be a fantastic choice for creating gingham plaid crochet potholders. However, feel free to experiment with other stitch patterns and techniques to find the one that best suits your style and desired outcome
C2C Stitch:
The C2C (corner-to-corner) stitch is a popular choice for potholders for several reasons:
- Thickness and Heat Resistance: The C2C stitch creates a dense and thick fabric due to its diagonal construction.
- Versatility: The C2C stitch allows for versatility in design and color. You can easily incorporate different colors to create gingham plaid or other patterns, giving your potholders a unique and customized look.
- Stability and Durability: Potholders require stability and durability to withstand frequent use and washing. The C2C stitch creates a solid and sturdy fabric that holds up well over time. The diagonal structure of the stitch provides added stability and prevents the potholder from stretching or losing its shape.
- Reversible Design: The C2C stitch produces a reversible fabric, meaning the design is visible on both sides. This is particularly useful for potholders as they often get flipped and used on both sides. With the C2C stitch, your potholders will have an attractive design on both the front and back.
- Customizable Size: The C2C stitch allows you to easily adjust the size of your potholders. You can start with a small square and continue increasing until you reach the desired dimensions. This flexibility enables you to create potholders of different sizes based on your needs.
Overall, the C2C stitch combines thickness, versatility, stability, and reversible design, making it a favorable choice for crochet potholders.
Now that you have all the tools and hopefully a lot a great ideas to create your project, let’s get down to crocheting these amazing gingham plaid potholders!
Here is what I used and the complete written pattern with a full video tutorial too.
How to Crochet Plaid Potholders
All About the Yarn…
This 100% cotton yarn has a lovely feel to it and it is very durable! I’ve been using my potholders and they stand up well to resisting stains too, which is a plus!


PATTERN:
Materials & Notions
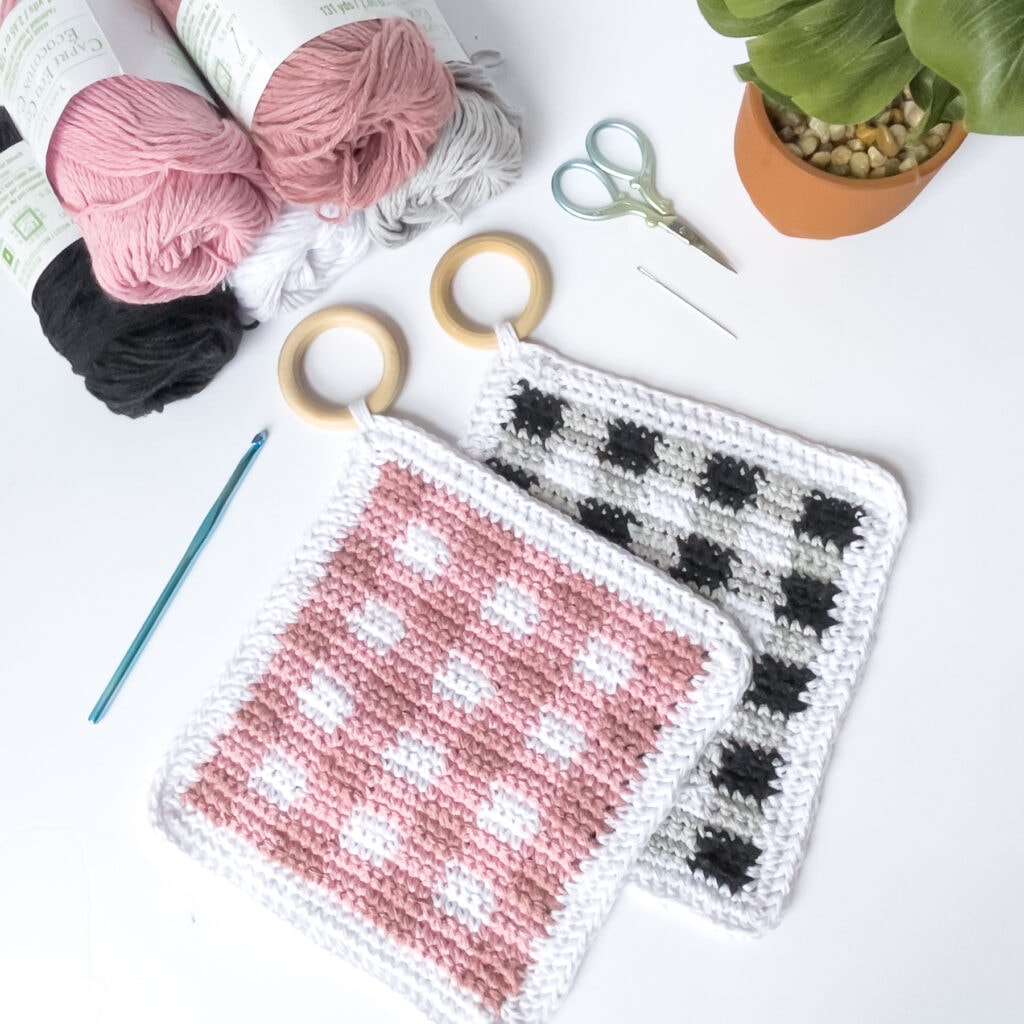
Suggested Yarn: Capri Eco Cotton Pink (White, Rose, Pastel Pink) Black & White (White, Black, Pewter), 85% Recycled Cotton/15% Polyester, 131 yds (120m), 2.65 oz (75g).
Colorways + Charts
| Pink & White | C1 – White | C2 – Rose | C3 – Pastel Pink |
| Black & White | C1 – White | C2 – Black | C3 – Pewter |
Yardage Needed: Approximately 17 – 20 total yards using the recommended yarn, including border.
Black (Dark Pink) 5.5 yds, White 4.5 yds, Gray (Light Pink) 8 yds.
- Hook Size: 5 mm (USA H8)
- Scissors
- Darning Needle
- Flexible Measuring Tape
- 1.5 – 2” Wooden Ring (Optional)
Gauge:
16 sts x 16 Rows = 4” x 4” (10 x 10 cm)
Sizes / Finished Measurements:
One size, you can create a larger or smaller pot holder by changing hook size or yarn size.
Dimensions: 7.75″ (19.68 cm) tall x 7.25″ (18,41 cm) wide.
Abbreviations
- Ch (s) – Chain (s)
- Sc – Single crochet
- Sk – Skip
- St (s) – Stitch(s)
- * – Repeat from * as many times indicated.
- Yo – Yarn over
- Hdc – Half double crochet
- Lhdc – Linked half double crochet
Stitch guide:
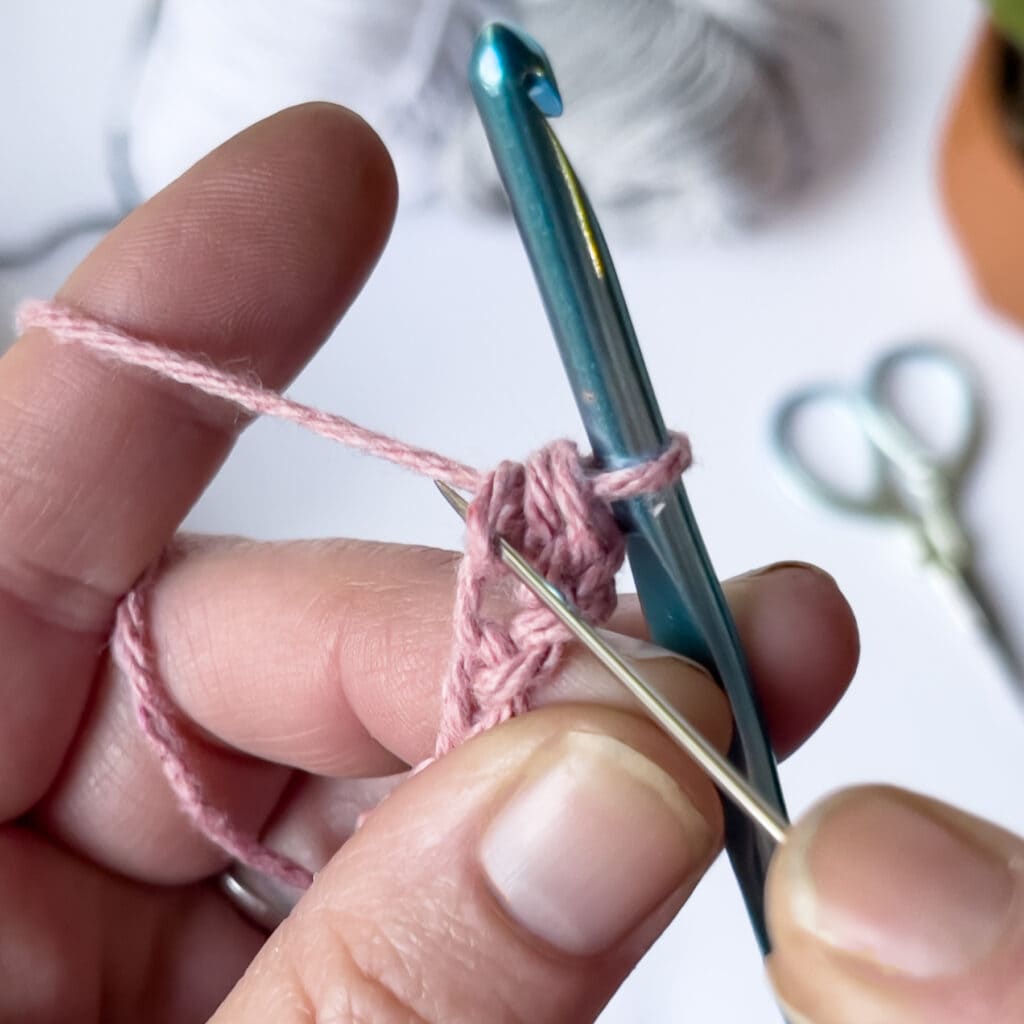
Sc – Single Crochet: Insert hook in indicated stitch, yo, draw up a loop, yo, draw through both loops on hook.
Hdc – Half Double Crochet: Yo, insert hook in indicated stitch, yo, pull up a loop, yo, pull loop through three loops on hook.
Special Stitches:
Lhdc – Linked Half Double Crochet: (see pictorial) Insert hook in bottom vertical bar of previous hdc, yo, pull up a loop, insert hook in indicated stitch, yo, pull up a loop, yo pull through all loops on hook.
Pattern Notes (please Read):
- Worked in rows, with a border.
- Carry unworked yarn when possible – see video Gingham Plaid Crochet Potholder Video Tutorial for tips & tricks on carrying yarn for this pattern.
- Ch1 & Turn at the end of each row unless otherwise indicated.
- Pattern works in multiples of 8 + 5, this will give you the same color at the start and end of your rows.
GINGHAM PLAID CROCHET POTHOLDERS PATTERN:
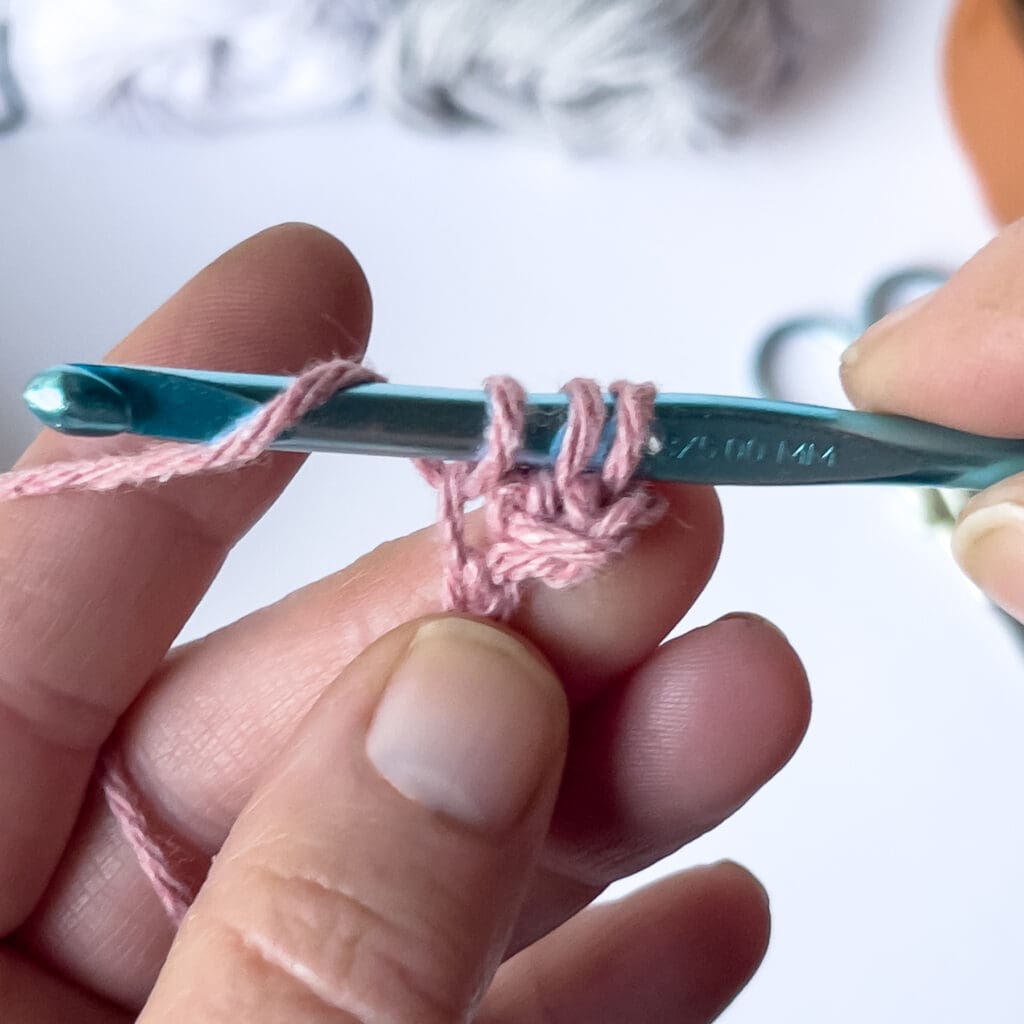
With C1, chain 29.
Row 1: (C1) Sc in 2nd chain from hook and across, finish last stitch with C2 – 28 sc.
Row 2: (C2) Sc 4, (C3) sc 4, repeat from * across, ending with 4 sc in (C2) – 28 sc.
Row 3 – 4: Repeat Row 2.
Row 5: *(C3) Sc 4, (C1) sc 4, repeat from * across, ending with 4 sc in (C3) – 28 sc.
Rows 6 – 7: Repeat Row 5.
Rows 8 – 10: Repeat Row 2
Rows 11 – 13: Repeat Row 5.
Rows 14 – 16: Repeat Row 2.
Rows 17 – 19: Repeat Row 5.
Rows 20 – 22: Repeat Row 2.
Rows 23 – 25: Repeat Row 5.
Rows 26 – 28: Repeat Row 2
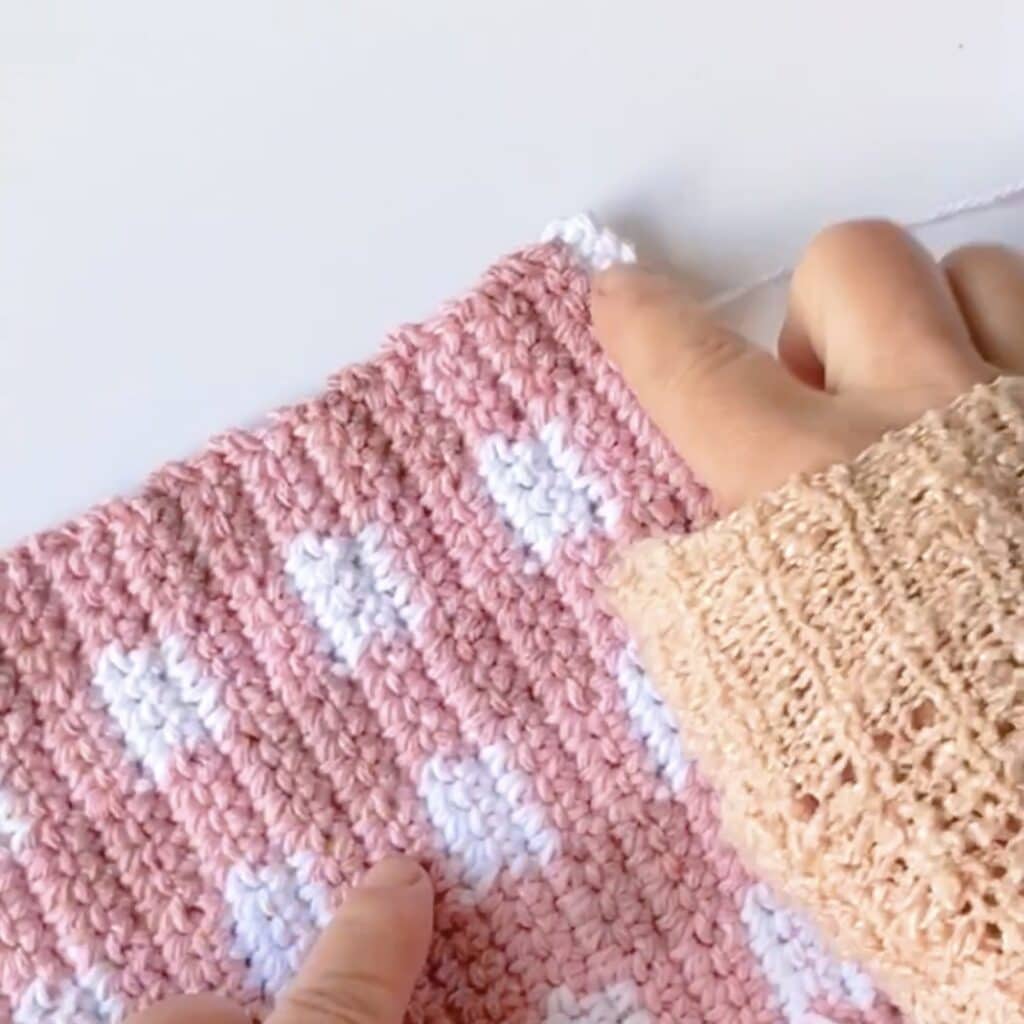
Cut and leave a long tail, enclose tails into the border. Weave in all other tails.
Border: (see Pictorial below)
Round 1: Turn your work so Row 1 is on top RS facing you. Attach yarn in the 1st sc of Row 1 (img 1), do not chain 1, (sc, ch 1, sc) in the same space. *Sc in each row/stitch across, (sc 1, ch 1, sc 1)** in the corner. Repeat from * 2 more times, end repeat at **, sc in each stitch across, (sc 1, ch 1) in the next corner, attach to the next sc of Row 1.
Stitch counts: 27 for sides 1 & 3, 28 for sides 2 & 4.
Round 2: Ch 1, hdc in same space, *lhdc in each stitch, (3 lhdc) in corner **, repeat from * 2 more times, end repeat at **, lhdc in each stitch across, 2 lhdc in corner, join to first hdc (cut yarn leaving a 15” tail).
Add a wooden ring with the remaining tail, wrapping around with your needles 4 times (instructions below.)
Finishing:
Thread your tail onto the darning needle. Put it through the center of the ring (1) and thread through the corner (2). Repeat steps 1 & 2 until you have 4 wrap arounds’ Weave in tails.


Round 2 Border Stitch Placement


Linked Half Double Crochet Stitch Tutorial
Insert hook in bottom vertical (1) bar of previous hdc, yo (2), pull up a loop (3), insert hook in indicated stitch (4-5), yo, pull up a loop (6), yo (7), pull through all loops on hook (8).


Congrats! You are finished!
We made it! Thanks so much for being here and learning how to crochet potholders with me today!
If you like this tutorial and want more…here are some more fun crochet patterns & tutorials you may enjoy:
Thanks again for being here and keep crocheting!


How to Crochet Potholders Video


How to Crochet Potholders (Gingham Plaid)
Learn to how to crochet potholders in this lovely gingham plaid style. Durable and fun to make. You will learn how to change colors, carry your yarn, and the linked half double crochet stitch!
Materials
- 1 Skein Each White, Dark Pink, Light Pink - Capri Eco Cotton™ Solid Yarn by Loops & Threads®
- 1.5" - 2" Wooden Ring
Tools
- 5 mm Crochet Hook (USA H)
- Scissors
- Darning Needle
Instructions
Materials & Notions
Suggested Yarn: Capri Eco Cotton Pink (White, Rose, Pastel Pink) Black & White (White, Black, Pewter), 85% Recycled Cotton/15% Polyester, 131 yds (120m), 2.65 oz (75g).
Colorways + Charts
Pink & White - C1 - White / C2 - Rose / C3 - Pastel Pink
Black & White - C1 - White / C2 - Black / C3 - Pewter
Yardage Needed: Approximately 17 - 20 total yards using the recommended yarn, including border.
Black (Dark Pink) 5.5 yds, White 4.5 yds, Gray (Light Pink) 8 yds.
- Hook Size: 5 mm (USA H8)
- Scissors
- Darning Needle
- Flexible Measuring Tape
- 1.5 - 2” Wooden Ring (Optional)
Gauge:
16 sts x 16 Rows = 4” x 4” (10 x 10 cm)
Sizes / Finished Measurements:
One size, you can create a larger or smaller pot holder by changing hook size or yarn size.
Dimensions: 7.75" (19.68 cm) tall x 7.25" (18,41 cm) wide.
Abbreviations
- Ch (s) - Chain (s)
- Sc - Single crochet
- Sk - Skip
- St (s) - Stitch(s)
- * - Repeat from * as many times indicated.
- Yo - Yarn over
- Hdc - Half double crochet
- Lhdc - Linked half double crochet
Stitch guide:
Sc – Single Crochet
Insert hook in indicated stitch, yo, draw up a loop, yo, draw through both loops on hook.
Hdc - Half Double Crochet
Yo, insert hook in indicated stitch, yo, pull up a loop, yo, pull loop through three loops on hook.
Special Stitches:
Lhdc – Linked Half Double Crochet
Insert hook in bottom vertical bar of previous hdc, yo, pull up a loop, insert hook in indicated stitch, yo, pull up a loop, yo pull through all loops on hook.
Notes:
- Worked in rows, with a border.
- Carry unworked yarn when possible - see video for tips & tricks on carrying yarn for this pattern.
- Ch 1 & Turn at the end of each row unless otherwise indicated.
- Pattern works in multiples of 8 + 5, this will give you the same color at the start and end of your rows.

PATTERN:
With C1, chain 29.
- Row 1: (C1) Sc in 2nd chain from hook and across, finish last stitch with C2 - 28 sc.
- Row 2: (C2) Sc 4, (C3) sc 4, repeat from * across, ending with 4 sc in (C2) - 28 sc.
- Row 3 - 4: Repeat Row 2.
- Row 5: *(C3) Sc 4, (C1) sc 4, repeat from * across, ending with 4 sc in (C3) - 28 sc.
- Rows 6 - 7: Repeat Row 5.
- Rows 8 - 10: Repeat Row 2
- Rows 11 - 13: Repeat Row 5.
- Rows 14 - 16: Repeat Row 2.
- Rows 17 - 19: Repeat Row 5.
- Rows 20 - 22: Repeat Row 2.
- Rows 23 - 25: Repeat Row 5.
- Rows 26 - 28: Repeat Row 2
Cut and leave a long tail, enclose tails into the border. Weave in all other tails.
Border:
Round 1: Turn your work so Row 1 is on top RS facing you. Attach yarn in the 1st sc of Row 1 (img 1), do not chain 1, (sc, ch 1, sc) in the same space. *Sc in each row/stitch across, (sc 1, ch 1, sc 1)** in the corner. Repeat from * 2 more times, end repeat at **, sc in each stitch across, (sc 1, ch 1) in the next corner, attach to the next sc of Row 1.
Stitch counts: 27 for sides 1 & 3, 28 for sides 2 & 4.
Round 2: Ch 1, hdc in same space, *lhdc in each stitch, (3 lhdc) in corner **, repeat from * 2 more times, end repeat at **, lhdc in each stitch across, 2 lhdc in corner, join to first hdc (cut yarn leaving a 15” tail).
Add a wooden ring with the remaining tail, wrapping around with your needles 4 times (instructions below.)
Finishing:
Thread your tail onto the darning needle. Put it through the center of the ring (1) and thread through the corner (2). Repeat steps 1 & 2 until you have 4 wrap arounds’ (as seen at >>> image to the right. Weave in tails.


Recommended Products
As an Amazon Associate and member of other affiliate programs, I earn from qualifying purchases.
-
 Capri Eco Cotton
 -
4 Pcs Sewing Embroidery Scissors with 4 Pcs Artificial Leather Cover 3.6 Inch Stainless Steel Stork Scissors Vintage Embroidery Scissors for Needlework, Manual Sewing Handicraft (Retro Colors)
-
OIATAIO-12 PCS Large-Eye Blunt Needles, Stainless Steel Yarn Knitting Needles, Sewing Needles for Hand Sewing, Crafting Knitting Weaving Stringing Needles, Perfect for Finishing Off Crochet Projects
-
Susan Bates Crochet Hook Set SZ G6-K105, Sizes G6/4mm to K10.5/6.5mm


