

Are you eager to learn how to crochet a perfect beanie? Look no further! In this comprehensive tutorial, I will guide you through the process of creating your very own crochet beanie.
This tutorial is perfect, whether you’re an experienced crocheter or an absolute crochet beginner.
This easy pattern, complete with pictures and a video tutorial, will help you craft a beautiful beanie in no time.
There is a link to a free crochet hat pattern included in this post along with more basic beanie pattern links and step by step instructions on how to create your own easy hats from scratch.
Full Beginner Crochet Beanie Video Tutorial
Head over to my YouTube channel to see the full video tutorial.
Table of contents
- Full Beginner Crochet Beanie Video Tutorial
- Crochet Beanies: A Wardrobe Essential
- Common Questions You May Have about Beginner Beanies
- Is Creating A Crochet Beanie Difficult?
- Can I Create One To Fit My Head Perfectly?
- What Crochet Stitch Is Best For A Beanie?
- Popular stitches for beanies include:
- How Do I Customize A Beanie For The Perfect Fit?
- Is A Beanie Easy To Crochet For Beginners?
- Can You Finger Crochet A Beanie?
- Designing Your Own Crochet Beanie
- Supplies to Create the Perfect Beanie
- Step 1: Yarn and Hook Selection
- Step 2: Head Measurement
- Step 3: Choose Your Beanie Style
- Step 4: Start Designing Your Crochet Beanie Pattern
- Write down important aspects of your design like the following:
- Step 5: Start Crocheting Your Beanie
- Download Free Hat Size Chart
- Step 6: Finish Your Beanie
- Add Cute Bear Ears!
- Additional Tips for Customization:
- Finding the Perfect Crochet Hat or Beanie Pattern
- Free Crochet Beanie Patterns
- More Free Beanie Crochet Patterns…
Crochet Beanies: A Wardrobe Essential
Beanies are a classic and versatile accessory that everyone needs in their wardrobe. They are perfect for cold weather and make great gifts for family and friends too!
Whether you want a simple, basic beanie crochet pattern, crochet slouchy hat, or a cozy, chunky beanie, I’ve got you covered.
Plus, with these free beginner-friendly pattern and a step-by-step tutorial, you can create your own stylish hats with ease.
This is the perfect easy crochet project to get you started.
Common Questions You May Have about Beginner Beanies
Is Creating A Crochet Beanie Difficult?
- No, creating a beanie is not difficult, especially with beginner-friendly patterns and resources like this guide filled with simple techniques for a beginner crocheter.
Can I Create One To Fit My Head Perfectly?
- Yes, you can tailor a beanie to your head size by measuring and adjusting the number of stitches accordingly.
- Keep reading to discover exactly how to create an easy crochet hat pattern built just for you.
What Crochet Stitch Is Best For A Beanie?
While various stitches work, those with smaller repeats are ideal for easy size adjustments.
When designing your own crochet hat or beanie, you want it to fit snug, but not too tight or too loose.
A stitch with a small repeat is ideal for easy size adjustments; common choices include single crochet, half double crochet, and double crochet stitches.
Popular stitches for beanies include:
For an easy crochet beanie pattern it’s best to start using basic stitches.
- Single crochet
- Half double crochet
- Double crochet
- Puff Stitches
- Crossed Doubles
- Bobbles
How Do I Customize A Beanie For The Perfect Fit?
To achieve a customized fit – take good measurements. Hat size & hat height are important things to consider. Additional considerations include: yarn weight, stitch count adjustments, adding a brim, or incorporating earflaps.
Is A Beanie Easy To Crochet For Beginners?
Absolutely! However, everything can create a challenge if you are new to crochet. Using basic crochet stitches to start is the best way. The most challenging aspect of crocheting a beanie from scratch is getting your sizing right. Don’t worry though, this tutorial will help you get the perfect size.
Can You Finger Crochet A Beanie?
Yes, finger crocheting a beanie is possible, and patterns are available for this technique. Although I’m not too familiar with finger crocheting, typically, finger crocheted beanies are worked from the bottom up.
Designing Your Own Crochet Beanie
Here’s a breakdown of the essential steps to design your own beanie:
How Do You Start A Crochet Beanie?
- Top Down Method: You can start by creating a magic circle and begin working in the round.
- Bottom Up (No Brim): Most hats have a brim, but you don’t have to. You can create a foundation chain, and work a front post stitch around the bottom of the hat to create a faux brim. This works best for top down, but you can work it bottom up too by creating a foundation double crochet row, then working your front post stitches in every other stitch around – make sure you start with an odd number of stitches to start if you decide to create it this way.
- Brim (Bottom Up): Creating a brim using a simple crochet ribbing stitch works best, like chaining 7, then single crochet in the second chain from the hook, and across (6 sc). On the next row, chain 1, turn, and single crochet in the back loop only across, repeat that until you have about 1.5″ shy of your head circumference.
- I’ve found that a brim height of 1 – 2″ is perfect. Although you can make your brim as wide and tall as you’d like!
- Bottom up using a rectangle and brim: This method uses no decreases – this is where you crochet the same size from brim to top, then cinch the top closed using a yarn needle and it’s easy to create different sizes.
I use number 3 quite often because it is essentially the easiest way to create a beanie. This method is used for knit hats too.
Keep in mind that knit hats have more stretch, so the idea is to always create a crochet hat that is just an inch or two smaller than the circumference of your head, so when you place it, it will stretch and fit snugly.
Supplies to Create the Perfect Beanie
To begin your crochet beanie making journey, you’ll need a few basic supplies. Here is what you will need to get started.
- Yarn
- Crochet Hook: Choose a hook size that complements your yarn choice. Check the yarn label for recommended hook sizes.
- Scissors: For cutting yarn and finishing your project.
- Tapestry Needle: Used for weaving in ends and finishing touches.
- Flexible measuring tape (here is a great one!)
- Stitch markers (when working in the round, it helps to mark the first stitch of each round)
Step 1: Yarn and Hook Selection
- The choice of yarn and hook size will determine the look and feel of your beanie. Select the right type of yarn. For beginners the best yarn is a medium-weight (worsted – 4 weight).
- The hook size influences the beanie’s tightness; larger hooks create looser beanies, and smaller hooks make them tighter – it’s best to use the recommended hook size from your yarn label. Once you get more comfortable crocheting, you can try other yarn / hook sizes.
Step 2: Head Measurement
- Measure your head circumference about 2 inches above your eyebrows and follow it around and down the widest part of your head – or the person you are making the beanie for. This measurement is crucial for determining the number of stitches needed to start your crochet hat project. If you are making a beanie for someone else, use the printable crown and hat size chart to help!
Step 3: Choose Your Beanie Style
- Decide on the beanie style you want to create; options include beanies with brims, earflaps, or pom-poms.
- My recommendation is to start with an easy rectangle or top-down, or working in the round and then cinch the top. However, the pattern below will teach you how to work a beanie top-down using increases.
Step 4: Start Designing Your Crochet Beanie Pattern
Grab a pen and paper! This will come in handy for writing down measurements and doodling out your design.
Write down important aspects of your design like the following:
Number of stitches in the foundation chain
- How do I figure this out? – if you want to use a fancy crochet stitch for your beanie (one that contains multiples (like the shell stitch), check out my crochet stitch calculator to help you figure it out.
- It will determine how many chains to start depending on your stitch multiples)
Stitch pattern you want to use
- This comes back to what stitch you’re going to use. If you want to use simple stitches like a single crochet, it will be easier.
- However, if you want to get adventurous, try a linen stitch (you may need more crochet knowledge on working stitch repeats for that one!)
- To make it easier on you, I’d start with basic single crochet and move on to more advanced stitches later.
Number of rounds to crochet
This will take a little math-ing. See the guides below for hat sizes and crown sizes, then measure how many rows your stitch pattern has in the 4″ x 4″ swatch. Then do some math. Here is an example and some formulas.
- If your hat height is 7.5″ (excluding the brim). Let’s say your brim is 2″ tall. Then subtract 2″ from 7.5″ = 5.5″.
- For example, if your swatch has 10 rows in 4″ then use this formula to determine how many rows you’ll need.
- First, determine how many rows are in 1″ with this formula: 10 (Rows in Swatch Height) / 4 (Height of Swatch) = 2.5 (Rows in 1″)
- In our example, you have 2.5 rows per 1″. Your hat height need to be 5.5 inches…so this is what you’ll do.
- Multiply 2.5 (Rows in 1″) * 5.5 (Hat Height – Brim) = 13.5 (Total Rows) – keep in mind that this doesn’t include decrease rows, this is just the total number of rows.
- Creating a swatch is very helpful, but if you want to just get started, then do that, just start crocheting and measure as you go! (Easiest way in my opinion!)
Bottom Up Method for Increasing Stitches to Shape Your Beanie
- If you’re working a brim up pattern, once you finish the brim, you’ll begin crocheting the “hat height” which is usually just a few inches tall.
- Then begin decreasing to form the crown. This is easy to do with basic decrease stitches like single crochet 2 together (sc2tog), double crochet 2 together (dc2tog), and half double crochet 2 together (hdc2tog).
- If you choose to do a more complicated stitch pattern, you may need to come up with a creative decrease – like I did in the Winter Blush Beanie & Scarf.
Top Down Method for Increasing Stitches to Shape Your Beanie
(Top Down Pattern) – If you’re working a top down pattern (like the pattern below).
- Remember to mark the first stitch of each round if you are working continuous rounds without joins.
- Start with a magic ring / magic circle, or a chain 3 and work stitches in the first chain.
- Then in Row 2, work increases in each stitch around (single crochet 2 stitches into one stitch = 1 increase stitch).
- Each round after round 2, the number of increases per round equals the number of stitches you started with in round 1.
- Example: If Row 1 has 10 single crochet, then round 2 will double that with an increase in EACH stitch around. Then round 3 will begin increasing by 10 stitches each round. The formula for this below.
I was a very ambitious beginner crochet designer, but wasn’t quite thinking about it or planning it out ahead of time – especially for sizing. So grading (creating different sizes) for that pattern was quite a feat.
My pattern testers were so kind to help me work through the pattern and it turned out great!
Step 5: Start Crocheting Your Beanie
Grab all of your supplies (a worsted weight yarn & 5 mm crochet hook) and let’s get started! But before moving on to Step 6 – let’s practice by creating a practice beanie to give you an idea before you dive into crocheting your own design.
Here is a sample basic crochet beanie pattern you can use to practice.
Step-by-Step Instructions:
This beginner crochet hat pattern is for ABSOLUTE beginner crocheters to get your started. This written pattern uses single crochet stitches.
Skill Level: Beginner
Crochet Beanie Hat – Basic Pattern – Top down
After measuring your head and grabbing your favorite yarns…
- Create a magic circle – single crochet six into the ring (alternatively you can chain 3 and work the six single crochet into the first chain). Pull the ring tight. Join with a slip stitch (sl st) into the first single crochet (6 sc).
- Begin crocheting in the round – Single crochet in the next stitch (mark it with a stitch marker). Working in continuous rounds means you will not be using any chains and your project will be seamless.
- Increase stitches – Next, single crochet one more into the same stitch as your first single (you just created a single crochet increase – sc INC – by working 2 sc into the same stitch). Continue working 2 single crochet in each of the remaining stitches around – 12 sc.
- Continue increasing stitches – Take the stitch marker out, single crochet in that stitch (mark that stitch), then single crochet two in the next stitch. You will repeat that around (sc, sc 2 in next st) until you reach the stitch marker. You should end that row with a sc INC, if you don’t, count back and make sure you did the pattern correctly. (18 sc).
- Continue increasing each round – You will continue to create increase rounds using this formula. sc 1, sc in next 3 / sc 1, sc in next 4 / sc 1, single crochet in next 5, etc…until your beanie circumference measures as follows:
Stop increasing when the diameter of your circle measures the table above on where to stop increases.
Download Free Hat Size Chart
- Crochet without increasing – once you reach your desired circumference, you will simply work single crochet stitches (with no increase) for each subsequent round until your beanie measures the following height
- Create the Brim – once you reach the desired height, it’s time to make a brim. There are several ways you can do this. The first is to simply work a row of double crochet using a hook that is one size smaller than your chosen hook. This will create a tighter brim. Another way is to create a round of double crochet. Then on the next round, work front post stitches on every other stitch to create a ribbing effect. Be creative!
- Weave in the ends.
Tips for Making Adjustments:
- How to make a larger beanie, you can increase your hook size or start with more stitches in the first round. So instead of 6, start off with 8. To make a smaller beanie, start with fewer stitches in the first round.
- To make a beanie with a tighter fit, increase stitches in step 4 and 5. To make a beanie with a looser fit, increase stitches less often in step 4 and 5.
- Want a longer brim? Crochet an extra round on the brim.
- Creating a slouchy beanie – on the rounds where you are not increasing, create more rounds, that will increase the height and create a slouchy beanie.
Step 6: Finish Your Beanie
- After crocheting, weave in yarn ends and consider blocking to shape and enhance the appearance of your beanie.
If you’re curious about working a bottom up or even creating one with changing colors. Head over to the Basic Bottom up Beanie Formula pattern and explore how to create one using that method.
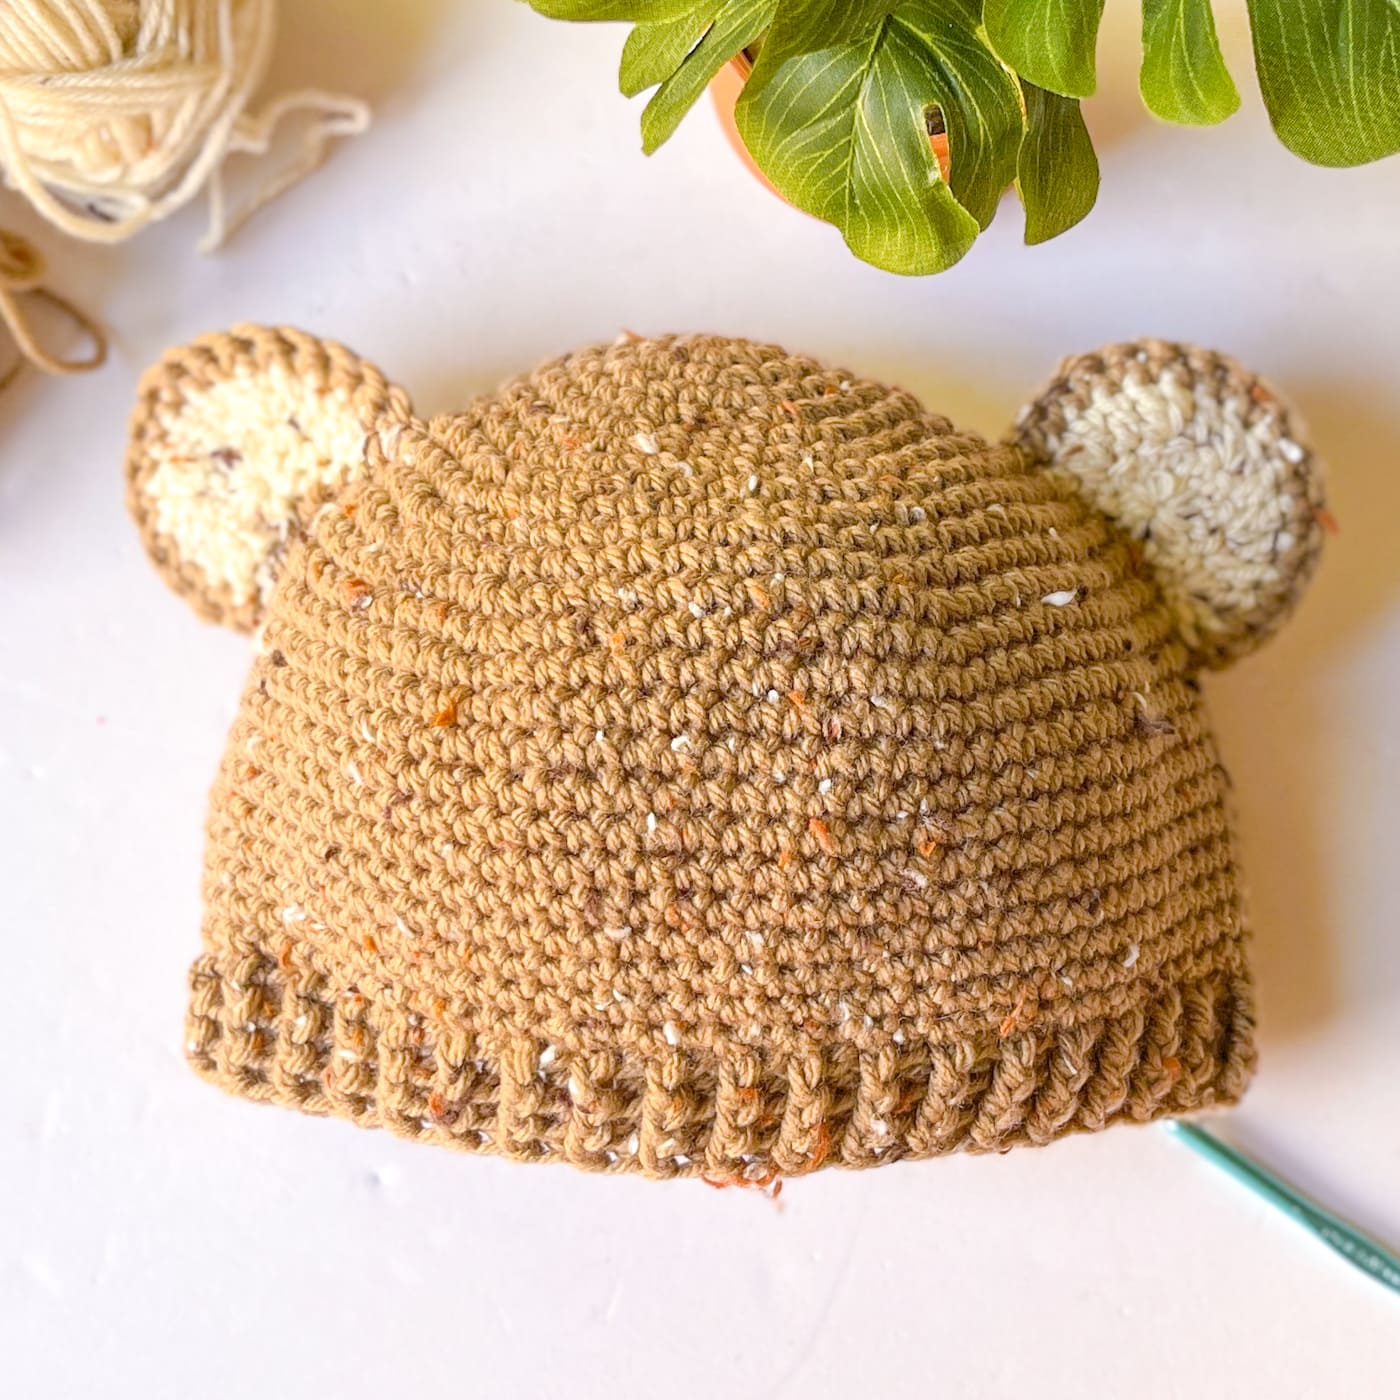
Add Cute Bear Ears!
After you finish, you can add some adorable cute crochet bear ears!
Additional Tips for Customization:
- Start with simple stitch patterns, such as single crochet or half double crochet, before experimenting with complex ones.
- Choose the appropriate yarn weight and desired style of your beanie.
- Continuously measure your beanie while crocheting to ensure a comfortable fit.
- Don’t hesitate to experiment with designs; there are no strict rules in beanie creation, be creative!
Finding the Perfect Crochet Hat or Beanie Pattern
If you would rather follow a crochet pattern to start, you can get some good practice by exploring some of the free crochet pattern projects out there.
There are countless options available, but if you’re new to crochet, it’s best to start with a simple and basic pattern. Look for patterns labeled “beginner” or “easy” to get started on the right foot.
Free Crochet Beanie Patterns
To get you started on your beanie-making journey, here are a couple of free crochet beanie patterns suitable for beginners:
- Simple Single Crochet Beanie: An easy and quick project that’s perfect for first-time crocheters.
- Chunky Ribbed Beanie: Stay warm and stylish with a cozy, chunky beanie that features a ribbed pattern.
More Free Beanie Crochet Patterns…
If you’re looking for some great unisex crochet hats or hats that more challenging, check out these posts:
Crocheting a perfect beanie is not only a fun and creative activity but also a practical way to keep warm during the colder months.
With the help of my hand-picked free crochet beanie patterns and beginner-friendly tutorial, you’ll be crafting beanies with confidence in no time.
So grab your yarn, hook, and let’s get started on your crochet beanie adventure!
Whether you’re new to crochet or an experienced enthusiast, designing your own crochet beanie is a fulfilling endeavor.
Follow these steps, and don’t hesitate to personalize your creation to suit your style and comfort preferences. Try adding some pretty flower motifs to spruce it up! Happy crocheting!


On the rounds where you continue to inc, is the pattern supposed to say 1 sc, 2 sc in the next 3, next inc-1 sc, 2 sc in next 4, etc.? Or am I missing something.
Hi! Thank you for the pattern. I’m having confusion about one of the steps. So, it’s around the beginning, the step after:Continue working 2 single crochet in each of the remaining stitches around – 12 sc.That one I managed fine, but moving on to:Continue increasing stitches – Take the stitch
marker out, single crochet in that stitch (mark that stitch), then
single crochet two in the next stitch. You will repeat that around (sc,
sc 2 in next st) until you reach the stitch marker. You should end
that row with a sc INC, if you don’t, count back and make sure you did
the pattern correctly. (24 sc).When I follow the sc, sc
2, sc, sc2… pattern, this doesn’t add up to 24 stitches at the end of
the row, there are 18. Did I do it right and it’s the 24sc that’s
wrong, or did I miss something?
Oh! I think I you’re right and it should say 18 because you’re increasing by 6 each round. So 12 + 6 is 18. I’ll change that. Thanks for pointing that out! typos suck!