


Welcome to the world of the Woven Worlds Mosaic Crochet Blanket! 🏡✨ This free pattern will help you create a cozy and unique blanket using a cool technique called overlay mosaic crochet. The Woven Worlds Mosaic Crochet Blanket is perfect to get started with mosaic crochet.
Get ready for a fun project filled with geometric designs, beautiful colors, and the satisfaction of making something special for your home. If you’re new to mosaic crochet, don’t worry, because there is so much support to help you learn the process, along with full tutorial videos.
You’ll learn how to use simple stitches and color changes to make a blanket you’ll treasure. Let’s begin! 😊
CROCHET ALONG DATES
- Starts April 28th and runs through July 14th (12 weeks to give us time and not rush!)
- Ebook Pre-sale starts April 14th and ends April 25th.
How It Works
Every Monday starting April 28th, 8 AM (PST) a new mosaic crochet blanket section will be released for FREE on the blog. We will crochet them together one a week (which gives us time to finish) for 12 weeks. Patterns 1 & 4 repeat on weeks 8 & 11, so no new design will be released those weeks.
Join the CAL Group on FB
Head over to the Crochet Along with US! group on Facebook to join in the conversation share your progress!
Get Notified
Sign up to get notified when each pattern drops! If you are already on the Stardust Gold Crochet list, you’ll get the updates.
I will send out an email every Monday, starting April 28th for reminders and to show my progress. I’ll also be posting progress pics and sharing your progress pics throughout (with your permission of course!)
- April 28th – Greek Tiles Geometrics – LIVE
- May 5th – Japanese Waves – LIVE
- May 12th – French Art Deco – LIVE
- May 19th – Greek Inspired Tiles No. 2 – LIVE
- May 26th – Mediterranean Inspired Mosaic – LIVE
- June 2nd – Celtic Hearts Ireland Inspired – LIVE
- June 9th – Ukrainian Inspired Mosaic – LIVE
- June 16th – Pattern 8 (repeat of pattern 4)
- June 23rd – South American Inspired Mosaic Crochet – LIVE
- June 30th – Middle East Inspired – LIVE
- July 7th – Pattern 11 (repeat of pattern 1)
- July 14th – Creating the Border – Scroll down!
Keep reading for more info about the yarn and how to prepare for the CAL
Get the Woven Worlds Mosaic Crochet Blanket EBook and Work at Your Own Pace
Pre-sale discounted price from April 14 – April 25 – Get the Woven Worlds Mosaic Blanket eBook! Learn mosaic crochet with this comprehensive guide, complete with tutorials and helpful resources.
The Woven Worlds Mosaic Blanket eBook includes:
- 9 Full Written Patterns & Charts
- 9 High Resolution Graphs
- Overlay Mosaic Crochet Tutorial
- Envelope Border Tutorial
- Border Ideas & Tutorial Links
- and more fun stuff!
- + FREE Bonus Pattern!
GET THE EBOOK HERE.
-OR- click the image below.

Table of contents
- CROCHET ALONG DATES
- How It Works
- Join the CAL Group on FB
- Get Notified
- Keep reading for more info about the yarn and how to prepare for the CAL
- Get the Woven Worlds Mosaic Crochet Blanket EBook and Work at Your Own Pace
- GET THE EBOOK HERE .
- Grab The Yarn
- Color Palette
- My Personal Color Choices
- How to Do Overlay Mosaic Crochet
- Learn to Change Colors
- Changing Colors Mid Row in Mosaic Crochet
- Learn Mosaic Crochet Video Tutorial
- Woven Worlds Mosaic Crochet Blanket Patterns – Free Crochet Along
- Get the Patterns HERE!
- Thanks Friends!

Grab The Yarn
Back in November when we crocheted the Cottagecore Mosaic Blanket, I partnered with Wool Warehouse for the yarn pack (link <<<). I fell in love with Yarnsmith’s Create yarn so much so that I ordered a LOT more in a ton of fune colors.
If you order the yarn from Wool Warehouse it comes pretty quick! So don’t worry, you can catch up quick. The prices are also super affordable and they are on sale right now!
I created this yardage based on using Yarnsmiths Create (DK). These are the yarn details: Skein Weight: 3.52 oz. / 100 g Yardage: 317.24 yd. / 290 m
The following is what I used to determine the average yardage using a DK weight and 4 mm hook.
The measurements I came up with for each stitch using a 4 mm hook are as follows:
- 3” (8 cm) per FPdc
- 1.5” (4 cm) per BLOsc, EBS and BBS
- 2” (5 cm) tails
Color Palette
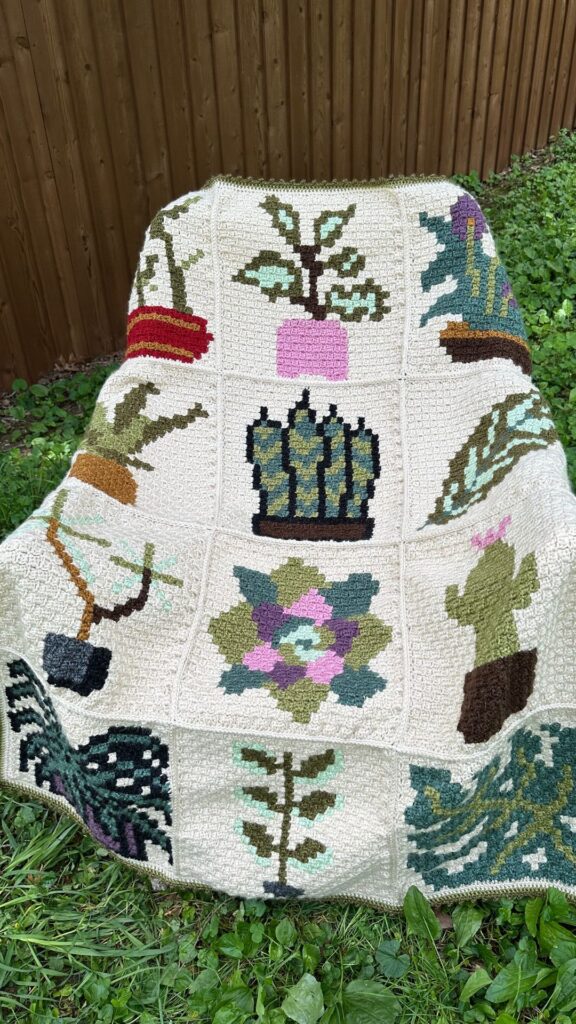
In the sample graphic below, you’ll notice I used rich earth tones. Then in the samples (which you’ll see as each blanket strip is released) –
Creating a blanket in royal earth tones is a beautiful way to blend luxury with the comforting essence of nature. Imagine wrapping yourself in a cozy, plush fabric that captures the quiet elegance of a serene forest or the grandeur of a majestic mountain landscape.
Choosing Colors:
The deep, rich hues of emerald green, sapphire blue, and opulent gold can evoke a sense of royalty, while earthy browns and warm terracottas ground the palette in the natural world. These colors together create a sophisticated yet inviting atmosphere, perfect for enhancing any living space.
Such a blanket not only offers warmth and comfort but also serves as a striking piece of decor that tells a story of the earth’s regal beauty and timeless grace. Whether draped over a sofa or spread across a bed, a royal earth-toned blanket can transform a room into a sanctuary of elegance and tranquility.
My Personal Color Choices
I used deep red, blue, brown, cream, and tan. You can use any colors you’d like to make your blanket completely unique. I highly recommend checking out Yarnsmith’s yarn selection because they have SO many colors. Remember to use contrasting colors to make the design POP!
I decided on these colors for my blanket but of course, you’re welcome to use whatever colors you’d like!

Estimated Yardage (using Yarnsmith’s):
Yardage & Skeins
I am going to play around with different color combinations and see what I like best!
- These estimates are for Yarnsmith’s DK weight yarn using 4 mm hook. These will vary depending on your yarn and hook choice of course.
- The following is the total yardage for the each color.
- White or off white and the contrasting color.
Total Yardage:
This can help if you want to use a self striping yarn or something similar. After this you’ll find each pattern breakdown and how many skeins per strip.
- Color A (MC – White): 1901 yds (1739 m) (without border) – approximately 6 skeins (without border) 7-8 (with border)
- Color B (CC – whatever you’d like): 1793 yds (1639 m) (without border) – approximately 6 skeins (without border) 7-8 (with border)
(You may want to add a few extra skeins for the border if you’d like to use the same colors.)
Reminder: These estimates are based on the length of stitch calculations above. Creating a swatch and measuring your stitch lengths may help you get a better idea of how much you’ll need to adjust. These yardages do not include the border either.
Individual Blanket Strip Yardage
If you want to use different colors for each strip, the approximate yardage for each skein is as follows using DK / 4 mm hook – the following are the individual blanket strips starting from #1 – #9 (pattern 4 & 8 are repeated in the blanket 2 times to create 11 total strips – the yardage below includes those totals)
| One Size Blanket with a starting of 227sts + 1 turning ch or 227 fsc A = Color A; B = Color B Pattern 1: A: 305.34 yds (279.22 m) (2 skeins) / B: 251.34 yds (229.78 m) (2 skeins) appears 2x in pattern in section 1 and section 11) Pattern 2: A: 128.67 yds (117.65 m) (1 skein) / B: 118.67 yds (108.49 m) (1 skein) Pattern 3: A: 153.25 yds (140.14 m) (1 skein) / B: 115.08 yds (105.23 m) (1 skein) Pattern 4: A: 243.50 yds (222.68 m) (1 skein) / B: 224.83 yds (205.54 m) (2 skein) appears 2x in pattern in section 4 and section 8. Pattern 5: A: 147.58 yds (134.97 m) (1 skein) / B: 141.25 yds (129.18 m) (1 skein) Pattern 6: A: 102.42 yds (93.65 m) (1 skein) / B: 102.33 yds (93.57 m) (1 skein) Pattern 7: A: 149.58 yds (136.79 m) (1 skein) / B: 136.47 yds (124.79 m) (1 skein) Pattern 8: A: 175.63 yds (160.57 m) (1 skein) / B: 175.63 yds (160.57 m) (1 skein) Pattern 9: A: 126.08 yds (115.28 m) (1 skein) / B: 126.08 yds (115.28 m) (1 skein) Total Pattern: Color A: 1902 yds (1738 m) / Color B: 1793 yds (1638 m) |
How to Do Overlay Mosaic Crochet
What is Overlay Mosaic Crochet?
Overlay mosaic crochet is a specific type of mosaic crochet where you work with two contrasting colors, but only one color per row. The magic happens by using a combination of single crochet (BLOsc) and front loop only dc (FLOdc) stitches to create the design.
The FLOdc stitches are worked two rows below your current row, allowing the contrasting color from previous rows to peek through, creating the mosaic effect.
Changing Colors Mid-row
Someone brought this up today and I’d thought I would touch on it. So, in this example, the tester uses various colors instead of just two colors – which is a little more complicated and takes a little more forethought.
If you would like to create a multicolored mosaic, you’re welcome to do it. If you are JUST learning mosaic crochet I would stick to two colors until you get it down, then play around with it more.
Learn to Change Colors
Creating a multi colored mosaic can be achieved in various ways. Here they are:
- Plan your colors first. Where do you want the new color to appear?
- Since in mosaic we have 2 main colors (contrasting color and main color), you’ll want to follow the A and B on the chart but replace your contrasting color with the color of your choice. (you can see from the mushroom image below that she uses green and tan in the same row.)
- How to achieve it. Either carry both colors inside the stitches and pull it up as you need it by changing our the last part of your stitch with your new color as in traditional color changes.
- Or you use your main contrasting color and add your new color as needed (like the stem of the mushroom below), which looks like she added the color as needed without carrying it in the stitches. I say that because you can see that the green of the square motif and the bottom part of the stem overlap and are on the rows. So She either had to carry two yarns or add the stem yarn as she needed it.
- This will cause more tails to weave in, unless you carry them through.
I hope this helps and if you have any questions, please let me know.
Changing Colors Mid Row in Mosaic Crochet
Here is a full video tutorial on how to change colors >>> Mid-row in Overlay Mosaic Crochet.

Learn Mosaic Crochet Video Tutorial
Learn how to do mosaic crochet in video form >>> Mosaic Crochet Video Tutorial

Key Aspects Of Overlay Mosaic Crochet:
- One color per row: You cut the yarn after each row, then add the color to the beginning of the next row.
- No turning: You work each row from the right side (or “front”) of the fabric.
- Direction of Work: Right to left (can be worked left to right as well for the lefties out there!)
- Stitch combination: The interplay of BLOsc and FLOdc stitches creates the pattern.
- Charts: Overlay mosaic crochet patterns typically rely on charts to guide the placement of stitches and color changes, however, written patterns are also helpful.
Woven Worlds Mosaic Crochet Blanket Patterns – Free Crochet Along
Here you will find links to ALL 9 sections of the blanket. Each are FREE on the blog – If you want to purchase the ebook (30% off until April 25th), you can do that too!
Get the Patterns HERE!
Woven Worlds Mosaic Crochet Blanket
Starting April 28 and ending June 30th. Learn the beautiful art of mosaic crochet in this 10 week crochet along hosted by Stardust Gold Crochet & The Infinite Yarniverse Community.
We have 9 amazing world tile inspired mosaic crochet blanket strips designed by Tasha.
Thanks for being here and we can't wait to see your finished blankets!
Sign up for the Woven Worlds Mystery CAL to get notified when the patterns are released and join the FB group to post your photos!Pattern 1 in the Woven Worlds Mosaic Crochet Along is the Greek Tile Inspired pattern, head over and start his beautiful blanket today, ready just in time for Fall! It's a FREE crochet pattern!

Pattern 2 - Japanese Waves is next up in the Woven Worlds Mosaic Crochet Along. So happy to have you here, head over and get the free pattern.
Pattern 3 - French Art Deco. Woven Worlds Crochet Along is the French Art Deco inspired shells! This pattern is one of my favorites in the CAL, and I hope you enjoy it too!
Pattern 4 - in the Woven Worlds Crochet Along is a second Greek Inspired tile blanket strip. Similar to pattern 1, but with a slight flare! Happy crocheting friends!

Pattern 5 - The Mediterranean inspired tile is all about the rich tones of pomegranates, and the flow vibes of the Mediterranean sea. Get inspired!

Pattern 6 - The Celtic Hearts tile is all about capturing the celtic knots in an intersting way and celebrating the beautiful Irish traditional art.

This Ukrainian Inspired floral mosaic crochet blanket strip is another favorite! Head over and get the free written pattern & graph - happy crocheting friends!

Week 9 is the beautiful South American Inspired mosaic crochet panel. Head over and grab the pattern.
The Middle East inspired blanket stripe is pattern 9, week 10 of the Woven Worlds Mosaic Crochet Blanket CAL - scroll up for patterns 1 - 8!

Learn the basics on creating a beautiful envelope border for your mosaic crochet blanket!
Collaboration Designer Crochet Blankets You May Like


Crochet Pattern Support
I hope you enjoy this easy pattern. Pattern support? Head over to Stardust Gold Crochet & Friends.
- If you are looking for a drama-free crochet group, check out my pattern support group, Stardust Gold Crochet & Friends
- We have fun and share crochet patterns, stories, and courses; you can ask me about any pattern in my library for support.
Thanks Friends!
Thanks so much for being here and I hope you enjoy the crochet along!


Hi Tasha,I am using an aran worsted weight. What are the multiples on this blanket, please. The 277 are too many for my yarn weight. Thanks! Excited! It looks so beautiful!
Michelle, she has a note in the pattern about the lease common multiple is 227, and is therefore the minimum width for the blanket. I am also using worsted weight and an H hook.
This looks fun! Do you have yardage estimates for WW yarn, or just DK? I want to use WW from my stash. Thank you.